Gofort UA1100 User manual

1
Portable Solar Power Station
User Manual

2
ATTENTION
The specifications and the pictures in this manual are for reference only. The product
is only used for emergency situations, it cannot replace the standard AC power for
household appliances or digital products .Actual AC outlet and AC adapter would be
different depending on the locations of customer.
Thank you for choosing UA1100 Portable Power Station.
The purpose of this manual is to help you use the product correctly.
Please read the manual carefully and follow the guidance.
Product Specifications
Model
UA1100
Battery
Lithium-ion Battery, 1100Wh, 297600mAh(3.7V)
AC Output
AC Pure Sine Wave Output
AC Continuous Power Output
1200W
AC Peak Power Output
2000W
Standard Out Voltage
110V
Input (Adapter)
12V-24V
Input (Solar Panel)
18V-24V (≥100W recommended)
Input (Car)
12v cigarette lighter
USB Output
1 X USB Output QC3.0
2 X USB Output 5V/2.4A
PD Type-c Output
45W
DC Output
12/10A(Max)
3
LED
5W/450lm
Charging Time
Approx 6 hours (with 22V/5A adapter)
Operation Temperature
-10℃~40℃
Life cycle
>800 times
Dimensions(LWH)
192*303*192MM
Net Weight
About: 11.5kg
Gross Weight
About: 13.5kg
Product Overview
Front and back overview
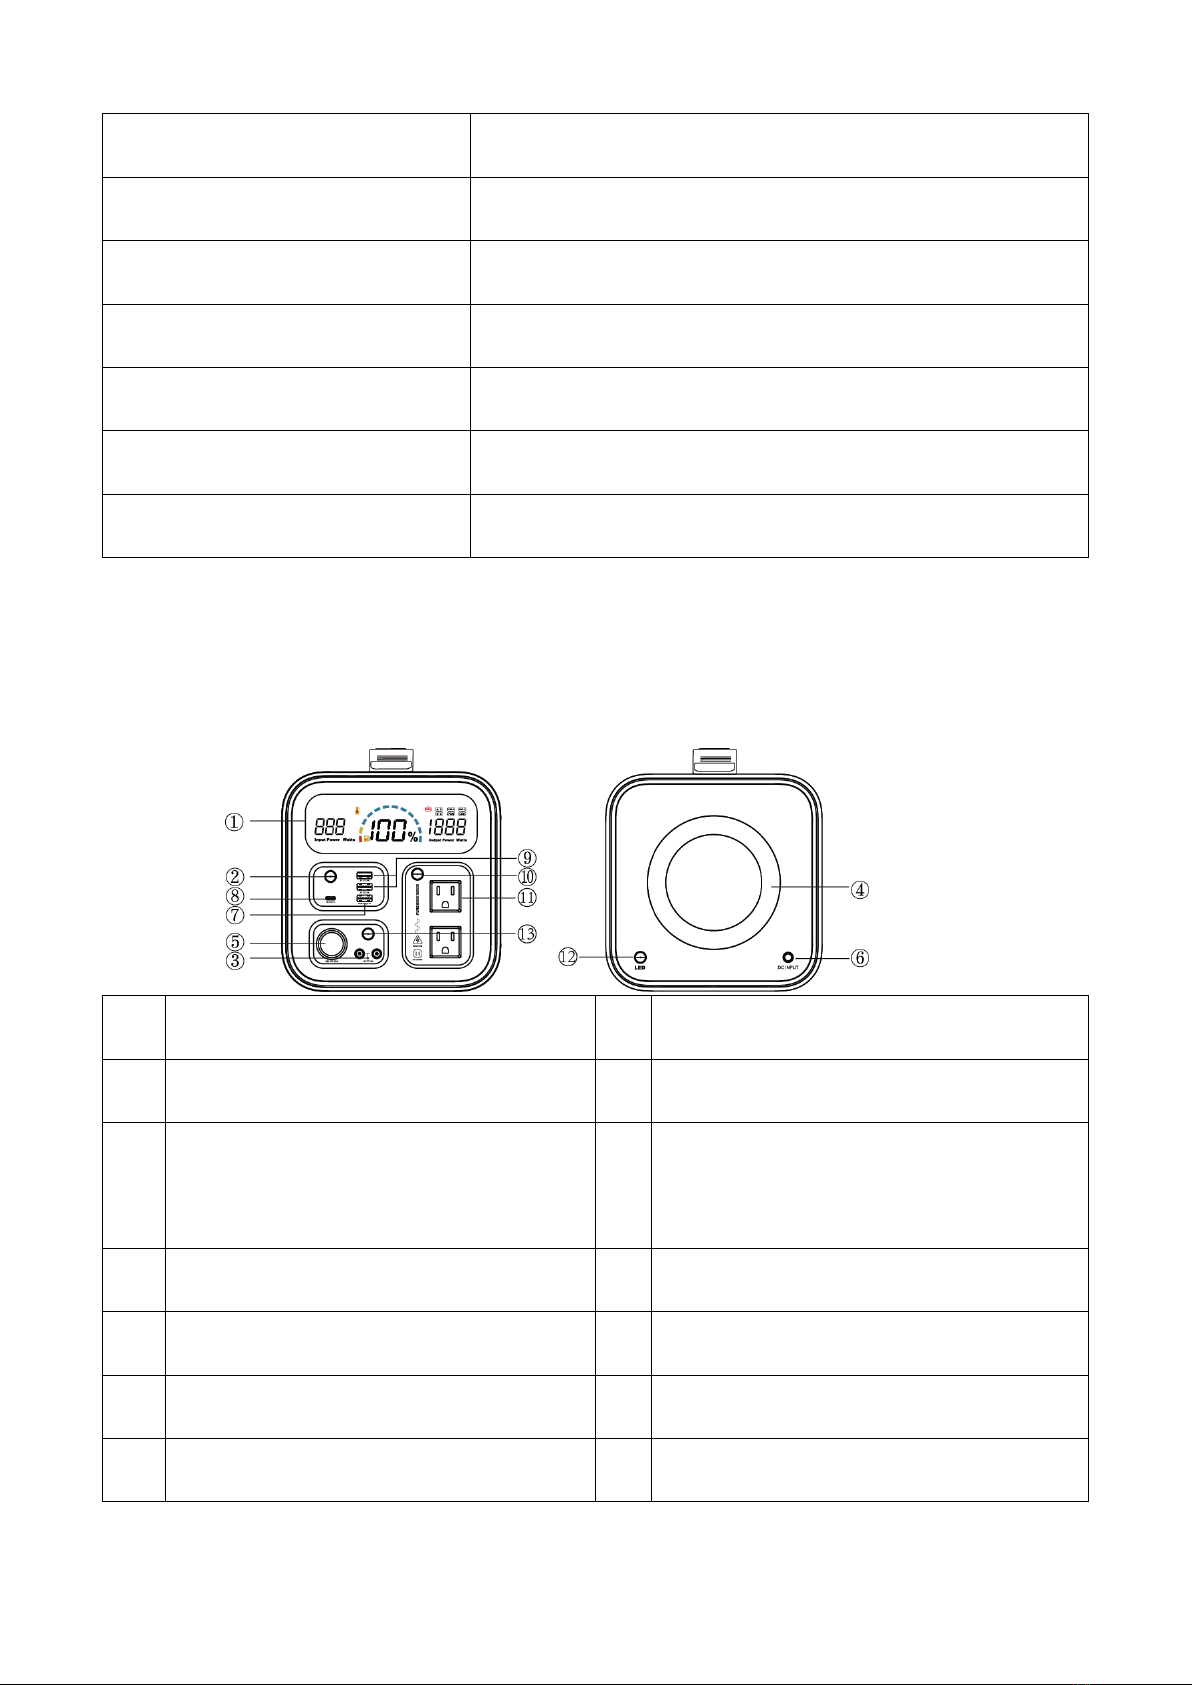
1.
Display Screen
2.
USB Switch
3.
double DC5521 12V/10A Output
4.
LED Light
5.
Cigarette Lighter Output
6.
DC Charging Input (Solar, Adapter &
Car Charging)
7.
USB-A / QC3.0 fast charging Output
8.
USB-C/ PD3.0 45W Output
9.
Double USB-A / 5V 2.4A Output
10.
AC Switch
11.
Double AC Output
12.
LED Switch
13.
DC switch
※
Note : DC5521 port is with outer diameter of 5.5mm, inner diameter of 2.1mm.

4
Introduction To The Display Screen
No.
Icon
Description
1
Input Power in Watts
The input power of UA1100
2
Battery indicator Arc
Approx 9% capacity each grid, yellow grid reminds of
input charging, red grid alarms capacity below 5% and
requires charging urgently.
3
Battery percentage
Remaining battery percentage
4
Output power in watts
Total power of output load
5
Operating function modes
indicator
Synchronize the operating function mode of fan, AC, DC, USB
andLED.
6
Frequency Indicator
AC output frequency 60Hz
7
Thermometer icon
Overheat indicator, icon will light up when UA1100 is
overheated.
1 . Long press the USB switch button for 1.5 seconds to start USB function, USB-A and
USB-C mode will show up on the screen; long press it for 1.5S again to shut the
function. Long press it for over 3S to shut the whole generator.

5
2 . Long press DC switch button for 1.5 seconds to start DC function, DC mode will
show up on the screen; long press it for 1.5S again to shut the function. Long press
it for over 3S to shut the whole generator.
3 . Long press LED switch button for 1.5 seconds to light on the LED, letters LED will
show up on the screen; long press it for 1.5S again to switch off the LED light.

6
4 . Long press AC switch button for 1.5 seconds to start AC function, AC mode will
show up on the screen; long press it for 1.5S again to shut the function. Long press
it for over 3S to shut the whole generator.
5 .UA1100 supports input and output charging simultaneously(UPS), the screen will
show both charging status as well as various function modes. When charging and
discharging at the same time, overheat temperature protection is based on the
charging temperature.
Warning: our UPS function only for short time usage,
we don’t recommend to use lithium battery UPS power as long time use as lead-acid
battery UPS power, please do not input and output charging simultaneously for a
long term usage
7
How to charge the product ?
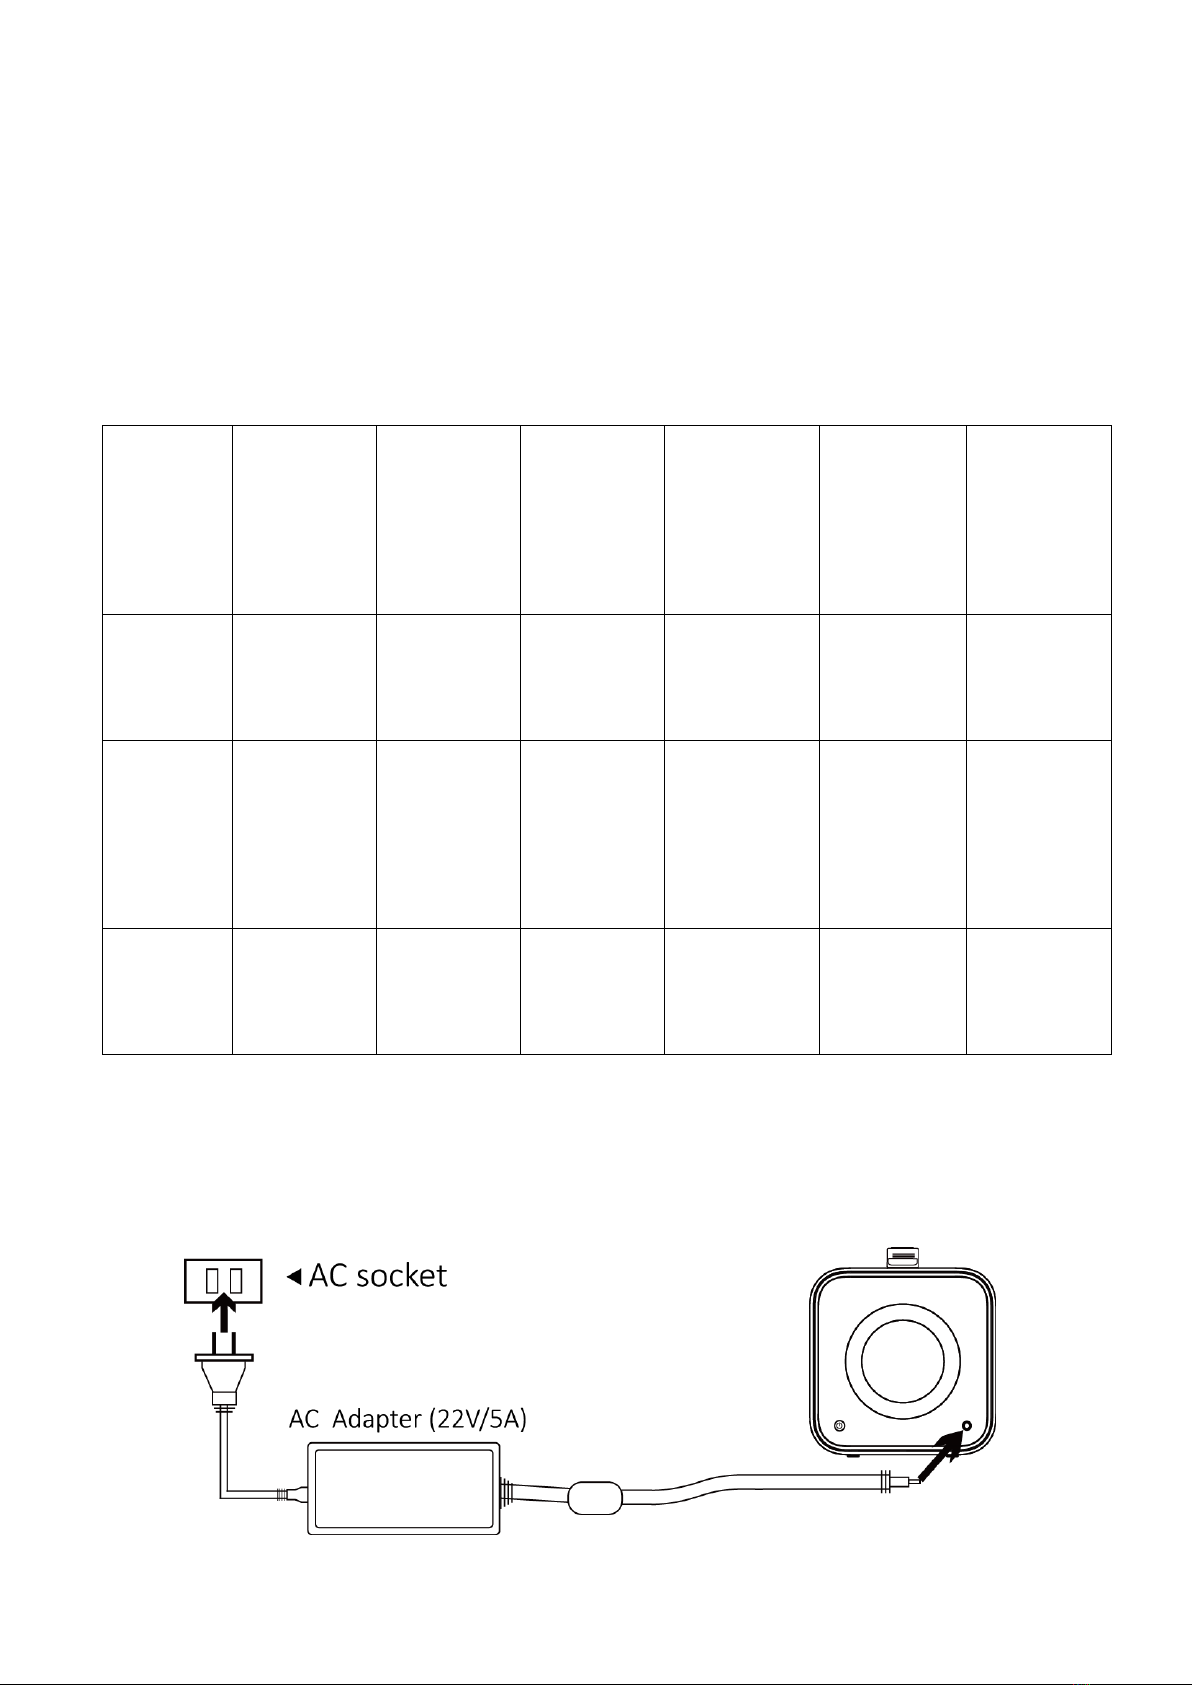
1 . Charge through AC wall charger
Connect the power adapter which come with the product to any wall outlet . The
Battery Indicator Arc on the LCD screen blinks which indicates that the product is
being charged.
NO.of
Indicator
light
1indicator
(red) light
blinks
2 indicator
(yellow)
light blinks
3 indicator
light blinks
4 indicator
light blinks
5 indicator
light blinks
6indicator
light blinks
Battery
status
0%-5%
charged
5%-14%
charged
14%-23%
charged
23%-32%
charged
32%-41%
charged
41%-50%
charged
NO.of
Indicator
light
7 indicator
light blinks
8indicator
light blinks
9 indicator
light blinks
10indicator
light blinks
11indicato
r light
blinks
12indicato
r light
blinks
Battery
status
50%-59%
charged
59%-68%
charged
68%-77%
charged
77%-86%
charged
86%-95%
charged
95%-100%
charged
When fully charged, the Battery Indicator Arc will be fully lighted on and stop
flashing, and the battery percentage shows 100%. After the product is fully charged ,
please unplug the AC wall charger in time .p

8
2 . Charge through solar panel (18V, ≥100W recommended)
1. Place your solar panel where it will get as much strong direct sunlight as possible.
2. Connect the output port of the solar panel with the input port of the product to
start charging. When the Battery Indicator Arc on the LCD screen blinks, the product
is being normally charged; when the Battery Indicator Arc is fully lighted on and
stops flashing, and the battery percentage shows 100%, the product is being fully
charged.
※
Note : When the sunlight is not strong enough to support continuous input
charging, please press the USB power switch to trigger the system.
※
Note : Actual charging efficiency can vary widely depending on weather ,
temperature , battery state of charge , and other factors.
3. Charge through the cigarette lighter receptacle of your 12V -15V car
Using the car charger, plug the product into the 12V -15V cigarette lighter receptacle
of your car. When the battery indicator arc on the LCD screen is flashing, you will
know the product is charging . When the battery indicator arc on the screen is fully
lighted on and stops flashing, with battery percentage shows 100%, the product is
fully charge .

9
Attention : To avoid car battery power loss , you should charge this product through
your car cigarette lighter only when your car engine is started . This function is for
12V-15V car .
Operation Guide
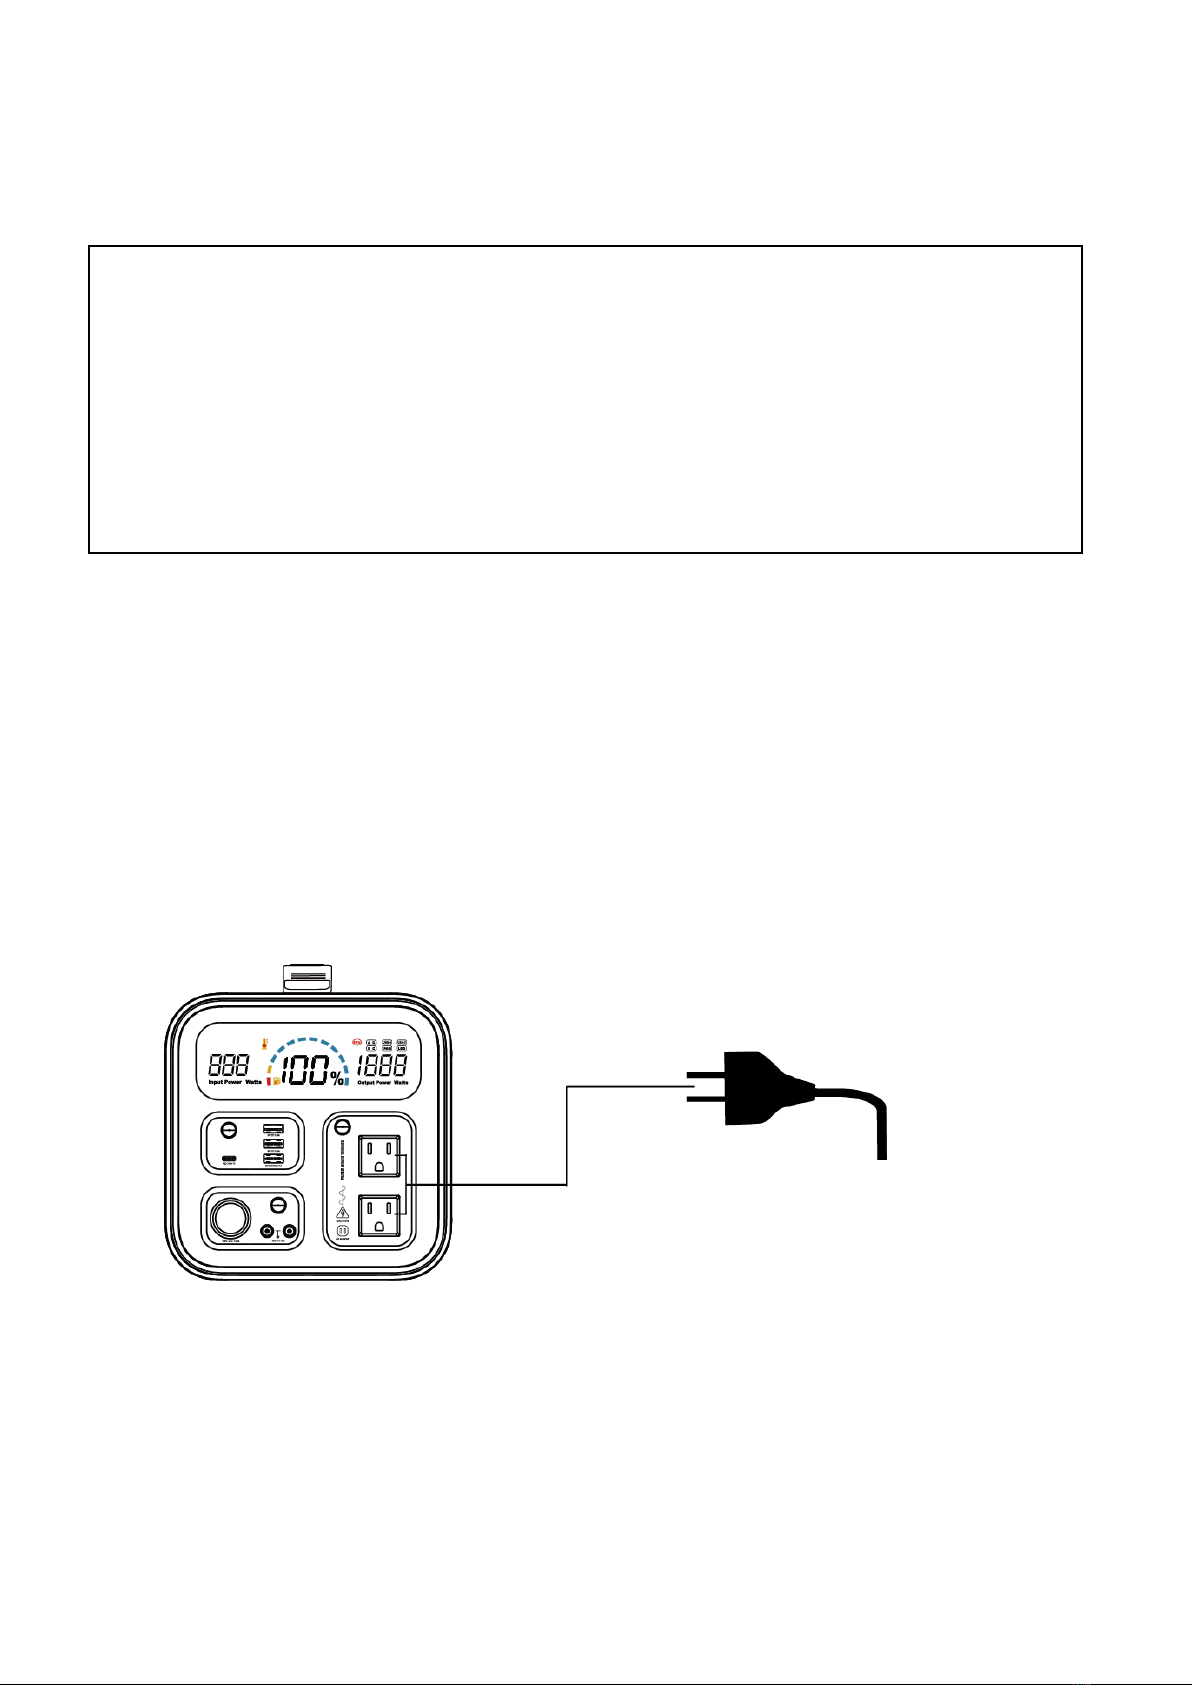
1. How to charge your facilities with the DC output of UA1100 ?
Connect your DC 12V appliances with the 12V DC output port. And your appliances
would be charged automatically.
※
Note : Please check to make sure that your 12V DC appliance supports charging
with the DC port of this product , which is DC 5521 port. You could confirm it with the
manufacturer or seller of your 12V DC appliances.
Charge 12V DC appliances
( Power< 120W ) by plug
in the connector (DC5521 )
into the DC output port
directly.
10
※
Note : The DC output of this power station is approx constant 12.8V. The max
output current is 10A . Please make sure your appliance can match this voltage.
Protection Mode ( DC Output ):
Short-circuit / Over power Protection : If the DC output is short-circuited or
overpowered ( Load ( S ) power > 120W ) , the product will shutdown to protect itself .
Please disconnect the 12V appliances from the product and repress to start the
product .
2. How to charge with the AC outlet of this product ?
Connect the power cable plug of the AC electrical appliance to the AC outlet of the
product . Press the AC power switch and the product will start providing power to
your appliances . Please make sure that the power of the AC appliance is less than
1200W.
※
Note : When the AC port is not in use , turn off the AC power button to conserve
power.e
Table of contents
Other Gofort Power Supply manuals