
Goclever FULL HD IR User manual

Przed skorzystaniem z urządzenia zapoznaj się z niniejszą instrukcją obsługi
oraz zachowaj ją na przyszłość
DVR FULL HD IR
OWNER’S MANUAL
DVR FULL HD IR
INSTRUKCJA OBSŁUGI
ODWIEDŹ NASZĄ STRONĘ
WWW.GOCLEVER.COM
ABY ZAPOZNAĆ SIĘ Z INNYMI PRODUKTAMI TAB, NAVIO, DVR, DVB-T
2
Contents / Spis treści
English
3
Polski
10
Warunki gwarancji
18
Karta gwarancyjna
20
3
First steps
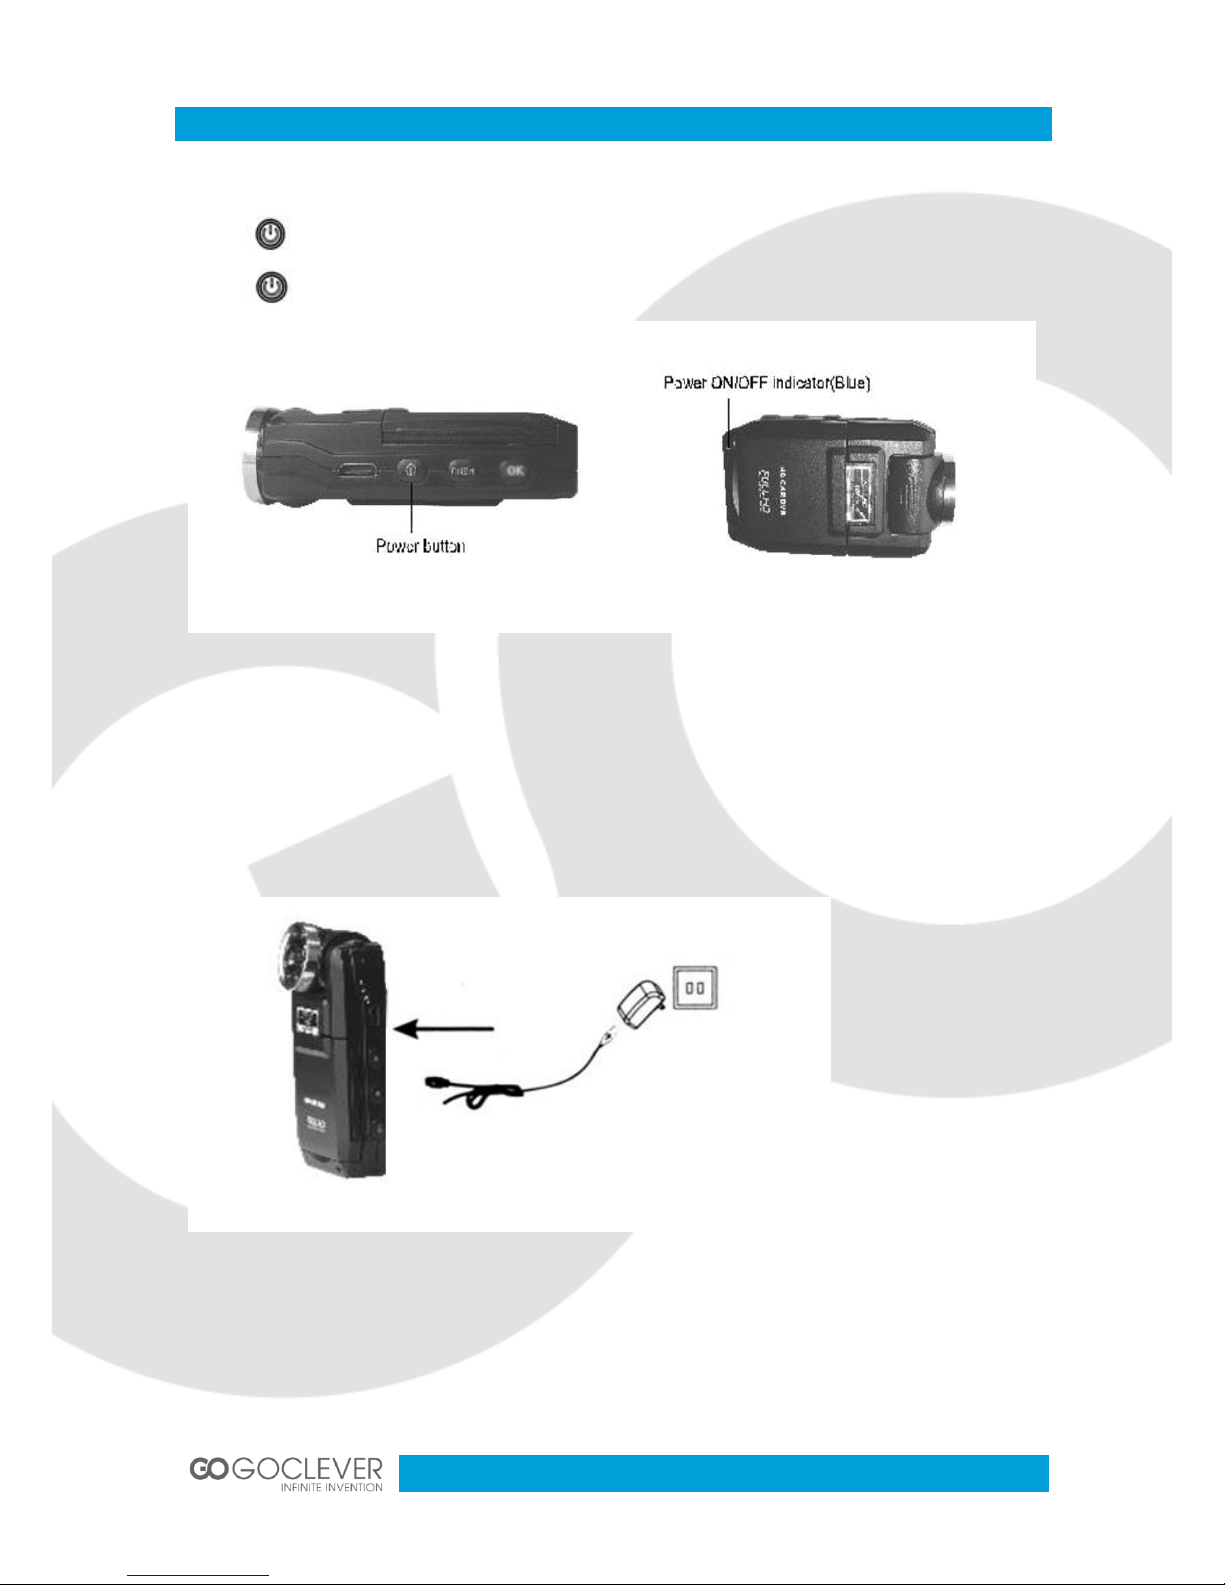
Turning ON/OFF
Press power button once to power on ,blue light indicator is on;
Press again to power off, blue light indicator is off.
Attention: Low battery is displayed before shutting down.
Charging Batteries
There 3 ways of charging the battery. Red light indicator is on while charging; full charge time
is 180 minutes.
Red light indicator will turn off when fully charged
Using the AC adaptor to charge battery

4
Using USB to charge battery
In-car battery charging
Placing the Micro SD card
Place the micro SD card into the memory card slot according to the image below; press it until
you hear a click sound.

5
Removing Micro SD card: Press it once and remove it after it pops up
Rotating the LCD display
90°Left will open the LCD display: LCD display can also rotate 90°down.
LCD display can rotate 180°towards lens.
Rotating Lens
Lens cans also rotate 180°as show on images below.
6
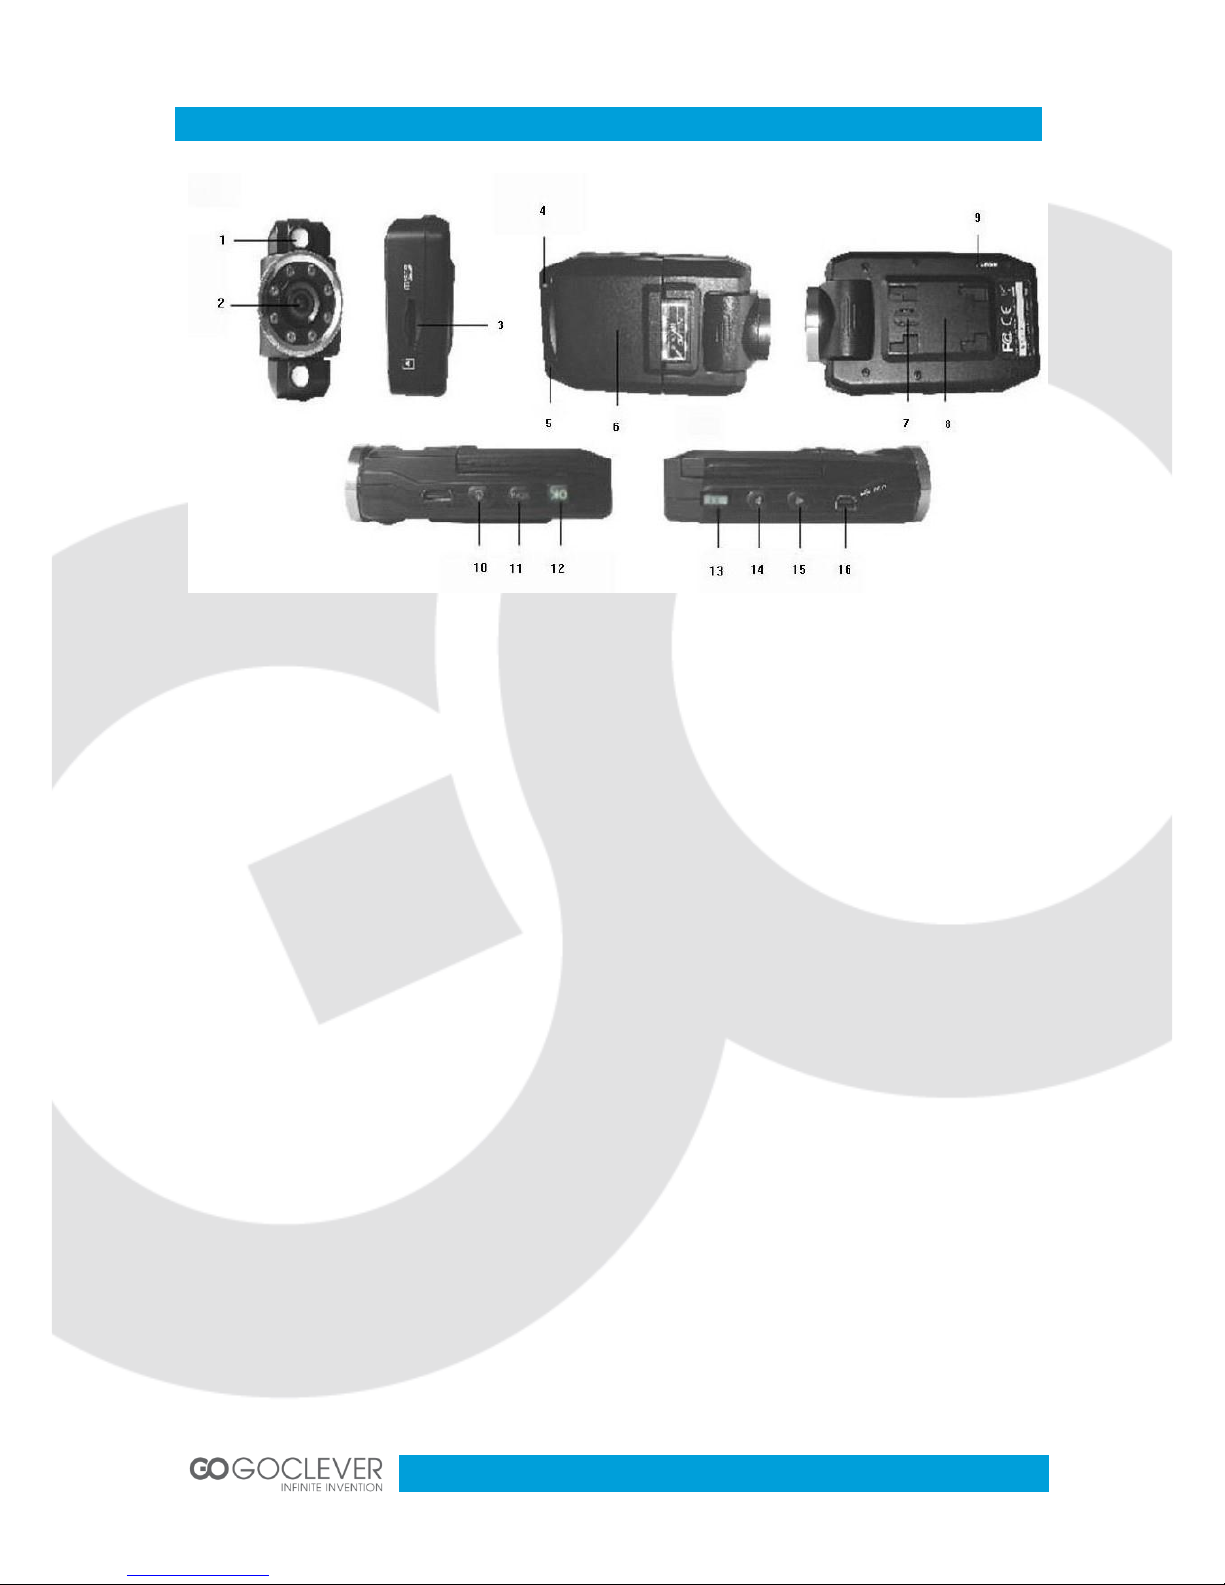
Quick Manual
1) LED Light
2) Lens
3) Micro SD card slot
4) Power indicator ( Blue)
Charging indicator ( Red)
5) Microphone
6) LCD display
7) Speaker
8) In-car arm stand socket
9) Reset button
10) Power button
11) MENU button
12) Confirm (OK) button
13) MODE button
14) Down key
15) Up key
16) USB port
How to switch between video, photos, playback modes
Press MODE to switch modes
How to enter setting mode
Press MENU once, press MENU key again, enter “System Setting” option, a blue background
will be displayed.
Format: Format Micro SD card (this action will delete all data stored in the Micro SD card)
Language setting: Change OSD language
Reset System settings :Cancel /Proceed
Frequency: 50 Hz/60Hz
Date setup: Set Date/Time

7
How to record a video
Press OK to start recording ,press it again to stop.
In video or photo mode press UP key to rotate the image and turn LCD off.
In video or photo mode press DOWN key to activate Day/Night mode
LED light will switch on automatically in low light conditions.
Video option settings
Press MENU key, enter video option setting
Image size:(VGA/D1/HD(1280*960)
Time display:ON/OFF
Auto recording:ON/OFF
Audio recording:ON/OFF
Recording time: 2min/5min/15min
Taking photo
Press OK key to take a photo.
Photo shooting setup option:
Press MENU key, enter photo shooting setup option.
Image resolution: VGA
Continuous shooting: ON/OFF
Self-timer: OFF/1sec/2sec/3sec/5sec/10sec/15sec
Manage Files
1. Press MODE key to enter File Management mode
2. There are 2 types of files: video and image files.
3. Most recent file will be displayed on LCD.
For example: If your last action was photo shooting, the photo will be displayed on LCD.
Video Playback
1. Press UP/DOWN key to select the desired file for playback
2. Press OK key to start/stop the video playback. Press DOWN key while playback to rewind.
3. Press MENU to stop video playback

8
Image Playback
Press UP/DOWN key to select desired file for playback.
Playback option setting:
While playback, press MENU key to Playback option setting:
1. Delete: Press OK key to select action Single/All/Select File
2. Minimize image:Print images thumbnail
3. Audio:Can set volume during playback
Connection with PC
Downloading Videos and Images
1. After USB cable is connected to computer,LCD display turns black,bule indicator will turn
on, wait for a few seconds.
2. Computer will automatically detect the Micro SD card drive.
Attention:System requirements:Windows 2000/XP/Vista/indows 7, MAC OS *10.3.6 or above
3. Browse or manage files through computer.
4. Unplug the USB cable turn the device off.
Notice: If device crashes during usage, press the RESET button and restart.
Product Features
Portable, can rotate 180°, 140° High Resolution A+Wide Angle Lens
270°Swivel LCD Display, convenient to take video/photo in different situations
Built-in 1/4inch low noise sensor,can capture clear images in low light environment
Day/Night Selectable modes
Auto Sensitivity Control,High performance dual LED light
Built-in simultaneous charging and recording mode
Built-in microphone/speaker

9
Supports High capacity Micro SD card
Can catch amazing image through the LCD display when taking self-portrait
Anti-Shake Mode
Can record while driving
Continuous recording mode,Auto delete when recording new file
Auto power on when starting car,Auto power off when car is off
With delayed turn on function
Can still record while LCD is off
Product Specification
LCD Display
2.0 LTPS (4:3)
Lens
140°A+High Resolution Wide Angle Lens
Language selection
English, Traditional, Chinese, Japanese ,Russian, German,
French, Spanish, Italian
Video resolution
VGA/D1/HD (1280*960)
Video format
AVI
Image resolution
VGA
Image format
JPG
Memory card
Micro SD
Microphone/Speaker
Yes
Self-Timer
2SEC/10SEC10+2SEC
LED light
Dual super bright LED
TV mode
PAL/NTSC
Frequency
50HZ/60HZ
USB Port
USB2.0
Power input
5V 500MA
Battery
Rechargeable Li-ion
Accesories
1. In-car charging cable
2. Charger (optional)
3. In-car arm stand
4. USB cable
5. User manual
6. CD (optional)
10
Przed skorzystaniem z urządzenia zapoznaj się z niniejszą instrukcją obsługi
oraz zachowaj ją na przyszłość
DVR FULL HD IR
INSTRUKCJA OBSŁUGI
ODWIEDŹ NASZĄ STRONĘ
WWW.GOCLEVER.COM
ABY ZAPOZNAĆ SIĘ Z INNYMI PRODUKTAMI TAB, NAVIO, DVR, DVB-T
This manual suits for next models
1
Other Goclever DVR manuals


