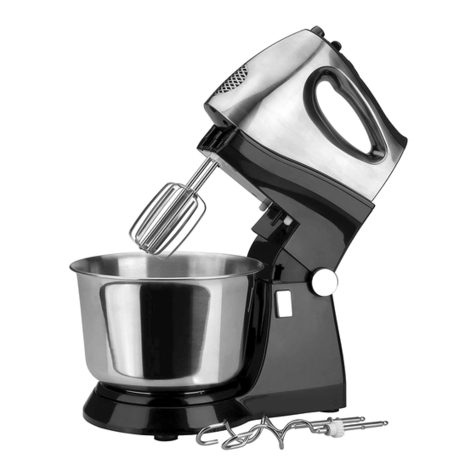
Globe SP05 User manual

Instruction Manual for the Globe Mixer
Model SP05
This manual contains important safety instructions which
must be strictly followed when using this equipment.
- IMPORTANT SAFETY NOTICE -
Model SP05
For additional Technical Support call Globe at 1-866-260-0522.
For all after sales support, visit www.globefoodequip.com
• Complete the Warranty Registration
• Find an Authorized Servicer
• View Parts Catalogs
Maintain and use this manual as a reference for training.
Model #:
Serial #:
Date of
Purchase:


ATTENTION OWNERS AND OPERATORS................................................................................................................4
KEY COMPONENTS OF THE MIXER ........................................................................................................................5
INSTALLATION ...........................................................................................................................................................6
OPERATING INSTRUCTIONS................................................................................................................................ 7-9
CLEANING INSTRUCTIONS ....................................................................................................................................10
IMPORTANT POINTS ...............................................................................................................................................11
CAPACITY CHART....................................................................................................................................................12
TROUBLESHOOTING ........................................................................................................................................ 13-14
LIMITED MIXER WARRANTY...................................................................................................................................16
GLOBE FOOD EQUIPMENT COMPANY
2153 DRYDEN RD.
DAYTON, OH 45439
PHONE: 937-299-5493
TOLL FREE: 800-347-5423
FAX: 937-299-4147
WEBSITE: www.globefoodequip.com
© Globe Food Equipment Company, 2018 980159 Ver. 3 Rev- 12-2018
Index

Page 4
Globe’s equipment is designed to provide safe and productive processing of food products as long as the
equipment is used in accordance with the instructions in this manual and is properly maintained. Unless the
operator is adequately trained and supervised there is a possibility of serious injury. Owners of this equipment bear
the responsibility to make certain that this equipment is used properly and safely, strictly follow all the
instructions contained in this manual and the requirements of local, state or federal law.
Owners should not permit anyone to touch this equipment unless they are over 18 years old, are adequately trained
and supervised and have read and understood this manual. Owners should also ensure that no
customers, visitors or other unauthorized personnel come in contact with this equipment. Please remember that
Globe cannot anticipate every circumstance or environment in which its equipment will be operated. It is the
responsibility of the owner and the operator to remain alert to any hazards posed by the function of this equipment.
If you are ever uncertain about a particular task or the proper method of operating this equipment, ask your
supervisor.
This manual contains a number of precautions to follow to help promote safe use of this equipment. Throughout the
manual you will see additional warnings to help alert you to potential hazards.
Warnings affecting your personal safety are indicated by:
Warnings related to possible damage to the equipment are indicated by:
If any warning labels or this manual are misplaced, damaged, or illegible, or if you require additional copies, please
contact your nearest representative or Globe directly for these items at no charge.
Please remember that this manual or the warning labels do not replace the need to be alert, to properly train and
supervise operators and to use common sense when using this equipment.
Attention Owners and Operators
or

Page 5
Key Components of the Mixer
FRONT VIEW
SIDE VIEW
Attachment Hub
Splash Cover
Planetary Shaft
Bowl Handle
Ingredient Chute
on Splash Cover
Bowl Slides
Bowl
Bowl Lift Lever
Bowl Clamp
Speed Control
Bowl Cradle
Overload Reset Button
Power Cord

Page 6
Installation
UNPACKING
Unpack the mixer immediately after receipt. If the machine is found to be damaged, save the packaging material
and contact the carrier within fteen (15) days of delivery. Immediately contact your source of the equipment.
You have no recourse of damage after fteen (15) days.
TO AVOID SERIOUS PERSONAL INJURY:
• ALWAYS install equipment in work area with adequate light and space.
• ONLY operate on a solid, level, nonskid surface that is nonammable.
• NEVER bypass, alter or modify this equipment in any way from its original condition. Doing so may create
hazards and will void warranty.
• NEVER operate the mixer without all warnings attached to it.
INSTALLATION
1. Read this manual thoroughly before installation and operation. DO NOT proceed with installation and
operation if you have any questions or do not understand anything in this manual. Contact your local
representative or Globe rst.
2. Remove the mixer from the box.
3. Select a location for the mixer that has a level, solid, nonskid surface that is nonammable and is in a
well-lighted work area away from children and visitors.
4. Inspect the mixer to ensure all parts have been provided (i.e., bowl, beater, whip, and hook).
PROPER GROUNDING
THIS MACHINE IS PROVIDED WITH A THREE-PRONG GROUNDING PLUG. THE OUTLET TO WHICH THIS
PLUG IS CONNECTED MUST BE PROPERLY GROUNDED. IF THE RECEPTACLE IS NOT THE PROPER
GROUNDING TYPE, CONTACT AN ELECTRICIAN. DO NOT UNDER ANY CIRCUMSTANCES CUT OR
REMOVE THE THIRD GROUND PRONG FROM THE POWER CORD OR USE ANY ADAPTER PLUG (Fig. 6-1
and Fig. 6-2).
5. Complete the warranty registration online at www.globefoodequip.com/support/warranty-registration-form.
6. Clean the mixer prior to using it. Follow the cleaning instructions on page 10. NOTE: It is normal for the
factory to apply a generous amount of grease in and on the machine before initial use. Excess high
pressured grease (brownish-black) may also be found on the planetary shaft and some drippings may be
found in the bowl.
Fig. 6-1 Correct Fig. 6-2 Incorrect

Page 7
Operating Instructions
Fig. 7-1
Fig. 7-2
Fig. 7-3
Fig. 7-4 Fig. 7-5
TO AVOID SERIOUS PERSONAL INJURY:
• DO NOT operate the mixer before reading the instruction manual rst.
• ALWAYS disconnect or unplug electrical power before cleaning, servicing or adjusting any parts or
attachments.
• NEVER bypass, alter, modify or attach any unauthorized parts to this equipment.
Doing so may create hazards and will void warranty.
• NEVER operate mixer with a damaged power cord or plug.
• ALWAYS keep hands, hair and clothing away from moving parts.
NOTE: Wash all attachments and bowl prior to use.
ATTACHING THE BOWL TO THE MIXER
NOTE: Install the bowl BEFORE attaching the agitators.
1. Lower the bowl by pushing the bowl lift lever backwards and down to its resting position.
2. Lift the bowl by the bowl handle and
a. Slowly position the locking pin (located on the rear of the bowl) into the hole in the
middle rear of the cradle (see Fig. 7-1).
b. Lower the bowl onto the pins located on either side of the bowl cradle.
3. Once the bowl is positioned on the cradle, secure the bowl by pulling both bowl clamps
forward until the bowl is locked tight (see Fig. 7-2).
ATTACHING THE AGITATOR TO THE MIXER (i.e., Beater, Hook, Whip)
NOTE: It is easier to install the agitator prior to adding the ingredients into the bowl.
1. The bowl must be installed, lowered into position and the splash cover should be
removed (see Fig. 7-3).
2. Slide the agitator slowly upwards onto the planetary shaft tting the shaft pin through the
slot in the agitator (see Fig. 7-4).
3. Rotate the agitator clockwise to secure it onto the planetary shaft (see g. 7-5).
NOTE: After cleaning, make sure to wipe the shaft with Vaseline or vegetable oil for
better lubrication and to prevent breakdown of shaft and its parts. DO NOT use any
lubricant that can be harmful to humans to ingest as some lubricants may come in
contact with some mixing processes.

Page 8
Operating Instructions
Fig. 8-1
Fig. 8-2
Fig. 8-3
MIXING INGREDIENTS
Follow the capacity chart located on page 12 in this owner’s manual.
Overloading or not following this chart will damage the mixer and void the warranty.
IMPORTANT: Make sure the speed control dial is in the
off position.
1. Add the appropriate mixing ingredients into the bowl.
2. If desired, place the splash cover on top of the bowl and align the pins on the
guard with the holes on the rim of the bowl (see Fig. 8-1 and 8-2).
Note: In order for the SP05-Q Mixer to operate, the splash cover must be in place
and clicked into locked position.
3. Lift completely up on the bowl lift lever until the bowl locks into position
(see Fig. 8-3).
4. Select the appropriate speed setting by rotating the speed selector knob
clockwise starting from 0. To increase mixer speed, continue turning the
selector button clockwise to desired speed.
Recommended speeds while mixing:
Position Speed Attachment Product Type/Ingredient
1 (stir) All Start to incorporate ingredients
2 (low) Spiral Heavy: mixing pizza, bread, pasta,
stufng and donut doughs, wafe/cake
batter, mashing potatoes, etc.
3-7 (medium) Beater Medium: 2nd stage of mixing for donut
dough, etc.
8-10 (high) Whip Light: whipping cream, egg whites,
meringue, mousse, pancake mix, sponge
cakes, etc.
IMPORTANT: When mixing product always follow the recommended
agitator and speed setting according to the capacity chart located on page 12 of
this manual.
Always STOP the mixer BEFORE changing or tting accessories! Failure to do so
may cause harm to the operator; it may also damage the gears or other parts and
WILL void the warranty!
5. During the mixing process, additional ingredients can be added to the mixture using the food chute located on
the splash cover.
6. To turn off the mixer, turn the variable speed control counterclockwise until the dial is aligned with the selector
notch to the zero “0” position and the mixer turns off.
NOTE: If the mixer shuts off during operation, return the speed control dial back to the zero “0” position.
NOTE: The mixer is equipped with a manual motor reset on the back column. Reduce the batch size and wait
approximately ve minutes, press the reset button and then continue mixing.

Page 9
Operating Instructions
IMPORTANT: Abrupt stops due to over batch size is detrimental to the quality and life of the mixer and may lead to
future mechanical failures. Make sure liquid to solid ratios are properly followed during preparation of mixes.
Example: Bread Dough 60% AR, Max speed of 2, Max Capacity of 5 lbs
50% AR, Max speed of 2, Max Capacity of 4 lbs
40% AR, Max speed of 2, Max Capacity of 3 lbs
(See chart on page 12 for a detailed measurement of ingredients.)
(For pizza dough with lower moisture content, please consult Globe.)
Higher gluten our, batch should be reduced by 25%
NOTE: Reduce batch size by 10% if chilled our, water below 70°F or ice is being used in the mix.
IMPORTANT: It is recommended for heavier loads, the mixer should not run longer than fteen minutes without
pausing for a cool down period of at least fteen minutes or more before resuming mixing. For lighter loads, the
mixer should not run longer than thirty minutes without pausing for a cool down period of at least thirty minutes or
more before resuming mixing.
7. When the ingredients have been thoroughly mixed, rotate the speed selector knob and begin turning the speed
control dial counterclockwise to the zero “0” position.
IMPORTANT: Do not attempt to remove the bowl or splash cover while the mixer is in motion.
8. Lower the bowl by pushing the bowl lift lever backwards and down to its resting position.
9. Remove the splash cover by lifting the cover off of the bowl.
10. Remove the agitator from the planetary shaft by lifting it upwards then rotating it counterclockwise until it is
unlocked. Lower the agitator and remove from planetary shaft.
11. Push each bowl clamp backwards to unlock the bowl from the bowl cradle.
12. Lift up slightly on the bowl so it clears the pins on the bowl cradle.

Page 10
• ALWAYS unplug the mixer before cleaning.
• FOLLOW the supplier’s instruction on all detergents. Clean mixer, attachments and parts thoroughly after use.
Lubricate moving parts appropriately with Vaseline or vegetable oil, after wash-down, for better lubrication and
to prevent breakdown of shaft and its parts.
• DO NOT use any lubricant that can be harmful to humans to ingest as some lubricants may come in contact
with some mixing processes.
• DO NOT hose down, immerse or pressure wash any part of the mixer.
• NEVER use a scrubber pad, steel wool or abrasive material to clean the mixer.
• NEVER use bleach (sodium hypochlorite) or bleach based cleaner.
• ALWAYS remove the agitator after each batch. If not, the agitator can become stuck on the shaft and be
difcult to remove.
The entire mixer, including removable parts, must be thoroughly cleaned and sanitized using the
procedures identied by your local health department and the ServSafe Essentials published by the
National Restaurant Association Educational Foundation (NRAEF). Visit www.servsafe.com for
more details.
It is extremely important to sanitize the mixer and to follow the instructions on the quaternary
sanitizer container to ensure proper sanitation is achieved.
ALWAYS DISCONNECT OR UNPLUG THE ELECTRICAL POWER FROM THE MIXER BEFORE
CLEANING.
RECOMMENDED CLEANING
PART REQUIRED ACTION FREQUENCY
Agitators Hand-wash using mild soap and water, rinse, dry and sanitize.
(Note: The hook and beater only are dishmachine safe for
washing. If dishmachine washed, these items must still be
properly sanitized before use.)
Clean after each use.
Bowl Using a scrubber pad, mild soap and water, apply pressure to
ensure the bowl is clean, rinse, dry and sanitize. The bowl can
also be placed in a dishwasher for cleaning.
Clean after each use.
Splash Cover Hand-wash using mild soap and water, rinse, dry and sanitize. Clean after each use.
Bowl Cradle Hand-wash using mild soap and water, rinse, dry and sanitize. Daily
Planetary Shaft Wipe with clean damp cloth, dry and sanitize then lubricate. Clean after each use.
Exterior Hand-wash using mild soap and water, rinse, dry and sanitize. DO
NOT use a water hose and NEVER immerse in water!
Daily
Cleaning Instructions
Other manuals for SP05
1
Table of contents
Other Globe Mixer manuals