Global Industrial 695800 User manual

Thermal Imaging System
Model 695800
User Manual
1. Introduction
1.1 General Description
This document introduces in detail the function of the 695800 Thermal Imaging System, the specific
operation steps and precautions.
1.2 Processor Requirements
Processor: Laptop or Workstation with i5-8265U 1.6G or
above
Operating System: Windows7/10 and above (64-bit)
Resolution: 1600 x 900 and above
Hard Disk: solid state disk,128GBor above
Memory: 4G or above
Wired Network Card: GbE (gigabit Ethernet)
1.3 Environmental Requirements
1) For indoor use only with an ambient temperature range of 60°F to 90°F (16°C to 32°C), and a relative
humidity less than 70%.
2) Keep the camera away from entrance doors to avoid the temperature difference between inside and
outside. Avoid direct sunlight or any light from directly facing the lens.
3) Before temperature screening, turn on the camera and allow up to 30 minutes for it to warm up.
4) The effective temperature measuring distance between the camera and personnel is 6-1/2 ft. to 10 ft.
The optimum temperature measuring distance is 7.2 ft.
5) The elevated temperature detection alarm can be set according to user preference. It is generally
recommended to set the alarm temperature to 99°F (37.3°C).
1.4 Precautions
1) Read entire manual and follow all instructions and precautions before assembly, operation or
maintenance. Not doing so will void warranty. For additional questions or concerns, contact Global
Industrial Customer Service at 1-800-645-2986 or visit www.globalindustrial.com.
2) Only use product-specific adapters and cables included with the thermal imaging system.
3) DO NOT face camera directly at high-intensity temperature sources such as the sun or lasers.
4) DO NOT plug or unplug any cables when the product is connected to the power supply.
5) DO NOT exceed 18 straight hours of continuous operation. At this point, it is then recommended to shut
down and allow machine to rest for 8 hours before using again.
6) DO NOT touch the optical window surface with your hands or any corrosive or sharp objects.
7) When stains appear on the surface of the optical window, it should be cleaned by professionals;
8) DO NOT disassemble, alter or modify the machine with consent from Global Industrial.
9) DO NOT remove or damage factory labels on the product.

2. Device Position
3. Assembly Instructions
Watch "English installation video.mp4" video for hardware assembly and installation instructions.

4. Software Installation
4.1 Computer Configuration
4.1.1 Resolution
Set the screen resolution to 1920 ×1080
Figure 4-1 Resolution Setting
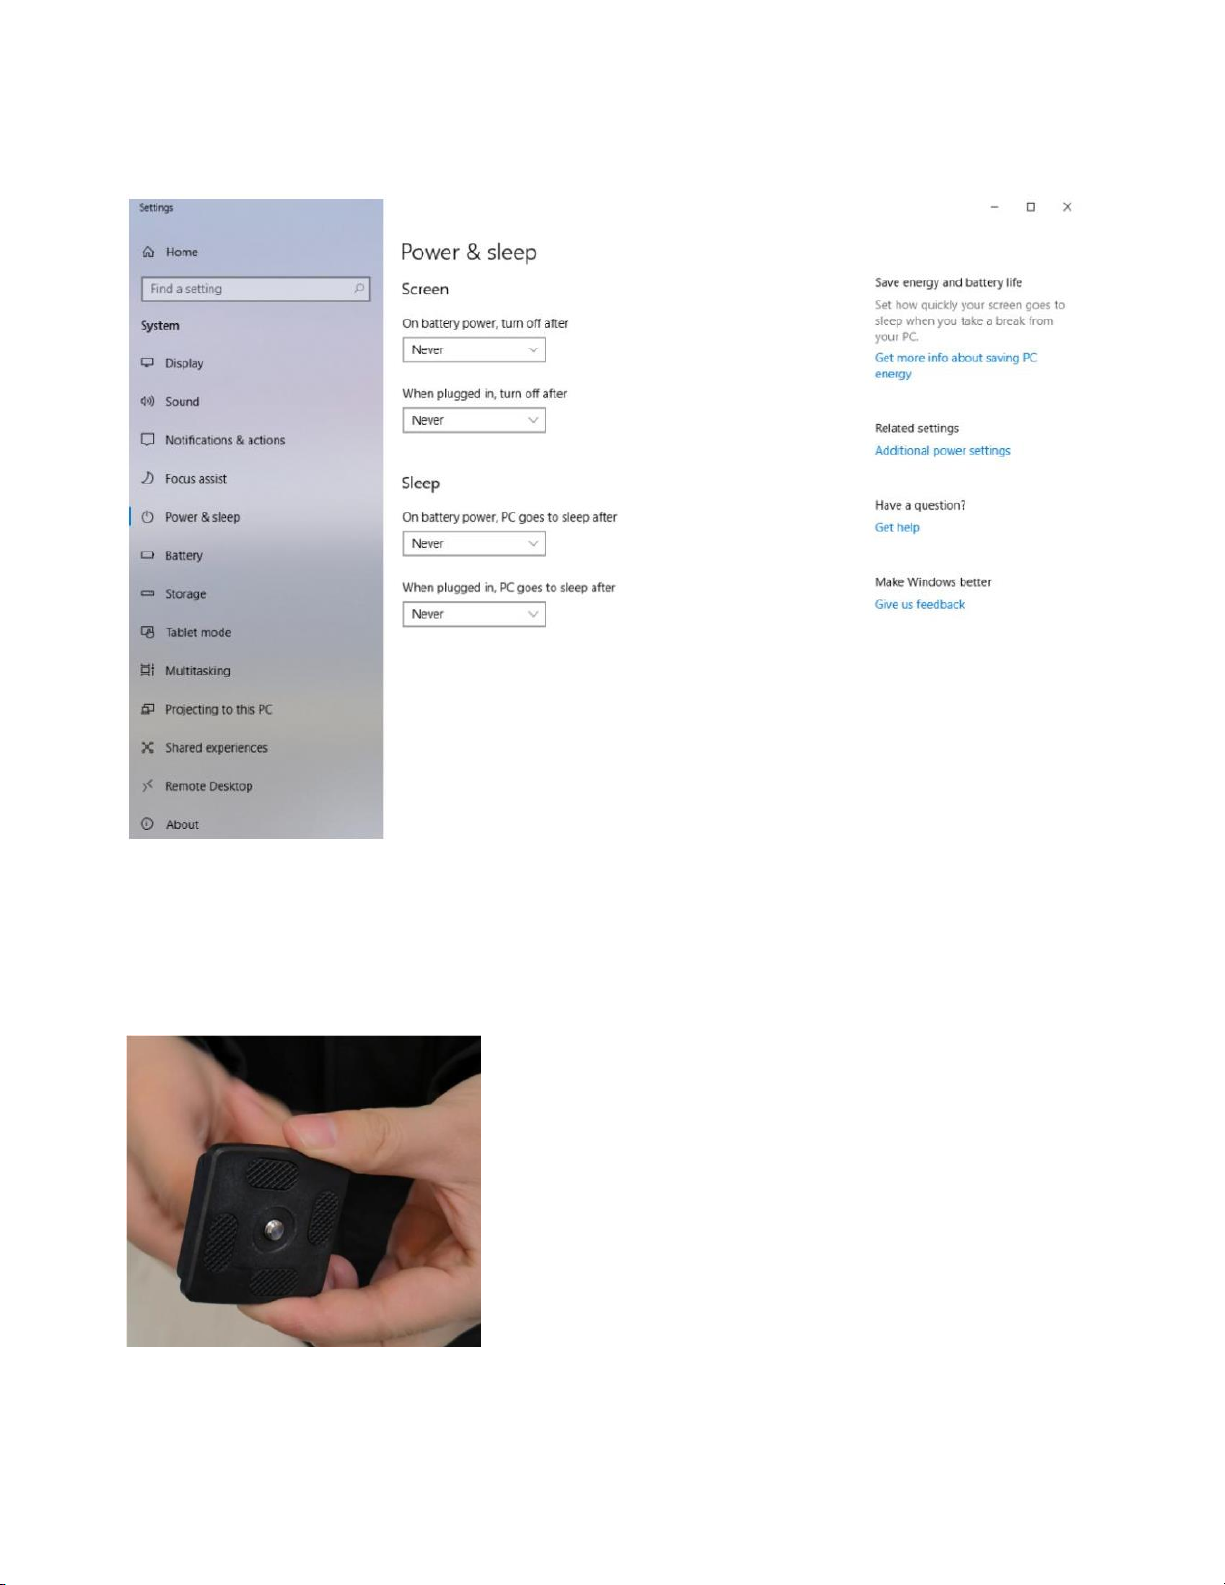
4.1.2 Power & Sleep Setting
Figure 4-2 Power sleep mode settings
4.1.3 Device Installation
1) Take off the dovetail foundation on top of the tripod and turn the screw to the most prominent position.

2) Match the dovetail foundation with the base part of IR (infrared) camera. Then fix the camera to the
tripod, make sure the locking mechanism is fastened.
3) Plug in the network cable and the power adapter into the IR camera. Remove the lens cover of the
camera. Turn on the power switch and the indicator light will turn on. On initial use, allow the camera to
warm up for at least 30 minutes.
4) Match the dovetail foundation with the blackbody. Then attach the blackbody to the tripod, make sure
the locking mechanism is fastened.

5) Connect the power cable and turn on the power switch. Locate the data represented in green on the
LED display and adjust the number to “36.0” using the keypad. Then press the “ENT” button.
4.2 Software Installation
1) Copy all installation packages into Local D: Disk; DO NOT install into C: Disk. If the laptop only has one
disk, please separate the system disk from the non-system disk and then copy the package to non-
system disk. There are 5 files in the installation package, as shown in the figure:
Figure 4-3 Software installation package

2) Jumbo Frame Setting:
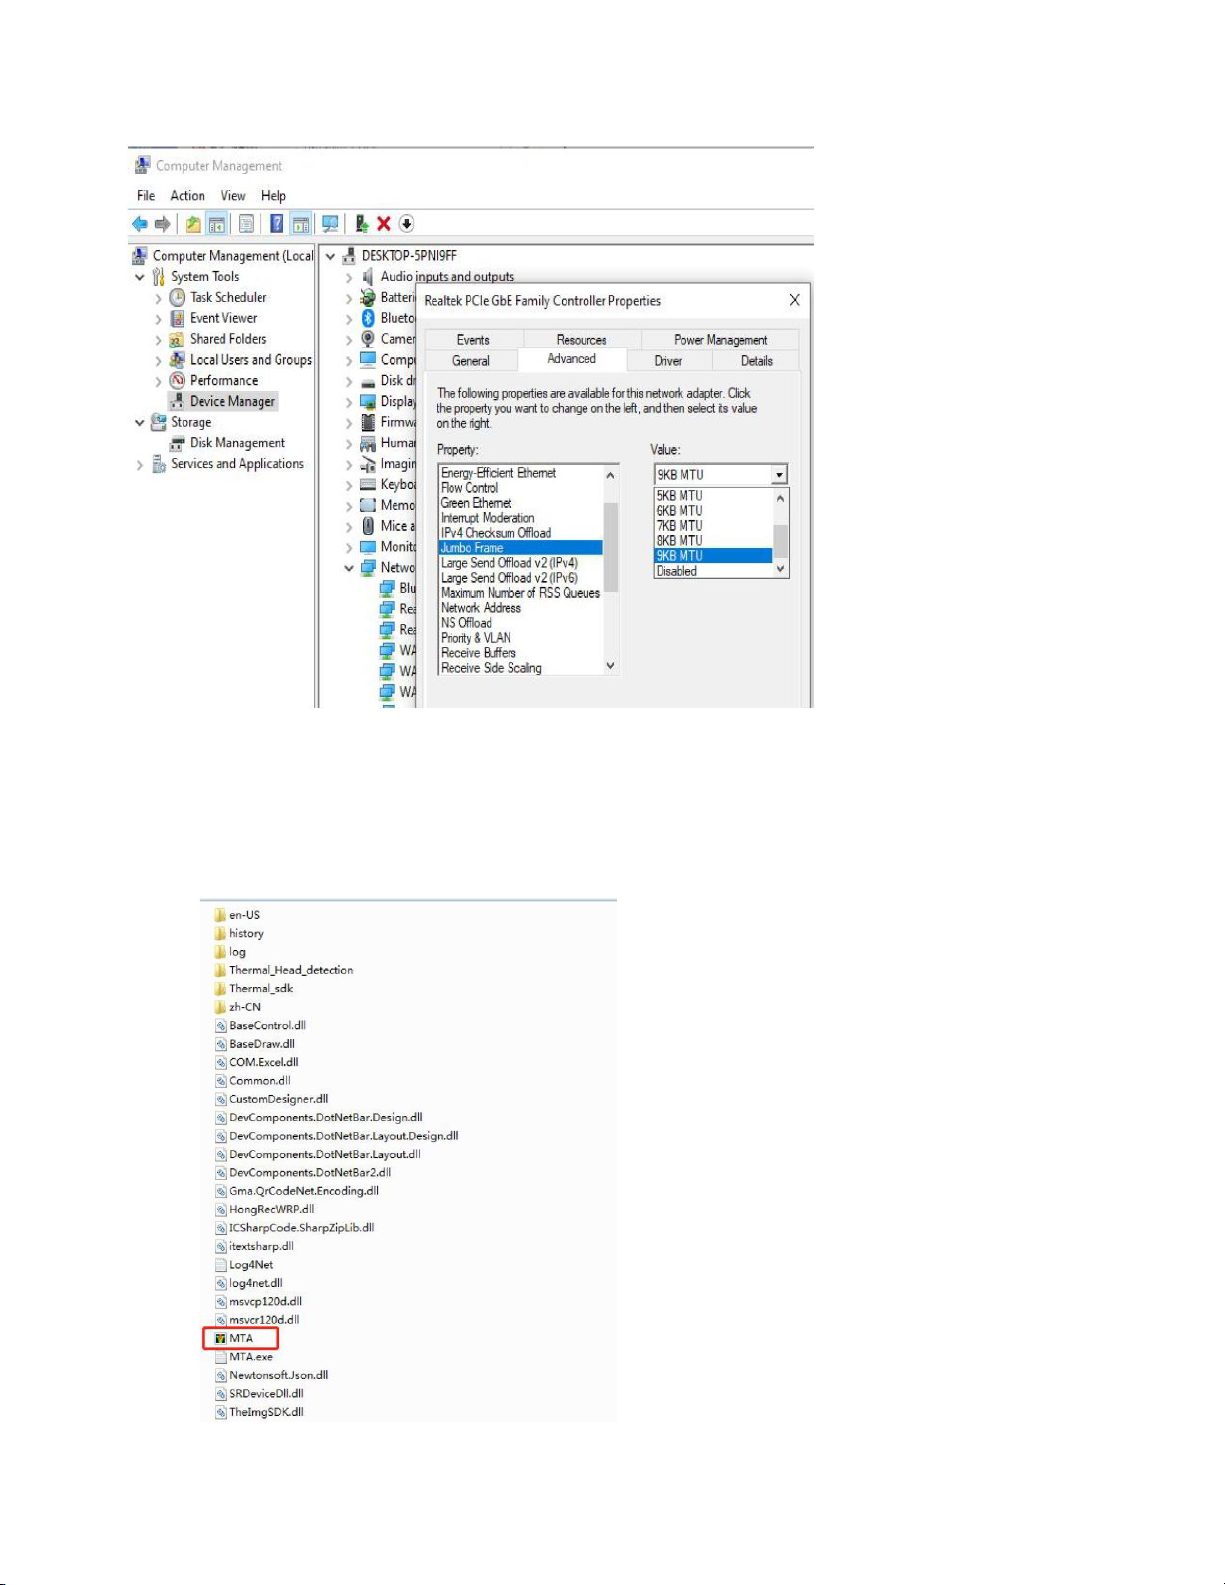
Figure 4-4 Jumbo Frame Setting
3) Run Software:
Step 1: Unzip "mtam1.3.0.rar" to the D: root directory
Step 2: Create a shortcut "mta.exe" onto the desktop
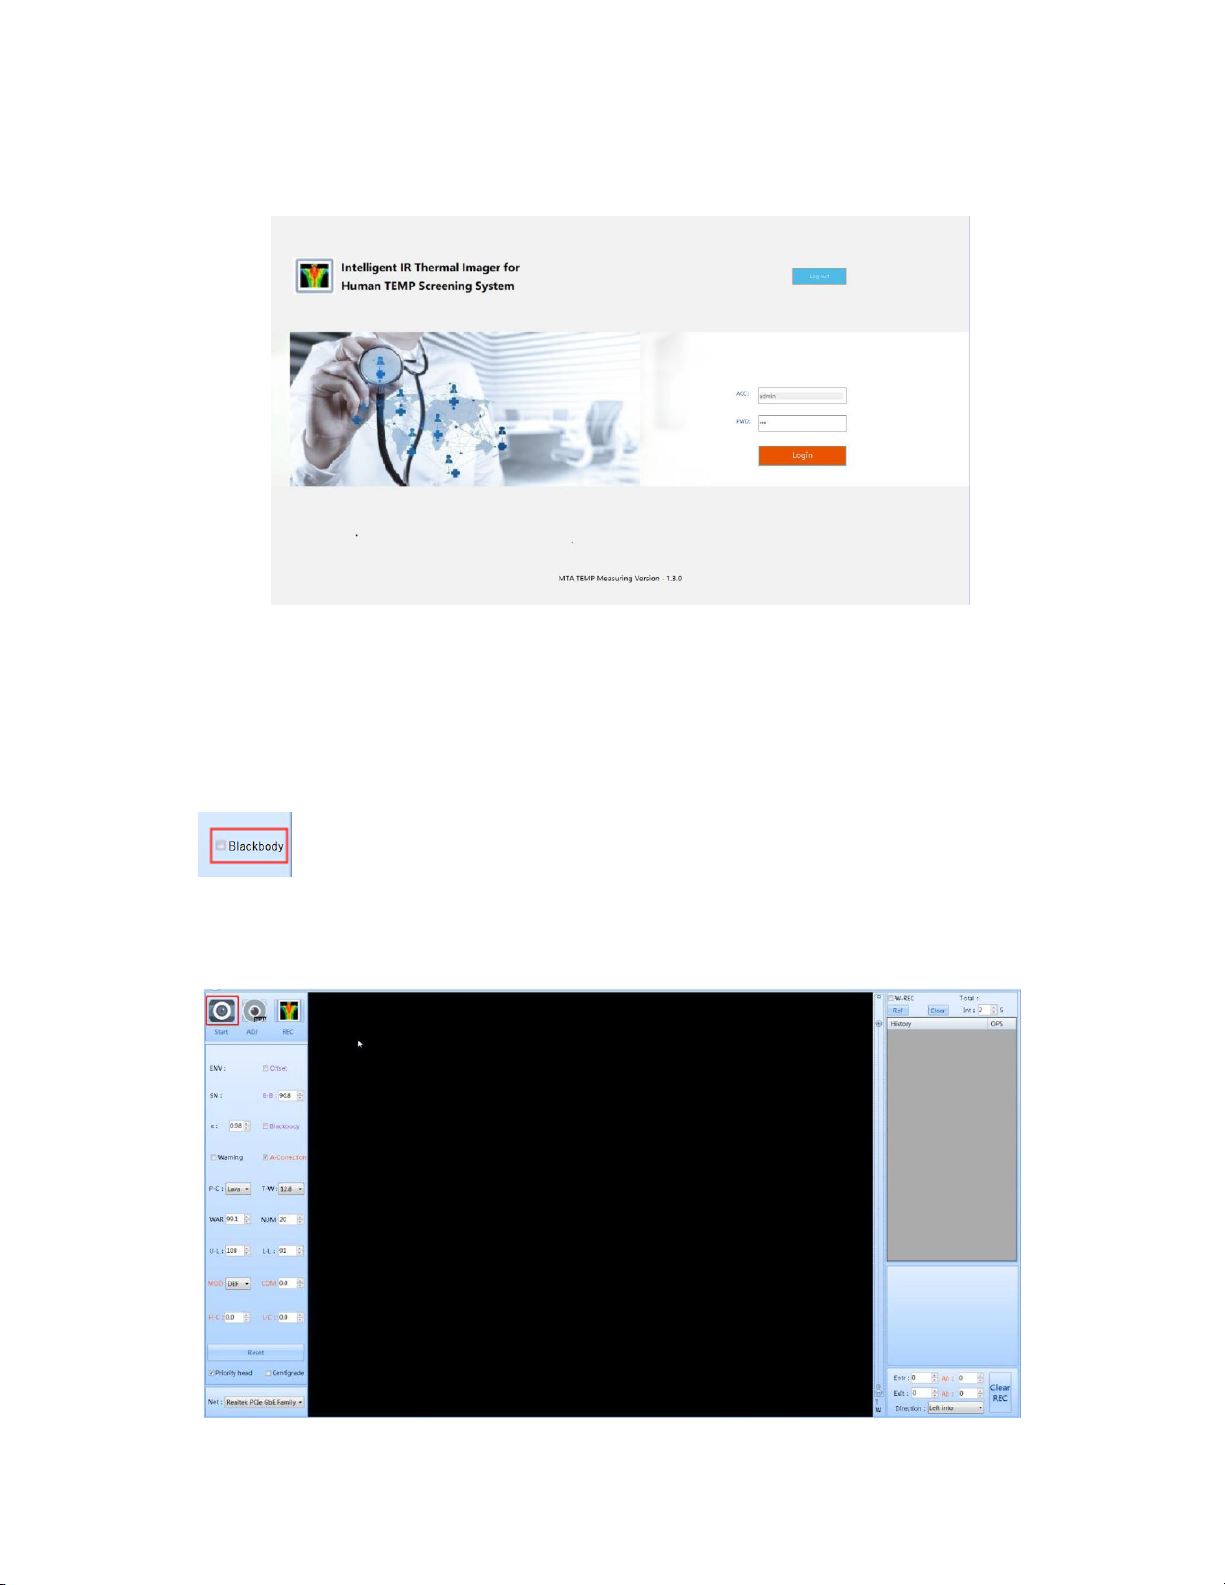
Step 3: Double-click the desktop shortcut to access the login interface.
Step 4: Enter password “123”, then click “LOGIN”; the main interface of the system will appear.
Figure 4-5 Login
Step 5: Click the "START" button
Step 6: Blackbody Settings
Note: Use of the blackbody is recommended for accuracy, however it is optional. If you are not
using the blackbody, skip this step. Otherwise, make sure the blackbody is visible on the monitor
screen (recommend in the upper right corner of the screen).
If the blackbody’s display number is the same as the setting number (ex. 36.0), click on the
“Blackbody”button (shown above), and right-click the center of the blackbody’s image to initiate
blackbody mode. If position of the black body changes during subsequent use, right-click the
center of the blackbody again, otherwise it will affect temperature accuracy.
Figure 4-6 Startup interface

Step 7: Other Settings
Figure 4-7 Blackbody Interface
Low temperature compensation is generally used for when the ambient temperature is
relatively low, and high temperature compensation is used for when the ambient
temperature is relatively high. In a hot environment, you need to adjust high temperature
compensation to make the normal human body temperature about 36.5°C (97.7°F).
This device uses infrared thermal technology to detect human body skin temperature and then to
compensate ambient temperature to achieve and display the human body temperature. Low and
high temperature compensation is used to achieve an accurate human body temperature reading.
Figure 4-8 Adjust Temperature Interface
Table of contents


