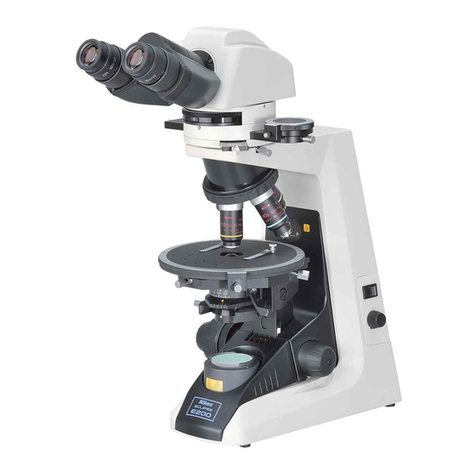
Gima 31002 Parts list manual

M31002-EN-Rev.0.11.17
Gima S.p.A.
Via Marconi, 1 - 20060 Gessate (MI) Italy
www.gimaitaly.com
Biological Microscope
USE AND MAINTENANCE BOOK
ATTENTION: The operators must carefully read and completely understand the present
manual before using the product.
31002 Teme l’umidità
Keep dry
Conservare al riparo della luce solare diretta
Keep away from sunlight
Fabbricante
Manufacturer
Alltion (Wuzhou) Co., Ltd.
Alltion Building, NO.10, 3rd Road, Wuzhou Industrial Park,
Wuzhou, Guangxi, China
Made in China

11
12
13
14
15
16
17
18
01
02
03
04
05
06
07
08
09
10

23
24
25
26
27
28
03
13
06
20
21
14
15
20
22

Biological Microscope
01 Eyepiece
02 Nosepiece
03 Objective
04 Condenser
05 Aperture Iris Diaphragm adjustment
06 Illumination
07 Main body
08 Main Switch
09 Bulb
10 Screw
11 Interpupillar Distance Indicator
12 Binocular viewing head
13 Stage
14 Portrait Adjustment Knob
15 Lateral Adjustment Knob
16 Right Fine Focus Knob
17 Right Coarse Focus Knob
18 Tension Adjustment Collar
20 Condenser Focusing Knob
21 Condenser centering knobs
22 Power cable
23 Locking Set
24 Left Fine Focus Knob
25 Left Coarse Focus Knob
26 Brightness Adjustment Knob
27 Fuse holder
28 Cable winder

Safety Note
1. Open the box carefully to avoid the accessories, like lens, dropping to ground or being
damaged.
2. Do keep the instrument out of direct sunlight, high temperature or humidity, dusty and easy
shakingenvironment.Makesurethestageisat,horizontalandrmenough.
3. When moving the microscope, carefully carry it with the handle and the base.
4. Make sure the instrument is earthed, to avoid lighting strike.
5. Forsafety,besurethemainswitchisin“O”(o)stateandcutothepowersupplybefore
replacing the bulb or the fuse. If you replace the bulb during use or right after use, allow the
lamp bulb and the lamp house to cool completely before touching.
(Designated bulb: 1W S-LED or 6V20W Halogen Lamp)
6. Check the input voltage: be sure the input voltage which is signed in the back of the
microscope is consistent with the power supply voltage, or it will bring a serious damage to
the instrument.
7. Always use the power cord provided by Gima.
8. The electrical equipment of the microscope should be discard as electronic waste.
Maintenance and Care
1. All the lenses have been adjusted properly; do not dismount them by yourself please.
2. Thenosepieceandcoarseandnefocusingpartsaresodelicatethatitisforbiddento
disassemble them carelessly by yourself.
3. Keep the instrument clean, and do not pollute the optical element when wiping away the
dust on the instrument.
4. Thecontaminationsontheprism,likengerprintsandoilsmudges,couldbegentlywiped
with a piece of soft cloth or tissue paper, gauze which has been immersed in pure alcohol
or ether. (Note that the alcohol and ether are highly ammable, do keep them away
from the re or potential sources of electrical sparks, and use them in a drafty room
as possible as you can.)
5. Do not attempt to use organic solvents to clean the microscope components other than the
glass components. To clean them, use a lint-free, soft cloth slightly moistened with a diluted
neutral detergent.
6. Whenusing,ifthemicroscopeissplashedbyliquid,cutothepoweratonce,andwipe
away the splash.
7. Donotdisassembleanypartsofthemicroscope,asthiswillaectthefunctionorreduce
the performance of the microscope.
8. Place the instrument in a cool, dry position. When not using the microscope, keep it covered
with a dust cover. Make sure the lamp socket is cool before covering the microscope.
ENGLISH

Assembly procedure
Before installing, be sure every components is clean, do not score any parts or
glass surface.
Keep well with hexagon wrench provided. When changing the components, you
will need it again.
Installing binocular viewing head
Insert the binocular viewing head 12 into the microscope head and turn it to a proper position,
then tight it.
Installing the eyepiece
Insert the eyepiece 01 into the eyepiece tube until they are against each other.
12
01
ENGLISH

Installing the objective
1. Adjusting the coarse focus knob until the
support device of the mechanical stage reaches
its low limit position.
2. Screwthelowestmagnicationobjective03
into the nosepiece 02 from the left or the right
side, then revolve the nosepiece 02 clockwise
and mount other objectives by the sequence of
lowtohighmagnication
Installing objective this way will make the change
ofmagnicationtobeeasierduringusing.
Clean the objective regularly, for lens
is susceptible to dust.
When operating, use 10×
magnication objective to search and
focus specimen rstly, then replace
with higher magnication objective if
necessary.
When replacing the objective, slowly
turn the nosepiece until you hear
“clicked”, that means the objective
is in place.
Connecting the Power Cord
The cable and cords are vulnerable
when bent or twisted, never subject
the power cord to excessive force.
1. Set the main switch 08to“0”(o)statebefore
connecting the power cable 22.
2. Insert the plugs into the power jack 27 of the
microscope safely.
3. Plug the power cable 22 into the power supply
receptacle. Make sure the connection is well.
Do use the supplied power cord all
the time. If lost or damaged, select
the same standard cord, please.
A wide range of voltage, like
100V~240V, is acceptable for this
microscope.
03
02
08 22
27
ENGLISH

ENGLISH
Replacing the fuse
Do remember to set the main switch 08 to the state “0” (OFF) and unplug the power cord
before replacing the fuse. Rotate the fuse out of the holder 27, replace with a new fuse, then
rotate it back to the holder again.
Installing and Replacing the bulb
Pleaseusethespeciedlamp.
1. Loosing the screw 10
2. Hold the bulb 09 after you wrap it with gauze
or other protection materials, and then insert its
pin deeply into the jack in the lamp holder.
3. During microscope using or soon after it is
turnedo,thebulb,thelamphouseandnearby
parts will be very hot and will cause serious
burns.Pleaseturnthemainswitchto“0”(o)
and disconnect the power plug, and make sure
the bulb, the lamp room and periphery are all
cool. Then, you can do your replacing.
Insert the bulb gently. Squeezing too hard will damage the bulb.
To prevent reduced bulb life or cracking, do not touch the bulb with bare hands. If
ngerprints are accidentally left on the bulb, wipe the bulb with a soft cloth.
Adjustment and Operation
Brightness Adjustment
1. Connect the power cord and set the main
switch 08 to “ I ”state (ON).
2. Turning the brightness adjustment knob 26.
Placing the Specimen
1. Place the specimen the center of the
mechanical stage and use the stage clips to
clamp it.
2. Turn the portrait 14 and lateral adjustment
knob 15 of the mechanical ruler, move the
specimen to the required position.
Be careful when changing the
objective. If you nish the observation
with the short working distance
objective, and want to change
another one, becareful of not letting
the objective touch the specimen.
09
10
26
14
15

Focusing the Specimen
1. Focus the specimen with 10x objective. To
avoid the objective touching the specimen during
focusing, you should raise the mechanical stage
toletthespecimenclosetotheobjectiveatrst,
then slowly separate them to bring the specimen
to focus.
Turn the coarse focus knob 25 conversely to
lower the specimen and search images in the
10×ocularsimultaneously,andthenusethene
knob 24 to focus. After that, you can replace with
othermagnicationobjectivessafely,andfocus
without the risk of damaging the specimen.
To make the observation more convenient, you can use the locking set 23toxthestagein
a vertical direction.
Condenser Adjustment
Turn the condenser focus knob 20 to move the
condenser up and down. Raise the condenser
whenusingthehighmagnicationobjective,and
descenditwhenusingthelowmagnicationone.
1. Focus the specimen with 10x objective.
2. Adjust the condenser focus knob 20 to get a
clearimageoftheeldirisdiaphragm.
3. Turn the condenser centering knobs 21 to
centertheimageofeldirisdiaphragminthe
eldofview.
The condenser and the objectiveare
coaxial. It has been adjusted before leaving factory, so the user needn’t to adjust
them by self
The highest position of the condenser has been adjusted too. It also needn’t any
user’s operation. (The top surface of the condenser is 0.03 mm - 0.4 mm lower
than the stage top surface.)
Aperture Iris Diaphragm Adjustment
Turn the aperture iris diaphragm stick 05 to
adjust the aperture iris diaphragm.
The aperture iris diaphragm is
designed for the adjustment of
the numerical aperture,not for the
brightness.
Generally, setting the aperture iris diaphragm
to 70- 80% of the N.A. of the objective in use
will provide an image with good contrast. If you
want to observe the image of the aperture iris
diaphragm, remove one eyepiece and look
through the tube. You will see a dark circle
encroaching on the bottom of the tube.
24 23
25
21
20
05
ENGLISH

Adjusting the Interpupillary Distance
The interpupillary distance range: 55mm ~ 75mm
While looking through the eyepieces, move both
eyepiecesrounduntiltheleftandrighteldsof
view coincide completely.
Adjusting the Diopter
1. Turn the eyepiece 01 to adjust the diopter while
looking through it.
The diopter range of the eyepiece
is±5 diopter. The number aligned to
the line on the viewing head is the
diopter in use.
Adjusting the tension adjustment collar
Turn the tension adjustment collar 18 with your
ngers.Whenthecollaristurnedinthedirection
of the arrow, the tension of the coarse adjustment
knob 17 increases. Turning the collar in the
opposite direction decreases the tension.
If the nosepiece descends on its own or if the
specimen gets out of focus quickly even when it
isbroughtintofocususingtheneadjustment
knob 16, it means the tension of the coarse
adjustment knob is too low. Turn the collar in the
direction of the arrow to increase the tension.
01
16
17
18
ENGLISH
Other manuals for 31002
1
Table of contents
Other Gima Microscope manuals
Popular Microscope manuals by other brands

VWR
VWR VisiScope 384 Series instruction manual

Nikon
Nikon ECLIPSE E200 POL instructions

Leica
Leica DI C800 User's manual & installation instructions

ThermoFisher Scientific
ThermoFisher Scientific Continuµm manual

ThermoFisher Scientific
ThermoFisher Scientific Continuµm manual

Olympus
Olympus SZ61 instructions