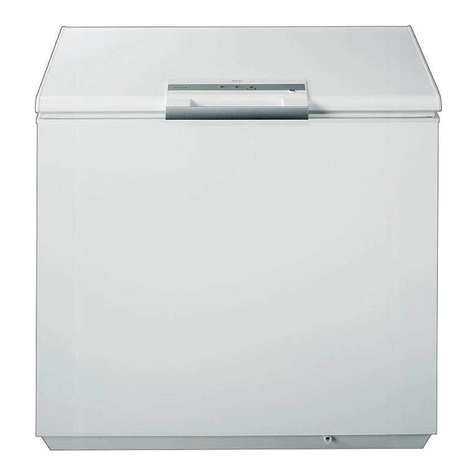
Galanz GLF50CWED12 User manual

CHEST FREEZER INSTRUCTION MANUAL
GUIDE D'UTILISATION DU CONGÉLATEUR HORIZONTAUX
GLF50CWED12
GLF70CWED12
Thank you for purchasing a Galanz product. Please read this manual carefully for correct usage and safety,
and keep for future reference. For service, support and warranty information, call 1-800-562-0738.
Nous vous remercions d'avoir acheté un produit Galanz. Veuillez lire attentivement ce guide pour un usage approprié
et sécurisé et conservez-le pour toute référence future. Pour obtenir des renseignements sur le dépannage,
et la garantie, composez le 1-800-562-0738.
© 2021 Galanz Canada Ltd.

CONTENTS
1
2
4
5
9
11
12
CONTENTS
IMPORTANT SAFETY INFORMATION
.........................................................
INSTALLATION INSTRUCTIONS
..................................................................
OPERATING INSTRUCTIONS
......................................................................
CARE & MAINTENANCE
.............................................................................
TROUBLESHOOTING
...................................................................................
LIMITED WARRANTY
..................................................................................

SAVE THESE INSTRUCTIONS
2
IMPORTANT SAFETY INFORMATION
SAFETY REQUIREMENTS
DANGER:
WARNING:
WARNING:
WARNING:
WARNING:
CAUTION:
DANGER:
DANGER:
IMPORTANT SAFETY INFORMATION

SAVE THESE INSTRUCTIONS
3
This appliance is not intended for use by persons
(including children) whose physical, sensory or
mental capabilities may be different or reduced,
or who lack experience or knowledge, unless such
persons receive supervision or training to operate
the appliance by a person responsible for their
safety.
This appliance is intended to be used in household
and similar applications such as:
Staff kitchen areas in shops, offices and other
working environments;
Farm houses and by clients in hotels, motels and
other residential type environments;
Bed and breakfast type environments;
Catering and similar non-retail applications.
GROUNDING INSTRUCTIONS
This appliance must be grounded. Grounding
reduces the risk of electrical shock by providing an
escape wire for the electrical current.
This appliance has a cord that has a grounding
wire with a 3-prong plug. The power cord must be
plugged into an outlet that is properly grounded.
If the outlet is a 2-prong wall outlet, it must be
replaced with a properly grounded 3-prong wall
outlet. The serial rating plate indicates the voltage
and frequency the appliance is designed for.
WARNING -
Improper use of the grounding
plug can result in a risk of electric shock.
Consult a qualified electrician or service agent
if the grounding instructions are not completely
understood, or if doubt exists as to whether the
appliance is properly grounded.
Do not connect your appliance to extension
cords or together with another appliance in the
same wall outlet. Do not splice the power cord.
Do not under any circumstances cut or remove the
third ground prong from the power cord. Do not
use extension cords or ungrounded (two prongs)
adapters.
IMPORTANT
SAFETY WARNINGS
SAFETY INFORMATION
SAFETY REQUIREMENTS
IMPORTANT SAFETY INFORMATION

SAVE THESE INSTRUCTIONS
4
Before connecting the appliance to a power
source, let it stand upright for approximately
6 hours. This will reduce the possibility of a
malfunction in the cooling system from handling
during transportation.
Allow 5 inches of space between the back,
sides and top of the freezer and all adjacent
walls.
This appliance is intended for free-standing
installation only and is not intended to be
built into a cabinet or counter. Building in this
appliance can cause it to malfunction.
IMPORTANT:
Before using the appliance, remove
the rubber plug from the accessory bag and
install it in the interior of the appliance. Do not
run the appliance without the plug installed as
this can cause water leakage and damage to
flooring.
INSTALLATION INSTRUCTIONS
INSTALLATION INSTRUCTIONS
LOCATION
Two people should be used when moving the
appliance.
Remove interior and exterior packaging prior to
installation. Wipe the outside of the appliance
with a soft, dry cloth and the inside with a
lukewarm wet cloth.
Place the appliance on a level floor that is strong
enough to support it when the freezer is fully
loaded.
Do not place the appliance in direct sunlight or
near sources of heat, such as a stove or heater.
as this can increase electrical consumption.
Extreme cold ambient temperatures may also
cause the appliance to perform improperly.
Do not use the appliance near water, for
example, in a wet basement or near a sink.
This appliance is intended for indoor household
use only. It is not designed for outside installation,
including anywhere that is not temperature controlled
(garages, porches,vehicles, etc.).

5
OPERATING INSTRUCTIONS
FEATURES
1. Wire Basket
2. Control Panel
3. Defrost Drain
4. Feet
IMPORTANT NOTE
The freezer lid may be difficult to open immediately
after closing it. This is normal and is due to the
pressure difference between the cold interior of the
freezer and the warm air that has just entered the
freezer when the lid was opened. The pressure will
equalize within a few minutes.
If the lid is especially difficult to open, wait 5
minutes to allow the pressure to equalize and then
try again.
SAVE THESE INSTRUCTIONS
OPERATING INSTRUCTIONS

6
OPERATING INSTRUCTIONS
OPERATING INSTRUCTIONS
TEMPERATURE CONTROL
The temperature of the appliance is controlled
by setting the thermostat dial on the front of the
cabinet.
The number 1 indicates the warmest setting. The
number MAX indicates the coldest setting.
The number 4 setting should be sufficient for
regular home use.
The temperature range of the appliance is
approximately 10.4 F to -11.2 F (-12 C to
-24 C).
To stop the cooling function, turn the dial to the
position.
Notes:
The temperature inside the appliance can
vary based on ambient room temperature, the
frequency that the lid is opened and the amount
of fresh food that has recently been added to the
appliance.
Do not overload the appliance as this can affect
performance.
Do not freeze large quantities of fresh food at
the same time.
Indicator Lights
1. Power indicator light:
Illuminates when the
appliance is connected to a working power
source.
2. Run indicator light:
Illuminates when the
compressor is operating.
SAVE THESE INSTRUCTIONS
1
2


IMPORTANT
Never use electrical appliances during
defrosting. Do not use pointed or sharp
objects to remove frost as this can damage the
refrigerant lines. If these lines are accidentally
pierced it will render the freezer in operable and
.
SAVE THESE INSTRUCTIONS
8
OPERATING INSTRUCTIONS
OPERATING INSTRUCTIONS
4. Place a bucket or pan under the drain cap to
catch defrosted water. Check the appliance
regularly during defrosting to ensure that the
5. When all water has been drained, twist the
drain cap until the arrow is pointing upwards
cabinet. See Figure 4.
6. Replace the cover in the interior defrost drain.
After defrosting is complete, set the temperature
control to maximum for 2 to 3 hours before
returning to the desired temperature setting.
3
4

SAVE THESE INSTRUCTIONS
9
POWER FAILURE
Most power failures are corrected within a few
hours and should not affect the temperature of your
appliance if you minimize the number of times the
lid is opened. If the power is going to be off for
a longer period of time, take the proper steps to
protect your contents.
Note:
Wait 3 to 5 minutes before attempting
to restart the refrigerator if operation has been
interrupted.
ENERGY SAVING TIP
The appliance should be located in the coolest area
of the room, away from heat producing appliances,
and out of direct sunlight. Do not overload the unit
or block any ventilation openings.
CARE & MAINTENANCE
CARE & MAINTENANCE
CLEANING
Ensure the appliance is unplugged before cleaning.
To clean the inside of the appliance, use a soft
cloth and a solution of a tablespoon of baking
soda to one quart of water or a mild soap
solution or some mild detergent.
Clean the outside with a soft, damp cloth and
some mild detergent.
It is important to keep the area where the lid
seals against the cabinet clean to ensure a tight
seal. Clean this area with a soapy cloth. Rinse
with a damp cloth and let dry.
Note:
Do not use cleaners containing ammonia or
alcohol on the appliance. Ammonia or alcohol can
damage the appearance of the appliance. Never
use any commercial or abrasive cleaners or sharp
objects on any part of the appliance.
This manual suits for next models
1
Table of contents
Languages:
Other Galanz Freezer manuals