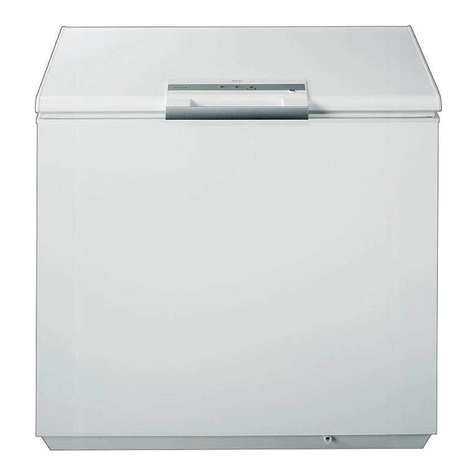
Follett FZRVAC2 User manual

FZRVAC2
Welcome to Follett Products LLC
Follett Products equipment enjoys a well-deserved reputation for excellent performance, long-term reliability and
outstanding after-the-sale support. To ensure that this equipment delivers that same degree of service, review this
guide carefully before you begin your installation.
Should you need technical help, please call our Technical Service group at (877) 612-5086 or (610) 252-7301.
Please have your model number, serial number and complete and detailed explanation of the problem when
contacting Technical Service.
Getting Started
After uncrating and removing all packing material, inspect the equipment for concealed shipping damage. All
freight is to be inspected upon delivery. If visible signs of damage exist, please refuse delivery or sign your delivery
receipt “damaged.” Follett Customer Service must be notied within 48 hours. Wherever possible, please include
detailed photos of the damage with the original packaging so that we may start the freight claim process.
Order parts online:
www.follettice.com
01441450R00
801 Church Lane • Easton, PA 18040, USA
Toll free (877) 612-5086 • +1 (610) 252-7301
www.follettice.com/healthcare
FZRVAC2
High-Performance Compact Freezers
Installation Guide
Please visit https://www.follettice.com/technicaldocuments
for the Operation and Service manual for your unit

Contents
Welcome to Follett Products LLC.............................................................................................................................1
Getting Started.......................................................................................................................................................1
Specications.............................................................................................................................................................3
Dimensions ............................................................................................................................................................3
Electrical Specications.........................................................................................................................................3
Refrigeration Specications...................................................................................................................................3
Heat Rejection .......................................................................................................................................................3
Ambient Information ..............................................................................................................................................3
Installation ..................................................................................................................................................................3
Locating the Freezer..............................................................................................................................................3
Installing Shelves - FZRVAC2 only .......................................................................................................................5
Installing Glycerine Solution in Product Simulation Bottle - Required...................................................................5
Battery Backup (KP models only)..........................................................................................................................6
Reversing the Door Swing – Optional ...................................................................................................................6
Adjusting Hinge Closure Force..............................................................................................................................9
Installing Third-party Temperature Probe ...........................................................................................................10
Cleaning ....................................................................................................................................................................12
Annual Cleaning ..................................................................................................................................................12
Operation ..................................................................................................................................................................12
Temperature Control ............................................................................................................................................13
Defrosting.............................................................................................................................................................13
Controller Operation ................................................................................................................................................13
Controller Display.................................................................................................................................................13
Controller Security ...............................................................................................................................................14
Changing Temperature Display from C to F........................................................................................................14
Changing Temperature Display from Decimal to Integer.....................................................................................14
Sleep Function.....................................................................................................................................................14
Minimum and Maximum Temperature Function ..................................................................................................14
Alarming Functions..............................................................................................................................................14
Follett Keypad Lock .............................................................................................................................................17
Refrigeration System ...........................................................................................................................................18
Checking Refrigeration System Pressures ..........................................................................................................18
Compressor Information ......................................................................................................................................19
Defrost Heater Information ..................................................................................................................................19
Wiring Diagram....................................................................................................................................................20
Freezer Troubleshooting..........................................................................................................................................21
Accessories ..............................................................................................................................................................22
2 FZRVAC2 Compact Freezers

Specications
Dimensions
FZRVAC2
Dimensions (external) 18.6" W x 24" D x 27.93" H
(47 cm x 61 cm x 71 cm)
Dimensions (internal) 14.6" W x 11.6" D x 15.72" H
(37 cm x 29 cm x 40 cm)
Shelf Size 13.75 W x 9 D
(35 cm x 23 cm)
Capacity 1.6 cu ft (44 L)
Usable Space 1.34 cu ft (0.4 m3)
Weight (uncrated)* 104 lbs (47 kg)
* Add 22 lbs/10 kg for packaging.
Electrical Specications
§115 V, 60 Hz, 1 phase
§Full load: 4.1A
§Minimum circuit ampacity: 15A
§Connect to dedicated circuit, fuse or breaker
§Maximum size of branch circuit overcurrent device: 15A
§Follett recommends circuit be protected by GFCI
Refrigeration Specications
Refrigerant Charge Size (oz)
Maximum Design Pressures (psi)
High Side Low Side
R404A 9.2 461 143
Heat Rejection
§875 BTU/hr (256 W) maximum
Ambient Information
CAUTION!
The FZRVAC2 are for indoor use only.
Optimum Maximum
Air Temperature ≤80 F (27 C) 100 F (38 C)
Relative Humidity 60% max
FZRVAC2 Compact Freezers 3

Installation
Locating the Freezer
Performance of FZRVAC2 is affected by ambient temperature and location. To ensure proper performance,
please refer to the following drawings and conrm that the clearance requirements are met. There is no
clearance requirement for the back of the freezer so it can be placed against the wall.
80 F (27 C) and 60% RH – located under overhanging cabinet or shelf with zero top clearance
Requires 6" (15.3 cm) clearance on either right or left side
6" (15.3 cm) minimum air
clearance required right
or left side
SHELF
80 F (27 C) and 60% RH – unrestricted topclearance location
Requires 2" (5.1 cm) clearance on both sides and unrestricted top clearance (12" (30.5 cm) min above unit)
UNRESTRICTED TOP
CLEARANCE
2" (5.1 cm) minimum air
clearance required on
both sides
2" (5.1 cm) minimum air
clearance required on
both sides
UNRESTRICTED TOP
CLEARANCE
100 F (38 C) – maximum temperature location with zero top clearance
Requires 6" (15.3 cm) clearance on both sides
6" (15.3 cm) minimum air
clearance required on
both sides
6" (15.3 cm) minimum air
clearance required on
both sides
SHELF
SHELF
4 FZRVAC2 Compact Freezers

Installing Shelves
1. Remove shelves and shelf brackets packed inside freezer. (If
ordered, nd additional shelf accessory in separate box.)
2. Install shelf brackets in pilasters (insert top tab, squeeze and
push in lower tab) (Fig. 1).
Fig. 1
Installing Glycerine Solution in Product Simulation Bottle -
Required
ATTENTION INSTALLER
§It is imperative that the top/bottom probe bottle be lled with a solution
that your facility uses to ensure proper operation of unit.
§Units are equipped with a third-party monitor installation port.
Customers are required to refer to CDC Vaccine and Handling Toolkit
(cdc.gov) for proper placement of the probe within the cabinet to
ensure proper performance.
§NSF 456 requires the temperature display probe (P4-RTD1 in
REF12, REF20/25, FZR20/25, and REF45 models) to be replaced or
recalibrated. Follett recommends replacement/recalibration 12 months
from the original date of calibration on the Certicate of Traceability
supplied with your equipment at the time of purchase. Recalibration
or purchasing a new calibrated probe is not covered by the original
equipment warranty. To purchase a new Probe with Certicate of
Traceability, please contact our Parts Department @ 1-877-612-5086 or
partsales@follettice.com
1. Remove the bottle from the bracket located in the upper right
corner of the freezer (Fig.2).
2. Remove the top and ll the bottle with a 60/40 solution of
glycerine and water.
3. Replace the top (and probe).
4. Reinsert bottle into the bracket.
Note: If you are using this in a food service application, and installing
in accordance with NSF, you must remove the probe from the
bottle. NSF requires that air temperature be displayed.
Fig. 2
5. Plug in the freezer and return the power switch to ON (Fig.3).Fig. 3
FZRVAC2 Compact Freezers 5

Battery Backup (KP models only)
1. Provide power to the unit and turn the power switch to the ON
position.
2. Open the door using the keypad lock and prop the door open so
it doesn’t close during the battery installation.
3. Turn power switch to the OFF position or unplug the unit from
the power supply.
4. Remove the two screws (Fig. 4.1) on the front panel at the
bottom of the unit.
5. Remove the front panel.
Note: Take care when removing, some wires are connected to the
front panel (Fig. 4.2).
6. Find the battery pack on the right-hand side of the front panel.
7. Pull the battery pack and the battery connector away from the
hook and loop patch on the front panel (Fig. 4.3).
8. Connect the battery connector with the black and red wires to
the top of the battery pack.
9. Place the battery pack back in place rmly on the hook and loop
patch.
10. Re-install the front panel.
11. Close the door.
12. Test operation of the keypad lock while the power to the unit is
OFF to conrm back-up battery connection.
13. Turn the power switch ON or plug the unit back into the power
supply.
Fig. 4
1
23
Reversing the Door Swing – Optional
WARNING!
For protection, safety goggles (and/or face shield) should be
worn when removing and/or installing the hinge spring.
1. Use at screwdriver to carefully remove hinge covers (Fig. 5).
Fig. 5
6 FZRVAC2 Compact Freezers

2. Using a small Phillips screwdriver, allen key or drift pin, rotate
top of spring assembly (counter-clockwise for right-hand hinged
doors) (Fig.6.1) to remove the pin (Fig.6.2).
3. Relieve torque on the spring.
Fig. 6
4. With a at-head screwdriver, simultaneously push down and pry
the top of the spring from out of the top of the hinge (Fig.7).
Fig. 7
5. Support door and remove screws attaching hinge to freezer
cabinet and remove the door (Fig. 8).
6. Cover hinge screw holes with screws removed from opposite
side of door and door frame.
Fig. 8
1
2
FZRVAC2 Compact Freezers 7

7. Remove screws holding lock strike-bracket at "bottom" inside of
door (Fig. 9.1).
8. Remove screws from inside of door "top" and install bracket.
9. Plug "bottom" holes with retained screws and install lock strike-
bracket to "top" inside of door (Fig. 9.2).
10. Reverse door 180° so that lock strike-bracket is on the bottom
inside of door (Fig. 9.3).
Fig. 9
1
2
3
11. Reinstall the door on the opposite side of the doorframe. Adjust
if needed.
12. Reinstall screws (torqued to 25 in-lbs) (Fig. 10).
Fig. 10
13. Insert bottom of spring kit onto bottom hinge pin (Fig.11).Fig. 11
8 FZRVAC2 Compact Freezers

14. Insert tool as shown and press down on both sides of tool
(Fig.12.1) to compress spring kit, then insert top of spring kit
onto top hinge pin (Fig. 12.2).
Fig. 12
1
2
1
Adjusting Hinge Closure Force
1. Remove the tool and insert it (Phillips screwdriver, Allen key,
drift pin) into hole nearest the hinge bracket (Fig.13).
Fig. 13
2. Rotate top of spring counter-clockwise to increase the spring
torque (Fig.14).
Fig. 14
FZRVAC2 Compact Freezers 9

3. Insert pin into an open hole nearest the hinge bracket
(Fig.15.1), and remove the tool used to torque the spring
(Fig.15.2).
4. Repeat Steps 2 and 3 until desired closure force is achieved.
CAUTION!
Do not overtorque the spring unnecessarily. Minimum closure
force should close door when door is opened 1" (2.5 cm).
Fig. 15
12
5. Reinstall hinge cover (Fig. 16).Fig. 16
Installing Third-party Temperature Probe
Facilities using a third-party alarming and/or temperature monitoring
system need to install the third-party probe in the freezer. Follett
recommends removing any stored product before performing this
procedure.
1. Move the power switch on lower rear panel to OFF and unplug
the freezer.
2. Remove the rear panel of the freezer (Fig. 17).
3. Open front door of freezer and remove shelf/shelves, if
installed, for better access.
Fig. 17
1
2
10 FZRVAC2 Compact Freezers
Table of contents
Other Follett Freezer manuals

Follett
Follett FZR5-PL Series Setup guide

Follett
Follett FZR Series Supplement

Follett
Follett FZR5-PL Series Setup guide

Follett
Follett FZR5-PL Series Setup guide

Follett
Follett FZR4P Setup guide

Follett
Follett Performance Plus FZR4P Setup guide

Follett
Follett FZRVAC4P Setup guide

Follett
Follett FZR4-ADA Setup guide

Follett
Follett ZF130 SLIM User manual

Follett
Follett fzr1 Setup guide

Follett
Follett FZR8-PC User manual

Follett
Follett Edge Series User manual

Follett
Follett C83253 Setup guide

Follett
Follett Advantage FZRADV25-LB Operation manual

Follett
Follett C45184 Manual

Follett
Follett FZR20-LB Setup guide

Follett
Follett H55798 Setup guide

Follett
Follett FZR Series Supplement

Follett
Follett D18495 Setup guide