
Fisher PLC-XR70N User manual
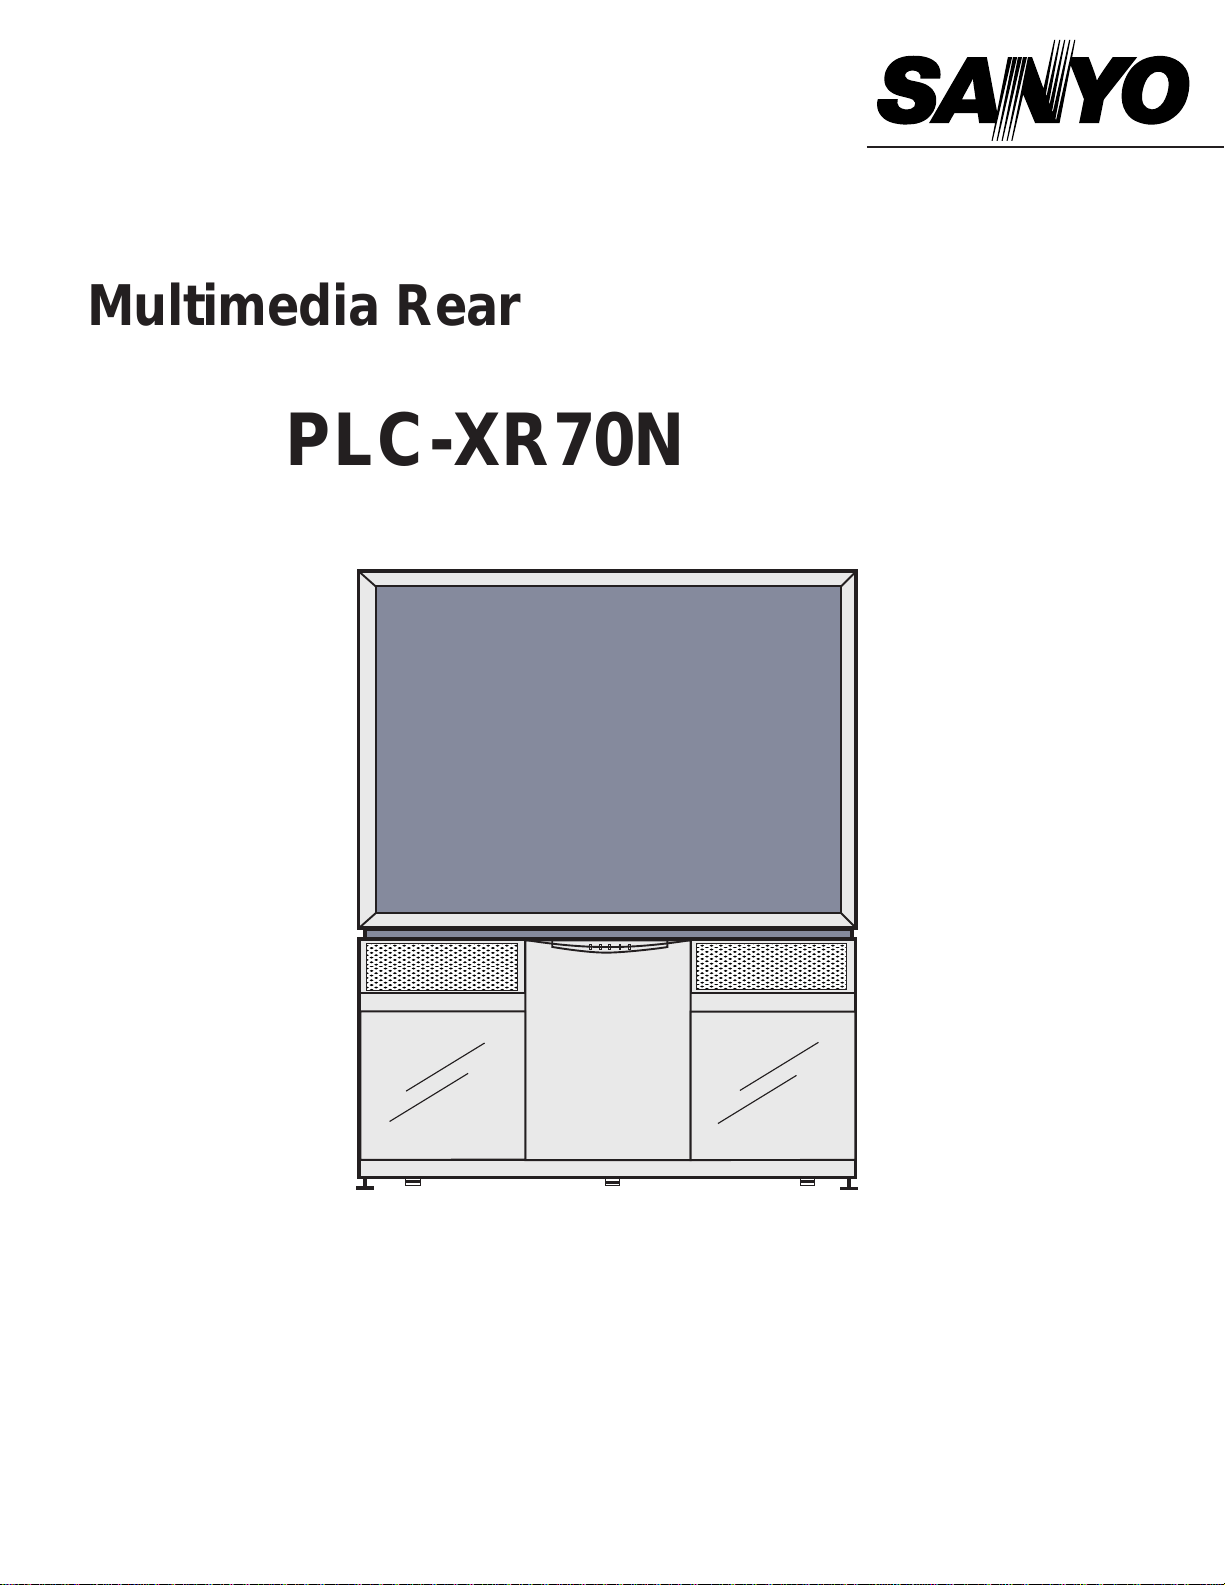
Owner's Manual
,,,
,
,
,
,
,
,
,,,
,,,
,
,
,
,
,
,
,,,
PLC-XR70N
Multimedia Rear-Projection Display
MODEL
2
INFORMATION TO THE USER
NOTE : This equipment has been tested and found to comply with the limits for a Class A digital device,
pursuant to Part 15 of FCC Rules. These limits are designed to provide reasonable protection
against harmful interference when the equipment is operated in a commercial environment. This
equipment generates, uses, and can radiate radio frequency energy and, if not installed and used
in accordance with the instruction manual, may cause harmful interference to radio
communications. Operation of this equipment in a residential area is likely to cause harmful
interference in which case the user will be required to correct the interference at his own expense.
As the owner of a new Rear-Projection Display, you are probably eager to try out your new projector.
Before you do, we suggest that your spend a little time reading this manual to familiarize yourself with the
operating procedures, so that you will receive maximum satisfaction from the many features included in
your new projector.
This owner's manual will acquaint you with your projector's features. Reading it will help us too. Through
the years, we have found that many service requests were not caused by problems with our projectors.
They were caused by problems that could have been prevented, if the owner had followed the instructions
in the manual.
You can often correct operating problems yourself. If your projector fails to work properly, see
"TROUBLESHOOTING" section on page 43 and try the solution marked for each problem.
WARNING:
TO REDUCE THE RISK OF FIRE OR ELECTRIC SHOCK, DO NOT EXPOSE THIS
APPLIANCE TO RAIN OR MOISTURE.
This Projector has a grounding-type AC line plug. This is a safety feature to be sure that
the plug will fit into the power outlet. Do not try to defeat this safety feature.
This projector produces intense light from the projection lens. Do not stare directly into
the lens as possible eye damage could result. Be especially careful that children do not
stare directly into the beam.
This projector should not be set in the way indicated. It may result in fire hazard.
If the projector will not be used for an extended time, unplug the projector from the power
outlet.
READ AND KEEP THIS OWNER'S MANUAL FOR LATER USE.
CAUTION : TO REDUCE THE RISK OF ELECTRIC SHOCK, DO NOT REMOVE COVER (OR BACK).
NO USER-SERVICEABLE PARTS INSIDE EXCEPT LAMP REPLACEMENT. REFER
SERVICING TO QUALIFIED SERVICE PERSONNEL.
THIS SYMBOL INDICATES THAT
DANGEROUS VOLTAGE CONSTITUTING
A RISK OF ELECTRIC SHOCK IS
PRESENT WITHIN THIS UNIT.
THIS SYMBOL INDICATES THAT THERE
ARE IMPORTANT OPERATING AND
MAINTENANCE INSTRUCTIONS IN THE
OWNER'S MANUAL WITH THIS UNIT.
TO THE OWNER
SAFETY PRECAUTIONS
CAUTION
RISK OF ELECTRIC SHOCK
DO NOT OPEN

3
All the safety and operating instructions should be read
before the product is operated.
Read all of the instructions given here and retain them for
later use. Unplug this projector from AC power supply
before cleaning. Do not use liquid or aerosol cleaners.
Use a damp cloth for cleaning.
Do not use attachments not recommended by the
manufacturer as they may cause hazards.
Do not place this projector on an unstable cart, stand, or
table. The projector may fall, causing serious injury to a
child or adult, and serious damage to the projector. Use
only with a cart or stand recommended by the
manufacturer, or sold with the projector. Wall of shelf
mounting should follow the manufacturer's instructions,
and should use a mounting kit approved by the
manufacturers.
Do not expose this unit to rain or use near water... for
example, in a wet basement, near a swimming pool, etc...
Slots and openings in the back and bottom of the cabinet
are provided for ventilation, to insure reliable operation of
the equipment and to protect it from overheating.
The openings should never be covered with cloth of other
materials, and the bottom opening should not be blocked
by placing the projector on a bed, sofa, rug, or other
similar surface. This projector should never be placed
near or over a radiator or heat register.
This projector should not be placed in a built-in installation
such as a book case unless proper ventilation is provided.
This projector should be operated only from the type of
power source indicated on the marking label. If you are
not sure of the type of power supplied, consult your
authorized dealer or local power company.
Do not overload wall outlets and extension cords as this
can result in fire or electric shock. Do not allow anything
to rest on the power cord. Do not locate this projector
where the cord may be damaged by persons walking on it.
Never push objects of any kind into this projector through
cabinet slots as they may touch dangerous voltage points
or short out parts that could result in a fire or electric
shock. Never spill liquid of any kind on the projector.
Do not attempt to service this projector yourself as
opening or removing covers may expose you to
dangerous voltage or other hazards. Refer all servicing to
qualified service personnel.
Unplug this projector from wall outlet and refer servicing to
qualified service personnel under the following conditions:
a. When the power cord or plug is damaged or frayed.
b. If liquid has been spilled into the projector.
c. If the projector has been exposed to rain or water.
d. If the projector does not operate normally by following
the operating instructions. Adjust only those controls
that are covered by the operating instructions as
improper adjustment of other controls may result in
damage and will often require extensive work by a
qualified technician to restore the projector to normal
operation.
e. If the projector has been dropped or the cabinet has
been damaged.
f. When the projector exhibits a distinct change in
performance-this indicates a need for service.
When replacement parts are required, be sure the service
technician has used replacement parts specified by the
manufacturer that have the same characteristics as the
original part. Unauthorized substitutions may result in fire,
electric shock, or injury to persons.
Upon completion of any service or repairs to this projector,
ask the service technician to perform routine safety
checks to determine that the projector is in safe operating
condition.
This projector is equipped
with a grounding type AC line
plug. Should you be unable
to insert the plug into the
outlet, contact your
electrician. Do not defeat the
safety purpose of this
grounding type plug.
Follow all warnings and instructions marked on the
projectors.
For added protection to the projector during a lightning
storm, or when it is left unattended and unused for long
periods of time, unplug it from the wall outlet. This will
prevent damage due to lightning and power line surges.
An appliance and cart combination
should be moved with care. Quick
stops, excessive force, and uneven
surfaces may cause the appliance
and cart combination to overturn.
If the projector is to be built into a compartment or
similarly enclosed, the minimum distances must be
maintained. Do not cover the ventilation slot on the
projector. Heat build-up can reduce the service life of
your projector, and can also be dangerous. (Refer to
pages 6 and 10.)

4
TABLE OF CONTENTS
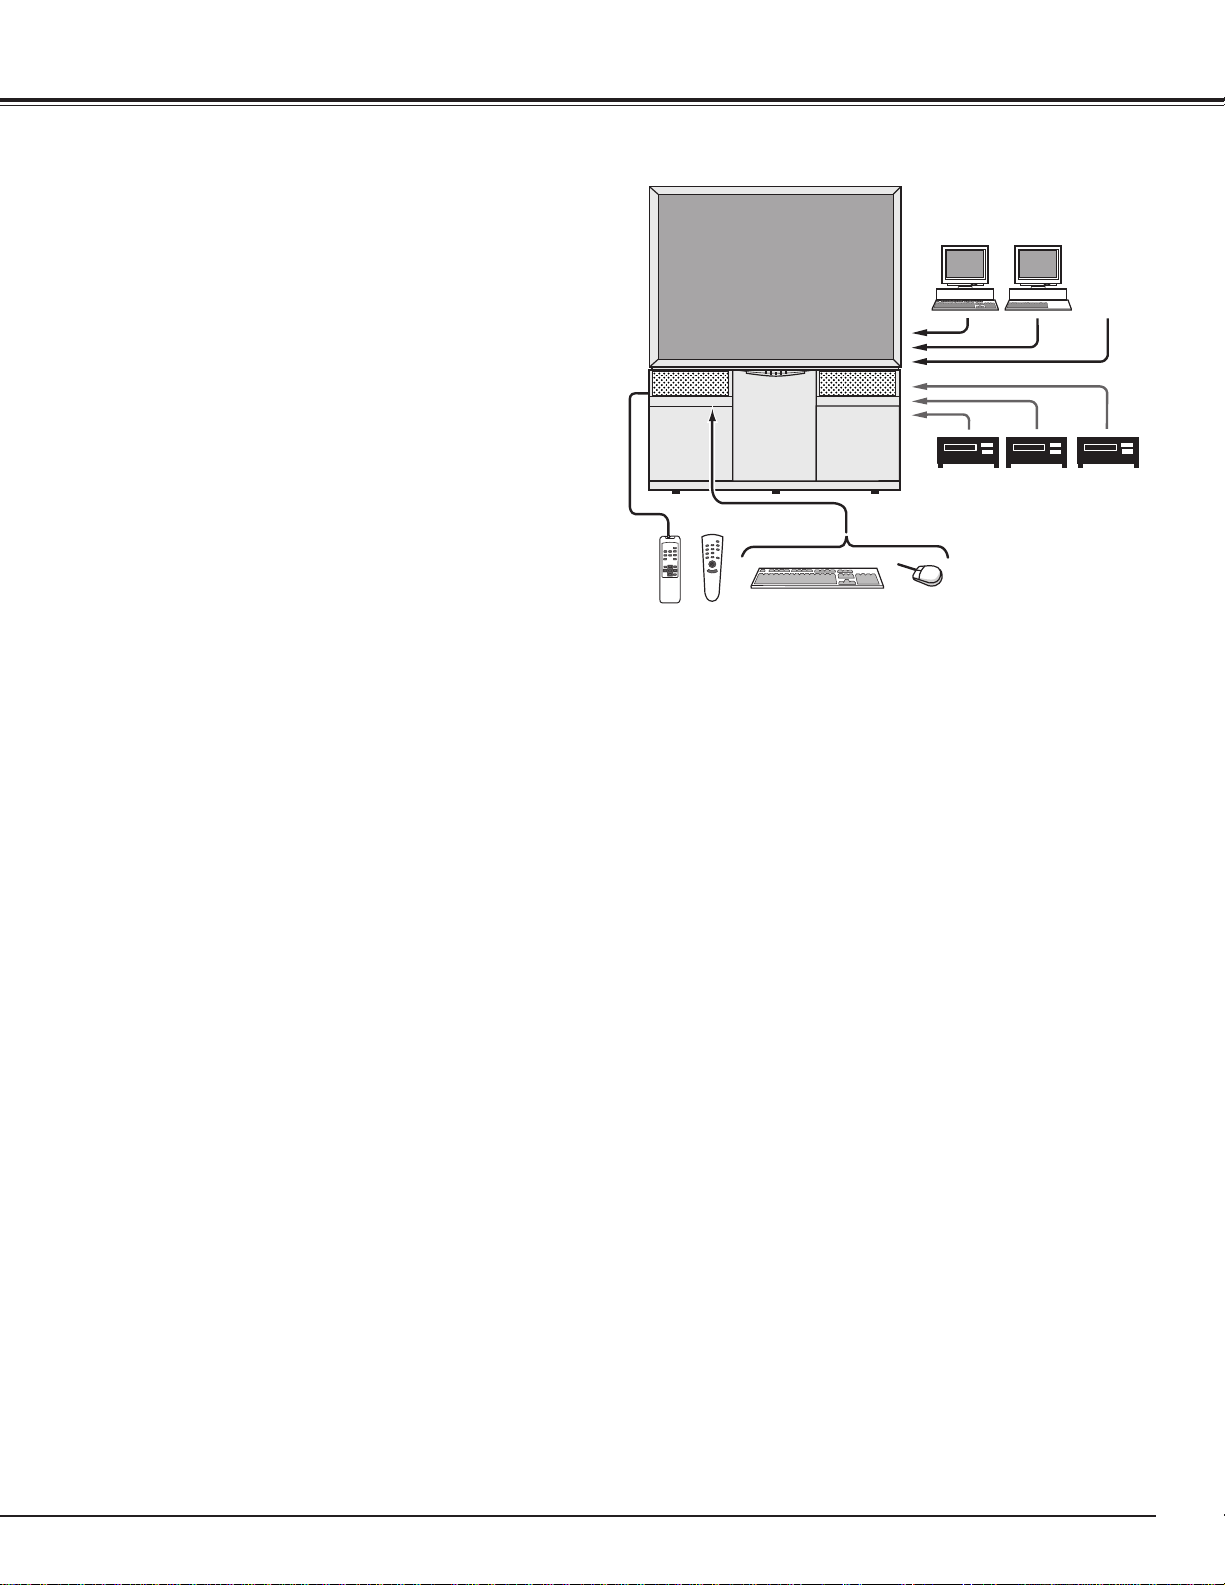
FEATURES AND DESIGN 5
BEFORE OPERATION 18
COMPUTER MODE 26
VIDEO MODE 34
SETTING 38
APPENDIX 39
INSTALLATION 6
INSTALLING THE PROJECTOR 6
PREPARING THE REMOTE CONTROLS 8
NAME OF EACH PART OF THE PROJECTOR 10
CONNECTING TO THE AC POWER CORD 11
CONNECTING THE PROJECTOR
12
TERMINALS OF THE PROJECTOR 12
CONNECTING TO THE COMPUTER 14
CONNECTING TO THE VIDEO EQUIPMENT 16
CONTROLS AND INDICATORS 18
OPERATION OF THE REMOTE CONTROLS 20
OPERATING ON-SCREEN MENU 22
SELECTING COMPUTER MODE 26
SELECTING COMPUTER SYSTEM 27
PC ADJUSTMENT 28
COMPATIBLE COMPUTER SPECIFICATIONS 29
PICTURE IMAGE ADJUSTMENT 30
PICTURE POSITION ADJUSTMENT 32
PICTURE SCREEN ADJUSTMENT 32
SELECTING VIDEO MODE 34
SELECTING COLOR SYSTEM 35
SELECTING VIDEO SOURCE 35
PICTURE IMAGE ADJUSTMENT 36
PICTURE SCREEN ADJUSTMENT 37
SETTING MENU 38
SETTING LANGUAGE 38
OPERATING WIRELESS MOUSE 39
MOUSE / KEYBOARD CONNECTION 40
MAINTENANCE 41
TROUBLESHOOTING 43
TECHNICAL SPECIFICATIONS 44
BASIC OPERATION 24
TURNING ON / OFF THE PROJECTOR 24
SOUND ADJUSTMENT 25
PICTURE FREEZE FUNCTION 25
lEach name of corporations or products in the owner's manual is a trademark or a registered trademark of its
respective corporation.
5
FEATURES AND DESIGN
,,,,
,,,,
,,,
,,,
6
INSTALLATION
10cm
(3.9")
20cm(7.8")
20cm
(7.8")
10cm(3.9")
20cm
(7.8")
INSTALLING THE PROJECTOR
Contact the sales dealer and request to install this projector. For installing this appliance properly, technical
services are required. Any person who is not familiar with technical terms and skills, should not attempt to install.
This projector should be installed referring to the Installation Manual separately attached.
Caution to the Installation
Placing and Settling the Projector
Caution for Installation
When installing and placing this projector, please observe the following precautions:
lInstall the projector by two people.
lAny package material should not be left inside the cabinet.
lBe careful not do drop any part or tool like screw into the appliance. If it should, contact a service center.
lNever touch the Projection Screen, Lens and Mirror directly. They may effect the projection image quality.
lPlace the projector where is indicated on this Owner's Manual.
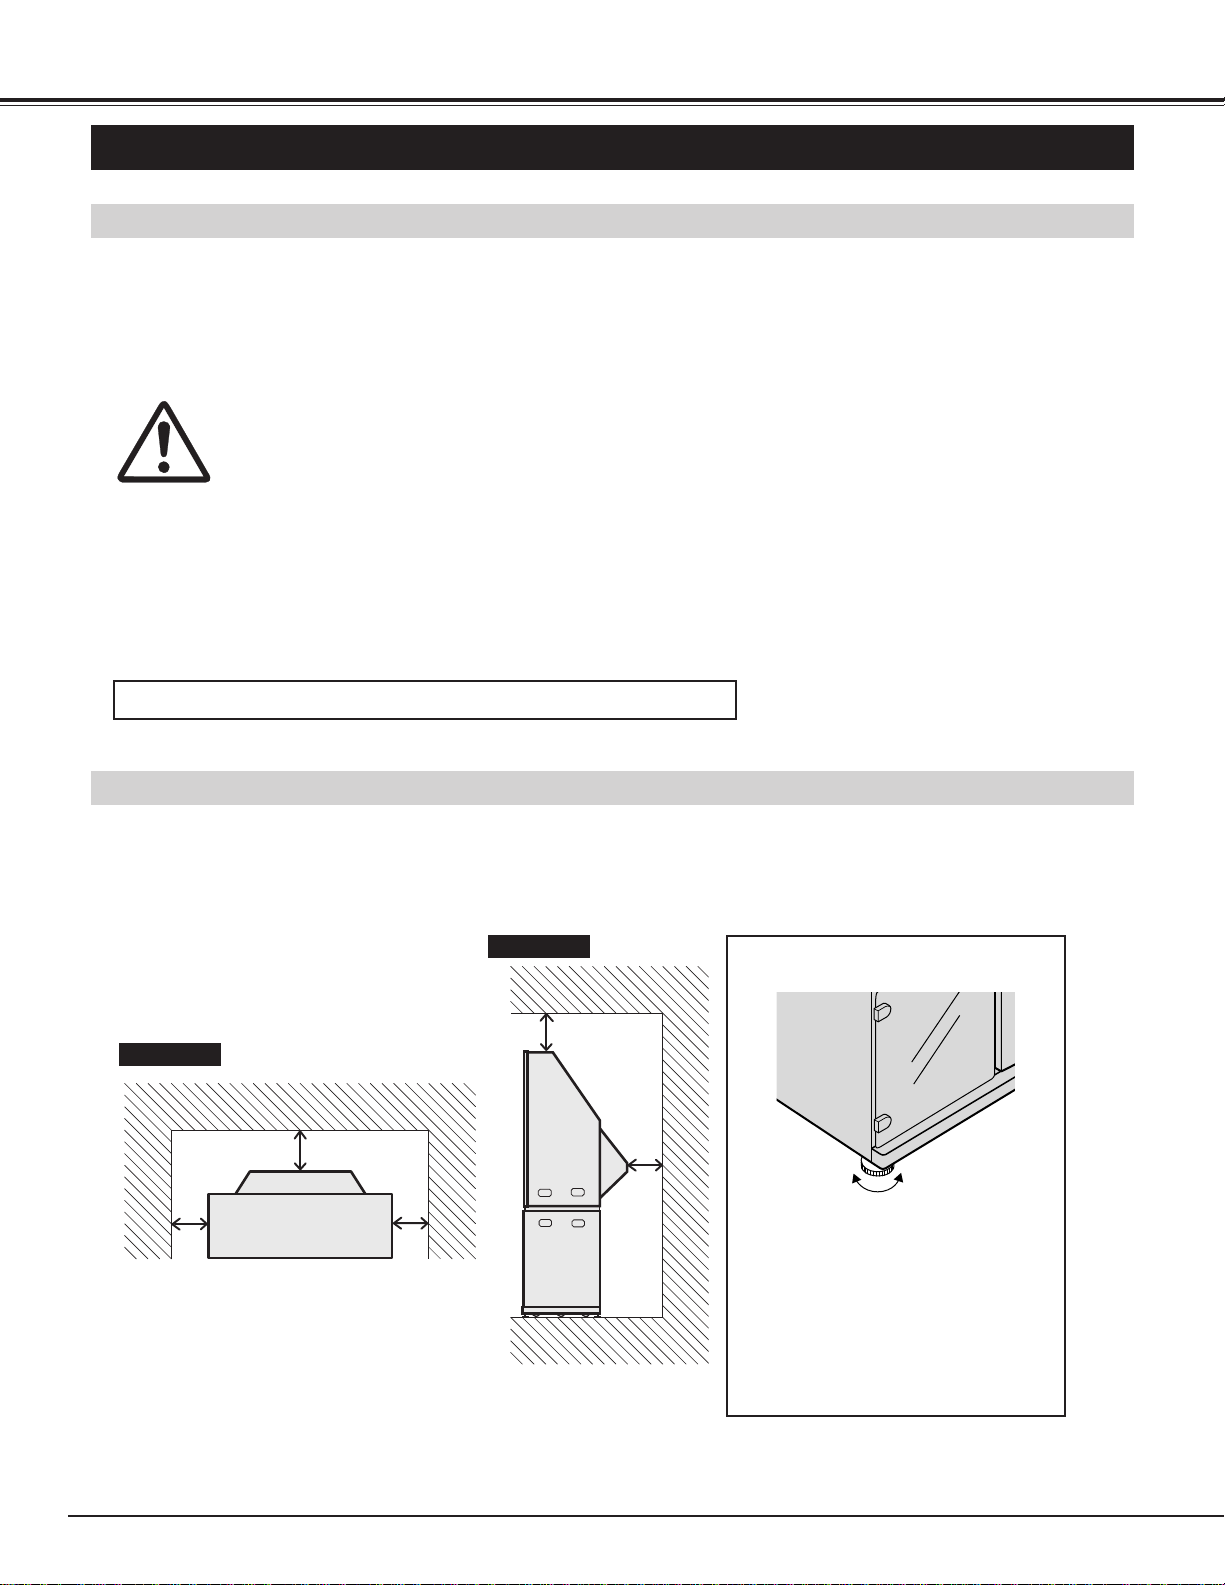
When placing the projector, the spaces for ventilation must be maintained. And fix the projector with the Lock
Bolts to settle it securely.
Turn the Lock Bolts to the direction
indicated on the figure to lock the
cabinet on the floor. Make sure
that all the Casters are slightly
raised from the floor.
The tilt of the Cabinet can be also
adjusted with these Lock Nuts.
Top View
Side View
Letting the
projector down to
move it.
Lifting the
projector up to
settle it.
This projector never be placed outdoor
uFix the projector securely.
7
INSTALLATION
CAUTION FOR INSTALLATION OF THE PROJECTOR
When using or installing the projector, following attention should be taken:
lWe recommend to avoid dusty / smoky place for operating the projector. .
When using under the dusty or smoky conditions, dust may accumulate on the LCD panel and Lens
inside it, and may be projected on the screen together with the picture. When the symptoms above are
noticed, contact your authorized dealer or service station for the cleaning.
lAir blown from the exhaust bent is hot. Do not put a flammable objects near this part. Keep heat-
sensitive objects away from the exhaust part. And do not touch this part especially screws and metallic
parts. This part will become hot while the projector is used.
lThe brightness in the room has a great influence on the quality of a picture. Adjust the light little darker
to provide fine pictures.
OPERATING TEMPERATURE : 5°C ~ 35°C
STORAGE TEMPERATURE : –10°C ~ 60°C
BE SURE TO USE OR PLACE THE PROJECTOR IN THE TEMPERATURE
INDICATED BELOW.
The surface of the cabinet and screen can be damaged if not properly maintained.
Many common household aerosol sprays, cleaning agents, solvents and polishes will
cause permanent damage to the fine surface.
Clean the cabinet with a soft cloth dampened with glass household detergent and warm water, and dry thoroughly.
Clean the screen with a soft cloth dampened with warm water. Wipe and dry with a soft dry cloth.
DO NOT APPLY SINNER, BENZINE OR AEROSOL SPRAYS. THEY MAY CAUSE PERMANENT DAMAGE ON
THE SCREEN.
CARE AND CLEANING
8
INSTALLATION
9
INSTALLATION
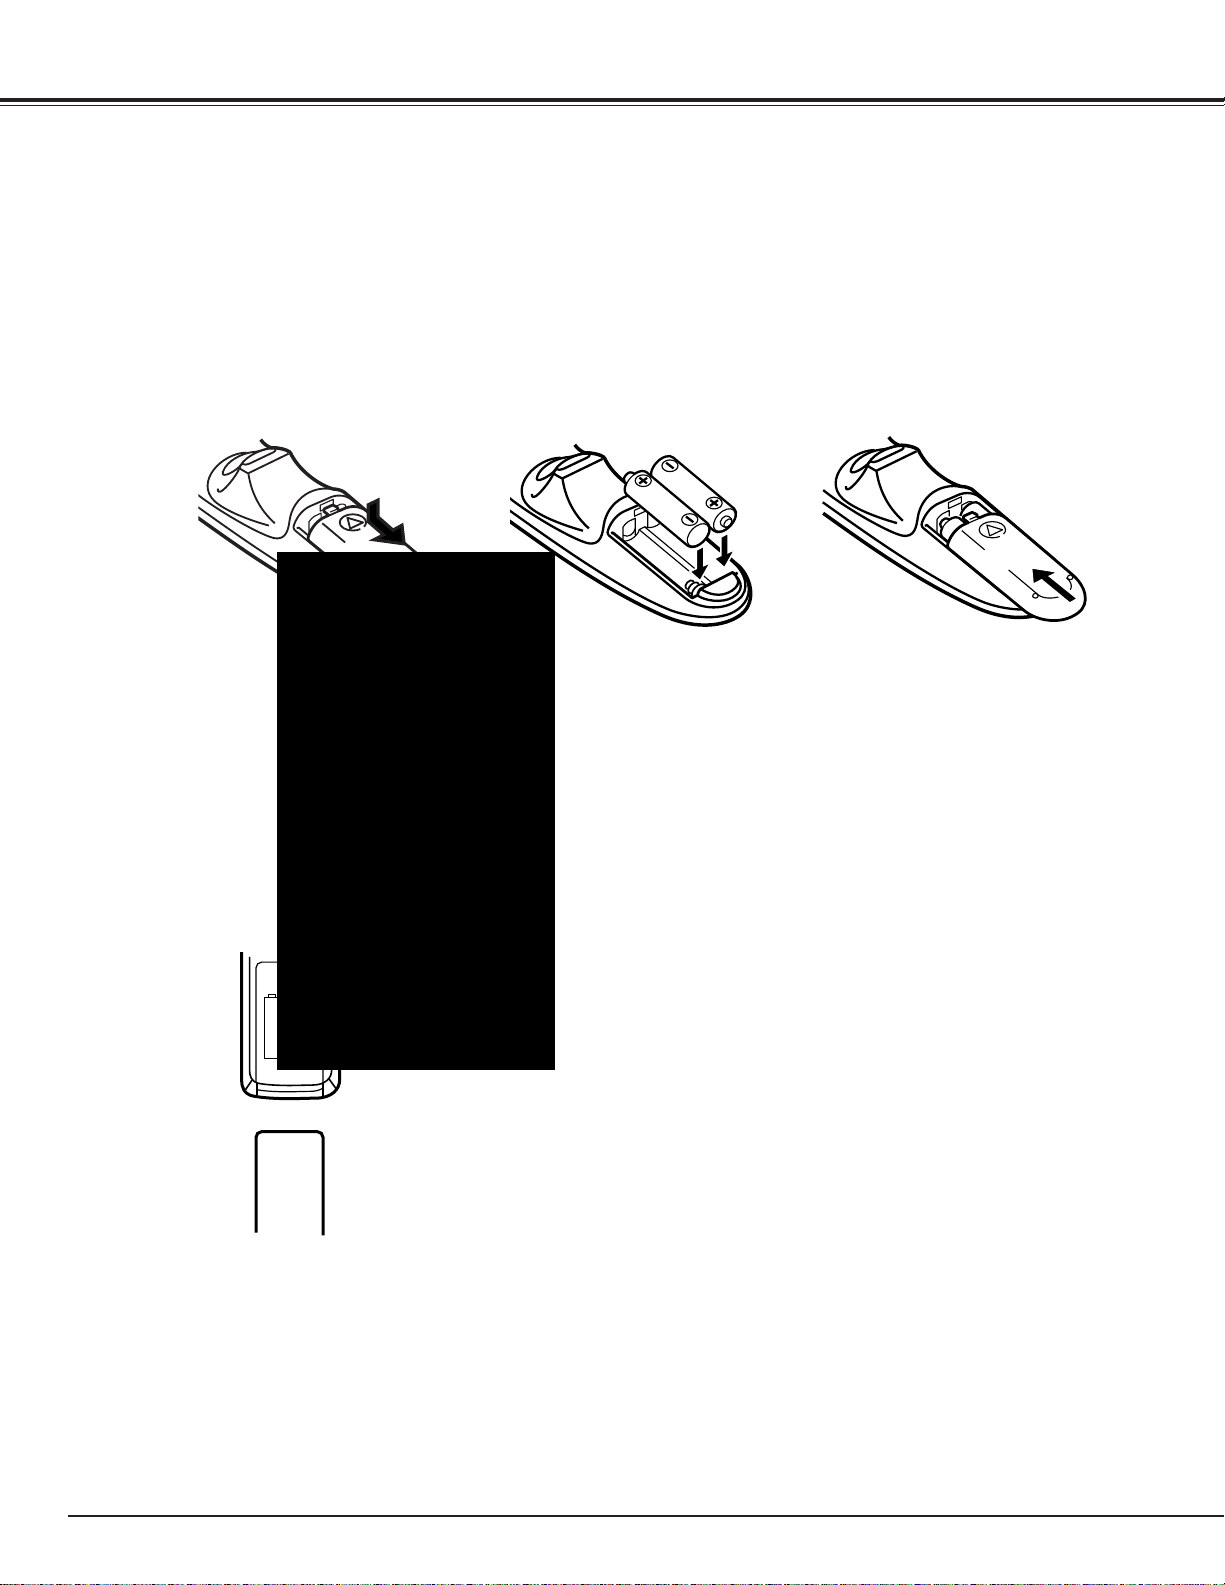
Caution for handling batteries
Install batteries properly to match the "+" and "–" marks inside the case. If batteries are installed or used
incorrectly, it may cause liquid leak, explosion, injury, fire hazard, or pollution. To insure safe operation,
please observe the following precautions:
lChange two batteries at the same time.
lDo not use a new battery with a used one .
lAvoid contact with water.
lCharging or reconstructing.
lIf batteries have leaked on the Remote Control Units, carefully wipe the case clean and load new batteries.
Caution for handling Remote Control Units
When operating the Remote Control Units, please observe the following precautions:
lAvoid contact with water.
lDo not expose the Remote Control Units to moisture, or heat.
lDo not drop the Remote Control Units.
10
INSTALLATION
Front of the Projector
Rear of the Projector
,,,
,
,
,
,
,
,
,,,
,,,
,
,
,
,
,
,
,,,
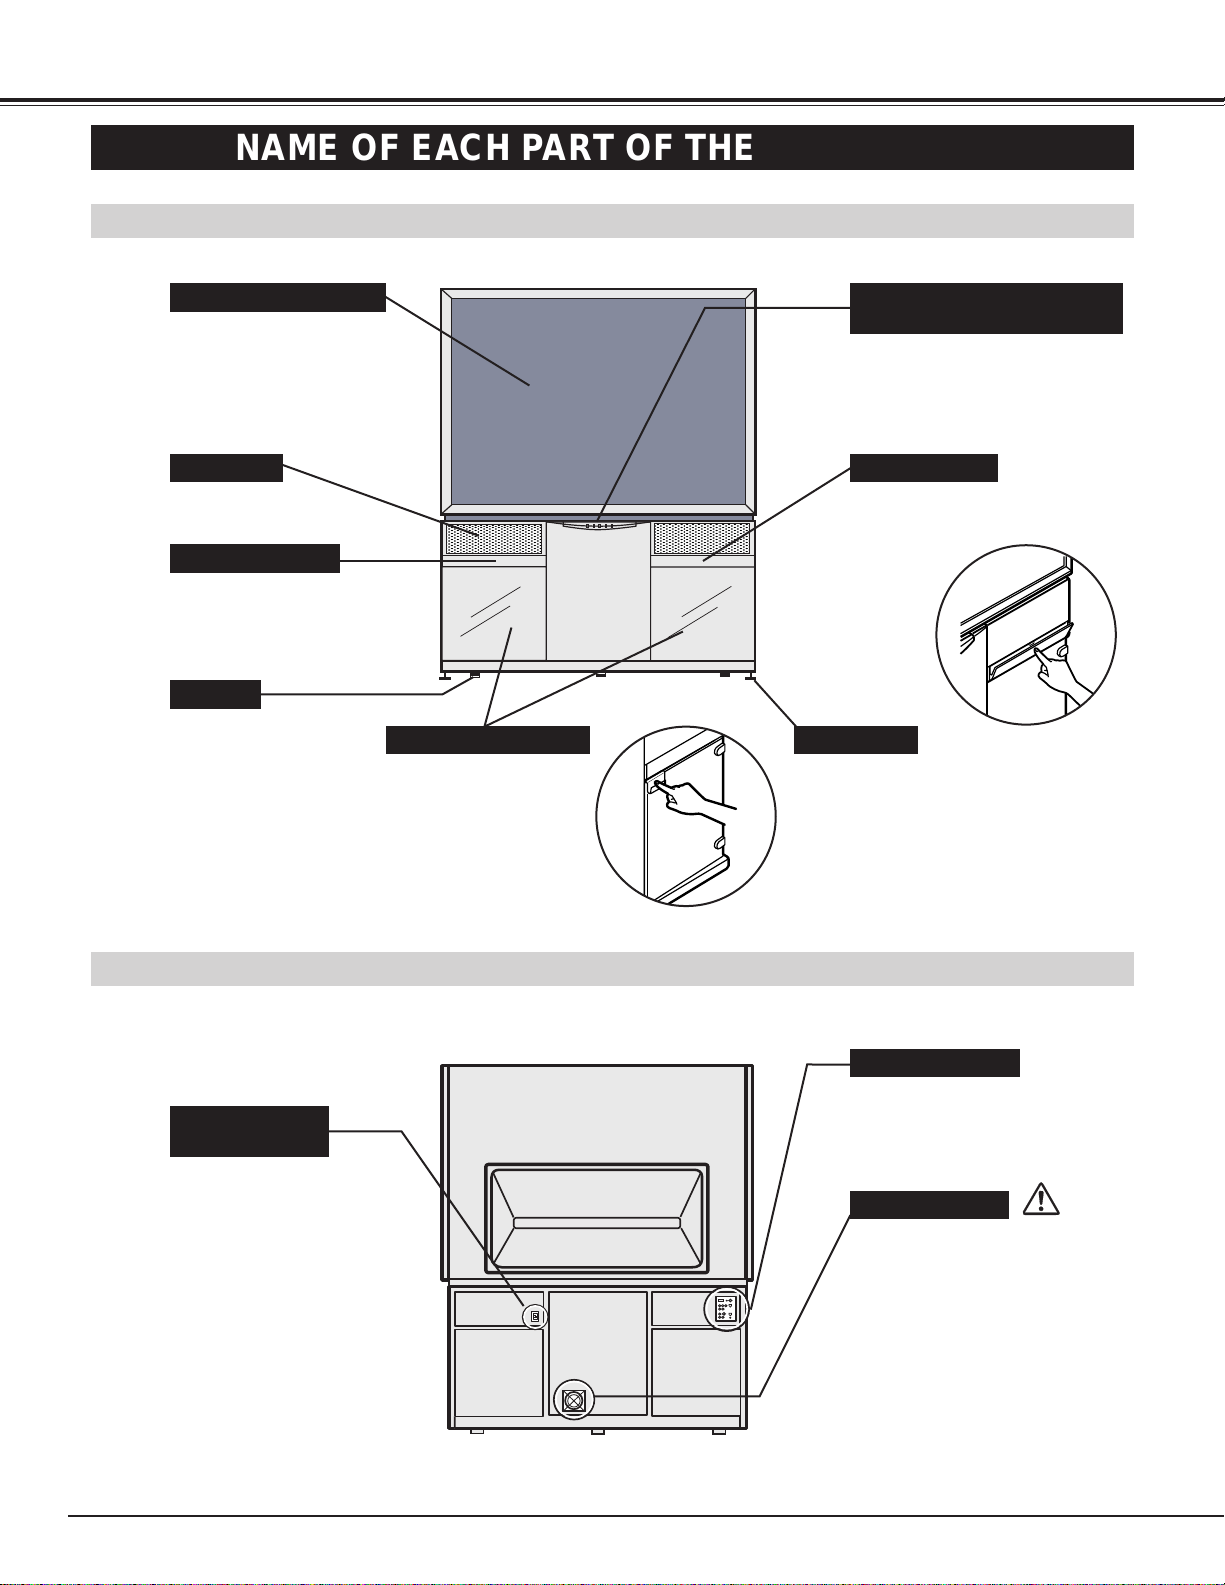
NAME OF EACH PART OF THE PROJECTOR
PROJECTION SCREEN
SPEAKERS
FRONT TERMINAL
STORAGE SPACES
INDICATORS AND INFRARED
REMOTE RECEIVER
FRONT PANEL
LOCK BOLT
CASTER
POWER CORD
CONNECTOR
REAR TERMINAL
EXHAUST VENT
Connect the AC Power
Cord to this terminal.
Refer to page 11 for
installation. Do not block the vent slot.
This projector is equipped with
the Cooling Fan to protect it from
overheating. Pay attention to the
following to ensure the ventilation
and avoid a possible risk of fire or
malfunction.
Refer to Page 12 for details.
Do not touch the surface of
the screen directly .
Refer to page 12 for details.
Press the Door and pull
the handle.
Press the Door and open it.
Refer to page 18 for details.
Settle the projector by
rotating 4 Lock Bolts.
Refer to page 19 for details.
Table of contents


