Fagor driron User manual

Manual de instalación y uso
Manual de instalação e uso
Installation and user manual
Installatie- en gebruiksaanwijzing
Installations- und Benutzerhandbuch
Unidad de planchado doméstico
Unidade doméstica para engomar
Domestic ironing unit
Huishoudelijke strijk-droogautomaat
Haushalts-Bügelmaschine

Chapter II - Installation
1. Unpacking the ironing centre 58
2. Location in the home 59
3. Levelling 59
4. Connection to mains drainage 60
5. Electrical Connection 61
6. Preliminary cleaning 61
Chapter III - Use of the appliance
1. Treatment: types of clothes and fabrics 62
2. Basic features of the Driron 63
3. Accessories for positioning the clothes 64
4. Preparing the clothes 66
5. Placing the clothes in the wardrobe 67
6. Selecting the drying and ironing programme 68
7. Selecting additional programme options 70
8. Selecting the drying level of the clothes 70
9. Turning on the appliance 71
10. Selecting additional functions 71
11. Programme control and progress 72
12. End of programme 74
13. Interruptions to the power supply 74
14. How to collect and store the accessories 74
Chapter I - Description of the appliance 56
Chapter IV - Appliance maintenance and cleaning 75
1. Table of most common technical problems 76
2. Other technical or practical problems 77
Chapter V - Troubleshooting
Chapter VI - Practical tips 78
CONTENTS
– 55 –
English

Chapter I - DESCRIPTION OF THE APPLIANCE
Cabinet
Removable
top hangers
Removable
and foldaway
bottom
hangers
Tank
Control panel
Perforated
grille
Basket
– 56 –
Filter

– 57 –
Sleeve-straighteners
Tenter clip
Trouser/skirt clip
IMPORTANT
If you wish, you can purchase more accessories. There are
also small hangers for children’s clothes.
Please ask your retailer.
ACCESSORIES
Wardrobe door
Handle
Functional part
6
units
Hanger
6
units
6
units
6
units

Chapter II - INSTALLATION
09530100350601002838
– 58 –
ENVIRONMENTAL NOTE
This appliance has been designed and manufactured with great care for the environment.
Dispose of the packaging in an appropriate way. Select the materials (polystyrene,
cardboard, plastic bags, etc.) in accordance with current standards and local regulations
governing waste disposal.
Remove the protective tapes from
the basket and the top and bottom
hangers.
Remove the accessories that come
inside the appliance on a polystyrene
tray.
1UNPACKING THE IRONING CENTRE
The specifications label is located
inside the water collection container.
This label must never be removed,
since it provides information about
the exact model of the ironing centre,
required power supply, serial number
and warranty.

English
dimensions
width 59.5 cm
depth 67.7 cm
height 185.8 cm
This appliance does not require special installation but thought should be given to where it is to
be located in the home.
– 59 –
For correct operation, it is important
for the appliance to be installed
perpendicular to the floor; adjust the
two front legs and use a spirit level
to level the appliance.
1. Near the washing machine, to
make it easy to move the clothes
from one to the other.
2. Make sure that it is well ventilated;
in other words, that the air intake
and outlet grilles at the rear and on
the front (base) of the appliance are
not obstructed.
3. If possible, position the Driron in
a well-aired, cool place in the home.
If the ambient temperature around
the Driron is very high, the duration
of the programmes could be
excessive.
If you have installed the Driron
outside your home, make sure it is
protected from very low tempera-
tures. Otherwise, the water inside
the appliance could freeze and burst
a pipe or the tank in the interior.
4. Since the air is expelled through
the front base of the appliance at a
temperature of approximately 40°C,
take care when installing it on
delicate carpets.
2LOCATION IN THE HOME
3LEVELLING

At the rear of the appliance,
unscrew the pipe bracket.
Remove the pipe from the nozzle
and leave it hanging where it is.
The drainage pipe is in the top
basket inside the appliance. First
of all, fit the pipe to the drain and
then to the nozzle. Fasten the
bracket.
There should be a fixed water
outlet drain at a distance of
between 25 and 100 cm from
the floor.
Make sure that the drainage pipe
is not bent or squashed.
a
This container must be emptied after
each drying cycle.
Collection of the water in the removable container in the appliance:
If the appliance is not connected to the home drains, the water will automatically be collected
in a removable container in the bottom drawer at the front of the appliance.
b
The Driron has a condensation system that extracts the humidity from the clothes during the
drying process. This humidity is turned into water.
There are two types of installation: drainage to the mains or collection of the water in the removable
container in the appliance.
Connection to the drain system:
If the appliance is located such that it can be connected to mains drainage, the condensated
water will be discharged to mains drainage. Proceed as follows:
c
d
– 60 –
ab
d
b1
c
min.
25 cm
max.
100 cm
4CONNECTION TO MAINS DRAINAGE
Make sure that the bend pipe of the drainage pipe
is securely fitted to the outlet so that it does not
come away and cause flooding.
IMPORTANT

English
a
a
specifications
voltage 230 V- 50 Hz
current 11 A
maximum power 2.600 W
See the specifications label inside
the water collection container drawer
before connecting the appliance to
the mains.
Make sure that the mains supply is
as shown on the label.
Once the Driron has been installed
and before its first use, the inside of
the wardrobe must be cleaned.
Clean it with a damp cloth to
remove any dust.
IMPORTANT
Make sure the Driron is connected to an earthed plug
socket. The electrical installation, plug, socket, fuses,
circuit-breaker and meter must be capable of the
maximum power shown on the specifications label.
If the power cable is damaged, it must be replaced
exclusively by the manufacturer, after-sales service
(TS) or authorised personnel.
09530100350601002838
– 61 –
a
5ELECTRICAL CONNECTION
6PRELIMINARY CLEANING

1TYPES OF CLOTHES AND FABRICS
Chapter III - USE OF THE APPLIANCE
Types of clothes that can be treated in the Driron.
• The Driron does not cause wear to clothes since they do not move throughout the entire process.
They do not rub against each other and the warm air flows over them while they are dried and
ironed at moderate temperatures. There is no risk of fading, since they are not exposed to the
sun. The deterioration of the fabric fibres is reduced as direct contact with the iron is avoided or
minimised. The Driron processes do not use chemical products.
As a result, there are very few limitations to the Driron.
– 62 –
• It can also treat fabrics made with synthetic fibres only (conventional
polyester, polyamide, lycra, elastane or combinations of these fibres).
However, given the popularity of synthetic fibres in recent years, we
recommend caution and advise you to look at the manufacturer’s
recommendations for drying the fabrics. In any case, it is advisable
to position them as far away as possible from the hot-air intake grille
at the bottom of the wardrobe, making sure they do not slip and fall
on it. Place them on the hangers at the top or, if they do not crease,
use the top basket.
• The Driron can be used for all kinds of everyday clothing, shirts,
T-shirts, blouses, trousers, skirts and, in general, for all machine-
washable clothes.
• It can also be used for household linen, sheets, pillowcases, towels,
kitchen cloths, etc.
• It also has a basket for drying small clothes (socks, underwear,
etc.), which do not normally need to be ironed.
• Take particular care with light knitwear, which should never be
hung for drying, since it stretches easily. Given that this clothing
does not normally crease, it can be placed in the top basket.
• Clothes made of leather, suede, plastic, fur and, in general, clothes
that may be damaged by damp and heat must not be treated in
the Driron. For this type of clothing, use only the airing and
deodorisation programmes.
Treating the different types of fibres and fabrics
• The Driron can treat fabrics made from all kinds of natural fibre, cotton, linen, wool, silk, flannel,
viscose, etc. or fabrics made from combinations of these fibres. It can also treat fabrics which
contain a certain percentage of synthetic fibres.
English
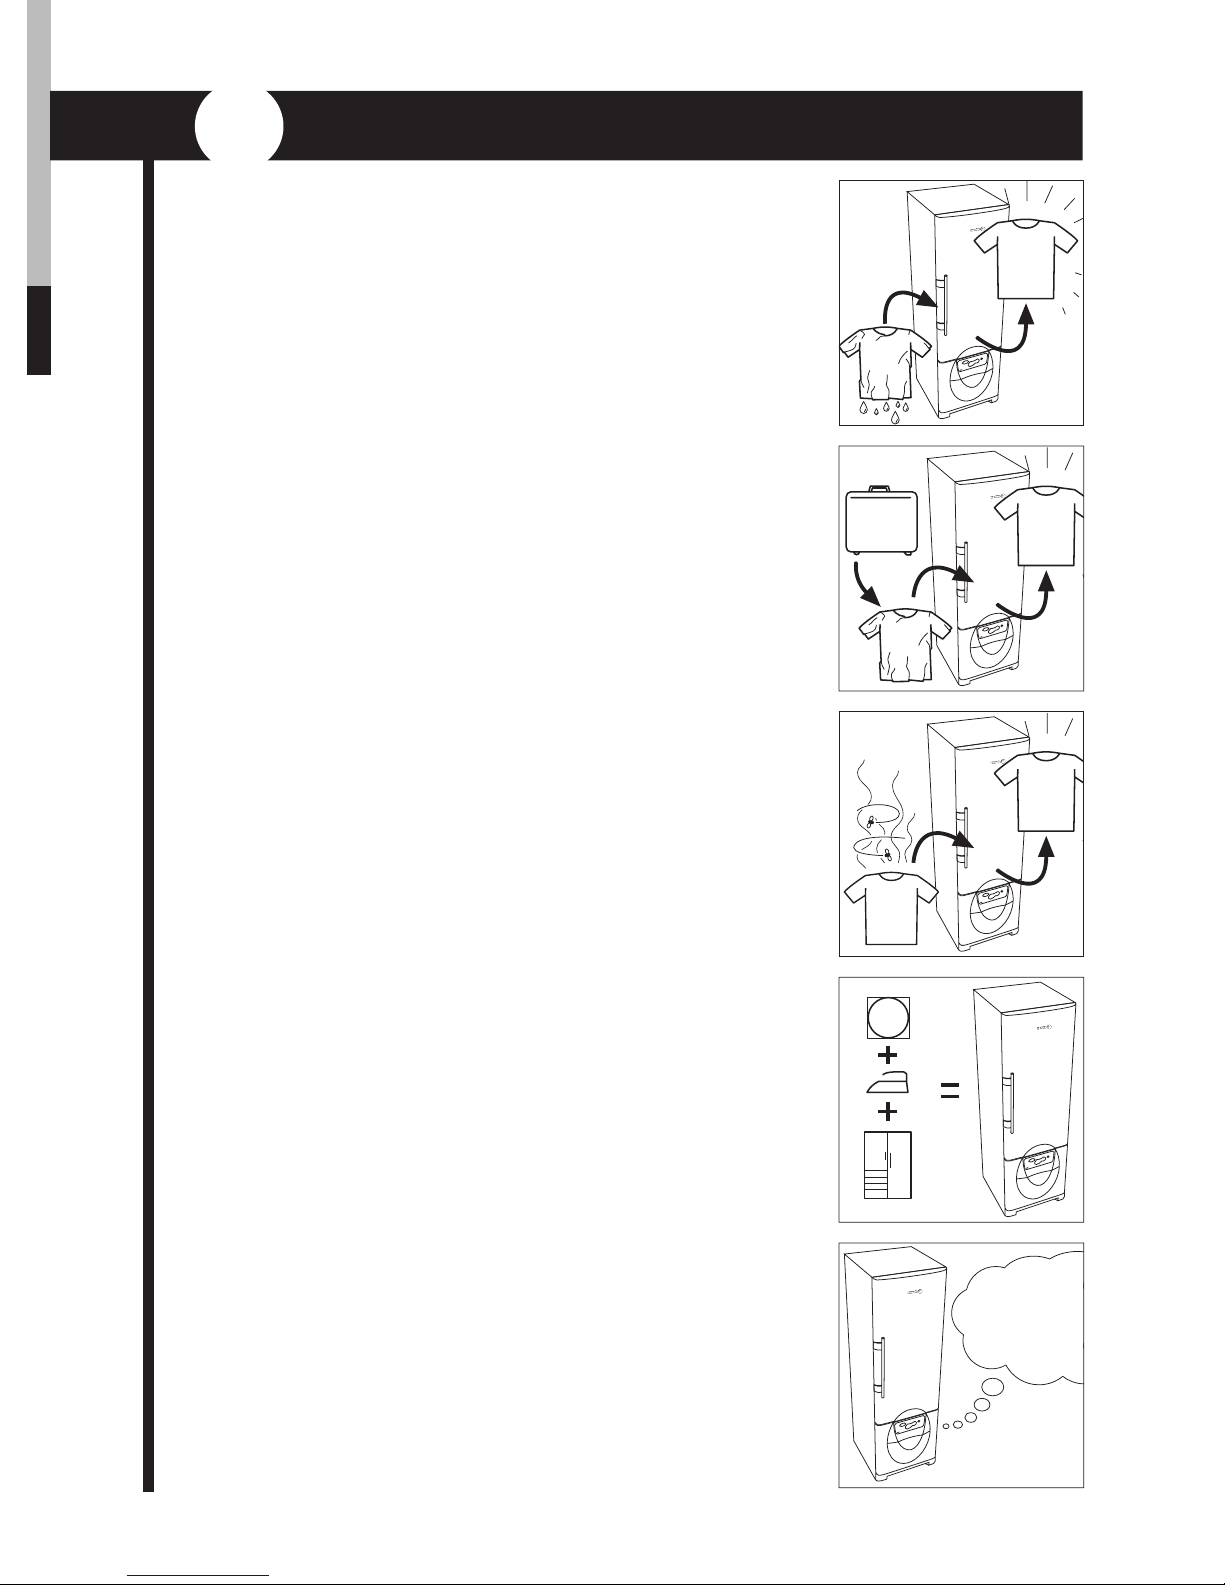
1. Ironing and drying all kinds of newly washed garments.
The Driron removes the creases from clothes, making it unnecessary
to iron almost all everyday garments, leaving them dry and ready
to wear.
Simply take the clothes from the washing machine, place them
correctly in the Driron and select the desired programme. The
clothes will be ready to wear or put away in the wardrobe in
approximately 120 minutes.
2. Ironing dry garments.
The Driron has a specific programme for ironing dry garments
that do not need washing either because they have been in the
wardrobe for a long time or because they have become creased
during a journey, etc.
3. Drying damp clothes.
Especially designed as a complementary programme to
programmes 1 and 2, for garments that are still damp and for
damp clothes in general.
4. Airing dry garments.
The Driron airs and deodorises garments in approximately 60
minutes, so they are ready to be worn again.
5. An all-round solution for treating clothes at home.
Once the programme has finished, you can leave the clothes inside
the Driron until you want to take them out, without having to worry
about them getting wet, fading or creasing.
With the Driron at home, you don’t need a clothes line or a drier
and the pile of clothes waiting to be ironed disappears. Next to
the washing machine, it provides an all-round process for garments
at home.
6. Automatic programme end.
Except for programme (or group of programmes) No. 4, (Drying
damp clothes programme and Dry garments airing programme),
the machine uses an intelligent electronic control to decide when
the clothes are ready and, consequently, when the programme
should end. This means you do not have to worry about the
appliance or the programme.
2BASIC FEATURES OF THE DRIRON
– 63 –
100101100010100
001000101110100
1001010010111010
010100100010111
000110101001010
001000101110100
1001010010111010
010100100010111
000110101001010
Table of contents
Other Fagor Household Appliance manuals


