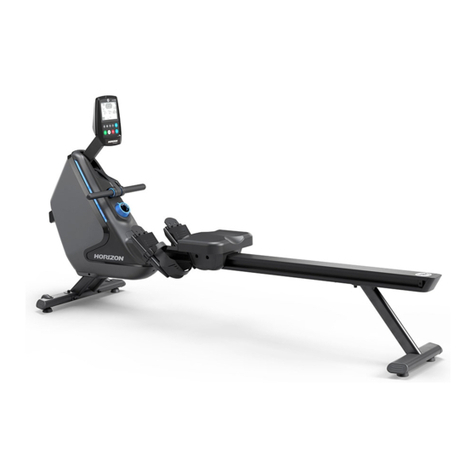
Everlast EV100RM User manual

CROSS-FIT ROWER
RETAIN FOR FUTURE REFERENCE
Dyaco Canada Inc. 5955 DON MURIE STREET, NIAGARA FALLS, ONTARIO L2G 0A9
OWNER`S
MANUAL
Model No.
16805931000
Assembly
Operation
Exercise
Parts
Warranty
CAUTION:
You must read and
understand this
owner’s manual
before operating
unit.

Customer Service 1-888-707-1880
Manufacture’s One-Year Limited Warranty
Your EVERLAST Cross-Fit Rower is warranted for one year from the date of purchase against
defects in material when used for the purpose intended, under normal conditions and provided it
receives proper care. Any part found defective or missing will be sent at no cost when returned
in accordance with the terms of this warranty.
Frame: 1 year
Parts: 1 year
Labour: 1 year
This warranty is not transferable and is extended only to the original owner.
The warranty shall not apply to exercise units which are (1) used for commercial or other
income producing purposes, or (2) subject to misuse, neglect, accident or unauthorized repair
and alterations.
This warranty provided herein is lieu of all other express warranties, any implied warranties,
including any implied warranties of merchantability of fitness for particular purpose, are limited in
duration to the first 12 months from date of purchase. All other obligations or liabilities,
including liability for consequential damages are hereby excluded.
REPAIR PARTS AND SERVICE
All of the parts for the Rower, shown in figure can be ordered from Dyaco Canada Inc. 5955
DON MURIE STREET, NIAGARA FALLS, ONTARIO L2G 0A9. When ordering parts, the parts
will be sent and billed at the current prices. Prices may be subject to change without notice.
Check or money order must accompany all orders. Standard hardware items are available at
your local hardware store.
To ensure prompt and correct handling of any errors, or to answer any questions, please call
our Toll Free number: 1-888-707-1880, or local number 1-905-353-8955 or fax 1-905-353-8968
AM to 5:00 PM Monday to Friday Eastern Standard Time.
Always include the following information when ordering parts
Model number
Name of each part
Part number of each part
TABLE OF CONTENTS
WARRANTY 2 SET UP INSTRUCTIONS 15
SAFETY PRECAUTION 3 FUNCTION INSPECTION 16-17
BEFORE YOU BEGIN 4 USER DIRECTION 18
PRE-ASSEMBLY CHECK LIST 5 MAINTENANCE 18
HARDWARE PACKING LIST 6 TROUBLESHOOTING 19
ASSEMBLY INSTRUCTIONS 7-10 GENERAL MAINTENANCE 20-21
PARTS LIST 11-12 TRAINING GUIDELINES 22-25
DIAGRAM 13 STRETCHING 26-27
MONITOR INSTRUCTIONS 14-15

Customer Service 1-888-707-1880
SAFETY PRECAUTIONS
Thank you for purchasing our product. Even though we go to great efforts to ensure the quality of each
product we produce, occasional errors and /or omissions do occur. In any event should you find this
product to have either a defective or a missing part please contact us for a replacement.
This product has been designed for home use only. Product liability and guarantee conditions will not be
applicable to products being subjected to professional use or products being used in a gym center.
This exercise equipment was designed and built for optimum safety. However, certain
precautions apply whenever you operate a piece of exercise equipment. Be sure to read the entire
manual before assembly and operation of this machine. Also, please note the following safety
precautions:
1. Read the OWNER’S OPERATING MANUAL and all accompanying literature and
follow it carefully before using your rowing machine.
2. If dizziness, nausea, chest pains, or any other abnormal symptoms are experienced
while using this equipment, STOP the workout at once. CONSULT A PHYSICIAN IMMEDIATELY.
3. Inspect your exercise equipment prior to exercising to ensure that all nuts and bolts
are fully tightened before each use.
4. The rowing machine must be regularly checked for signs of wear and damage. Any part found
defective must be replaced with a new part from the manufacturer.
5. Fitness equipment must always be installed on a flat surface, It is recommended to use an
equipment mat to prevent the unit from moving while it is being used, which could possibly scratch
or damage the surface of your floor.
6. No changes must be made which might compromise the safety of the equipment.
7. It is recommended to have a minimum of 2’ safe clearance around the exerciseequipment while in use.
8. Ensure that the rail is locked properly when in storage.
9. Do not allow children to use or play on the rower. Keep children and pets away from this equipment
at all times while exercising.
10. The rower should only be used by one person at a time.
11. Maximum user weight 220lbs (100KG).
12. Warm up 5 to 10 minutes before each workout and cool down 5 to 10 minutes afterward. This allows
your heart rate to gradually increase and decrease and will help prevent you from straining muscles.
13. Never hold your breath while exercising. Breathing should remain at a normal rate in
conjunction with the level of exercise being performed .
14. Always wear suitable clothing and footwear while exercising. Do not wear loose fitting clothing that
could become entangled with the moving parts of your rowing machine. Do not exercise in bear feet or
socks. Proper footwear such as running, walking or cross training shoes should be worn.
15. Tie all long hair back. Remove all personal jewelry before exercising
16. Be careful to maintain your balance while using, mounting, dismounting the rower, loss of balance
may result ina fall and bodily injuries.
17. After eating, allow 1-2 hours before exercising as this will help to prevent muscle strain.
18. Injuries may result from incorrect or excessive training and using the equipment otherwise than as
directed or recommended by your doctor.
19. Care must be taken when lifting or moving the equipment, so as not to injure your back. Always use
proper lifting techniques.
WARNING: Before beginning any exercise program consult your physician. This is especially
important for individuals over the age of 35 or persons with pre-existing health problems.
Read all instructions before using any fitness equipment. We assume no responsibility from
personal injury or property damage sustained by or through the use of this product.
SAVE THESE INSTRUCTIONS

Customer Service 1-888-707-1880
BEFORE YOU BEGIN
Thank you for choosing the Everlast Rower. We take great pride in producing this quality
product and hope it will provide many hours of quality exercise to make you feel better, look better, and
enjoy life to its fullest. It's a proven fact that a regular exercise program can improve your physical and
mental health. Too often, our busy lifestyles limit our time and opportunity to exercise. The Everlast
rower provides a convenient and simple method to begin your assault on getting your body in
shape and achieving a happier and healthier lifestyle.
For your benefit, read this manual carefully before you use the rower. If you have
questions after reading this manual, please see the front cover of this manual. To help us assist
you note the product model number and serial number before contacting us. The model number
and the location of the serial number decal are shown on the warning label of the rower.
Before reading further, please familiarize yourself with the parts that are labeled in the drawing
below.
The decal shown above has been placed on the rower. If the decal is missing or
illegible, please call our Customer Service Department toll-free at 1-888-707-1880 to order a
replacement decal.
Front
sbtabilizer
Computer
Handlebar
Pedal
Seat
Slide rail
Transportation
wheel
Middle
stabilizer
8-Level tension knob
Rear stablilizer

Customer Service 1-888-707-1880
PRE-ASSEMBLY CHECK LIST
NO.9 NO.14 L/R
NO.24
NO.1 NO.3
NO.18 NO.26
NO.38
PART NO. DESCRIPTION Q’TY
1 Main frame 1
3 Front stabilizer 1
9 Computer 1
14L/R Pedal L/R 1/1
18 Pedal support tube 1
24 Slide rail 1
26 Seat 1
38 Rear stabilizer 1
Hardware Pack 1
Manual 1

Customer Service 1-888-707-1880
HARDWARE PACKING LIST
19
M8*45mm
2X
?8*?20mm
6
2X
?6*?17mm
4X
M8
7
4X
12
M6*12mm
4x
17
6x
?8*?17mm
15
2x
M8*20mm
21
2X
22
2X
2
2X
M8*65mm
6mm
1X
4mm
2X
1X
M8*20mm
80
4X
13
16
1x
?8*?25mm
20
2X
36
1x
M6*20mm
37
2X
PART NO. DESCRIPTION Q’TY PART NO. DESCRIPTION Q’TY
2 Carriage bolt M8*65 2 20 Washer Φ8*Φ25 2
6 Washer Φ8*Φ20 2 21 Allen screw M8*20 2
7 Domed nut M8 4 22 Spring washer Φ8 2
12 Allen screw M6*12 4 36 Limit pad 1
13 Washer Φ6*Φ17 4 37 Allen screw M6*20 2
15 Axle for pedal 2 80 Allen screw M8*16 4
16 Axle 1 Allen Wrench 1
17 Washer Φ8*Φ17 6 Allen Key 4mm 2
19 Carriage bolt M8*45 2 Allen Key 6mm 1
Above described parts are all the parts you need to assemble this machine. Before you
start to assemble, please check the hardware packing to make sure they are included.

Customer Service 1-888-707-1880
ASSEMBLY INSTRUCTIONS
This manual is designed to help you easily assemble, adjust and use this machine. Please read
this manual carefully. For the sake of familiarizing yourself with the parts identified in the
instruction, first study the overview drawing.
Set all parts in a clear area on the floor and remove the packing material. Refer to the parts list
for help to identify the parts.
It will take two people to assemble your unit.
ENSURE THAT ALL NUTS AND BOLTS ARE FIRMLY TIGHTENED AFTER EACH STEP
STEP 1
1. Attach the front stabilizer (3) to the main frame (1). Secure using two carriage bolts (2), two washers
(6) and two domed nuts (7).
2. Connect the computer sensor wire (11) to the back of the computer (9).
3. Attach computer (9) to computer bracket and tighten with two screws (10) which are preassembled on
the back of computer.
NOTE: Ensure that the wires are not pinched behind the computer.
7
6
7
6
3
2
2
1
10
9
11

Customer Service 1-888-707-1880
STEP 2
1. Attach the left pedal (14L) to the left bracket of pedal support tube (18). Secure using one axle for
pedal (15),two allen screws (12) and two washer (13).
2. Repeat the same procedure for right pedal.
3. Attach the pedal support tube (18) to the bottom of main frame(1). Secure using two carriage bolts
(19),two washer (17)and two domed nuts (7).
12
13
15
12
13
14R
12
13
12
13
14L
15
18
1
14R
18
7
19
17
7
19
17
14L

Customer Service 1-888-707-1880
STEP 3
1. Pull out the lock pin (23) from slide rail (24).
2. Insert the slide rail (24) to the main frame (1).Secure using one axle (16), two washers(20), two allen
screws (21) and two spring washers (22).
3. Insert the lock pin (23)back to the pivot to lock the slide rail in vertical position.
4. Slide the Seat (26) onto the slide rail.
20 21
22
22
21
20
24
1
16
23
23
26
24
STEP 4
1. Attach rear stabilizer (38) to back of the slide rail (24). Secure using four allen screws (80) and four
washers (17).
2. Attach limit pad(36) to back of the slide rail (24). Secure using two allen screws (37).
80
17
37
36
24

Customer Service 1-888-707-1880
STEP 5
1. Pull out the lock pin (23) to lower the the sliding rail (24) to unfold the rower. Insert the pock pin (23)
to secure the sliding rail (24).
23
23
24
24
You have completed the assembly of your rower.
Your rower is equipped with adjustable end caps.
If the unit is wobbly, please turn the leveling caps on
the rear stabilizer to level the unit.
This manual suits for next models
1
Table of contents
Other Everlast Home Gym manuals

Everlast
Everlast EVE-725 User manual

Everlast
Everlast EVE-890 User manual

Everlast
Everlast 16805539960 User manual

Everlast
Everlast EVE-1500 User manual

Everlast
Everlast EV500 User manual

Everlast
Everlast ev-700 User manual

Everlast
Everlast EVE-540 User manual

Everlast
Everlast EVE-900 User manual

Everlast
Everlast DUMBBELL PRO User manual

Everlast
Everlast EVE-840 User manual