5
(3). Installation –Fitting the Rangehood.
This Rangehood must be placed at a distance of 65cm minimum from the
cooking surface of a cooker/hotplate and 120cm minimum from the
cooking surface of a BBQ.
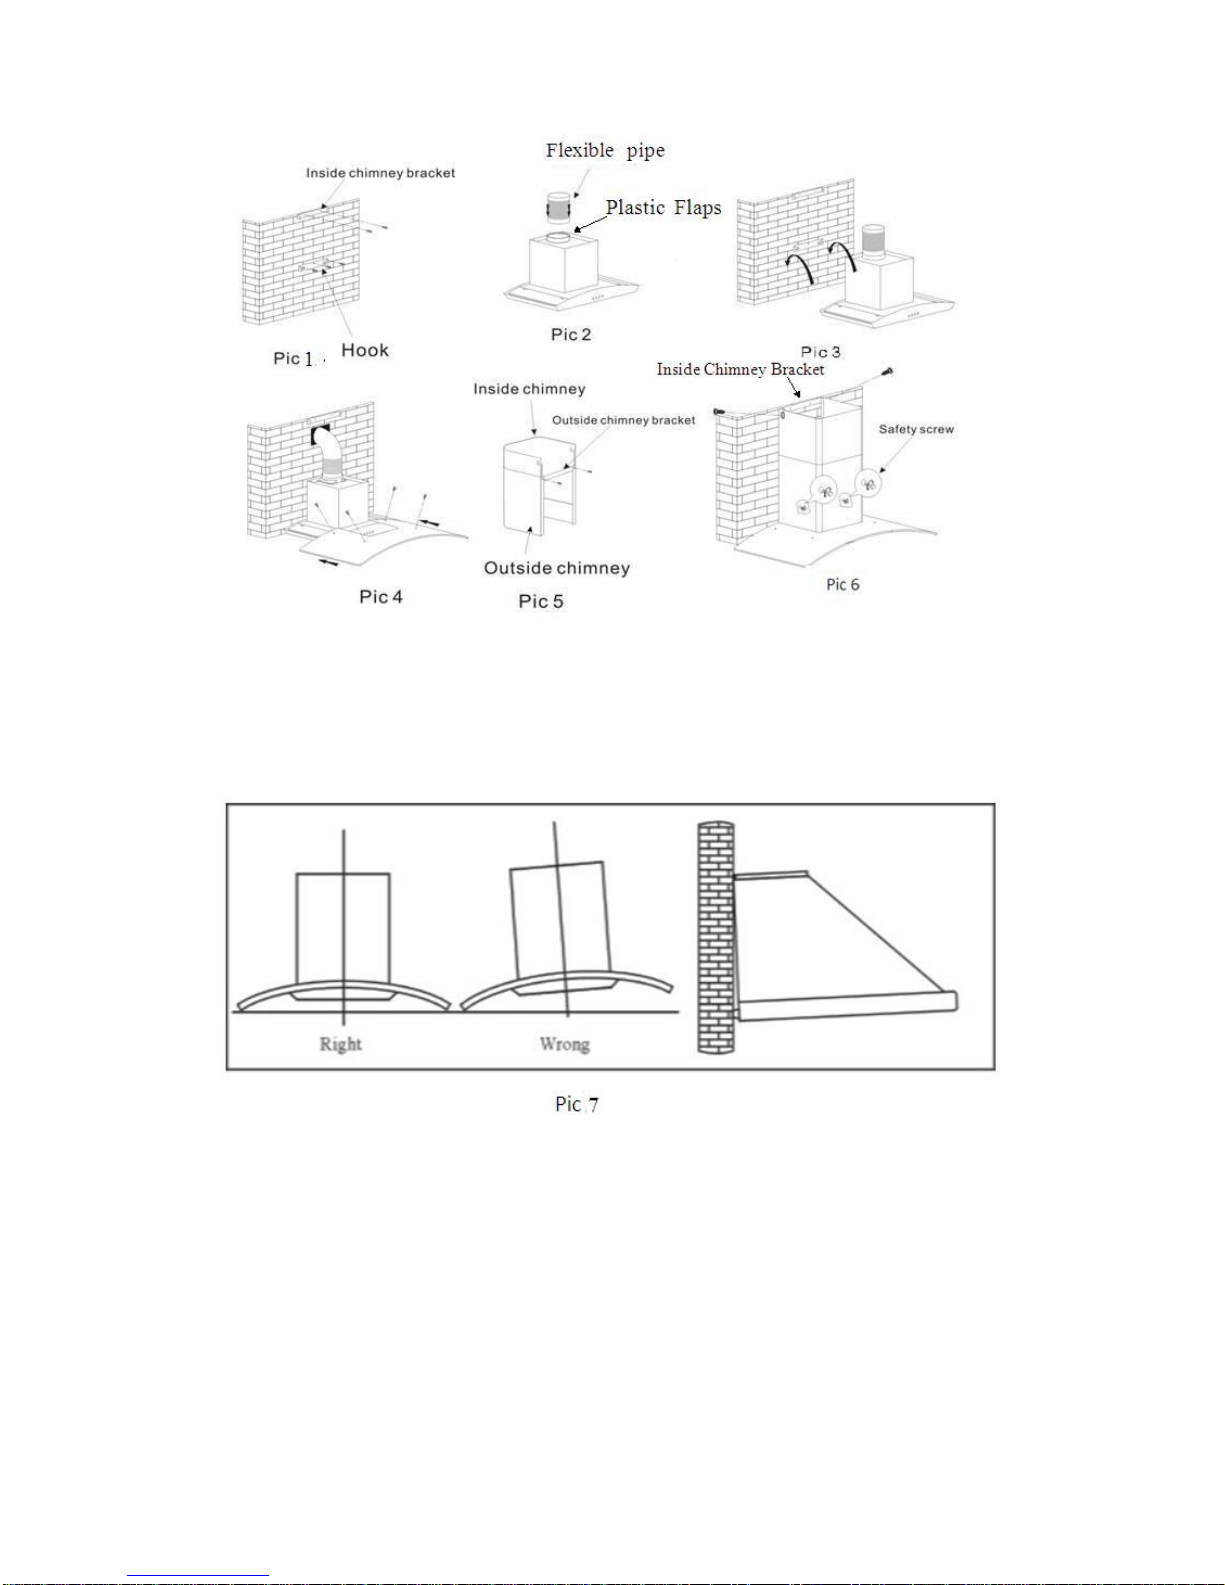
3.1 Fit the supplied Hook to the wall using the 36mm long screws
supplied (refer to Pic 1). Fixing method to the wall must be capable of
supporting the weight of the Canopy.
3.2 Fit the Inside Chimney Bracket against the ceiling (refer to Pic 1).
3.3 Fit the plastic flaps to the outlet vent of the canopy by deforming
the flaps slightly so that the ends fit into the holes (refer to Pic 2 for
location of the flaps).
3.4 Lift the Canopy onto the Hook and make sure both left and right
hand hooks are engaged (refer to Pic 3).
3.5 Fit the Flexible Duct (not supplied) to the outlet (refer to Pic 2).
3.6Exhaust the Flexible Duct to the outdoors and fit a one way valve
to prevent rain & dust entering into the Canopy.
3.7 Fit the glass to the Rangehood with 20mm countersunk screws &
rubber collars supplied (refer to Pic 4). Do not over-tighten screws.
3.8 Fit the Outside Chimney on top of the Rangehood, line up the holes
with the Outside Chimney Bracket and fix the bracket to the wall using
the 36mm long screws supplied (refer to Pic 5).
3.9 Pull up the Inside Chimney up to align it with the holes on the
Inside Chimney Bracket and fit the 9mm screw supplied through each
side (refer to Pic 6).
3.10 Drill two Ø3.5mm holes in line with the Outside Chimney Bracket
through both the Outside and Inside Chimneys and fit a 9mm long screw
supplied on each side to fix them together.
3.12 Fix the Canopy with two 30mm safety screws. The two safety
screw holes are positioned on the back casing (refer to Pic 6).