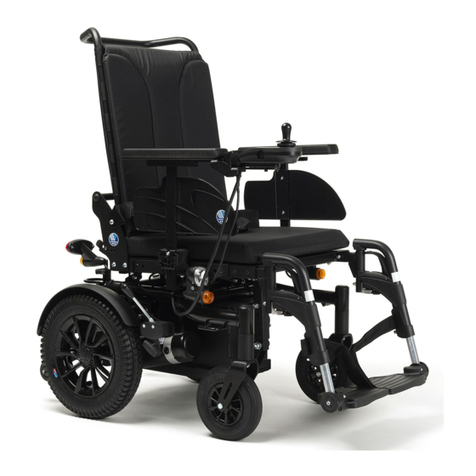
Eloflex F Instruction manual

INSTRUCTION MANUAL
FOR USE, DRIVING AND SAFETY
Read this documentation before using your Eloflex
to make sure that you use it in a manner that is safe, and which does not harm you,
your environment or your power wheelchair.
Eloflex F

2
Thanks and good luck!
Thank you for choosing an Eloflex as your power wheelchair. It means a lot to us because
our vision is to make people’s everyday life a little easier and to give people with disabilities
a greater freedom. We hope you experience both with the help of your Eloflex.
We believe that you will enjoy much of your new power wheelchair. This manual contains
important information on safety, use and care. We encourage you to read through this enti-
re documentation before using your Eloflex for the first time. We also suggest that you train
to run your Eloflex on a secluded, open and level surface before using it in other contexts.
Eloflex power wheelchair is designed for users with many different needs. Decide whether
Eloflex is suitable for the user is always taken by the ordinator or dealer together with the
user himself. Eloflex accepts no responsibility for cases where the power wheelchair is not
adapted to the user’s needs.
An Eloflex should primarily be used in its standard design. If the power wheelchair has to
be adapted or altered in any way, it must only be carried out by your assistant center or by
Eloflex. Please note that damages and faults caused by non-compliance with the opera-
ting instructions or due to poor maintenance are not covered by the warranty.
Good luck and great joy with your Eloflex.
Drive carefully!
Content Page
Intended use 3
Folding 4
Install the joystick control 5
Charging instructions 5
Lift armrests 6
Manual driving 6
The footrest 6
Joystick 7
Adjusting the lock 8
Change the seat width 8
Adjust the backrest 9
Transport and storage 10
Accessories 11
Driving 13-15
Safety 16-18
Technical specifications 19
Contact 20

3
Type classification and intended use
Eloflex power wheelchairs have been developed for people
who have difficulty walking or cannot walk at all, but who
have vision ability, physical ability and mental ability to control
an power wheelchair.
The Eloflex power wheelchair is sufficiently compact and flex-
ible for indoor use, but the chair is also suitable for outdoor
use. The chapter ”Technical data” at the back of this docu-
ment contains information on speed, turning radius, range,
maximum lifting capacity and maximum weight for the user
and so on. We encourage you to read all safety information in
the chapter ”Safety” in this document.
Eloflex is tested and approved according to EN12184: 2014
- class B (indoor and outdoor use). Eloflex is also approved
according to ISO-7176, IEC60601 and the batteries are
approved according to UN38.3.
Eloflex power wheelchairs meet the applicable requirements
of the Medical Devices Act (1993: 584) and the regulations
(LVFS 2003: 11 and LVFS 222009: 18) on medical devices.
The product thus fulfills the requirements of the EC directive
on medical devices, 93/42 / EEC and 22007/47 / EC.
Class 1 conformity assessment / CE marking has been
issued in accordance with the Medical Directive 93/42 EEG /
MPG (Medical Devices Act) and applies only to the complete
product. The CE marking will be void if you use replacement
components or accessories that have not been approved for
this product.
Needs
The purpose of an Eloflex power wheelchair is to compensa-
te for an injury or disability, which is why it is recommended in
the following circumstances:
• If the user has the inability to walk or very limited ability
to walk, which makes it difficult to move in his / her own
home.
• If there is a need to leave the home to get out or to visit pla-
ces that are normally visited in order to carry out everyday
affairs.
• When the user has difficulty getting to, or performing work
or activities because of his / her mobility disabilities.
It is advisable to use Eloflex power wheelchairs both indoors
and outdoors, if it is not possible to use hand-operated
wheelchairs due to mobility problems, but it is still possible to
properly handle power wheelchairs.
Accessories
Chargers and bag with simpler tools are available when deliv-
ered in the storage bag under the seat.
Utility
Only use the Eloflex power wheelchair when fully functional.
Otherwise you put yourself and others at risk. The following
list does not include all possible situations. It describes only
certain situations that may affect the usability of the power
wheelchair.
• Do not use the power wheelchair if the batteries are defec-
tive or deformed
• Do not use the power wheelchair if the engine is jerky or
makes abnormal noise
• Do not use the power wheelchair if the brake function
appears to be wrong
• If your tires are worn, contact your assistant center or
dealer
• If you notice any damage to the seat belt, armrest, seat,
backrest, joystick or other part of the chair, contact your
assistant center or dealer.
• If you notice any damage to the electrical system (cables,
batteries, chargers, etc.), please contact your assistant
center or dealer.
Warranty
You always have a two-year warranty on your Eloflex power
wheelchair. The warranty conditions are in line with the appli-
cable national and general terms and conditions and rules
and regulations. The detailed warranty conditions can be
downloaded at www.eloflex.eu. Note that you should save
the original carton for your Eloflex during the warranty period
(the carton can be folded together and set aside).
Life span
The estimated lifetime of an Eloflex is 5 years. However, the
life of the product is largely affected by how it is used and
managed. An Eloflex can have a much longer life if you take
care of it in a good way and only use it in line with the infor-
mation in this document.
Safety regulations and risks
PLEASE READ THE SAFETY INSTRUCTIONS FROM THE
PAGE 13 BEFORE YOU USE YOUR ELOFLEX.
Intended use

4
Folding
Fold up
Step 1
Place the folded chair on the ground as
shown on the right. Grasp the backrest
and pull upwards to open the chair.
Hold on with one hand on the seat
cushion.
1
Collapse
Step 1
Open the lock as shown in the pictures
to the right.
Step 2
Put one hand on the front of the seat
cushion. Grasp the top of the backrest
with the other hand and fold it forward.
Push the chair together according to
the pictures on the right.
1
2
Step 2
Close the lock - this is very important!
”Click”
2It is very
important
that you close
the lock before using the
chair.

5
IMPORTANT!
NEVER
connect
the charger
directly to
the battery.
Install the joystick control
This is how you charge
Start by turning off your Eloflex (all lights
on the joystick should be off). Connect
the charger to the socket on the front
of the joystick. Make sure that the
contacts’ position matches each other.
Then plug the charger’s power cable
into a wall outlet.
Charging is indicated by a lamp on the
charger. Red lamp means that char-
ging is in progress. After about three
hours, the batteries are charged at 90
percent. The chair can now be used
again.
After about 5-8 hours, the light on the
charger becomes green and the batte-
ries are fully charged. During charging,
the charger itself becomes warm, and
this is normal.
For maximum battery life, charging
Charging instructions
should take place for about five hours
when the bar on the battery indicator
at the joystick has dropped to one third
(when three of the lights are green).
The batteries will not be damaged by
maintenance charges but for maximum
battery lifespan we recommend that
you disconnect the charger when the
batteries are fully charged.
Charging the batteries can be done
down to -10 degrees. When charging
in lower temperatures, the batteries will
not get fully charged.
If your Eloflex is used in minus degrees,
the mileage is affected. For example,
at -10 degrees, the mileage can be
reduced by up to 50%.
Step 1
Mount the joystick in the tube under the
armrest and tighten the screw in the
desired position.
Step 2
Assemble the cable connectors and
gently rotate until the pins enter the
holes and the grooves in the two
connectors engage. Then screw the
sleeves together on each contact.
Be careful
not to
damage
or bend the
pins in the connector.
IMPORTANT!

6
For easier entry and exit, the footrest
can be folded up as shown on the right.
If the footrest does not remain in the
raised position, you can adjust the
footrest’s inertia.
Step 1
Remove the black plastic cover from the
four nuts.
Step 2
Tighten the retaining screws while hol-
ding the nut.
The footrest
To lift the armrests up and down, first
loosen the lock by turning the locking
lever half a turn. Then lift the armrests.
Lift armrests
OPEN
LOCKED
It is important
that you lock
the armrests
when you fold
them down again by
turning the lock lever
back half a turn.
1
ADJUST FOOTREST
Turn off the power wheelchair with the
joystick. Then push the red levers on
the motors (see picture) to disconnect
the magnetic brakes. In this position,
the chair can be rolled manually.
Note! If the user uses the chair without
assistance, the magnetic lock of the
chair must always be switched on.
Manual driving
ON OFF
IMPORTANT!
NEVER kick on the red
levers with your foot.
Only use your hands.
Lock the nuts with thread glue / loctite when tightening them tightly, so you do not have to redo the procedure in the future.
2

7
Power on and off
Battery status
Reduce speed Increase speed
Joystick Horn
USB connector
Joystick
Joystick: Controls the
chair’s speed and direction.
Power on and off: Press to
turn your Eloflex on and off.
Battery status: This indicates
how much power is left in the
batteries. When the batteries
are fully charged, all the lights
illuminate. As the batteries are
emptied, the lights go out in
turn. Charge when two-thirds
of the lights go out.
Speed indicator: All bars light
= max speed.
Horn: Press to call attention.
Increase speed: Press to
increase the chair’s maximum
speed.
Reduce speed: Press to
reduce the chair’s maximum
speed.
1
1
2
2
TIP:
Use the USB con-
nector on the under-
side of the joystick to
charge your mobile
phone.

8
You can increase the seat width by
moving out the armrests using the wi-
dening kit. You can choose to increase
the seat width by 5 or 10 cm.
Step 1
Loosen the armrests on each side by
unscrewing its two brackets.
Step 2
Fit the widening sleeve between the
chair and the armrest. Reinstall the
armrests.
Change the seat width
Adjusting the lock
2
If the lock is sluggish to close or too
loose, the two springs alongside the
lock can be tensioned or released.
Step 1
Remove the black plastic cover from
the two nuts.
Step 2
Tighten the nut on the springs while
holding the washer under the spring
with a tool.
It is important that the lock on your Eloflex
is tight to pull up and down. It should go
so slowly that it can stand straight out
by itself as in the picture above. This is
important for the lock to stay in its locked
position even if the springs are pressed
together. To make the lock more tight, you
just need to tighten the bracket with the
two hex screws that hold the lock in place.
1
2
It is important
that the lock
goes slow to
pull up and
down so that it does not
open when the springs
are pressed together.
1
You order the widening kit free of charge from Eloflex. Email your order to info@eloflex.eu

9
Adjust the back
Fold up the trim of the back by pul-
ling it. Tighten the Velcro straps for a
comfortable sitting position. Then fold
the trim down and press lightly so that
it gets stuck in the Velcro strips.
Adjust the angle
You can set the backrest slope in three
different positions by pulling the locking
pins inwards and then changing the
position of the back.
Adjust the backrest

10
• To lift the chair, it is recommended that the chair is first folded.
• A folded chair can be put in the luggage of a car or set in a
wardrobe.
• If the chair is not to be used for a while, we recommend that
the batteries be fully charged before the chair is set aside.
• The chair should be stored indoors in frost-free, dry and venti-
lated areas. Storage temperature 0-30 degrees.
• When transporting by bus or by handicap transportation, the
Eloflex must be attached to the fastening points shown in the
pictures at the bottom. Note that Eloflex is not tested as a car
seat. We therefore always recommend that the user moves
over to the car’s own seats.
Transport and storage
This manual suits for next models
1
Table of contents
Other Eloflex Wheelchair manuals