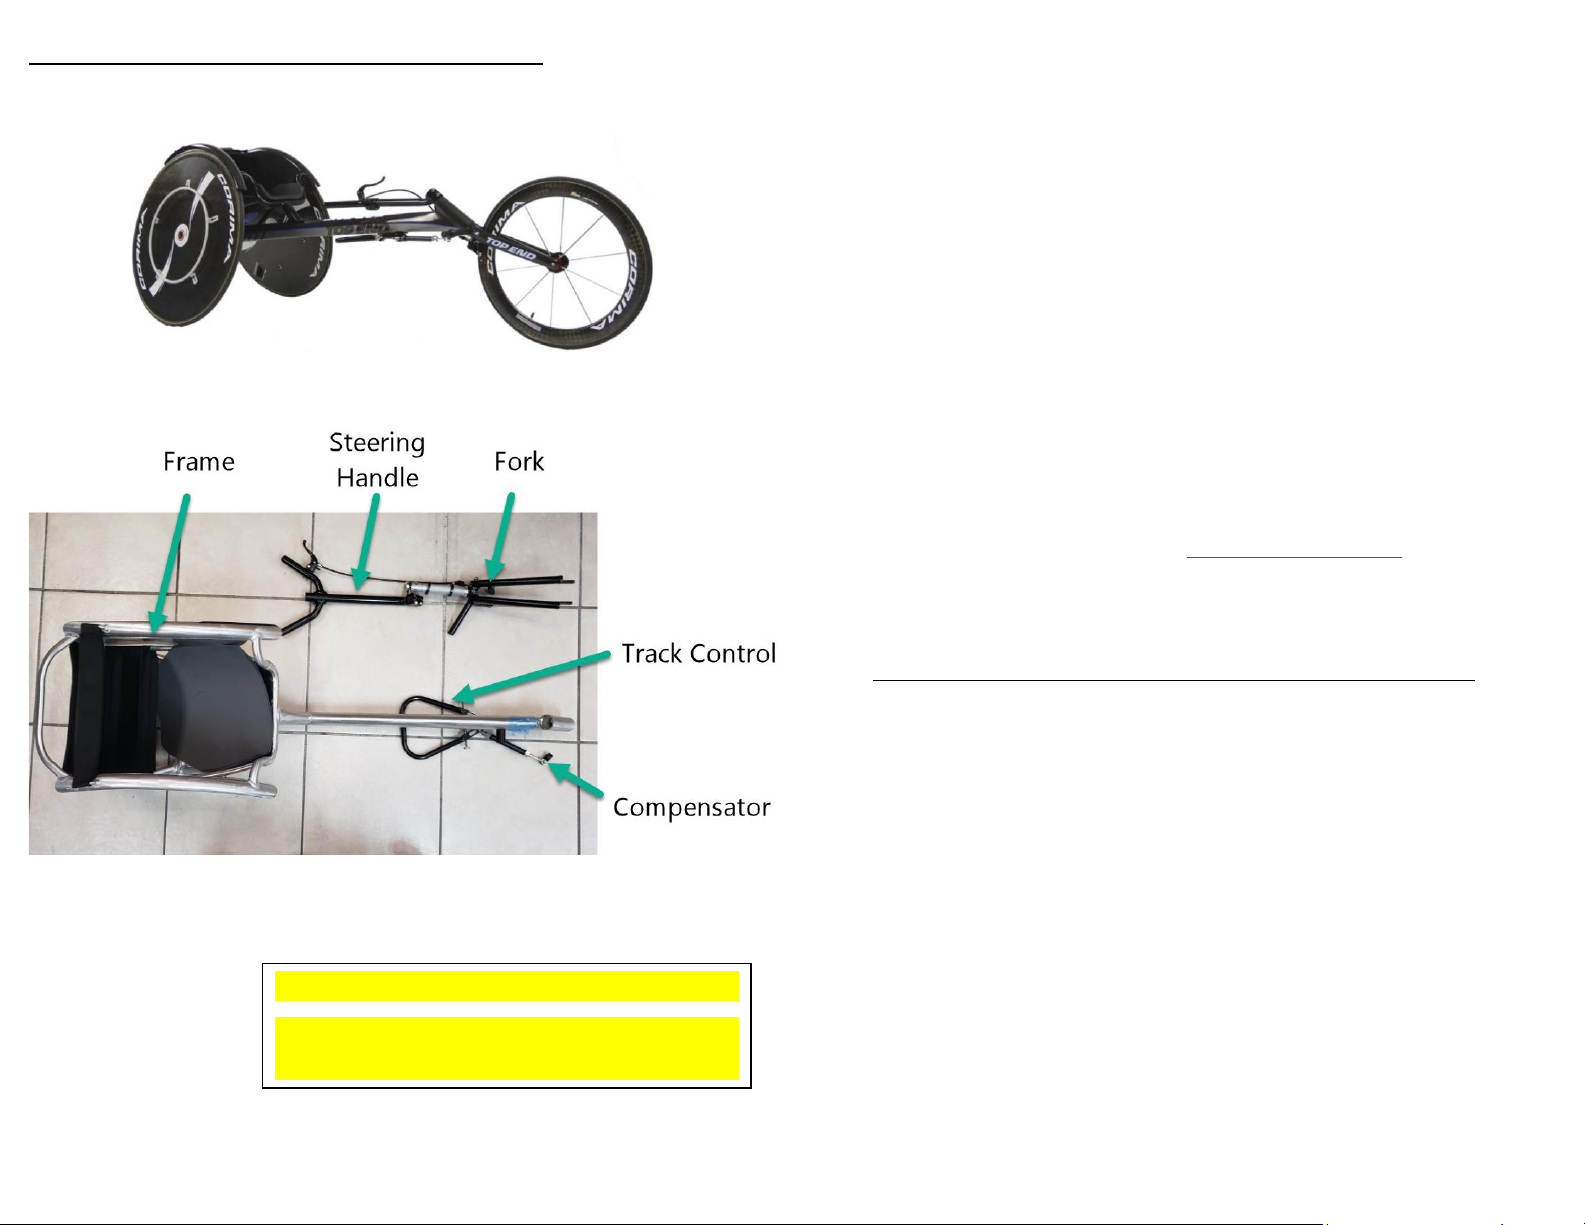
Part No 60121511 Rev D 5 Instructions, Racer Customer Assembly
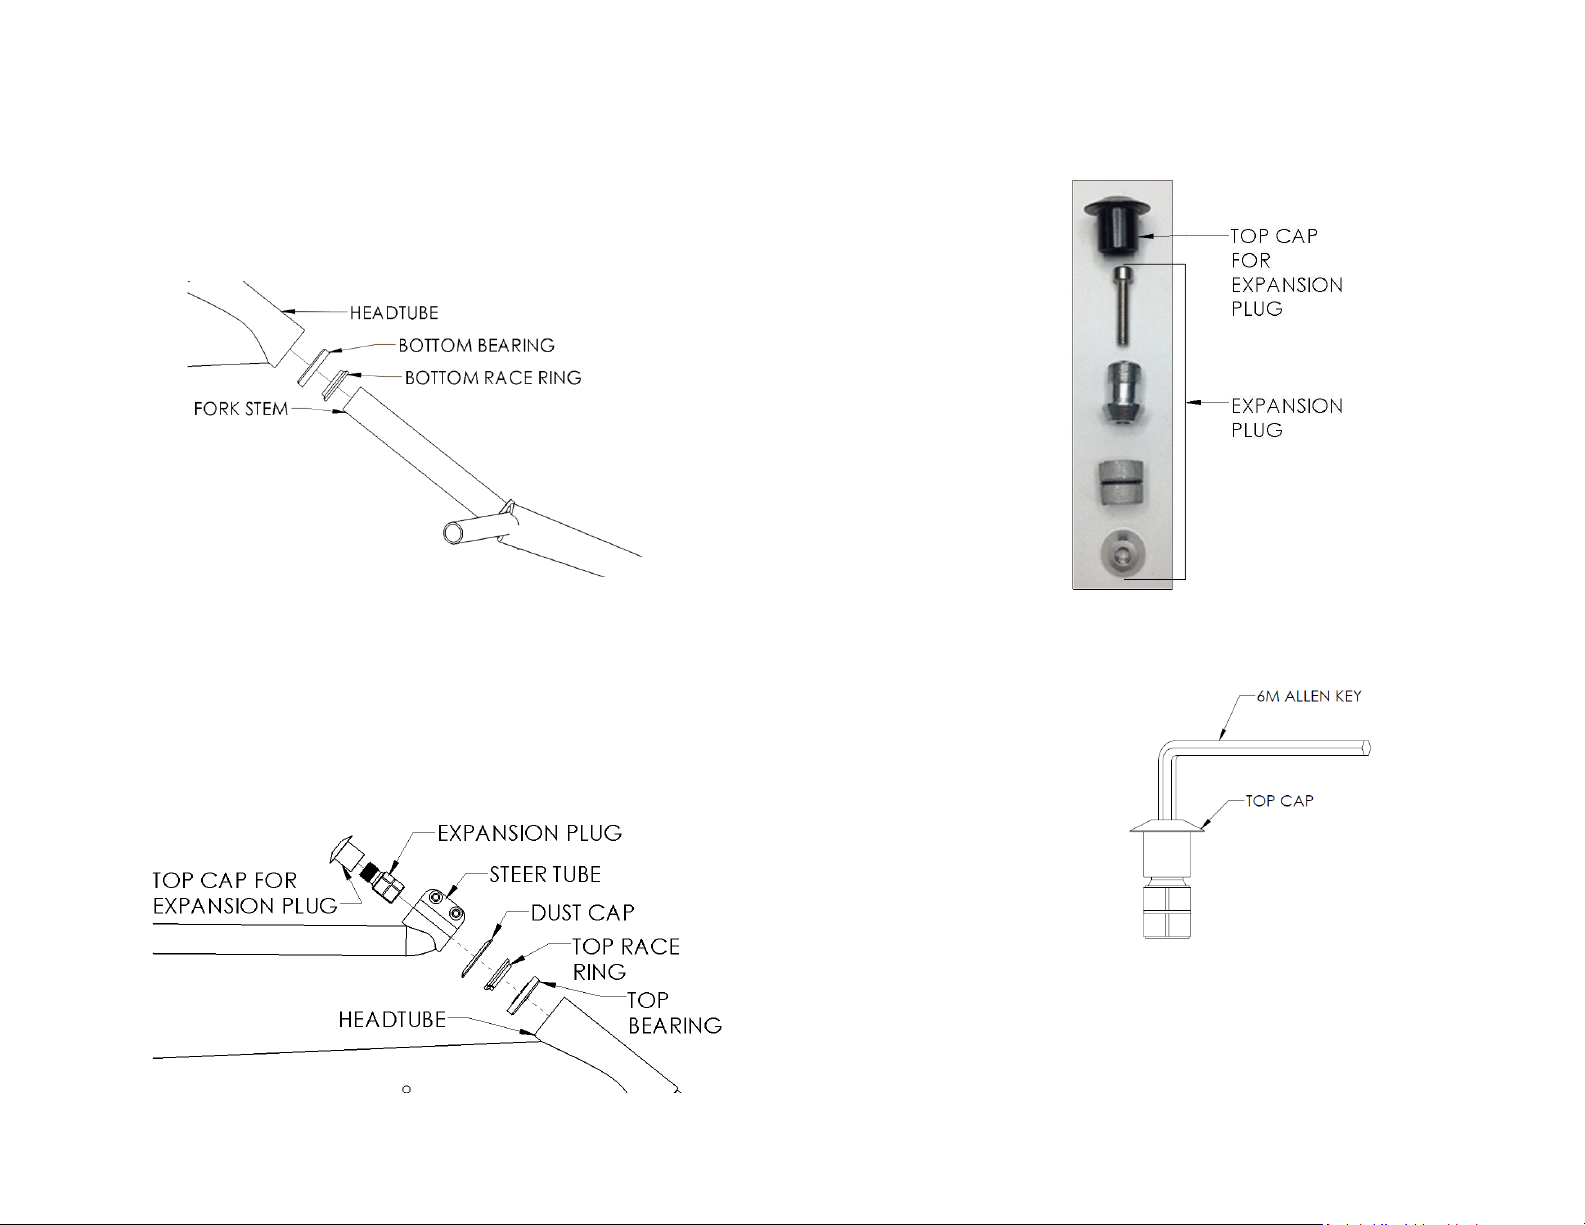
3. Aluminum Fork Assembly Instructions
(skip if you have a carbon fiber fork)
a. Remove the packing material from the fork, track control, compensator
and the headtube in the front of the main frame.
b. Remove the bearings from their packaging on [SHEET #3].
c. Insert the fork stem through the bottom race ring and the bottom
bearing from [SHEET #3] as shown in figure c ensuring taper of
bearings and racing ring are towards the headtube.
d.
e. Insert the fork stem through the headtube until the bearing is fully
seated inside the headtube.
f. Using parts from [SHEET #3],slide the top bearing, the top race ring
and the dust cap respectively over the fork stem and into the head
tube as shown in figure f ensuring taper of bearings and racing ring are
towards the headtube.
i. NOTE: The flat side of the dust cap is to be against the top of the
race ring.
g.
h. Install the steering handle over the fork steer tube on top of the dust
cap. You may need to unscrew the screws and pry the clamp open
using a flathead screwdriver for it to fit over the fork.
i. Install the top cap and screw from [SHEET #3] onto the fork stem using
the 5mm Allen key from [SHEET #1] (recommended torque: 7-9 N.m.)
j. Finger tighten both M6 x 16mm screws in the steering handle from
[SHEET #2].
k. Ensure the entire chair (rear wheels and fork blades) is resting on a flat
level surface. Ensure the fork blades are flat against the surface.
l. Using the 5mm Allen Key from [SHEET #2], tighten the M6 X 16mm
screws in the steering handle clamp (recommended torque: 7-9 N.m.)
i. NOTE: Make sure that the brake cable is not tangled or twisted.
It’s intended to route freely along the user’s left-hand side of the
frame.
ii. NOTE: In some cases, with custom mounting positions the brake
cable may have to cross over the frame. In these situations,
ensure that the brake cable does not get tangled or twisted
when moving the steering handle to either side.
m. Ensure that the headset has zero play but also rotates freely. Once
confirmed, move onto attaching your compensator.
n.