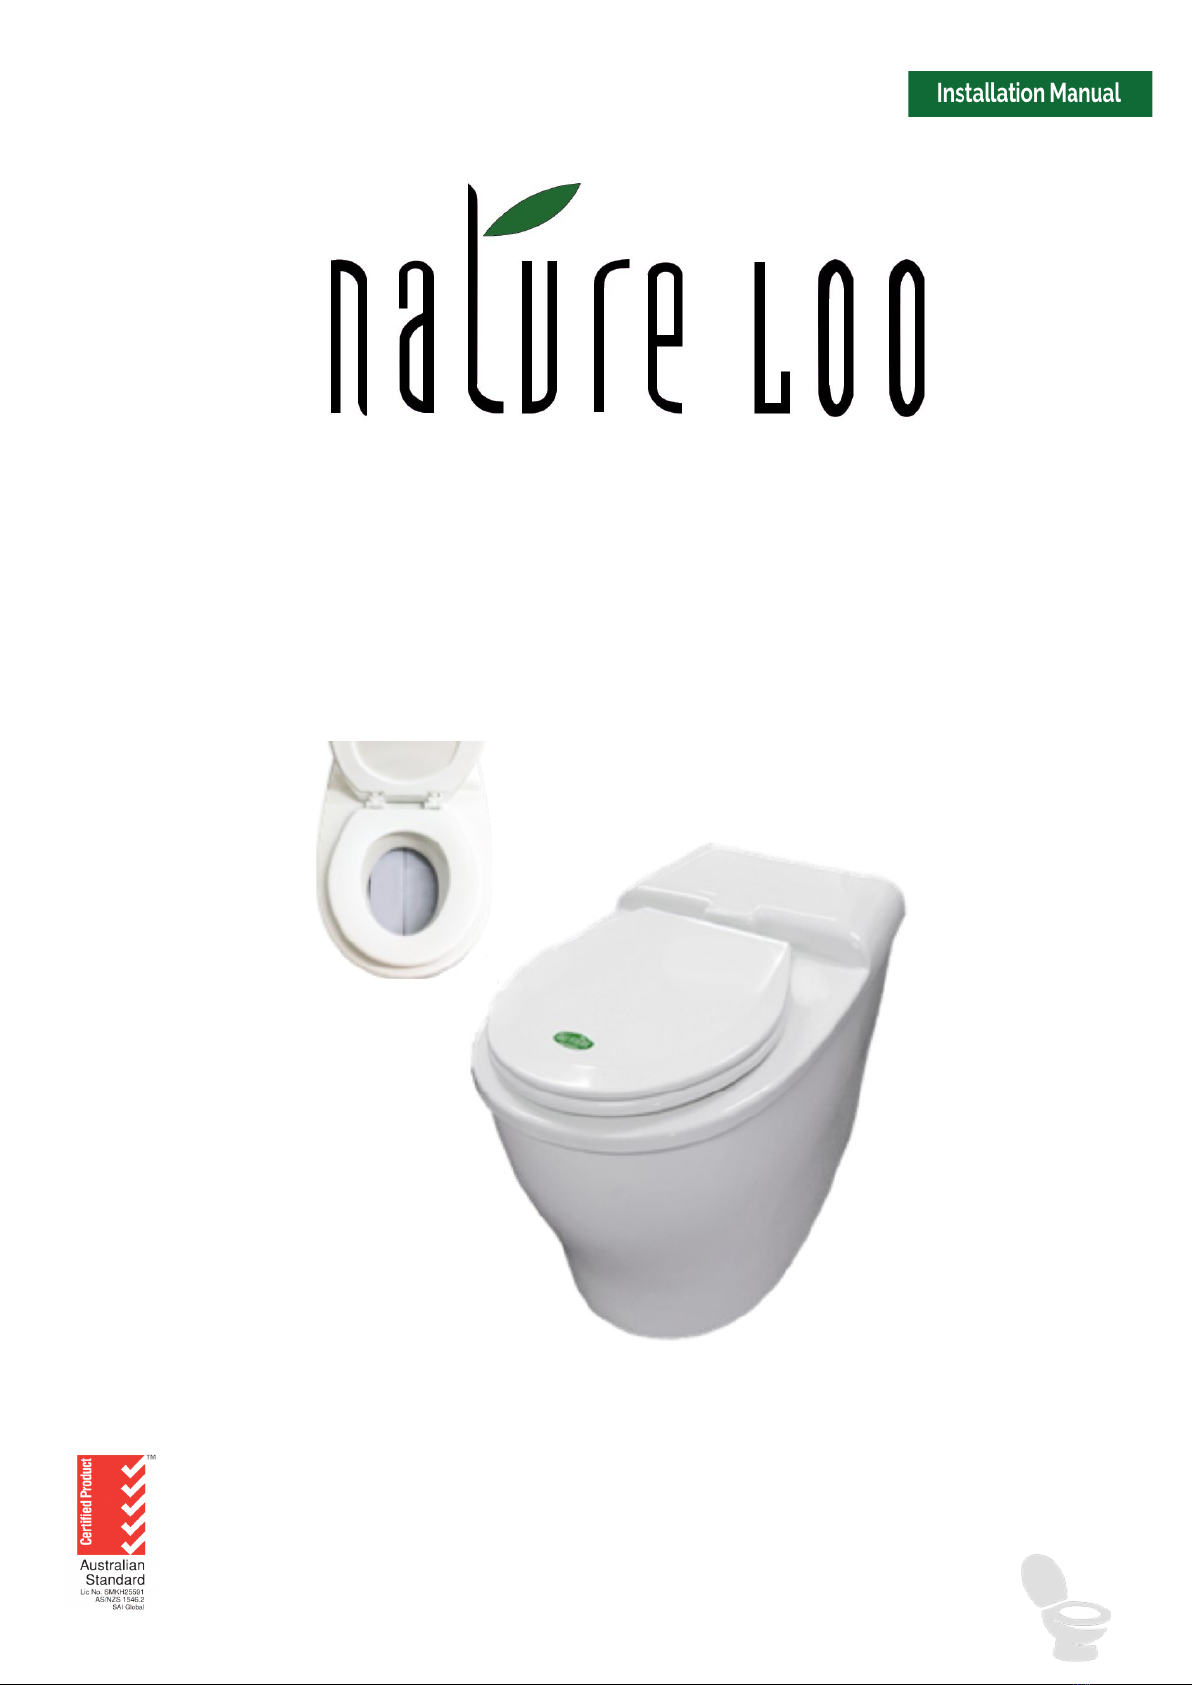
Ecoflo NATURE LOO EXCELET CS Instruction Manual
IMNL-003.181008 © Ecoflo Wastewater Management Pty Ltd Page 1
®
EXCELET CS & EXCELET
Installation & Maintenance Manual
▪Thank you for purchasing the Excelet model. Please read this manual carefully before installation.
▪“Nature Loo” is a brand of Ecoflo Wastewater Management Pty Ltd.
▪ Visit our website at ecoflo.com.au
IMNL-003.181008 © Ecoflo Wastewater Management Pty Ltd Page 2
Copyright © 2018 Ecoflo Wastewater Management Pty Ltd
Please call your local distributor or Ecoflo Wastewater Management for support if required.
Ecoflo Wastewater Management Pty Ltd
www.ecoflo.com.au
www.natureloo.com.au
Phone: 1300 138 182
Phone: 07 3889 6144
Email: [email protected]
ABN 33 606 583 895
Proudly Designed and Assembled in Australia
by Ecoflo Wastewater Management

IMNL-003.181008 © Ecoflo Wastewater Management Pty Ltd Page 3
Table of Content
COMPONENTS, TOOLS & MATERIALS ..................................................................................... 4
TOILET INSTALLATION .............................................................................................................. 8
STEP 1: Choose a suitable site to install the toilet........................ 8
STEP 2: Installing the vent pipe & liquid drain .............................. 9
STEP 3: Constructing the liquid drain trench .............................. 13
STEP 4: Powering the fan .......................................................... 14
STEP 5: Assembling the compost chamber................................ 17
COMPOSTING ACCELERATORS ..............................................................................................21
TOILET USE & MAINTENANCE .................................................................................................22
EXCHANGING THE COMPOST CHAMBER...............................................................................23
THE COMPOSTING PROCESS ..................................................................................................26
TROUBLE SHOOTING................................................................................................................28
HOW TO DEAL WITH VINEGAR FLIES .....................................................................................31
PRODUCT & COMPONENT WARRANTY ..................................................................................32
MAINTENANCE SCHEDULE .....................................................................................34
IMNL-003.181008 © Ecoflo Wastewater Management Pty Ltd Page 4
WHAT’S IN THE BOX?
Please check the packing slip to ensure everything has been delivered.
If anything is missing, please notify your supplier immediately.
For Excelet/Excelet CS-3 or Excelet/Excelet CS-4, there will be 1 or 2 additional chambers
and associated fittings.
Items you will need to complete your installation:
Wall brackets to fix the vent pipe to the building
A length of 100mm DWV vent pipe (to connect to the air exhaust) (length depending on
specific installation)
2 x 100mm (DWV) PVC 45 degree bends Or 1x 100m roof cowling
You will also require the following materials for the Excess Fluid Absorption Trench (check
with your local Authority):
2.0m length of 100mm diameter agricultural pipe
2.0m x 0.5m synthetic or Hessian geotextile mat
0.30 cubic metre 20 mm Aggregate
50mm PVC pipe to connect the hose to the agricultural pipe
Or
Purchase a Drain Kit from Ecoflo.
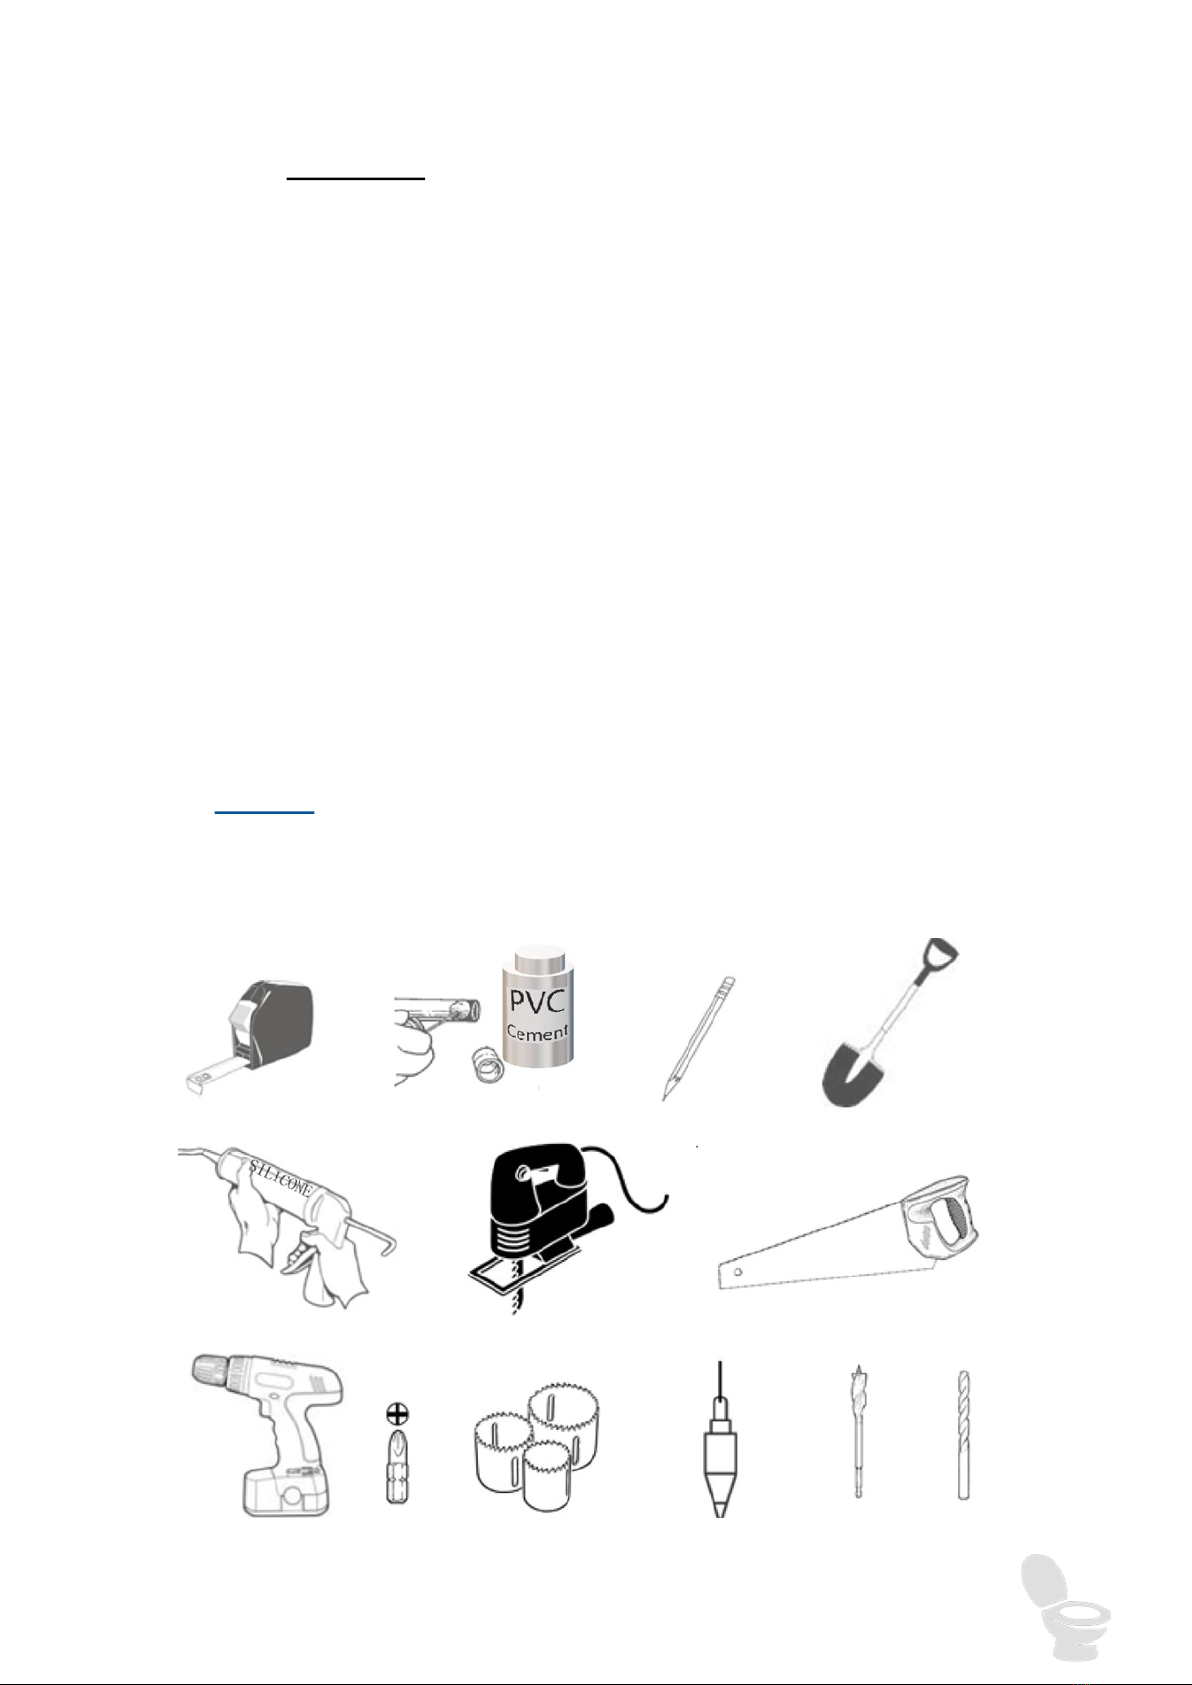
The following tools will be required to complete the installation:
IMNL-003.181008 © Ecoflo Wastewater Management Pty Ltd Page 5
TOILET INSTALLATION
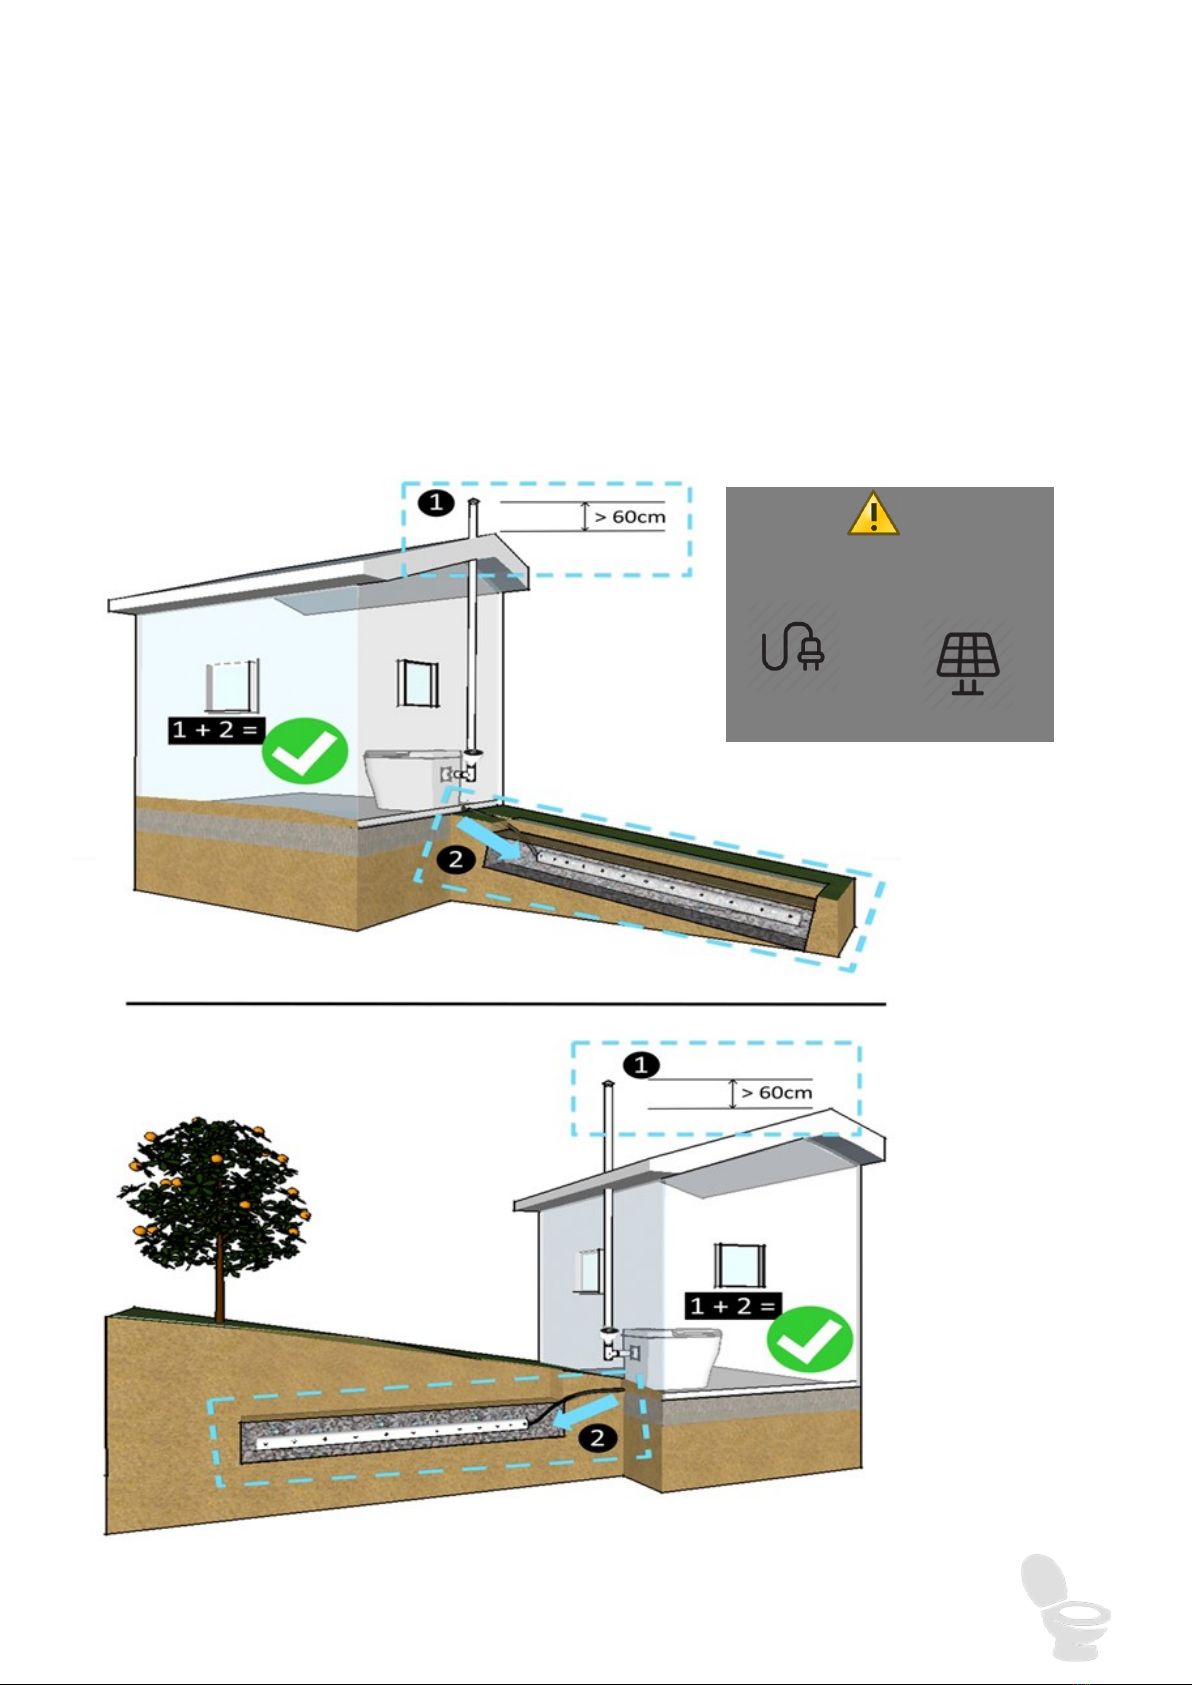
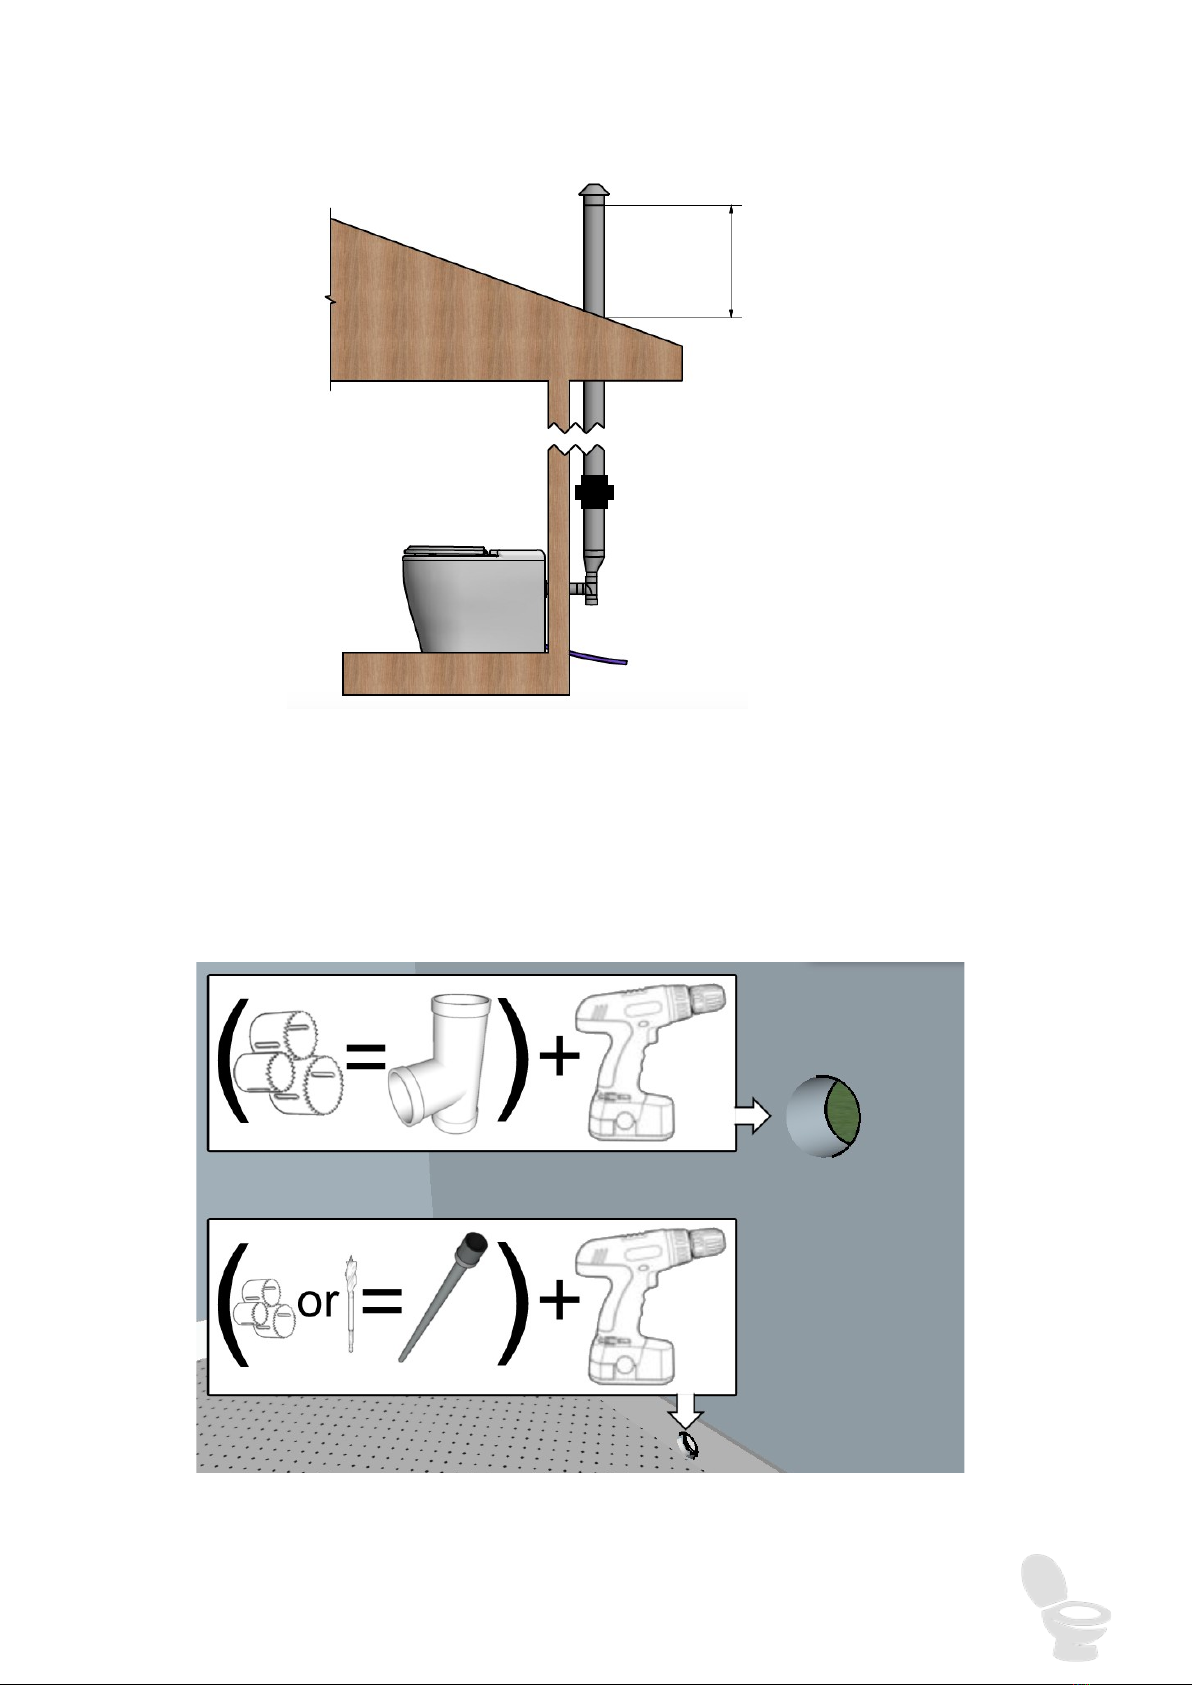
STEP 1: Choose a suitable site to install the toilet.
The location of the toilet must have both:
Easy access to connect the fan system to a permanent vent pipe up the outside of the
structure. The vent pipe from the toilet exits horizontally through the wall behind the
toilet.
An elevated starting point for liquid to flow by gravity from the toilet down into a liquid
absorption trench which is to be dug outside the toilet room.
The toilet must also be located
close to a power source. E.g.
/
IMNL-003.181008 © Ecoflo Wastewater Management Pty Ltd Page 6
STEP 2: Installing the vent pipe & liquid drain
After selecting the toilet’s location, place the 50mm DWV PVC pipe through the 50mm Wal-
lace seal in the back of the pedestal. Push the pipe flush against the wall the toilet will back
onto (in the correct alignment). Use the PVC pipe to mark a circle on the wall as a guide.
Keeping the fibreglass bottom in the same position, put the 19mm liquid drain hose inside the
fibreglass bottom and push the end without the connector through the small hole at the rear of
the shell. Using this hose as a guide, mark a circle around the hose as close to the floor as
possible.
Using the circles drawn on the wall as a guide, cut a hole of sufficient size to allow the 50mm
DWV PVC pipe to push through the wall and a second hole (approximately 25mm) for the liq-
uid drain hose.
EcoFlo
IMNL-003.181008 © Ecoflo Wastewater Management Pty Ltd Page 7
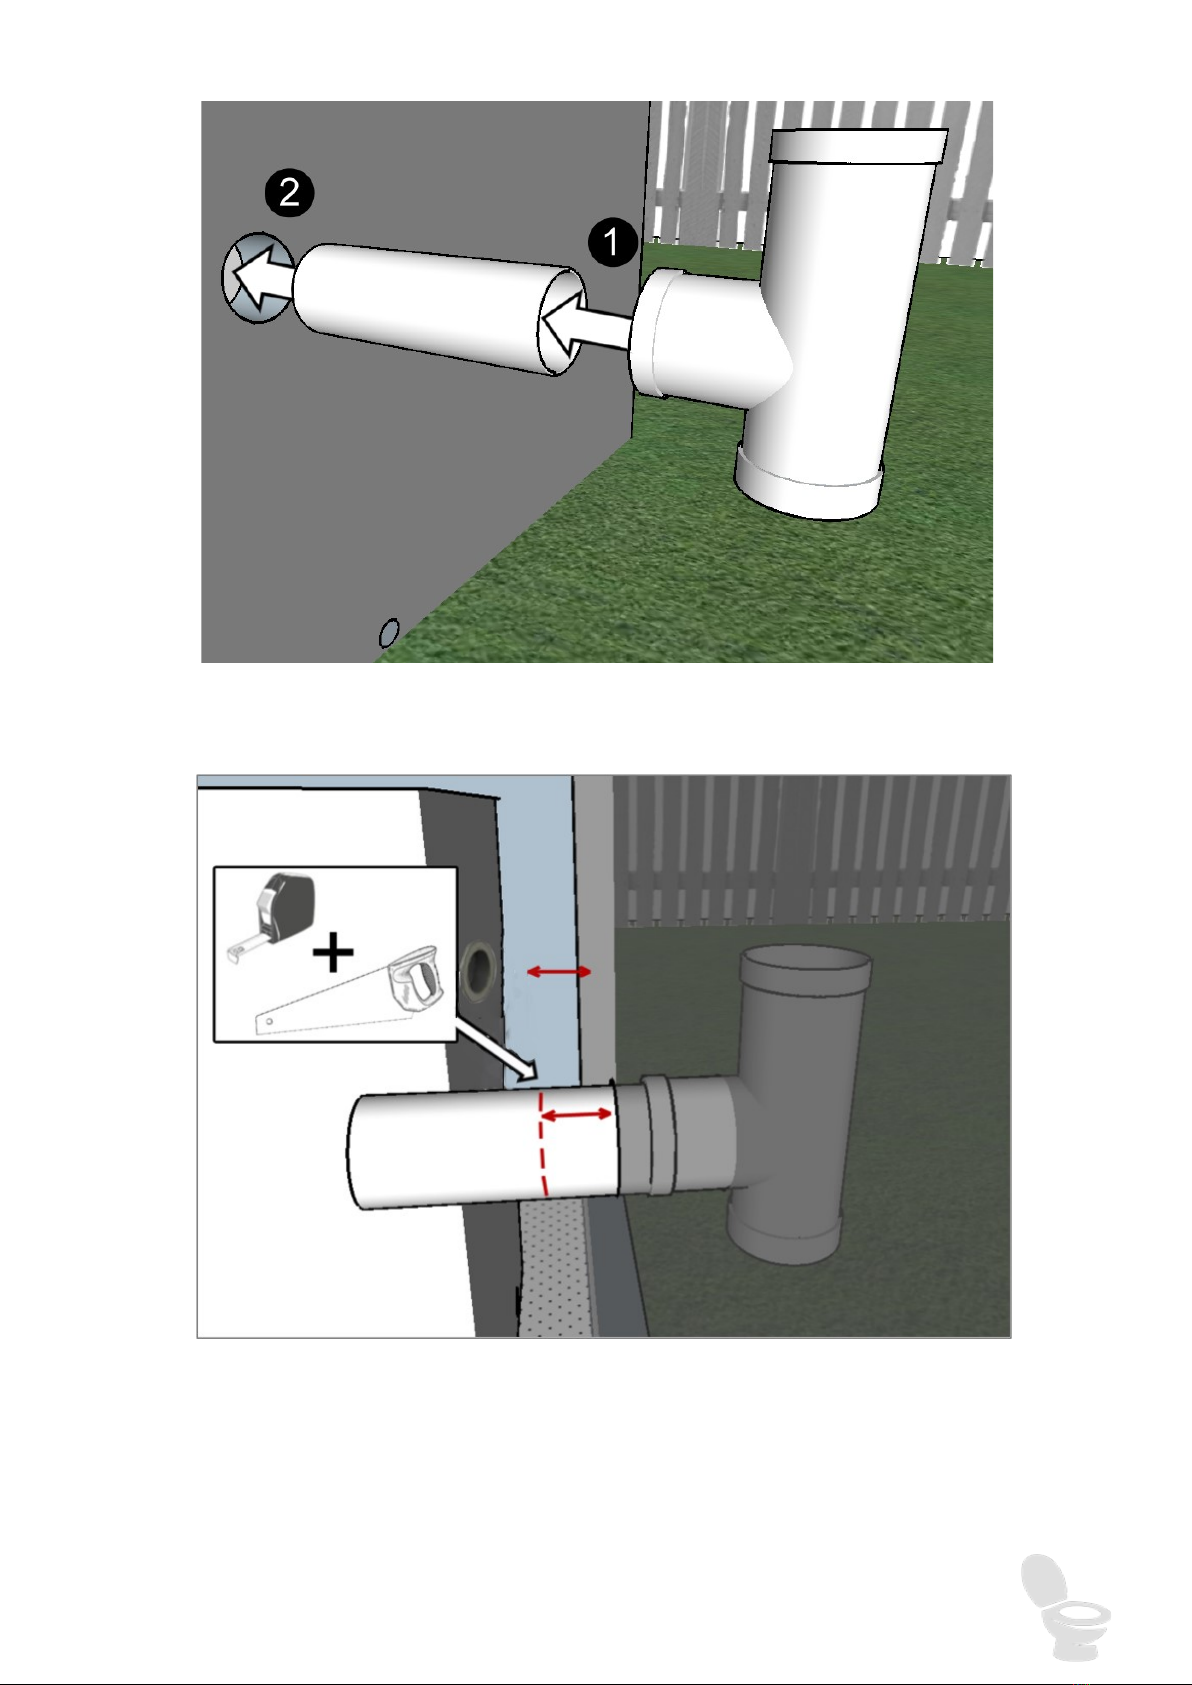
Push the 50mm PVC pipe length provided into the ‘T’ piece and then insert the 50mm PVC
pipe through the wall until the ‘T’ piece is flat against the wall.
Choose how far you would like the toilet to be from the wall and cut the 50mm DWV PVC
pipe to the corresponding length. Most people choose to locate the pedestal as close to the
wall as possible (remember to leave enough room for the pedestal lid to be removed when
changing chambers).
IMNL-003.181008 © Ecoflo Wastewater Management Pty Ltd Page 8
Purchase sufficient length(s) of 100mm
PVC vent pipe such that the vent will ex-
tend 600mm (2 feet) above the highest
point of the roof. Take the fan housing
provided to the plumbing store if you
aren’t sure which type to purchase.
All PVC pipe components, except all
components attached to the T piece
(including the fan housing) should be
glued together using Plumbers PVC
glue.
Con-
nect the provided 100mm vent cowl to the top of the
vent pipe, and then the bottom of the vent pipe into the
fan housing (do not glue this into the fan housing).
Install
the 100mm DWV PVC pipe as per Option 1 or Option 2 (pictured above). If possible, Op-
tion 1 is far better for ventilation as the two 45 degree elbows in Option 2 can slow the air
IMNL-003.181008 © Ecoflo Wastewater Management Pty Ltd Page 9
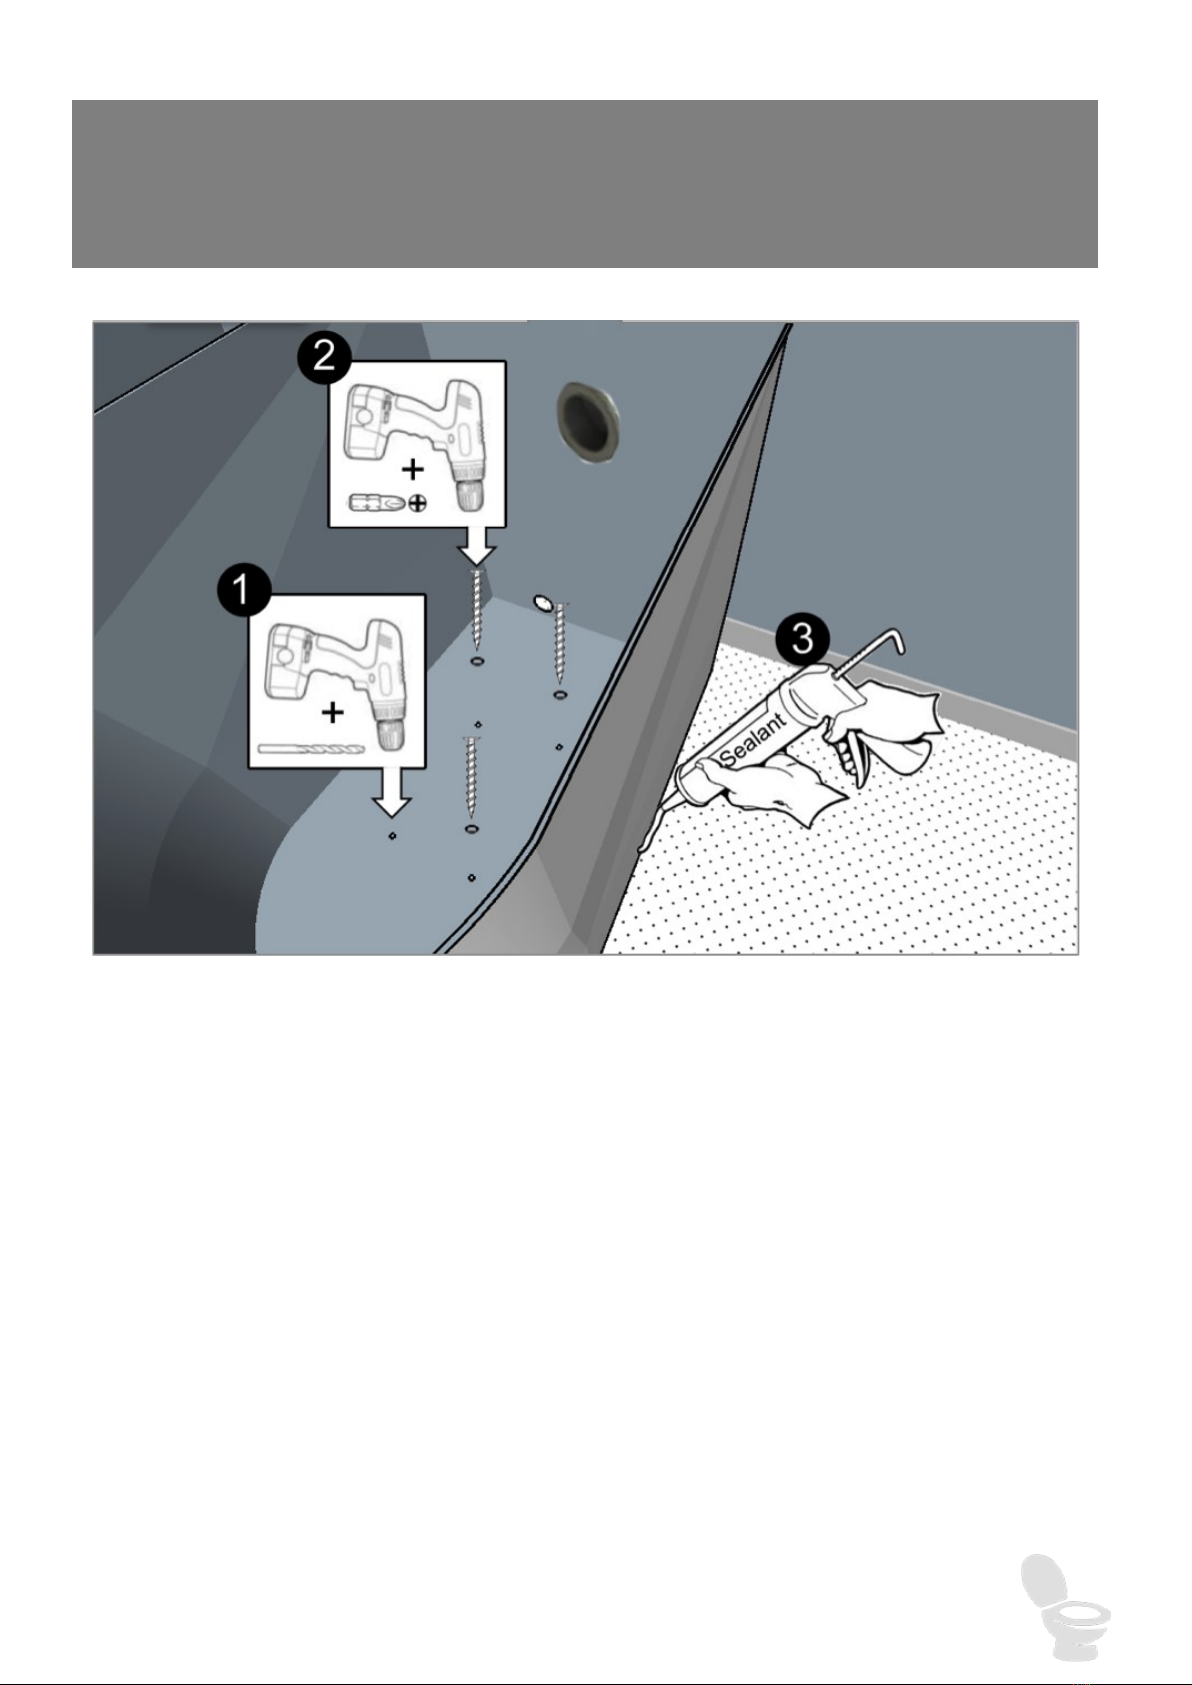
Once the toilet is permanently connected to the ‘T’ piece you may attach the fibreglass toilet
bottom to the floor with the self tapping screws and nylon washers (supplied) and / or an seal-
ant (not supplied).
The moisture trap is a 50 mm PVC ‘T” Junction with a small hole in the push-on
cap base. Any rain or condensation draining from the vent pipe will be trapped in
this junction instead of wetting the fan and shortening its life. The water drains
from the hole which needs to be cleaned regularly.
IMNL-003.181008 © Ecoflo Wastewater Management Pty Ltd Page 10
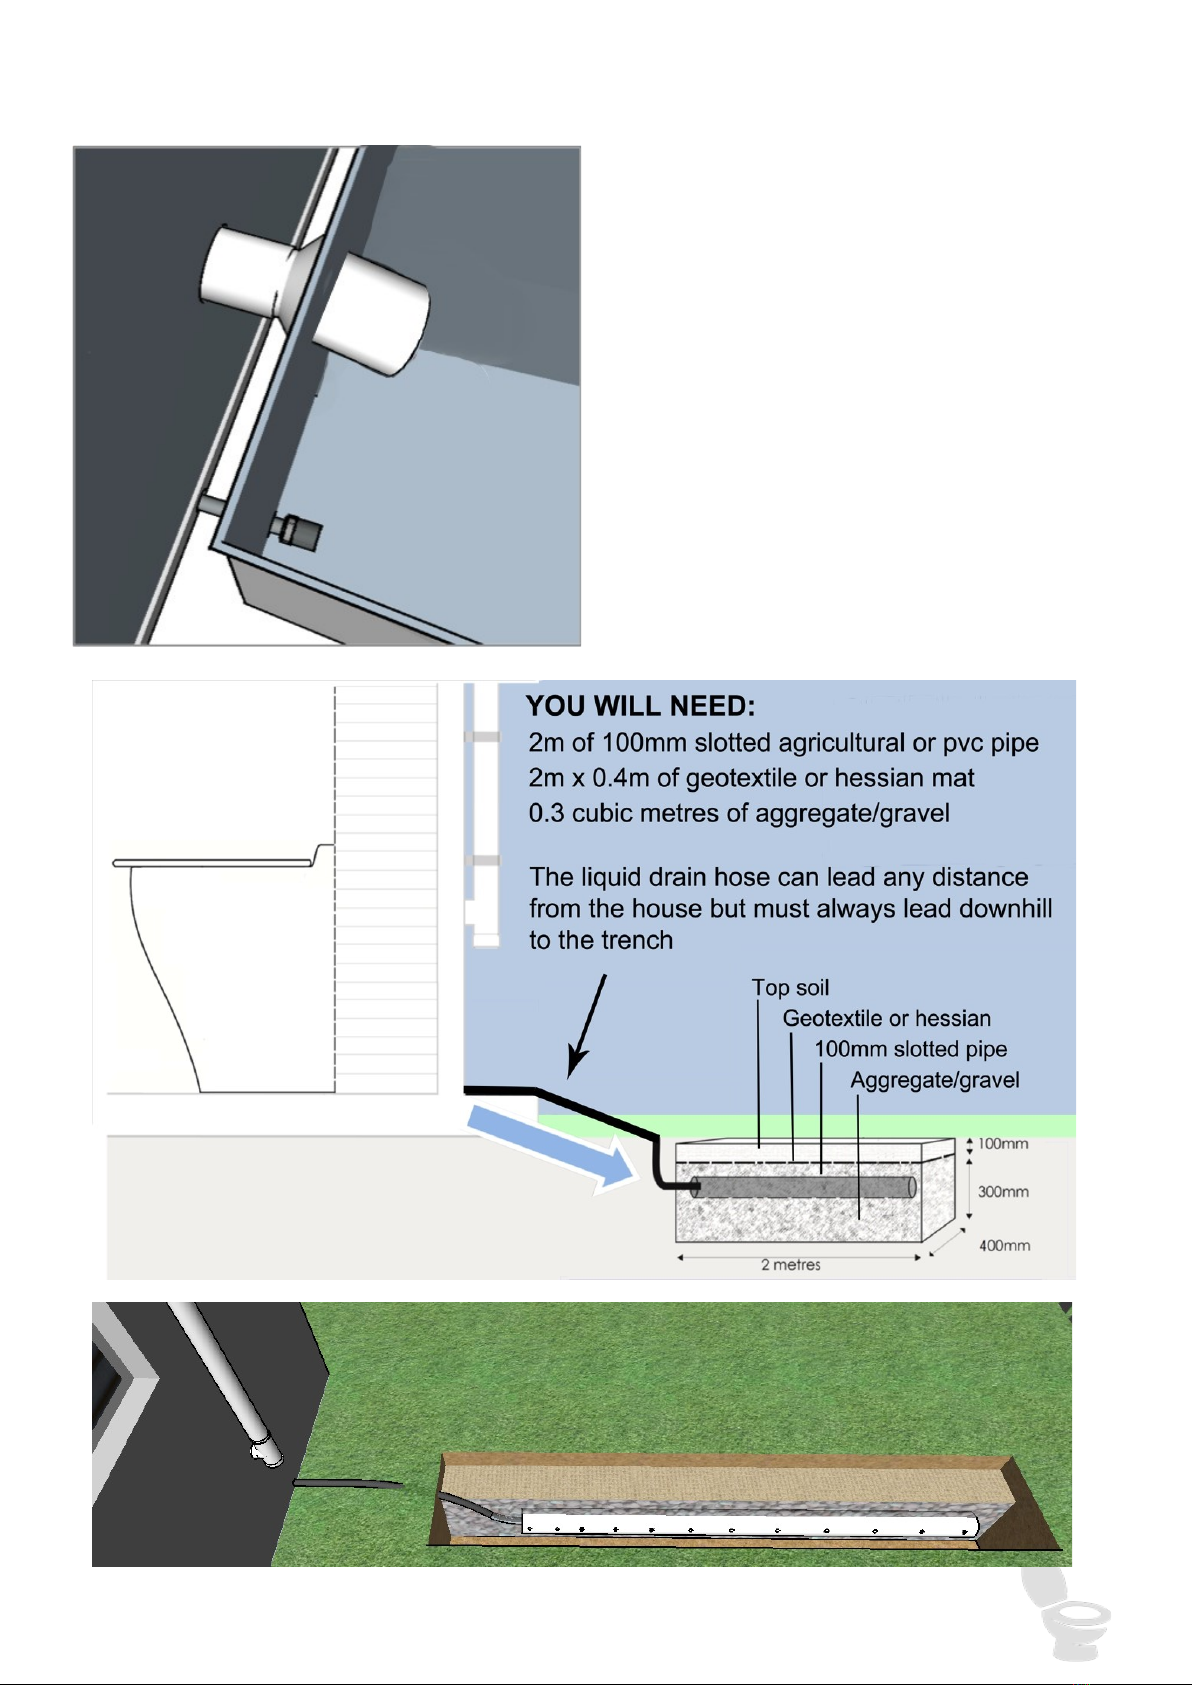
STEP 3: Constructing the liquid drain absorption trench
Place the plain end of the 19mm lilac liquid
drain hose through the small hole in the rear of
the fibreglass toilet shell. Feed the hose
through until the liquid drain valve connection
side is resting just on the inside of the shell
near the hole.
The hose exiting through the hole in the shell
should lead through the hole previously cut into
the bathroom wall and out towards the absorp-
tion trench.
Construct the excess liquid drain absorption
trench as per the following diagrams.
This manual suits for next models
1
Table of contents
Other Ecoflo Toilet manuals


Popular Toilet manuals by other brands


Better Bathrooms
Better Bathrooms BUN/BeBa 27555/78725 user manual

American Standard
American Standard CONCEPT Cube TF-2704 installation manual

BIOLAN
BIOLAN ECO Instructions for installation, use and maintenance

Thetford
Thetford C260 Series user manual

KELISS
KELISS T162A Series instruction manual

Kohler
Kohler K-22241K Installation and care guide

Kohler
Kohler ESCALE K-32771T-NS installation instructions

BIOLAN
BIOLAN GARDEN TOILET Instructions for installation, use and maintenance

washloo
washloo Prestige user manual

JABSCO
JABSCO 37010 Series quick start guide

Drive
Drive TSE 150 operating instructions

Olympia
Olympia EPOQUE 69209 Installation and Maintenance