Dynex DX-CDRW52 User manual

USER GUIDE • GUIDE DE L’UTILISATEUR • GUÍA DEL USUARIO
52× Internal CD-RW Drive
Lecteur/graveur de CD-RW
Unidad de CDRW
Dynex DX-CDRW52
DX-CDRW52.fm Page 1 Friday, April 1, 2005 4:16 PM

2
Dynex DX-CDRW52
Internal CD-RW Drive
Contents
Introduction..................................................................................................3
System Requirements...................................................................................3
Features........................................................................................................4
Installing your CD-R/RW drive.......................................................................6
Installing CD software.................................................................................10
Troubleshooting..........................................................................................11
Specifications..............................................................................................14
Français ............................................................. 16
Español .............................................................. 31
© 2005 Dynex. DYNEX and the DYNEX logo are trademarks of Best Buy Enterprise
Services, Inc. Other brands and product names are trademarks or registered trade-
marks of their respective holders. Specifications and features are subject to
change without notice or obligation.
Disclaimer
We make no representations or warranties, either expressed or implied, with
respect to the contents hereof and specifically disclaims any warranties, mer-
chantability or fitness for any particular purpose. Any software described in this
manual is sold or licensed "as is". Should the programs prove defective following
their purchase, the buyer (and not our company., its distributor, or its dealer)
assumes the entire cost of all necessary servicing, repair, and any incidental or
consequential damages resulting from any defect in the software. Further, we
reserve the right to revise this publication and to make changes from time to time
in the contents hereof without obligation to notify any person of such revision or
changes.
DX-CDRW52.fm Page 2 Friday, April 1, 2005 4:16 PM

Introduction 3
Introduction
This half-height CD-RW drive supports a maximum 52× speed writing ability on
CD-R discs, 32× speed on CD-RW discs, and 52× speed reading performance.
With the bundled CD-RW mastering software, this drive is ideal for creating cus-
tomized audio and data CDs and for archiving large files for backups. This drive
supports:
• Automatic media format recognition
• 52× reading speed
• 8×, 16×, 24×, 32×, 40×, 48×, and 52× writing speeds on CD-R media
• 4×, 10×, 12×, 16×, 24× and 32× writing speeds on CD-RW media
• Buffer underrun prevention (MTKSuperLink)
• Supports TAO, DAO, SAO, and packet writing modes
• Large 2 MB internal buffer
• Upgradable firmware
System requirements
• Microsoft® Windows® 98 SE/2000/ME/XP
• IBM-compatible PC
• Intel® Pentium® III 800 MHz or above with at least 256 MB memory
• Minimum 2 GB hard drive space available
DX-CDRW52.fm Page 3 Friday, April 1, 2005 4:16 PM

4Features
Features
Front panel
Using force to pull out or push in the disc tray candamage the drive.
Name Features
Disc tray This tray is for loading the CD. It accepts 120 mm (standard) and 80 mm (mini) discs.
Place the CD in the center of the tray.
Indicator When a CD has been ejected or is being saved, the indicator light turns on. When a CD
is being written, or a CD can’t be saved, the indicator light turns off. When a CD is
unreadable or the drive is malfunctioning, the indicator light flashes.
Manual eject hole When the power has been interrupted or it is impossible to eject a disc,
insert a straightened paper clip or pin into the manual eject hole to eject the
disc. The manual eject hole is only for emergency use. Mechanical damage
could result if you routinely use this.
Eject button Opens and closes the disc tray.
Disc tray
Indicator
Manual eject hole
Eject button
DX-CDRW52.fm Page 4 Friday, April 1, 2005 4:16 PM

Features 5
Rear panel
Connecting or disconnecting the EIDE cable while the power is on may
damage the drive. Make sure that you turn off power before connecting or
disconnecting the cable.
Drive jumpers must be set before installing the CD-R/RW drive. Set the
jumpers at the rear panel of the drive.
Before setting the jumpers, make sure that you have turned off the com-
puter power supply.
Name Features
Audio output
connector Connects the CD drive to a sound card (audio input).
Device
configuration
jumper
Selects the device configuration. Don't use jumpers to change anything other
than the device configuration. Configuration changes become valid after power
is turned off, then turned back on again. Master is the factory setting.
EIDE connector Connects an IDE cable with 40-pin IDE connectors at both ends to thesystem
board. Before connecting, turn off the power supply.
Power connector Connects 5V/12V DC power to the drive.
Audio output
connector
Device
Configuration
Jumper IDE Connector
Power Connector
DX-CDRW52.fm Page 5 Friday, April 1, 2005 4:16 PM

6Features
Installing your CD-R/RW drive
Required tools
• A medium-size Phillips screwdriver
• Long-nose pliers
To install your CD-R/RW drive:
1Turn off your computer and all peripheral devices. Unplug your computer’s
power cord from the AC power outlet.
Static electricity discharge can damage electronic circuitry. You can avoid
static discharge by touching a grounded metal object, like your computer
case, before and during installation of hardware inside your computer.
2Remove the cover of your computer. Be careful of any sharp edges on the
sheet metal or plastic.
3If there is no other CD drive installed in your system, we recommend install-
ing the CD-R/RW drive in the Secondary IDE port. It is unnecessary to adjust
any other jumpers on the CD-R/RW drive. Proceed to Step 4.
Or, if a CD drive is already installed in your system, we recommend that you
install the original CD drive on the Secondary IDE channel as the master
device (MA), and the CD-R/RW drive on the Secondary IDE channel as the
slave device (SL). Follow the steps below:
DX-CDRW52.fm Page 6 Friday, April 1, 2005 4:16 PM

Features 7
• Make sure that your Secondary IDE cable has two ports available for two
IDE devices. If not, ask your system board manufacturer or purchase one
from a computer hardware store.
• If the original CD drive was installed in the Primary IDE channel, discon-
nect it from the Primary IDE cable.
• Adjust the Device Configuration jumper of the original CD drive to the
Master (MA) position.
• Adjust the Device Configuration jumper of the CD-R/RW drive to the
Slave (SL) position.
SLAVE MASTER
USE CSEL
Do not use the USE
CSEL setting
DX-CDRW52.fm Page 7 Friday, April 1, 2005 4:16 PM

8Features
4Remove the 5.25-inch drive filler panel. For information on how to remove
this, see to your computer’s user guide.
5Insert the CD-R/RW drive into the open slot. It should easily slide into place.
Make sure that you do not pinch the cables.
6Use the four M3 × 0.5 × 4 mm screws (provided) to secure the drive into
the bay.
This CD-R/RW drive can be installed and operated both horizontally and
vertically.
DX-CDRW52.fm Page 8 Friday, April 1, 2005 4:16 PM

Features 9
7Locate your computer’s power supply and find an unused power cable con-
nector. If you do not have an available power connector, you must buy a
Y-power cable splitter that expands one power connector into two. You can
buy a power cable splitter from a computer store.
8Plug an IDE cable into the 40-pin Secondary IDE connector on your system
board, then connect the cable to your CD-R/RW drive. Attach the audio
cable if necessary. If you had another CD drive with audio cable attached, it
is not necessary to attach the audio cable to your CD-R/RW drive.
System board
Sound card
DX-CDRW52.fm Page 9 Friday, April 1, 2005 4:16 PM
10 Installing CD software
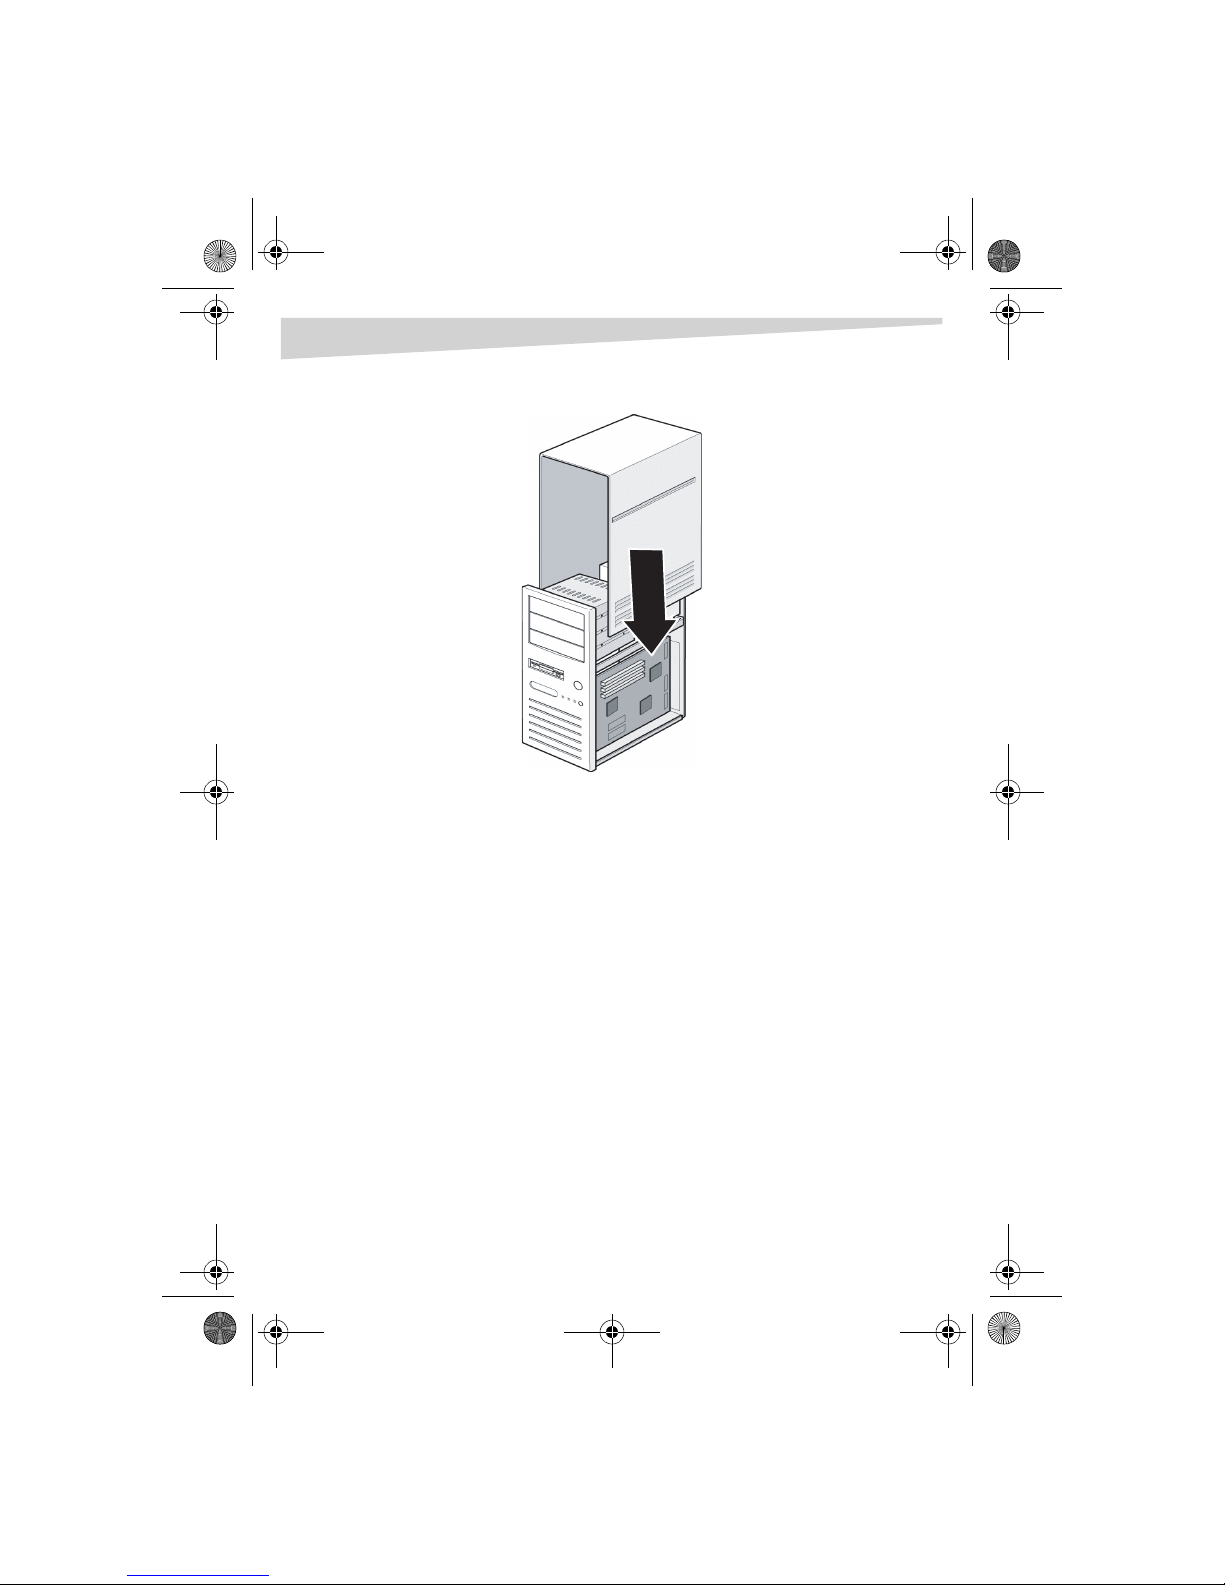
9Put your computer’s cover back on. Be careful of any sharp edges.
10 Plug in your computer’s power cord, then turn on the computer. Your
CD-R/RW drive is now ready to use.
Installing CD software
The software thatcame with your CD drivelets you make audio and data CDs right
from your desktop. It also lets you copy files from your computer to a recordable
CD. Music CDs you create with the software can be played on most home or auto
CD players. Using CD-RWs, you can write and erase data on the CD multiple times,
just like you can with a diskette.
To install the software:
1Insert the CD into your CD drive. The software installation starts automati-
cally.
Or, insert the CD into your CD drive, then run the file install.exe or
setup.exe.
2See the manual in the software CD for more information.
DX-CDRW52.fm Page 10 Friday, April 1, 2005 4:16 PM
Table of contents
Languages:
Other Dynex CD/CDR Drive manuals