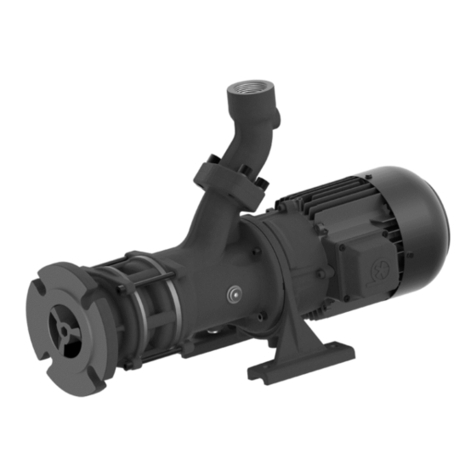
Dekker RVL007 User manual

Oil-Sealed Rotary Vane Vacuum Pumps
RVL007, RVL010, RVL016, RVL030,
RVL040, RVL080, RVL125, RVL185,
RVL212, RVL400
INSTRUCTION MANUAL
300943860_A
Original instructions

Copyright notice
©2021 DEKKER Vacuum Technologies, Inc.
Trademark credit
DEKKER and the DEKKER logo are trademarks.
Disclaimer
The content of this manual may change from time to time without
notice. We accept no liability for any errors that may appear in this
manual nor do we make any expressed or implied warranties
regarding the content. As far as practical we have ensured that the
products have been designed and constructed to be safe and without
risks when properly installed and used in accordance with their
operating instructions.
We accept no liability for loss of prot, loss of market or any other
indirect or consequential loss whatsoever.
Product warranty and limit of liability are dealt with in our standard
terms and conditions of sale or negotiated contract under which this
document is supplied.
You must use this product as described in this manual. Read the
manual before you install, operate, or maintain the product.

Contents
1. Safety and compliance. . . . . . . . . . . . . . . . . . . . . . . . . . . . . . . . . . . . . . . . . . . . . . . 6
1.1. Denition of Warnings and Cautions. . . . . . . . . . . . . . . . . . . . . . . . . . . . . . . . . 6
1.2. Trained personnel . . . . . . . . . . . . . . . . . . . . . . . . . . . . . . . . . . . . . . . . . . . . . . . . . . . 6
1.3. Safety symbols. . . . . . . . . . . . . . . . . . . . . . . . . . . . . . . . . . . . . . . . . . . . . . . . . . . . 8
2. Important safety information. . . . . . . . . . . . . . . . . . . . . . . . . . . . . . . . . . . . . . . . . 9
2.1. General precautions . . . . . . . . . . . . . . . . . . . . . . . . . . . . . . . . . . . . . . . . . . . . . . . . . 9
2.2. Safety precautions during installation. . . . . . . . . . . . . . . . . . . . . . . . . . . . . . . . 9
2.3. Safety precautions during operation. . . . . . . . . . . . . . . . . . . . . . . . . . . . . . . . . 11
2.4. Safety precautions during maintenance or repair. . . . . . . . . . . . . . . . . . . 12
3. Description. . . . . . . . . . . . . . . . . . . . . . . . . . . . . . . . . . . . . . . . . . . . . . . . . . . . . . . . . 15
3.1. Vacuum and ow rate. . . . . . . . . . . . . . . . . . . . . . . . . . . . . . . . . . . . . . . . . . . . . . . 15
3.2. Overview. . . . . . . . . . . . . . . . . . . . . . . . . . . . . . . . . . . . . . . . . . . . . . . . . . . . . . . . . . . . 16
3.3. Air ow . . . . . . . . . . . . . . . . . . . . . . . . . . . . . . . . . . . . . . . . . . . . . . . . . . . . . . . . . . . . . 17
3.4. Oil ow . . . . . . . . . . . . . . . . . . . . . . . . . . . . . . . . . . . . . . . . . . . . . . . . . . . . . . . . . . . . 24
4. Technical data. . . . . . . . . . . . . . . . . . . . . . . . . . . . . . . . . . . . . . . . . . . . . . . . . . . . . . 25
4.1. Pump performance graphs. . . . . . . . . . . . . . . . . . . . . . . . . . . . . . . . . . . . . . . . . 25
4.2. Reference conditions and limitations. . . . . . . . . . . . . . . . . . . . . . . . . . . . 30
4.3. Pump data. . . . . . . . . . . . . . . . . . . . . . . . . . . . . . . . . . . . . . . . . . . . . . . . . . . . . . 34
4.4. Motor data. . . . . . . . . . . . . . . . . . . . . . . . . . . . . . . . . . . . . . . . . . . . . . . . . . . . . . 36
5. Installation. . . . . . . . . . . . . . . . . . . . . . . . . . . . . . . . . . . . . . . . . . . . . . . . . . . . . . . . . 38
5.1. Dimension drawings. . . . . . . . . . . . . . . . . . . . . . . . . . . . . . . . . . . . . . . . . . . . . . . . 38
5.2. Installation guidelines. . . . . . . . . . . . . . . . . . . . . . . . . . . . . . . . . . . . . . . . . . . . . . 42
5.3. Motor installation (if applicable). . . . . . . . . . . . . . . . . . . . . . . . . . . . . . . . . . . . 44
5.4. Electrical connections. . . . . . . . . . . . . . . . . . . . . . . . . . . . . . . . . . . . . . . . . . . . . . 48
5.5. Pictographs. . . . . . . . . . . . . . . . . . . . . . . . . . . . . . . . . . . . . . . . . . . . . . . . . . . . . . . . 48
6. Operation. . . . . . . . . . . . . . . . . . . . . . . . . . . . . . . . . . . . . . . . . . . . . . . . . . . . . . . . . . 49
6.1. Initial start-up preparation. . . . . . . . . . . . . . . . . . . . . . . . . . . . . . . . . . . . . . . . . . 49
6.2. Intake lter. . . . . . . . . . . . . . . . . . . . . . . . . . . . . . . . . . . . . . . . . . . . . . . . . . . . . . . . . 49
6.3. Start the pump. . . . . . . . . . . . . . . . . . . . . . . . . . . . . . . . . . . . . . . . . . . . . . . . . . . . . 50
6.4. During operation. . . . . . . . . . . . . . . . . . . . . . . . . . . . . . . . . . . . . . . . . . . . . . . . . . . 50
6.5. Stop the pump. . . . . . . . . . . . . . . . . . . . . . . . . . . . . . . . . . . . . . . . . . . . . . . . . . . . . 50
6.6. Taking out of operation. . . . . . . . . . . . . . . . . . . . . . . . . . . . . . . . . . . . . . . . . . . . . 51
7. Maintenance. . . . . . . . . . . . . . . . . . . . . . . . . . . . . . . . . . . . . . . . . . . . . . . . . . . . . . . 52
7.1. Preventive maintenance schedule. . . . . . . . . . . . . . . . . . . . . . . . . . . . . . . . . . 52
7.2. Oil specications . . . . . . . . . . . . . . . . . . . . . . . . . . . . . . . . . . . . . . . . . . . . . . . . . . . 53
03/2021 - ©DekkerPage 3300943860_A

7.3. Storage. . . . . . . . . . . . . . . . . . . . . . . . . . . . . . . . . . . . . . . . . . . . . . . . . . . . . . . . . . . . . 54
7.4. Service kits. . . . . . . . . . . . . . . . . . . . . . . . . . . . . . . . . . . . . . . . . . . . . . . . . . . . . . . . . 54
7.5. Disposal of used material . . . . . . . . . . . . . . . . . . . . . . . . . . . . . . . . . . . . . . . . . . 54
8. Adjustments and servicing. . . . . . . . . . . . . . . . . . . . . . . . . . . . . . . . . . . . . . . . . 55
8.1. Drive motor. . . . . . . . . . . . . . . . . . . . . . . . . . . . . . . . . . . . . . . . . . . . . . . . . . . . . . . . . 55
8.2. Exhaust lter replacement . . . . . . . . . . . . . . . . . . . . . . . . . . . . . . . . . . . . . . . . . 55
8.3. Oil and oil lter change. . . . . . . . . . . . . . . . . . . . . . . . . . . . . . . . . . . . . . . . . . . . . 57
8.4. Cleaning the intake lter (optional) element. . . . . . . . . . . . . . . . . . . . . . . 58
8.5. Replacing V-belts. . . . . . . . . . . . . . . . . . . . . . . . . . . . . . . . . . . . . . . . . . . . . . . . . . 58
8.6. V-belt tensioning. . . . . . . . . . . . . . . . . . . . . . . . . . . . . . . . . . . . . . . . . . . . . . . . . . . 59
8.6.1. How to use the V-belt tension meter. . . . . . . . . . . . . . . . . . . . . . . . . . 59
9. Fault nding. . . . . . . . . . . . . . . . . . . . . . . . . . . . . . . . . . . . . . . . . . . . . . . . . . . . . . . 61
10. Accessories. . . . . . . . . . . . . . . . . . . . . . . . . . . . . . . . . . . . . . . . . . . . . . . . . . . . . . . 64
03/2021 - ©DekkerPage 4300943860_A

List of Figures
Figure 1: Vacuum and ow rate. . . . . . . . . . . . . . . . . . . . . . . . . . . . . . . . . . . . . . . . . . 15
Figure 2: Pump components. . . . . . . . . . . . . . . . . . . . . . . . . . . . . . . . . . . . . . . . . . . . . 17
Figure 3: Air ow components. . . . . . . . . . . . . . . . . . . . . . . . . . . . . . . . . . . . . . . . . . . . 18
Figure 4: Flow diagram-RVL007 and RVL010. . . . . . . . . . . . . . . . . . . . . . . . . . . . . . . 19
Figure 5: Flow diagram-RVL016. . . . . . . . . . . . . . . . . . . . . . . . . . . . . . . . . . . . . . . . . . . 20
Figure 6: Flow diagram-RVL030 and RVL040. . . . . . . . . . . . . . . . . . . . . . . . . . . . . . . 21
Figure 7: Flow diagram-RVL080, RVL185 and RVL212. . . . . . . . . . . . . . . . . . . . . . . . 22
Figure 8: Flow diagram-RVL125. . . . . . . . . . . . . . . . . . . . . . . . . . . . . . . . . . . . . . . . . . . 23
Figure 9: Flow diagram-RVL400. . . . . . . . . . . . . . . . . . . . . . . . . . . . . . . . . . . . . . . . . . 24
Figure 10: RVL007 (50 Hz - 60 Hz). . . . . . . . . . . . . . . . . . . . . . . . . . . . . . . . . . . . . . . . . 25
Figure 11: RVL010 (50 Hz - 60 Hz). . . . . . . . . . . . . . . . . . . . . . . . . . . . . . . . . . . . . . . . . 25
Figure 12: RVL016 (50 Hz - 60 Hz). . . . . . . . . . . . . . . . . . . . . . . . . . . . . . . . . . . . . . . . . 26
Figure 13: RVL030 (50 Hz - 60 Hz). . . . . . . . . . . . . . . . . . . . . . . . . . . . . . . . . . . . . . . . . 26
Figure 14: RVL040 (50 Hz - 60 Hz). . . . . . . . . . . . . . . . . . . . . . . . . . . . . . . . . . . . . . . . . 27
Figure 15: RVL080 (50 Hz - 60 Hz). . . . . . . . . . . . . . . . . . . . . . . . . . . . . . . . . . . . . . . . . 27
Figure 16: RVL125 (50 Hz - 60 Hz). . . . . . . . . . . . . . . . . . . . . . . . . . . . . . . . . . . . . . . . . . 28
Figure 17: RVL185 (50 Hz - 60 Hz). . . . . . . . . . . . . . . . . . . . . . . . . . . . . . . . . . . . . . . . . 28
Figure 18: RVL212 (50 Hz - 60 Hz). . . . . . . . . . . . . . . . . . . . . . . . . . . . . . . . . . . . . . . . . . 29
Figure 19: RVL400 (50 Hz - 60 Hz). . . . . . . . . . . . . . . . . . . . . . . . . . . . . . . . . . . . . . . . . 29
Figure 20: Dimension drawing RVL007. . . . . . . . . . . . . . . . . . . . . . . . . . . . . . . . . . . . 38
Figure 21: Dimension drawing RVL010. . . . . . . . . . . . . . . . . . . . . . . . . . . . . . . . . . . . 38
Figure 22: Dimension drawing RVL016. . . . . . . . . . . . . . . . . . . . . . . . . . . . . . . . . . . . 39
Figure 23: Dimension drawing RVL030. . . . . . . . . . . . . . . . . . . . . . . . . . . . . . . . . . . . 39
Figure 24: Dimension drawing RVL040. . . . . . . . . . . . . . . . . . . . . . . . . . . . . . . . . . . . 40
Figure 25: Dimension drawing RVL080. . . . . . . . . . . . . . . . . . . . . . . . . . . . . . . . . . . . 40
Figure 26: Dimension drawing RVL125. . . . . . . . . . . . . . . . . . . . . . . . . . . . . . . . . . . . . 41
Figure 27: Dimension drawing RVL185. . . . . . . . . . . . . . . . . . . . . . . . . . . . . . . . . . . . . 41
Figure 28: Dimension drawing RVL212. . . . . . . . . . . . . . . . . . . . . . . . . . . . . . . . . . . . . 42
Figure 29: Dimension drawing RVL400. . . . . . . . . . . . . . . . . . . . . . . . . . . . . . . . . . . . 42
Figure 30: Motor coupling half position RVL080. . . . . . . . . . . . . . . . . . . . . . . . . . . . 45
Figure 31: Motor coupling half position RVL185 and RVL212. . . . . . . . . . . . . . . . . . 46
Figure 32: Belt tensioning. . . . . . . . . . . . . . . . . . . . . . . . . . . . . . . . . . . . . . . . . . . . . . . . 59
03/2021 - ©DekkerPage 5300943860_A

1. Safety and compliance
1.1. Denition of Warnings and Cautions
NOTICE:
For safe operation from the start, read these instructions carefully
before you install or commission the equipment and keep them safe
for future use.
Read all the safety instructions in this section and the rest of this
manual carefully and make sure that you obey these instructions. The
equipment must only be operated and maintained by trained
personnel in the proper condition and as described in this instruction
manual.
Obey local and state requirements and regulations. If you have any
questions about safety, operation or maintenance of the device,
please contact our nearest subsidiary.
Important safety information is highlighted as warning and caution
instructions. Obey these instructions.
WARNING:
If you do not obey a warning, there is a risk of injury or death.
Different symbols are used according to the type of hazard.
CAUTION:
If you do not obey a caution, there is a risk of minor injury, damage to
equipment, related equipment or process.
NOTICE:
Information about properties or instructions for an action which, if
ignored, will cause damage to the pump or the system.
We reserve the right to change the design and the stated data. The
illustrations are not binding.
Keep the instructions for future use.
1.2. Trained personnel
“Trained personnel” for the operation of this equipment are
03/2021 - ©DekkerPage 6300943860_A
300943860_A - Safety and compliance

▪skilled workers with knowledge in the elds of mechanics, electrical
engineering, pollution abatement and vacuum technology and
▪personnel specially trained for the operation of vacuum pumps.
03/2021 - ©DekkerPage 7300943860_A
300943860_A - Safety and compliance

1.3. Safety symbols
The safety symbols on the products show the areas where care and
attention is necessary.
The safety symbols that follow are used on the product or in the
product documentation.
Warning/Caution
An appropriate safety instruction must be followed or
caution to a potential hazard exists.
Warning - Automatic start up
The equipment can be remotely started.
03/2021 - ©DekkerPage 8300943860_A
300943860_A - Safety and compliance

2. Important safety information
2.1. General precautions
WARNING: AUTOMATIC RESTART AFTER VOLTAGE
FAILURE
Risk of injury and damage to equipment. If the machine is equipped
with an automatic restart after voltage failure function and if this
function is active, the machine will restart automatically when the
power is restored if it was running when the power was interrupted.
1. The operator must employ safe working practices and observe all
related work safety requirements and regulations.
2. If any of the following statements does not comply with the
applicable legislation, the stricter of the two shall apply.
3. The vacuum pump is designed for handling atmospheric air only.
No other gases, vapours or fumes should be exposed to the vacuum
pump intake or processed by the vacuum pump.
4. Before any maintenance, repair work, adjustment or any other non-
routine checks, stop the vacuum pump, press the emergency stop
button, switch off the voltage and make sure that the pump system
is at atmospheric pressure level. In addition, the power isolating
switch must be opened and locked.
5. Avoid contact with pump intake during operation.
6. The owner is responsible for maintaining the unit in a safe
operating condition. Parts and accessories shall be replaced if
unsuitable for safe operation.
7. Do not walk or stand on the unit or its components.
2.2. Safety precautions during installation
The machine must only be lifted using suitable equipment in
accordance with the applicable safety regulations. Loose or pivoting
parts must be securely fastened before lifting. It is strictly forbidden to
stay in the risk zone under a lifted load. Lifting acceleration and
deceleration must be kept within safe limits. Wear a safety helmet
when working in the area of overhead or lifting equipment.
1. The unit is designed for indoor use. If the unit is installed outdoors,
special precautions must be taken, consult your supplier.
2. Place the machine where the ambient air is as cool and clean as
possible. If necessary, install a suction duct. Do not obstruct the air
inlet. Water handling capacity is limited.
3. Blanking anges, plugs, caps and desiccant bags must be removed
before connecting the pipes.
4. Air hoses must be of the correct size and suitable for the working
pressure. Never use frayed, damaged or worn hoses. Distribution
03/2021 - ©DekkerPage 9300943860_A
300943860_A - Important safety information

pipes and connections must be of the correct size and suitable for
the working pressure.
5. The aspirated air must be free of ammable fumes, vapours and
particles, e.g. paint solvents that can lead to internal re or
explosion.
6. Arrange the air intake such that loose clothing worn by people
cannot be sucked in.
7. No external force may be exerted on the inlet and outlet
connections, the connected pipes must be free of strain.
8. If remote control is installed, the machine must bear a clear sign
stating:
DANGER: This machine is remotely controlled and may start
without warning.
The operator must make sure that the machine is stopped,
depressurised and that the electrical isolating switch is open, locked
and labelled with a temporary warning before any maintenance or
repair. As a further safeguard, persons switching remotely
controlled machines must take adequate precautions to make sure
that there is no one checking or working on the machine. To this
end, a suitable notice shall be afxed to the start equipment.
9. Air-cooled machines must be installed in such a way that an
adequate ow of cooling air is available and that the exhausted air
does not recirculate to the inlet.
10. The electrical connections must correspond to the applicable codes.
The machines must be earthed and protected against short circuits
by fuses in all phases. A lockable power isolating switch must be
installed near the pump.
11. On machines with an automatic start/stop system or if the
automatic restart function after voltage failure is activated, a sign
stating "This machine may start without warning" must be afxed
near the instrument panel.
12. In multiple vacuum pump systems, manual valves must be installed
to isolate each pump. Non-return valves (check valves) must not be
relied upon for isolating multiple systems.
13. Never remove or tamper with the safety devices, guards or
insulation installed on the machine.
14. Piping or other parts with a temperature in excess of 70 ˚C (158 ˚F)
and which may be accidentally touched by personnel in normal
operation must be guarded or insulated. Other high temperature
piping must be clearly marked.
15. For water-cooled machines, the cooling water system installed
outside the machine has to be protected by a safety device with set
pressure according to the maximum cooling water inlet pressure.
16. If the ground is not level or has variable inclination, consult the
manufacturer.
17. Pump outlet air contains traces of oil mist. Make sure that it is
compatible with the working environment.
03/2021 - ©DekkerPage 10300943860_A
300943860_A - Important safety information

This manual suits for next models
9
Table of contents
Other Dekker Water Pump manuals
Popular Water Pump manuals by other brands

Sykes AmeriPumps
Sykes AmeriPumps GP100M Operation and maintenance instructions

DUROMAX
DUROMAX XP WX Series user manual

BRINKMANN PUMPS
BRINKMANN PUMPS SBF550 operating instructions

Franklin Electric
Franklin Electric IPS Installation & operation manual

Xylem
Xylem e-1532 Series instruction manual

Milton Roy
Milton Roy PRIMEROYAL instruction manual