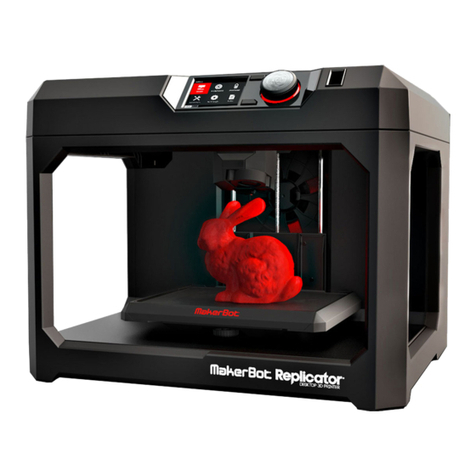
CraftUnique CraftBot 3 Supervisor User manual


2
CraftBot 3
TABLE OF CONTENTS
INTRODUCTION 3
IMPORTANT 4
WARNINGS 4
CAUTION! 5
CONTENTS OF THE BOX 5
INTRODUCING THE CRAFTBOT 3D PRINTER 6
UNPACKING THE CRAFTBOT PRINTER 7
ASSEMBLING THE CRAFTBOT PRINTER 7
1. Installing the lament guide tube holder 7
2. Installing the lament guide tube 8
3. Installing the lament spool holder 8
4. Mounting the lament spool 8
5. Attaching the power cord 8
USING THE CRAFTBOT PRINTER 9
1. Switching on the appliance 9
2. Setting the language 9
3. Setting the heat measurement 9
4. Setting the clock 9
5. Connecting CraftBot 3 to a wireless network 10
6. Leveling the build plate 10
7. Heating up the printer 11
8. Loading the lament 12
9. Removing the lament from the extruder 13
10. FMS operation 13
11. Dual head calibration X-Y 14
12. Dual head calibration Z 15
13. Printing objects from a pendrive 15
14. Conguration of colored led strip 16
15. Printing modes 16
16. In-print adjustments 17
17. Mobile application 18
18. Navigating the build plate and the extruder 19
19. Adjusting the lighting 20
20. Sound settings 20
21. Activating the fans 20
22. Using CraftWare to convert 3D design into printing commands 20
23. Cleaning and maintenance 22
24. Troubleshooting 23
25. Firmware update 23
26. Applying a new layer of protective Kapton sheet to your build plate 24
27. Guarantee 25
28. Limitation of liability 25
APPENDIX 26
Technical Specication 26

3
CraftBot 3
INTRODUCTION
Congratulations on your purchase of the CraftBot 3D printer and welcome to the word of 3D crafting! At
CraftUnique we believe that 3D printing opens a new window to enhance creativity. It oers outstanding
crafting experience even without prior programming or 3D printing experience.
How does the printer work? The CraftBot 3D printer makes solid, three-dimensional objects out of
melted plastic lament. Design Your objects with the help of a 3D design program. Then use the
CraftWare program (downloadable from www.craftunique.com/craftware) to transform Your 3D design
les into printing instructions for the CraftBot 3D printer. Transfer this to Your CraftBot 3D printer via
USB drive or USB cable. The CraftBot 3D printer will melt plastic laments and squeeze it out onto the
building plate in thin lines to print your object layer by layer.

4
CraftBot 3
IMPORTANT
Read this user manual carefully before you use the appliance, and save it for future reference.
All information in this user manual is subject to change at any time without notice and is provided for
convenience purposes only. CraftUnique reserves the right to modify or revise this user manual in its
sole discretion and at any time. By using the manual, you agree to be bound by any modications and/or
WARNINGS
• Check if the voltage indicated on the bottom of the appliance corresponds to the local mains voltage
before you connect the appliance.
• Do not immerse cord, plug or main body in water or any other liquid. This may cause electrical
shock.
• Do not use the appliance if the plug, the mains cord or the appliance itself is damaged or not
operating properly.
• If the mains cord is damaged, you must have it replaced in order to avoid hazard.
• Only connect the appliance to grounded wall sockets.
• Keep the mains cord away from hot surfaces.
• Do not let the mains cord hang over the edge of the table or worktop on which the appliance stands.
• Keep the appliance and its cord out of the reach of children.
• This appliance can be used by children aged from 8 years and above; and by persons with reduced
physical, sensory or mental capabilities or lack of experience and knowledge only under supervision
and adequate instruction concerning the use of the appliance in a safe way, understanding the
hazards involved. Cleaning and user maintenance shall not be made by children.
• Children can receive great educational benets from designing 3D objects, but the printing process
should not be done by small children.
• Do not touch moving parts or heated elements, it can cause injuries.
• Never reach inside the machine when turned on. Dierent parts of the machine (mainly the extruder
and heated build plate) operate at very high temperatures and can cause severe burns.
• Never leave the CraftBot 3D printer unattended while it is plugged in, and is in operation.
• Make sure that the power supply is o and that the power cord is disconnected before servicing.
Allow at least 5 minutes for the device to cool down after unplugging it before reaching inside to
service.
• Always turn o the printer and disconnect from the computer when it is not being used.

5
CraftBot 3
CONTENTS
OF THE BOX
It’s time to unpack additional
parts. Below you can see con-
tents of the box. First of all, check
the list to make sure nothing is
missing!
1. Filament encoder (2x)
2. Filament guide tube (2x)
3. Filament spool holder (2x)
4. Hex wrenches (5x)
5. USB Flash storage
6. USB A-B cable
7. AC power cable
8. Spacer card
You should also get 2 spools of
PLA lament along with the box
containing your CraftBot.
1
6
2
4
7
3
5
8
CAUTION!
• Make sure to level the build plate properly before use.
• Make sure not to force anything, whether it be during unpacking, setup, operation or service.
• Service and oil the suggested parts as often as recommended. Use only substances recommended
by CraftUnique.
• The CraftBot 3D printer melts plastic during printing. Plastic odors are emitted during this operation.
Make sure to set up the CraftBot 3D printer in a well-ventilated area.

6
CraftBot 3
3 3
2
2
5
6
7
9
10
11
13
14
8
8
INTRODUCING THE
CRAFTBOT 3D PRINTER
1. Touchscreen LCD display
2. Filament guide tube
3. Separated dual heads
4. Removable build plate
5. Leveling knobs
6. Filament spool holder
7. Filament spool
8. FMS encoder
9. Separated dual heads
10. USB for ash drive
11. USB for PC connection
12. AC power socket and ON/OFF switch
13. Encoder 1 connection
14. Encoder 2 connection
1
4
12

UNPACKING
THE CRAFTBOT PRINTER
1. Place the CraftBot cardboard box on an even surface with open space around.
2. Open the box with care, avoid damaging the contents when using any tool, cutter.
3. Remove the protective cardboard cover. You will nd the Quick Start Guide atop of the inner
packaging.
4. The accessories (including a USB pen drive with copy of the CraftBot user manual) are placed in the
upper foam tray. We suggest you keeping the accessories in a secure place, avoid losing any of them.
5. The CraftBot 3D printer is under the upper foam tray enclosed in a protective plastic bag supported
with side foams to avoid any damage while shipping.
6. First remove the side foams then open the plastic bag.
7. Firmly grasp the frame of the CraftBot. Make sure not to touch the extruder or the electronic panel
inside the device!
8. Consider its weight. Request physical help if needed. Lift the printer from inside the plastic cover
and remove out of the cardboard packaging.
9. Place the CraftBot 3D printer on a stable and even surface with sucient space around.
10. Remove the cardboard panel xing the two heads inside the printer.
ASSEMBLING
THE CRAFTBOT PRINTER
1. INSTALLING THE ENCODERS
• Select the desired position for the encoders. Choose their position so that the lament spool bracket
ts beside them.
• Plug the connectors at the ends of the encoder cables into the encoder ports.
• When looking at the machine, the extruder on the left side is number 1, and the extruder on the
right is number 2.
• The two encoder connectors are found beneath the USB connector on the side of the machine. The
upper one is number 1 and the lower one is number 2.
7
CraftBot 3
3 4 6 10

8
CraftBot 3
2. INSTALLING THE FILAMENT GUIDE TUBE
• Locate the lament guide tube.
• Fit the lament guide tube to the extruder and the encoder.
3. INSTALLING THE FILAMENT SPOOL HOLDERS
• Locate both of the lament spool holders.
• Using a hex wrench, install the lament spool holder next to the FMS
encoder.
4. MOUNTING THE FILAMENT SPOOLS
• Fit both of the lament spools onto the lament spool holder so that
the lead end keeps its course when the lament is fed into the guide
tube holder.
5. ATTACHING THE POWER CORD
• Ensure that the power switch on the CraftBot is set to the OFF position.
• Find and then insert the AC power cord into the power input on the
back of the CraftBot.

9
CraftBot 3
USING
THE CRAFTBOT PRINTER
1. SWITCHING ON THE APPLIANCE
• Switch on CraftBot by the ON/OFF button located on the back
part of the appliance.
• The LCD panel on the front will light up.
2. SETTING THE LANGUAGE
• Go to „Settings”
• Navigate to the right with the arrow.
• Choose LNG.
• Select the desired language.
• Conrm selection.
• Use the left arrow to get back to the main menu.
3. SELECTING THE HEAT MEASUREMENT
Temperature can be displayed in Celsius or Fahrenheit.
• Select „Settings” on the LCD menu.
• Navigate to the right with the arrow.
• Press the ⁰C/⁰F button.
• By touching the button, the scale will change from Fahrenheit to
Celsius and vice versa.
• Use the left arrow to get back to the main menu.
4. SETTING THE CLOCK
You can set the time and reset the operating hour counter. This
function helps to track printing time between maintenance sessions.
• Select „Settings” on the LCD menu.
• Navigate to the right with the arrow.
• Press the Clock button.
• Set the time by using the up and down arrows. Switch between
minute and hour by pushing the right arrow.
• Total operating hours are measured, it cannot be reseted.
• Counter can be reset by reset button , which helps tracking the
elapsed time between the maintenance sessions.

10
CraftBot 3
5. CONNECTING CRAFTBOT 3 TO A WIRELESS NETWORK
• Select „Settings” on the LCD menu.
• Navigate to the right with the arrow.
• Choose Wi-Fi.
• Select „search Wi-Fi network” icon – the left icon in the bottom
row.
• Scroll down with up-down arrows. Select desired network with
the left arrow.
• Enter password.
• Conrm password with the tick mark in right bottom corner.
• Selected Wi-Fi network is displayed indicating host name and LAN IP.
6. LEVELING THE BUILD PLATE
CraftBot has a leveling procedure which ensures that the extruder
and the heated build plate are at optimal distance and they must
be leveled evenly. Smaller gap or uneven levelling may lead to the
damaging of the Kapton cover of the build plate or the extruder.
• Select „Settings” on the LCD menu.
• Select the Leveling icon – three crossed circles which represent
the three knobs and screw.
• Follow the step-by-step instructions on the LCD screen:
• Turn all three black knobs holding the build plate all the way to
the right until the springs in between have been compressed fully
and the knobs begin to feel tight. (There is one knob at the front
in the middle and two in the back left and right corners of the
build plate). Do not force them!
• Locate the 0.3mm spacer card in the top foam among the other
accessories. This card will ensure the optimal distance between the
build plate and the extruder. Please keep it for future use as well.
• The preprogrammed leveling process will rst set the front center
point. Place the spacer card above the front center black knob on
the build plate, then press the right arrow on the screen. Adjust
the front center knob if needed based on the instruction on the
screen.
• Repeat the process with the two back knobs. First the right back,
then the left back knob will be adjusted.
• Before switching from knob to knob, please remove and replace
the leveling card as necessary.
• Process is repeated twice to make sure that all 3 knobs are in the
correct position.
• As a result, the building plate should be evenly calibrated.
• You can return to the main menu by pressing the right arrow.
Table of contents
Other CraftUnique 3D Printer manuals