Cool-Living CL-D025BA-35PT User manual
DEHUMIDIFIER
Owner’s Manual
KEEP THESE INSTRUCTIONS FOR FUTURE REFERENCE
CL-D025BA-35PT
CL-D026BA-50PT


THANK YOU
Thank you for purchasing a COOL-LIVING Dehumidifier. This User
Manual is intended to provide you with important information needed
to set up, operate, maintain and troubleshoot this product.
Please take a few moments to read the instructions and familiarize
yourself with all the operational aspects of your new COOL-LIVING
Dehumidifier.
SAFETY WARNINGS
When using the unit, please read the following safety instructions:
DO NOT touch the dehumidifier or the electrical plug with wet hands.
Always ensure effective grounding. Incorrect grounding may cause electric
shock.
Do NOT exceed the rating of the power outlet or connection device.
Never use or store gasoline or other flammable vapor or liquid near this
unit unless instructed by this manual.
Disconnect the power if strange sounds, smell, or smoke comes from the
dehumidifier.
Always unplug the dehumidifier before emptying the water bucket.
You should never try to take apart or repair the dehumidifier by yourself.
1

Do NOT take the water bucket out while the dehumidifier is working.
This appliance has been manufactured for use in domestic environments
and must not be used for other purposes.
Maintain a 12-18 inch clearance space around this unit. Do not block or
cover air inlet or outlet grilles.
Never insert your finger or other foreign objects into grills or openings.
Take special care to warn children of these dangers.
If the unit is damaged or it malfunctions, do not continue to operate it.
Unplug the product from the electrical outlet. Refer to the troubleshooting
section and contact the customer support center.
DO NOT cover the air inlet or outlet on the appliance as this may cause the
unit to fail.
Do NOT place flower vases or other water containers on top of the unit.
Water may spill inside the unit, causing insulation failure and electrical
shock or fire.
To reduce the risk of fire or electric shock, do not use this dehumidifier with
any solid-state speed control device.
Risk Of Fire Or Explosion. Flammable Refrigerant Used. To Be Repaired Only By Trained
Service Personnel. Do Not Puncture Refrigerant Tubing.
Risk Of Fire Or Explosion. Dispose Of Properly In Accordance With Federal Or Local
Regulations. Flammable Refrigerant Used.
•
•
2

FEATURES
Powerful Dehumidifying Capability
Taking advantage of refrigeration technology, the dehumidifier powerfully removes moisture
from the air to decrease the humidity level of the room and keep the indoor air dry and
comfortable.
Unique Portable Design
The dehumidifier is built to be compact and lightweight. The casters on the bottom of the unit
make it easy to move from room to room.
Adjustable Humidistat
Different dehumidification levels can be selected according to different room requirements.
Save Money
This dehumidifier is Energy-Star rated, and could quickly remove moisture from the air without
running up your utility bill. Energy Star units not only save energy for the environment, but also
cost 30% less to save your money comparing to non-Energy Star units.
Automatic Defrost
When frost builds up on the evaporator coils, the compressor will cycle off and the fan will
continue to run until the frost disappears. When the coils are completely defrosted, the
compressor or fan (depending on the model) will automatically restart and dehumidification
will resume.
PRODUCT OVERVIEW
1. Control Panel 2. Handle 3. Water bucket
4. Air Filter 5. Air Outlet Grille 6. Drain Hose Outlet
7. Power Cord 8. Power Cord Buckle 9. Caster
3
OPERATING INSTRUCTIONS
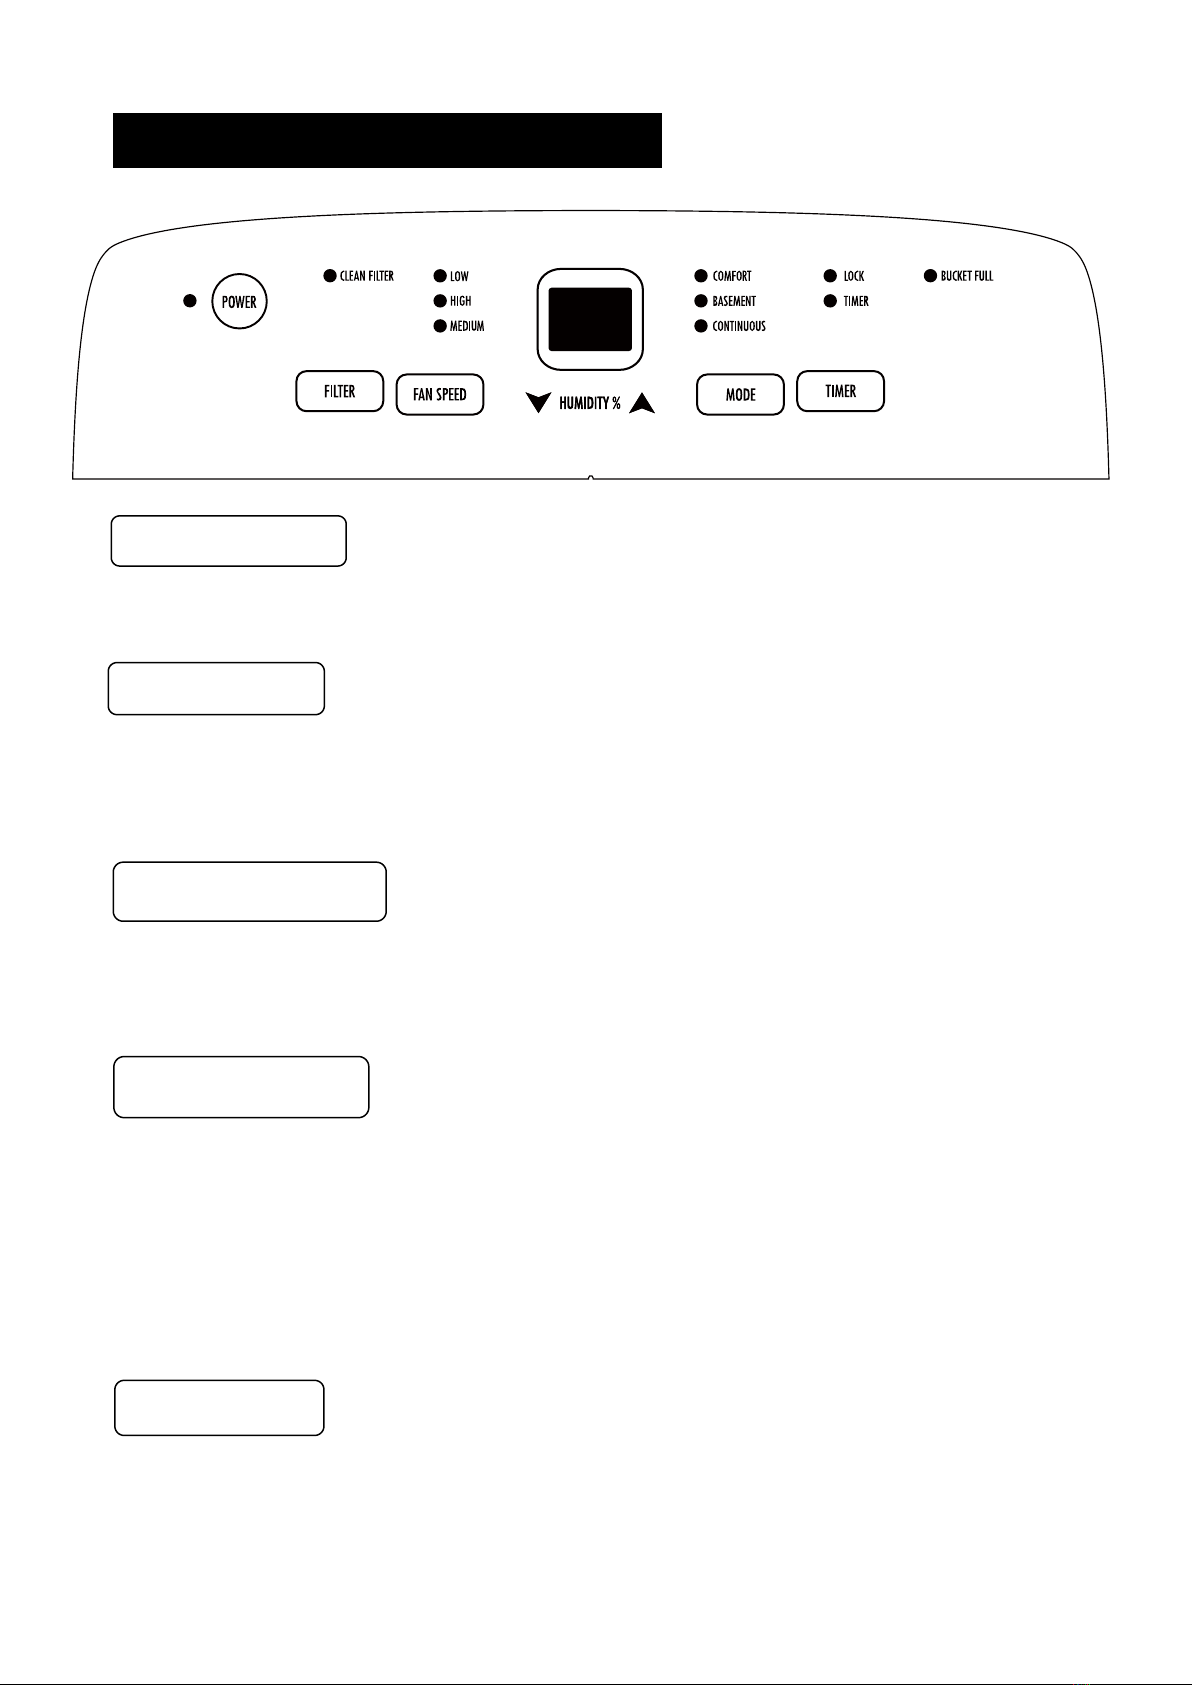
Press to turn the dehumidifier on and off.
When the Filter Alert Light is ON, it is time to clean the filter. Switch the unit OFF and
carefully remove the filter from the unit and clean. Replace the filter and switch ON the unit.
Press to cycle through High, Medium, or Low fan modes. Higher fan speeds lead to
increased moisture removal. When humidity has been reduced or quiet operation is
preferred, set the fan to Medium or Low.
POWER Button
FILTER Button
FAN SPEED Button
When the unit is switched ON, the Display Screen shows the current humidity percentage.
Press ▲ or ▼ to select your preferred humidity level. The humidity is adjusted in
increments of 5% by pressing ▲ or ▼. The adjustable Relative Humidity (RH) range is
between 35% RH to 80% RH. If you want the dehumidifier to operate continuously
regardless of the room humidity, press the MODE button until you see “CO” on the digital
display. This will enable continuous operation and the “Continuous” indicator will light up on
the control panel.
Preset humidity level settings allow the user to easily move the dehumidifier room-to-room
and select the corresponding mode for the location in which the dehumidifier is operating
for optimum performance. Press the MODE button to choose from comfort and basement.
HUMIDITY Button
MODE Button
4

●Timer Auto On - To program the unit to automatically turn on, press the TIMER button
when the unit is off. Press ▲or to increase or decrease the timer in 30 min increments (.5
hours) up to 10 hours. After 10 hours, each press of the ▲or ▼buttons will increase the
timer in 1 hour increments up to 24 hours. Once the desired time is reached, the unit will
automatically turn on.
●Timer Auto Shut-Off - To program the unit to automatically turn off, press the TIMER
button when the unit is on. Each press of the ▲ or ▼ buttons will change the timer setting in
30 min increments ( .5 hours) up to 10 hours. After 10 hours, each press of the ▲ or ▼
buttons will increase or decrease the timer in 1 hour increments up to 24 hours. Once the
desired time is over, the unit will automatically power off.
●Child-Lock Mode - To lock the control panel, press and hold the TIMER button for 3
seconds. Locking the control panel prevents someone from accidentally changing the
settings. When locked, the LOCK indicator will light up. Press and hold the TIMER button
for 3 seconds to unlock the control panel.
TIMER Button
5
REMOVING COLLECTED WATER
There are 2 options to remove water collected by your dehumidifier.
●Option 1: Drain Bucket.
When the drainage bucket is full, the bucket full indicator light will turn on, the operation will
stop automatically and the buzzer will beep 3 times to alert the user, that the water need to
be emptied from the drainage bucket.
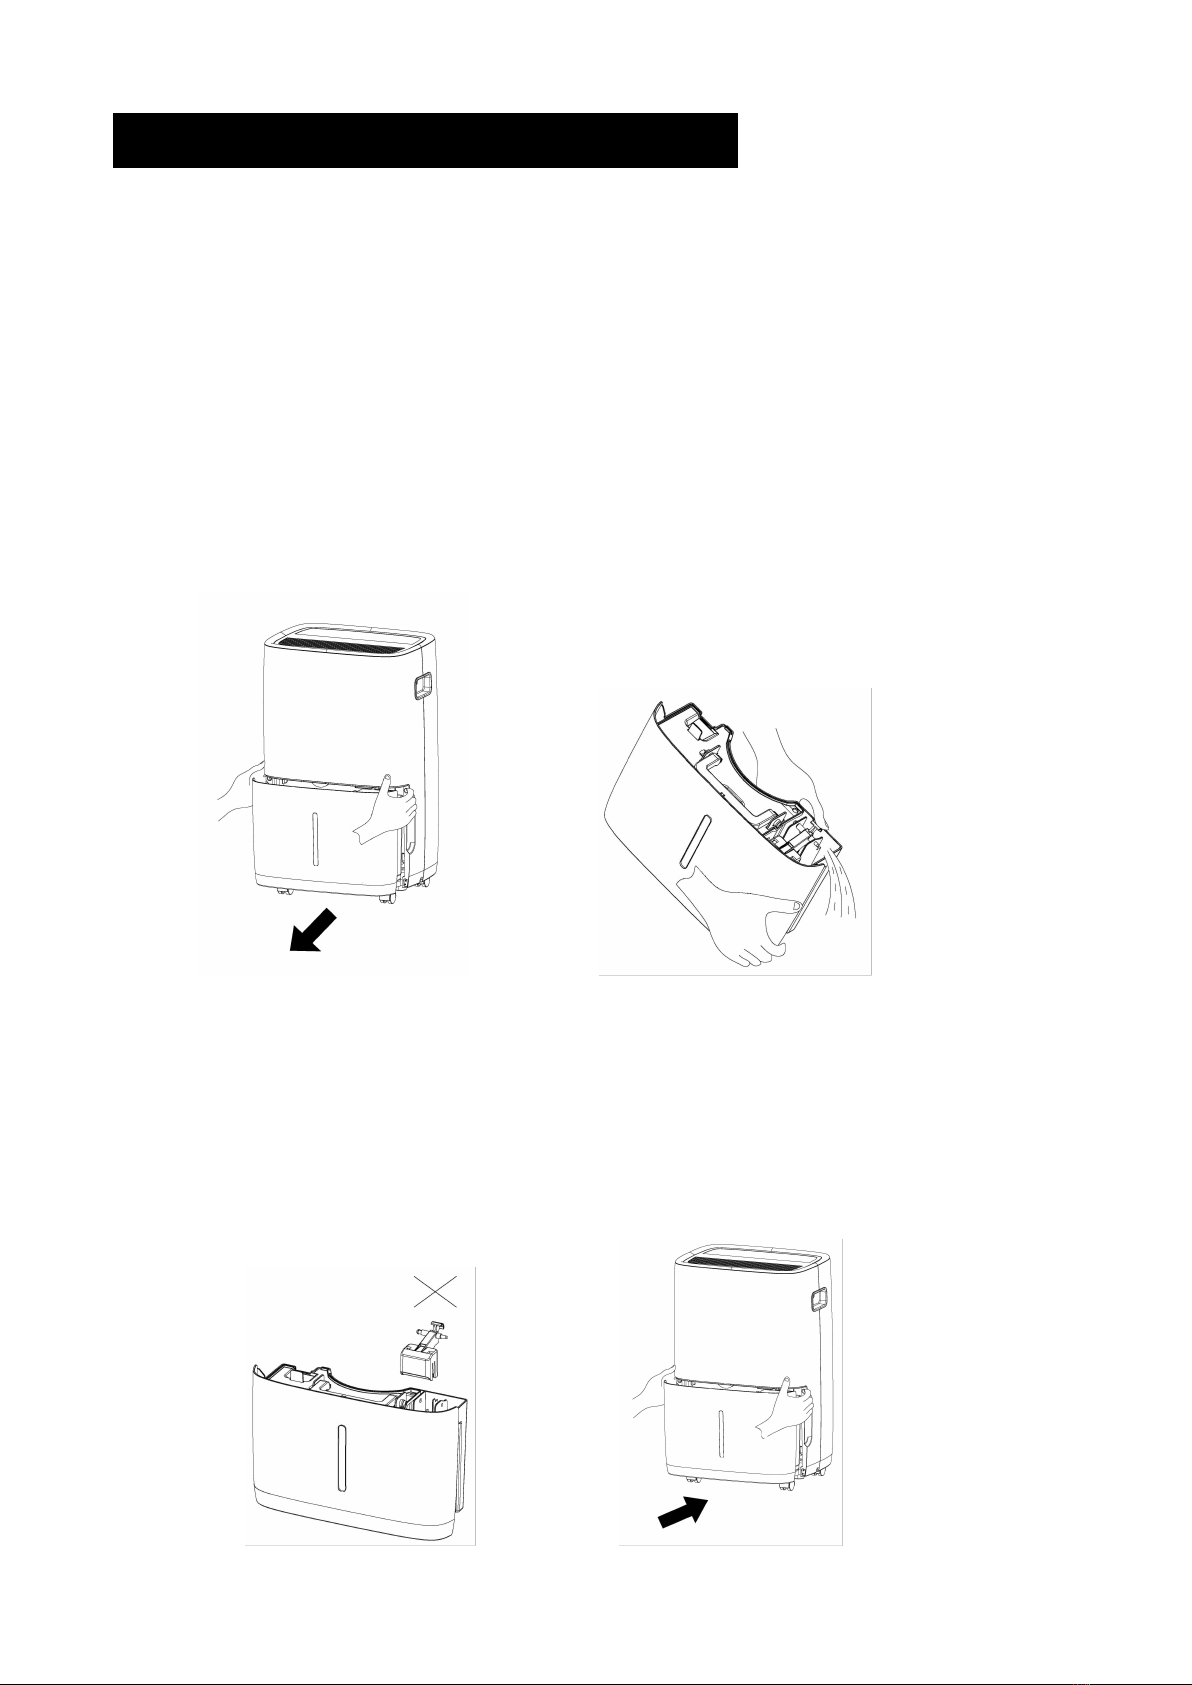
Emptying the Drainage bucket
1. Lightly press on the sides of the bucket with both hands and pull the bucket out gently.
2. Drain the collected water.
NOTE
1. Do not remove the float from the water bucket. The water full sensor will no longer be
able to detect the water level correctly without the float and water may leak from the water
bucket.
2. If the drainage bucket is dirty, wash it with cold or lukewarm water. Do not use detergent,
scouring pads, chemically treated dust cloths, gasoline, benzene, thinner, or other
solvents, as these can scratch and damage the bucket and cause water leakage.
3. When replacing the drainage bucket, press the bucket firmly into place with both hands.
6
●Option 2: Continuous Drainage
Garden Hose Installation Setup
Water can be automatically emptied by attaching a garden hose to the continuous drainage
port on the back of the dehumidifier. This will allow the unit to run continuously (depending
on the selected humidity level) without having to empty the water bucket. To drain, simply
attach a standard garden hose (not included). The thread standard for garden hoses in the
US and its territories is known as GHT or "garden hose thread" which has an outer
diameter of 1 1/16 inches (1.0625 inches or 27.0 mm) and a pitch of 11.5 TPI.
• Place dehumidifier on a level surface
• Unscrew the cap on the back of the unit to access the garden hose nozzle
• Thread a garden hose (not included) onto the accessible nozzle, lead to a floor drain and
cut to length
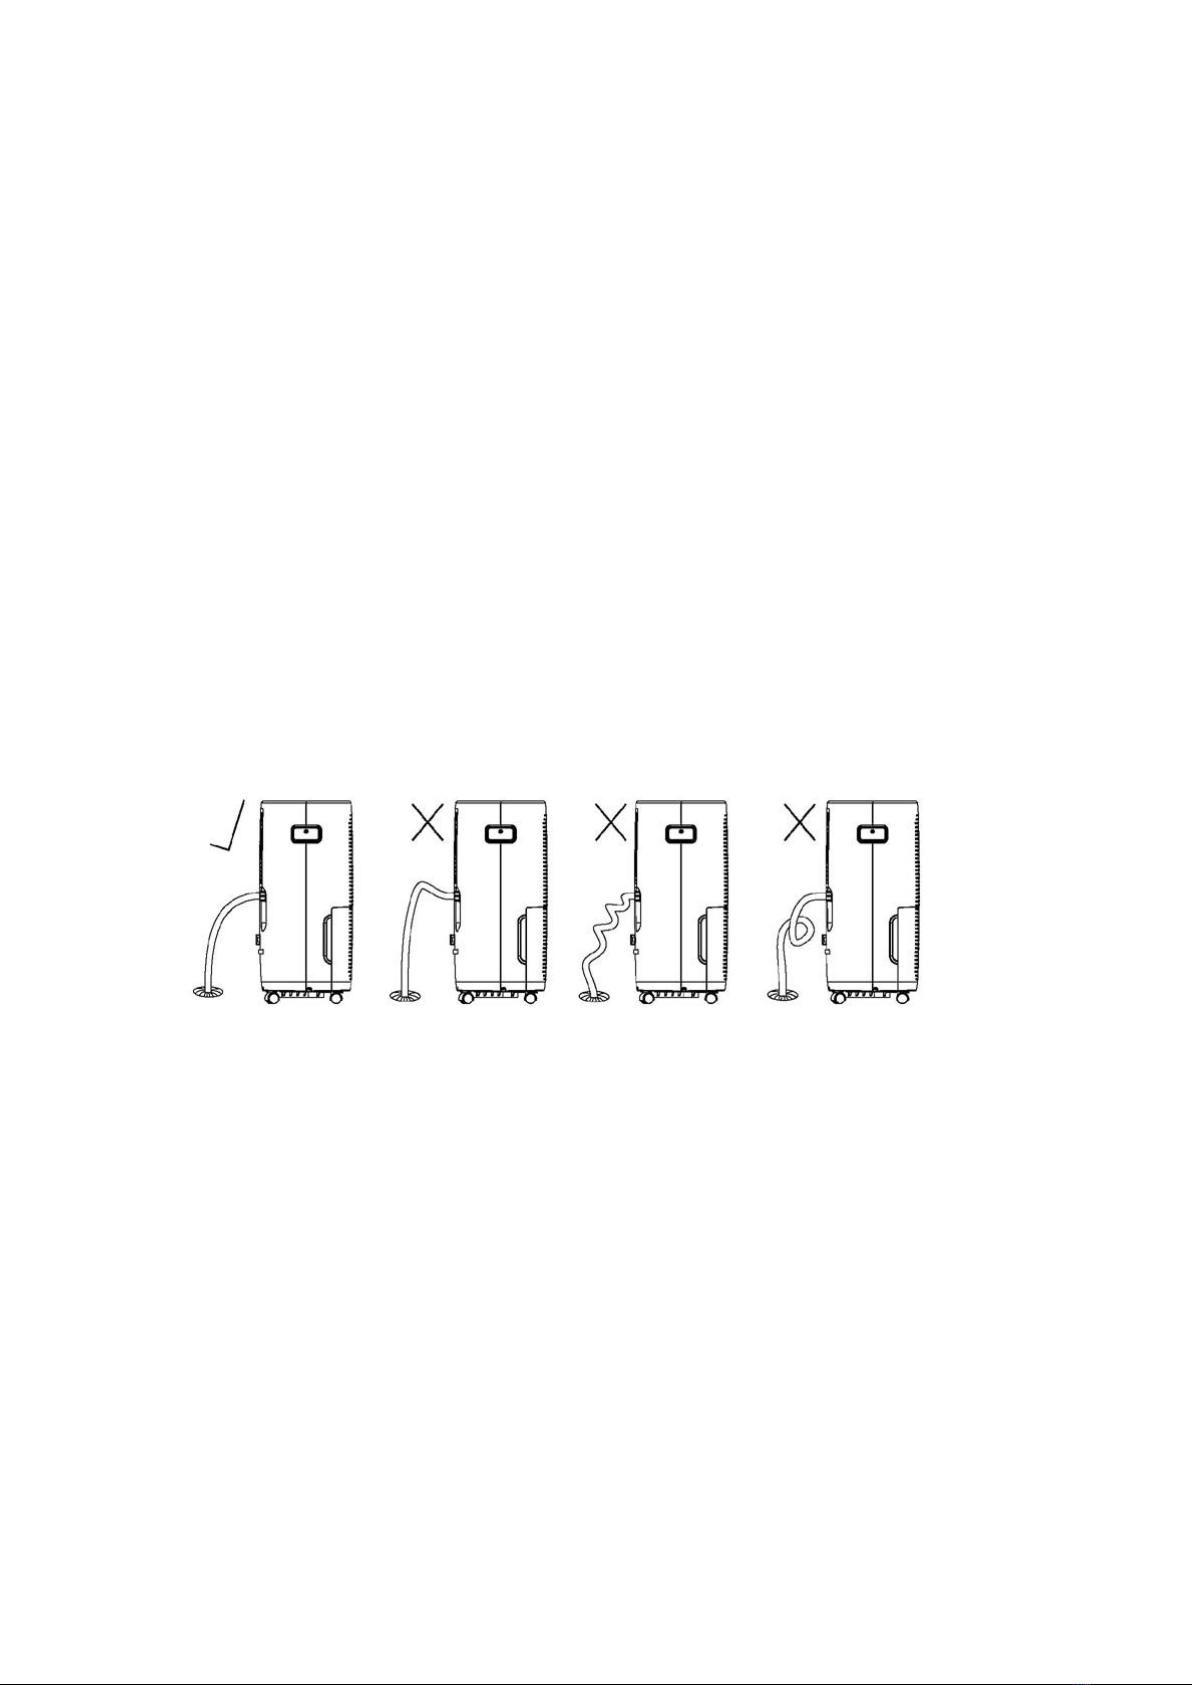
• Make sure that there are no kinks or knots in the garden hose (See picture below)
• Turn on the unit and press the MODE button until set to CONTINUOUS
Garden Hose Installation Reference Guide
IMPORTANT NOTES:
Placing the dehumidifier on an uneven surface or improper hose installation may result in
water filling up the bucket and cause the unit to shut off. Empty bucket if shut-off occurs,
then check dehumidifier location and hose for proper setup. The bucket must be in place
and securely seated for the dehumidifier to operate.
7
CLEANING & MAINTENANCE
WARNING: Always switch OFF the dehumidifier and unplug it from the electrical outlet
before attempting any cleaning or maintenance of this product.
● Clean the Grill and Case
Use water and a mild detergent. Do not use bleach or abrasives.
● Clean the bucket
Every few weeks, clean the bucket thoroughly to prevent growth of mold, mildew and
bacteria. Partially fill the bucket with clean water and mild detergent. Swish it around in the
bucket, empty and rinse.
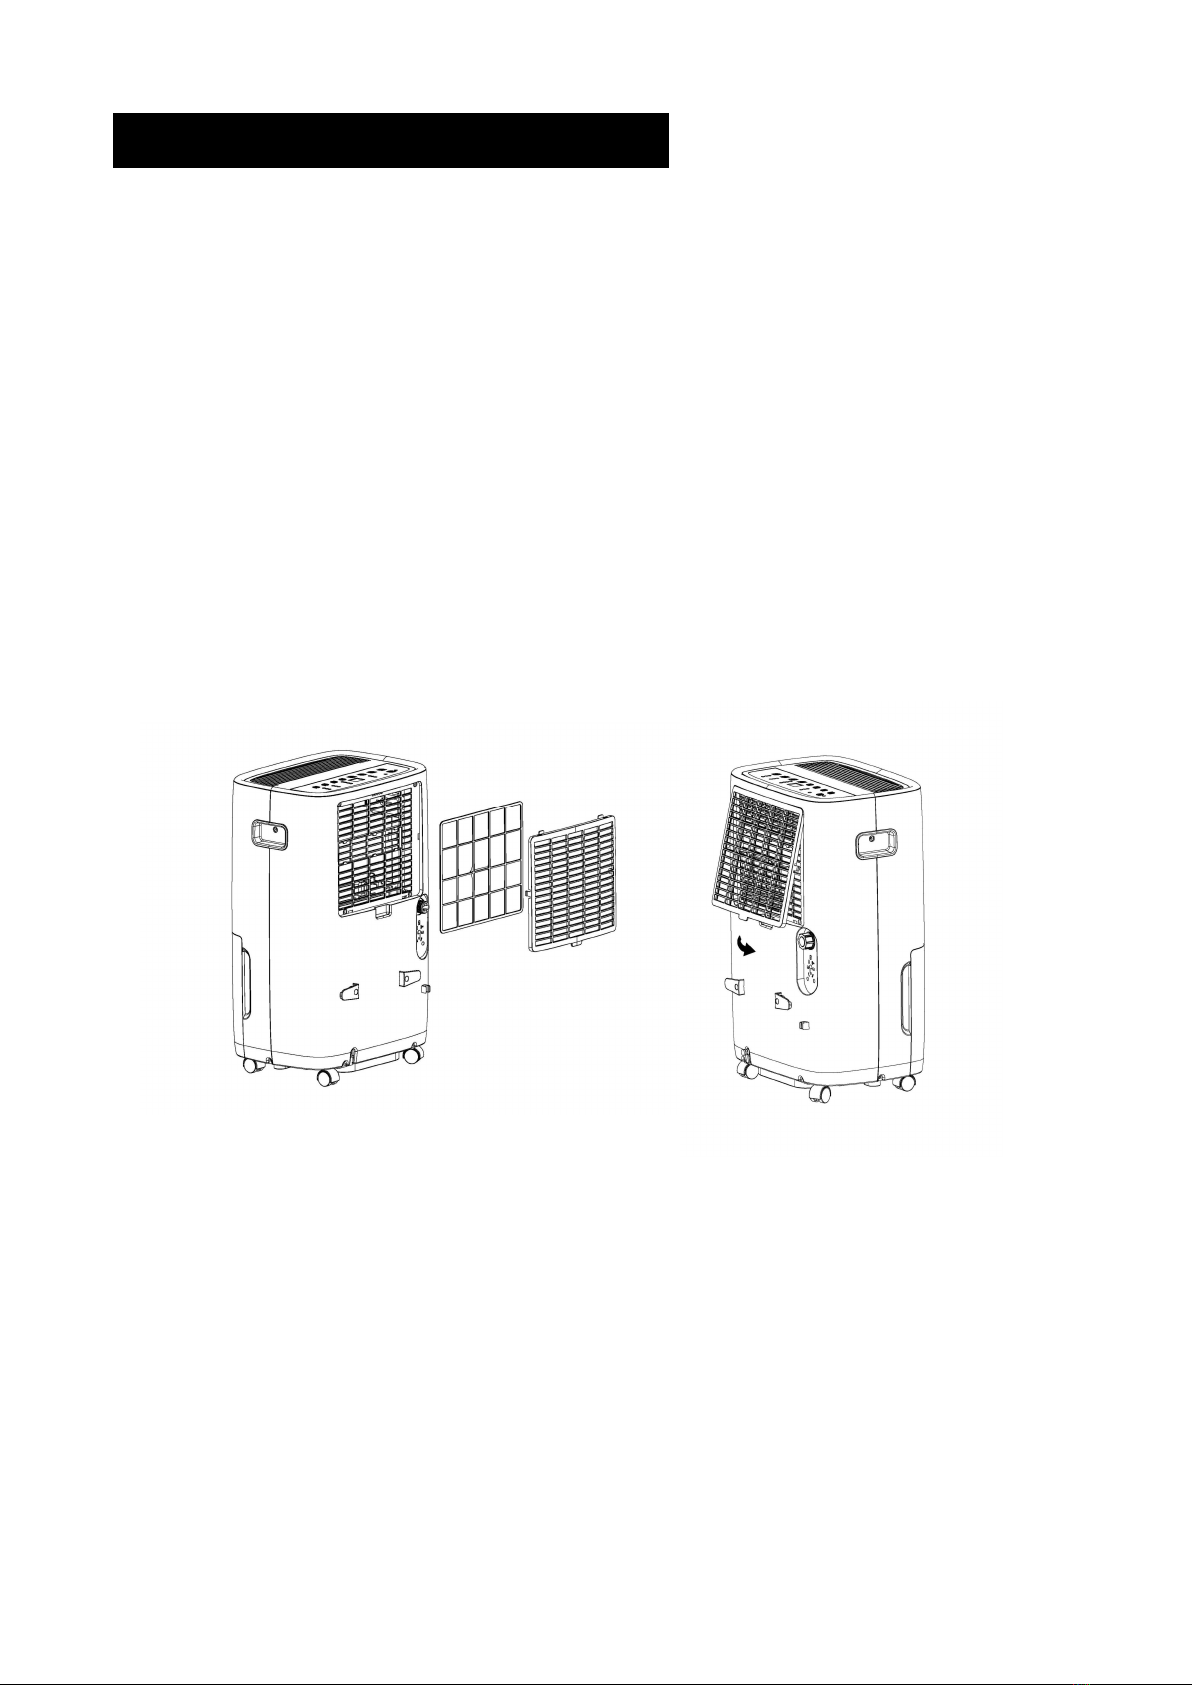
● Clean the air filter
1. To remove the filter, pull filter outwards.
2. Wash the filter with clean water then dry.
3. Re-install the filter, replace bucket.
● Storing the dehumidifier
1. Before storing the unit, let it rest for one full day so that the system can dry out naturally.
2. Clean the unit, water bucket and air filter.
3. Wrap the cord with the power cord buckle.
4. Cover the unit with a plastic bag.
5. Store the unit upright in a dry, well-ventilated area.
8
This manual suits for next models
1
Table of contents


