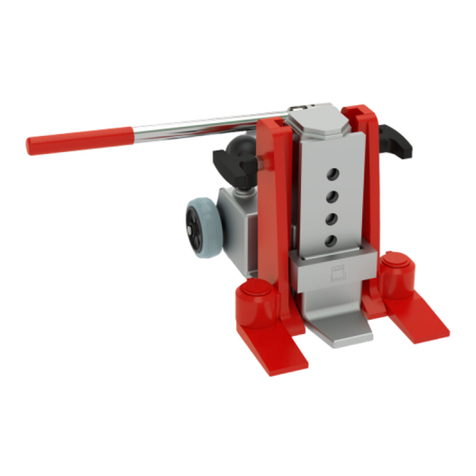
Continental Refrigerator JB320AS User manual

The
F
u
t
u
r
e
in
M
ot
i
o
n
Air-hydraulic Jacking Beam
U
s
e
r Ma
n
u
a
l
JB320AS
JB326AS
325069
I
ss
1
Registered no. 965702 England Phone + 44 (0) 121 326 1234 Fax +44 (0) 121 326 1298
0825005-2306??

2
Fig.1
OK?
2000 kg
2600 kg
Fig.2 Fig.3
WARNINGS – Safe usage instructions

3
Fig 5
6235325
6235330
Fig.4
Fig.5

4
Fig.6
1
2
Fig.7 Fig.8
12 mm
3
Fig.9
ASSEMBLY
*
*
*
*
*
Example

5
5
7
1
1
2
4
6
±
Fig.12 Fig.13
Fig.14 Fig.15
6235330
6235325 89
Fig.10 Fig.11

6
x 4 10
Fig 6
11
Fig.16
12
Fig.17
Fig.18
13
Fig.19

7
JB320AS / JB326AS
WARNING -
SAFE USAGE INSTRUCTIONS
1. The jacking beam is only to be mounted on lifts
approved by the lift manufacturer for mounting
of jacking beams - be aware that not all lifts are
approved. Rated beam capacity must be max. 2/3 of
vehicle lift capacity.
2. Mount the jacking beam with adequate support arms
on horizontal, parallel and solid rails and secure it
against crashing before use. See g. 1-19.
3. Study, understand and follow all instructions before
installing, operating, servicing, or maintaining this
equipment.
4. Check before each lift, that the support arms are
correctly placed on rail of lift or pit edge.
5. This is a lifting device only. Do not move or transport
vehicle with jacking beam.
6. If screws or nuts for mounting support arms replaces,
ensure the new ones have a minimum quality of
10.9.
7. Always lower the jacking beam to the nearest safety
stop immediately - or use axle stands for support -
before working on vehicle.
8. Do not overload, for instance due to sudden external
load. Overload can cause damage or failure of jack.
9. Lift only on points as specied by automaker. During
lifting be attentive that the saddles cannot slide.
10.When lifting the complete vehicle by means of 2
jacking beams they shall be placed minimum 0,85 m
from each other.
11.Gravity of load must always be placed centrally.
When lifting by means of only one saddle always
place it in the centre of the jacking beam. Also, the 2
extension arms must only be used simultaneously.
12.The vehicle must be allowed to run freely during
lifting and lowering (without brakes and in neutral).
13.No person must remain in, on or under a vehicle
when lifted or supported only by the jacking beam.
14.The operator must observe, that the jacking beam
can be operated without any danger to himself and
others.
15.The jacking beam as well as the safety valve is not
to be altered.
16.Maximum air-pressure: 10 bar. Full capacity at 8,5
bar.
17.Failure to follow these warnings may result in loss
of load, damage to jack, and/or failure resulting in
personal injury or property damage.
Assembly
See g. 1-19 on previous pages.
Air supply through gland on the rear side, ¼” pipe
thread.
Please notice that an air connection set with hose guide,
wire and spiral hose is available – please refer to the
last section “Accessories” in this guide.
Use
Lifting: Turn left handle clockwise. Lower to the nearest
safety stop by turning left handle counter clockwise.
Lowering: Lift a little to allow release of safety stop.
Turn both handles counter clockwise. (release valve
to the left, release for safety stop to the right). Both
handles automatically return to neutral after releasing.
Noise emision: The A-weighted sound pressure level is
max. 85 dB(A).
Maintenance
Maintenance and repairs must always be carried out by
qualied personnel. The air-hydraulic pump needs oil for
lubrication of the mechanical parts. It is recommended
to install water separator/lter and oil lubricator close to
the jacking beam.
Daily: Check jacking beam and supports for damage -
and the correct placement of supports.
Monthly: Lubricate all moving parts with oil. Empty the
water separator and ll the oil lubricator.
Oil rell and check: Lift to maximum height without
load and remove ller plug (12). Correct oil-level is up to
the hole.
WARNING: Do not operate with the ller plug removed
(oil tank will be pressurized).
Oil quantity: 0,6 l.
Any good hydraulic oil with viscosity ISO VG 15 can be
used.
Never use brake uid!
Safety inspection
In accordance with national regulations - yet, at least
once a year - the following parts must be checked by
an expert: Supports and support arms (security against
crashing), abnormal wear and damages, weldings and
the hydraulic system for leaks. Furthermore that all
safety labels are legible.
Possible faults and how to overcome them
1. The jacking beam cannot lift to maximum height:
Rell the oil tank. (See “Maintenance”).
2. The jacking beam cannot lift enough: Check that
release handle is on “neutral” and can move freely.
Both release 6222600 (adjusted with nut 0262700)
and release arm 6222802 (adjusted with counternuts
2 x 0201600 on the pump’s release spindle) must be
loose to allow the release valve to close tightly. Also
check the air supply: minimum 8,5 bar and 500 l/min.
3. The jacking beam cannot lower to minimum position:
Check for damages; lubricate mechanical parts.
4. The jacking beam continues to lower after letting go
of the release handle: Ventilate the hydraulic cylinder
by screw (10).
WARNING: The jacking beam is not to be loaded.
Spare parts
Replace worn or broken parts with genuine jack
manufacturer supplied parts only. All major parts may
not be provided after discontinuation of a model.
Destruction
The oil must be drained o and legally disposed of.

8
JB320AS
JB326AS

9
JB320AS JB326AS
Pos. Art. No. Art. No. Pcs. Description
62 200 50 62 360 50 Air-hydraulic jacking beam
1 01 000 00 01 000 00 1 O-ring
2 02 002 24 02 002 24 1 Fitting
3 02 004 28 02 004 28 4 Disc
4 02 010 07 02 010 07 2 Screw
5 02 204 00 02 204 00 2 Circlip
6 02 205 00 02 205 00 2 Circlip
7 02 206 00 02 206 00 6 Circlip
8 02 222 00 02 222 00 2 Circlip
9 02 405 00 02 405 00 1 Fitting
10 02 418 00 02 418 00 1 Hose union
11 02 421 00 02 421 00 2 Hose clamp
12 02 470 00 02 470 00 1 Plug
13 02 506 00 02 506 00 1 Fitting
14 02 511 00 02 511 00 1 Filter
15 02 512 00 02 512 00 1 Fitting
16 02 545 00 02 545 00 1 Fitting
17 02 546 00 02 546 00 1 Fitting
18 02 556 00 02 556 00 4 Bearing
19 02 558 00 02 558 00 1 Hydraulic hose
20 02 627 00 02 627 00 1 Nut
21 02 630 00 02 630 00 7 Screw
22 02 646 00 02 646 00 2 Screw
23 02 648 00 02 648 00 1 Cover button
24 02 649 00 02 649 00 3 Cover button
25 02 650 00 02 650 00 3 Cover button
26 02 705 00 02 705 00 2 Bearing
27 02 754 00 02 754 00 1 Spring
28 62 022 00 62 022 00 2 Extension, 45 mm
29 62 023 00 62 023 00 2 Extension, 90 mm
30 62 024 00 62 024 00 2 Saddle
31 62 172 00 62 172 00 2 Rubber saddle
32 62 201 00 62 201 00 1 Bottom frame
33 62 202 00 62 202 00 1 Scissor half with tank
34 62 202 07 62 202 07 2 PVC disc
35 62 203 00 62 203 00 2 Outer scissor arm
36 62 207 00 62 207 00 1 Safety stop
37 62 207 04 62 207 04 1 Distance bushing
38 62 210 00 62 210 00 2 Curve
39 62 211 00 62 211 00 2 Axle
40 62 212 00 62 212 00 1 Axle
41 62 213 00 62 213 00 1 Axle
42 62 215 00 62 215 00 1 Axle
43 62 216 00 62 216 00 4 Roller
44 62 217 00 62 217 00 2 Roller
45 62 218 00 62 218 00 2 Roller axle
46 62 219 00 62 219 00 2 Axle journal
47 62 220 00 62 220 00 1 Control panel
48 62 225 00 62 225 00 1 Guide block f. release
49 62 226 00 62 226 00 1 Release
50 62 228 02 62 228 02 1 Release lever
51 62 230 00 62 230 00 1 Top beam, complete
52 62 260 00 62 260 00 2 Base support arm
53 62 325 00 62 325 00 1 Air-line connection
54 90 794 12 90 794 12 1 Air hose
55 90 796 40 90 796 40 1 Air hose
56 90 796 55 90 796 55 1 Air hose
57 90 796 55 90 796 55 1 Air hose
58 90 880 47 90 880 47 1 Oil hose
59 91 200 30 91 200 36 1 Pump, cpl.
60 91 204 00 91 204 00 1 Oil tube
61 91 205 00 91 205 00 1 Gland
62 91 206 00 91 206 00 1 Filterhousing
63 91 207 00 91 207 00 1 Nut
64 91 230 00 91 230 00 1 Cylinder, cpl.

10
91 200 30
91 200 36
90 728 40
90 728 42
This manual suits for next models
1
Table of contents
Other Continental Refrigerator Jack manuals

Popular Jack manuals by other brands

Omega Lift Equipment
Omega Lift Equipment 18122C Operating instructions & parts manual

Pittsburgh
Pittsburgh 58816 Owner's manual & safety instructions

Unimec
Unimec TP Assembly instructions

Sonic
Sonic 4800703 instructions

BGS technic
BGS technic 70039 instruction manual
TradeQuip
TradeQuip 1128T owner's manual

VEVOR
VEVOR TJD-12000SP-F quick start guide

ULTIMATE SPEED
ULTIMATE SPEED URW 2 A1 HYDRAULIC TROLLEY JACK operating instructions

Stels
Stels 51131 user manual

Bushranger
Bushranger RJX01 instruction manual
Clarke
Clarke CTJ2500QLG Operating & maintenance instructions

Valex
Valex 1650520 Translation of the original instructions