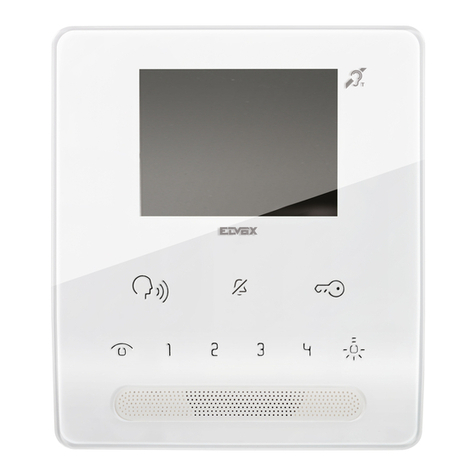
Commax DRC-481L Operating manual

-Feature-
●8-wire Common Method (Interphone)
●4-wire Common Method (Videophone)
●RF/ID Feature (Optional)
●Surveillance Monitor Support
Use Guide
Model No. DRC-481L
Model No. DRC-500L
DRC-481L DRC-500L
(Common Method)
Main Entrance Camera
•Thank you for purchasing our COMMAX product.
•Please carefully read this User’s Guide (in particular, precautions for safety)
before using the product and follow the instructions to use your productexactly.
•The company is not responsible for any safety accidents caused in abnormal
operation of the product.

- 1-
Table of Contents
1. Greetings ⋯⋯⋯⋯⋯⋯⋯⋯⋯⋯⋯⋯⋯⋯⋯⋯⋯⋯⋯⋯⋯⋯⋯⋯⋯⋯⋯ 4
2. Before Getting Started ⋯⋯⋯⋯⋯⋯⋯⋯⋯⋯⋯⋯⋯⋯⋯⋯⋯⋯⋯⋯ 4
3. Overview⋯⋯⋯⋯⋯⋯⋯⋯⋯⋯⋯⋯⋯⋯⋯⋯⋯⋯⋯⋯⋯⋯⋯⋯⋯⋯⋯⋯ 5
4. PIN Types ⋯⋯⋯⋯⋯⋯⋯⋯⋯⋯⋯⋯⋯⋯⋯⋯⋯⋯⋯⋯⋯⋯⋯⋯⋯⋯ 10
5. Setting PIN ⋯⋯⋯⋯⋯⋯⋯⋯⋯⋯⋯⋯⋯⋯⋯⋯⋯⋯⋯⋯⋯⋯⋯⋯⋯⋯ 11
6.Household PIN Confirmation ⋯⋯⋯⋯⋯⋯⋯⋯⋯⋯⋯⋯⋯⋯⋯⋯⋯ 14
7.
Configuring Building and Serial Numbers in the Main Entrance Interphone
⋯⋯ 15
8. Using Remote Cardkeys (RF/ID) - Optional ⋯⋯⋯⋯⋯⋯⋯⋯⋯ 17
9. Surveillance Monitor Configuration ⋯⋯⋯⋯⋯⋯⋯⋯⋯⋯⋯⋯⋯ 23
10. Door Release Time Setup ⋯⋯⋯⋯⋯⋯⋯⋯⋯⋯⋯⋯⋯⋯⋯⋯⋯⋯ 24
11. Page Tone Selection ⋯⋯⋯⋯⋯⋯⋯⋯⋯⋯⋯⋯⋯⋯⋯⋯⋯⋯⋯⋯ 25
12. Wiring Method Selection ⋯⋯⋯⋯⋯⋯⋯⋯⋯⋯⋯⋯⋯⋯⋯⋯⋯⋯ 26
13. Video Out Impedance Adjustment ⋯⋯⋯⋯⋯⋯⋯⋯⋯⋯⋯⋯⋯ 27
14. Household Interphone Diagnosis ⋯⋯⋯⋯⋯⋯⋯⋯⋯⋯⋯⋯⋯⋯ 28
15. Household Number Registration ⋯⋯⋯⋯⋯⋯⋯⋯⋯⋯⋯⋯⋯⋯ 30
16. Paging the Household ⋯⋯⋯⋯⋯⋯⋯⋯⋯⋯⋯⋯⋯⋯⋯⋯⋯⋯⋯⋯ 32
17. Paging the Guardhouse ⋯⋯⋯⋯⋯⋯⋯⋯⋯⋯⋯⋯⋯⋯⋯⋯⋯⋯⋯ 32
18. Door Release Using the Household PIN⋯⋯⋯⋯⋯⋯⋯⋯⋯⋯⋯ 33
19. Door Release Using the Building (Management) PIN⋯⋯⋯⋯ 33
20. Appendix (Various Program Summaries) ⋯⋯⋯⋯⋯⋯⋯⋯⋯⋯ 34
21. Wiring Method ⋯⋯⋯⋯⋯⋯⋯⋯⋯⋯⋯⋯⋯⋯⋯⋯⋯⋯⋯⋯⋯⋯⋯ 36
22. Specifications ⋯⋯⋯⋯⋯⋯⋯⋯⋯⋯⋯⋯⋯⋯⋯⋯⋯⋯⋯⋯⋯⋯⋯⋯ 51
Instructions for Users
Class-B
Product
This Product, which has been registered for the home
service, can be used in all the areas including the
household area.

- 2-
Please follow the things described below in order to prevent any
danger or property damage.
Warning
Caution
Safety Warning & Caution
Prohibition.
No disassembly
No touch
Must follow strictly.
Shows plugging out the power cord
without an exception
Shows the warning and caution for an electric shock.
Shows the warning and caution for a fire.
It may cause a serious damage or
injury if violated.
It may cause a minor damage or
injury if violated.
Power&Installation
Warning
Please don’t use several
products at the same time on
one power socket.
·It may cause a fire due to an
abnormal overheating.
Please don’t bend the power
cable excessively or it may
cause an electric shock.
·fire when using a damaged
power cable.
Please don’t handle the power
cable with a wet hand.
·It may cause an electric
shock.
Please plug out the power
cable from the socket when
not using it for a long period
of time.
·It may shorten the product
lifespan or cause a fire.
Please don’t install the
product in the place where
there is much oil, smoke or
humidity.
·It may cause an electric
shock or fire.
Please don’t install the
product with the lightening
and thunder.
·It may cause an electric
shock or fire.
Please don’t use and connect
this product with other
products with different rated
voltage
·It may cause a disorder or
fire.
When installing the product
that generates heat, please
install the product away from
the wall (10cm) for the
ventilation.
·It may cause a fire due to
the increased internal
temperature.

- 3-
Cleaning & Use
Please don’t disassemble,
repair or rebuild this product
arbitrarily (please contact the
service center if a repair is
needed.
·It may cause an electric
shock or fire.
Please plug the power cable
firmly into the inner end
·It may cause a fire.
Please hold the plug tightly
when unplugging the power
cable (a part of the copper
wire may be disconnected if
the grabbing is only made on
the cord when pulling out the
cable).
·It may cause an electric
shock or fire
When connecting the power
cables after cutting the cable,
please install the product with
power off
·It may cause an electric
shock or fire
When installing the product,
please fix it firmly while using
the wall-mounting unit and
screws.
·It may cause an injury from
the falling object.
Please be careful when using
an AC circuit breaker since
there is a possibility of an
electric shock.
When cleaning the product,
please rub it with a soft and
dry cloth after plugging out
the power cable. (Please don’t
use any chemical products
such as wax, benzene, alcohol
or cleanser.)
Please don’t drop the product
on the ground and don’t apply
a shock .
·It may cause a failure.
Please use the designated
connection cable within the
maximum calling distance
designated for the product
·It may reduce the product
performance.
Please check the use voltage
and current for the DC-only
products and use the
appropriate rectifier.
·It may cause a fire.
Please avoid direct rays of the
sun or heating devices at a
time of installation.
·It may cause a fire.
Please don’t install the
product on an unstable place
or small support board.
·It may cause an injury if it
falls down while in use.
If an abnormal sound, burning
smell or smoke is coming out
of the product, please plug out
the power cable and contact a
service center.
·It may cause an electric
shock or fire.
Please don’t insert any
metallic or burnable materials
into the ventilation hole.
·It may cause an electric
shock or fire.
Please use only the designated
batteries for the products of
using DC power.
·It may cause an electric
shock or fire.
Cleaning & UsePower&Installation
Warning
Caution

- 4-
Thank you for purchasing a Commax product.
This product is a high tech Main Entrance interphone that supports
electronic and remote (Optional) keys and finger print recognition
(Optional) features. Please read this manual carefully.
Using 8-wire common wiring method between the Main Entrance interphone and
the Guardhouse interphone, this system supports 3 communication circuits, and
each communication circuit is a Balance Type that supports 2 wires.
Using 4-wire common wiring method between the Main Entrance interphone and
the Household interphone, this system supports telephone and video
connections. Only use coaxial cables for video connection.
The short and cut of wiring can cause a malfunction. Be sure to check wiring
before installation.
It is recommended that each Main Entrance interphone is installed and its
connection be checked from the Guardhouse and the Household(s).
Maximum of 2048 Remote Cardkeys are supported. (When not connected to a
computer)
Three consecutive entries of wrong Management PIN, Building PIN, or
Household PIN will automatically page the Guardhouse.
Three consecutive attempts at unlocking doors with an unregistered Remote
Cardkey will also automatically page the Guardhouse.
1. Greetings
2. Before Getting Started
※Remarks

- 5-
3. Overview
3-1. Feature
DRC-481L
No
1
2
3
4
5
6
7
8
9
Description
Display Window (FND)
RF/ID Receiver (Optional)
Speaker
Mic
Key Pad
Call Button
CCD Camera
Program Button
Electronic Key Button
No
10
11
12
13
14
15
16
Description
Guard Button
Cancel Button
Reset Button
Selection Switches
Infrared Sensor Terminal
Guardhouse Interphone Terminal
Computer Connection Terminal
No
17
18
19
20
21
22
23
Description
Household Interphone (1)
Household Interphone (2)
Video Out
Power: DC12V/1A (RF-1A)
Door Release Terminal
Receiver Volume Control
Security Switch Connection
No. 1: Computer Connection
No. 2: Electronic Key Selection
(Finger Print Recognition)

- 6-
DRC-500L
No
1
2
3
4
5
6
7
8
9
Description
Speaker
Key Pad
Program Button
Electronic Key Button
Guard Button
Cancel Button
Call Button
Mic
RF/ID Receiver (Optional)
No
10
11
12
13
14
15
16
17
18
Description
Night Lamp
Display Window (FND)
CCD Camera
Computer Connection Termina
Guardhouse Interphone Termina
Household Interphone (1)
Household Interphone (2)
Video Out(Surveillance Monitor Connection)
Infrared Sensor Terminal
No
19
20
21
22
23
24
25
Description
Security Switch Connection
Power:
DC15V/1A(CS-15C)
Reset Button
Selection Switches
Receiver Volume Control
Door Release Terminal
Power:
AC220V/60Hz
No. 1: Computer Connection
No. 2: Electronic Key Selection

- 7-
3-2. Basic Function
✽RF/ID Receiver (Optional)
To open the door using a Remote Cardkey, place the key here. The word‘oPEn’will
display and the door will be released.
✽Call Button (E: Enter)
This button is used to page households.
✽Program Button (P: Program )
This button is used to Program.
✽Electronic Key Button (K: Key)
This button is used to release the door by using PIN.
(Available only when the Electronic Key option has been set as OFF. When it is set as
ON, Finger Print Recognition is enabled)
✽Guardhouse Page Button (G: Guard)
This button is used to page the Guardhouse if the Guardhouse interphone has been
installed.
Audio Guide
“Door Opened”
Press the Page button after entering
the Household Number.
Please the Card HereOPEN DOOR
Program Enter

- 8-
✽Cancel Button (X: Cancel)
This button is used to cancel the current operation.
✽Selection Switches
No. 1: Computer Connection Switch (Used for connection with a computer)
Connects a computer using network exclusive to DRC-481L.
OFF : To connect to a computer via the RS-485 Port with Finger Print Recognition in use.
ON : To connect to a computer via an internal network without Finger Print Recognition in
No. 2: Electronic Key Selection (Finger Print Recognition Switch)
OFF: Electronic Key is enabled.
(Finger Print Recognition is disabled)
ON: Electronic Key is disabled.
(Finger Print Recognition is enabled)
✽Reset Button
This button is used to reset the Guardhouse PIN or the Management PIN.
✽Receiver Volume Control
Controls the volume in the receiver from LOW to HIGH.
Audio Guide
“Cancelled”
Not Connecting to a Computer
Using Electronic key
If you cannot remember the number of a management office,
push the reset button both 12 and 21.
Not Using Electronic key
Connecting to a Computer
To Lower the Volume To Raise the Volume

- 9-
●Must Know Before Use!
1) Accessing All Features with the Program Button
-When an error has been made as indicated by continuous beeps, please
cancel and start again from the beginning.
2) Forgotten PIN
2-1. Household PIN
Use the Household PIN verification feature of 6-1 to retrieve the PIN.
(Please inquire to the Guardhouse or the Management Office)
2-2. Building PIN
Reenter using the Management PIN.
2-3. Management PIN
Press the Reset button.
Both the Building and the Management Building PINs are reset to default.
3) 8-5 All Remote Cardkey Deletion is to be used only when the unit is being
initially installed.
4) Configuration Mode Indications
Configured features are displayed on the Display Window when the Main
Entrance interphone is not in use.
Version No.
Series
Camera Impedance
Wiring Method
Serial Number
Building Number
Beep-Beep-Beep
(Error) Start again from the
beginning
This manual suits for next models
1
Table of contents
Other Commax Intercom System manuals

Commax
Commax DR-2GN User manual

Commax
Commax Fineview CDV-70H2 User manual

Commax
Commax CDV-43U User manual

Commax
Commax DP-LA01M User manual

Commax
Commax DRC-4BA User manual

Commax
Commax DRC-MSB User manual

Commax
Commax CIOT-700M User manual

Commax
Commax DRC-40YFD User manual

Commax
Commax CDV-704MA User manual

Commax
Commax CDV-50 User manual

Commax
Commax CDV-72UM User manual

Commax
Commax CDV-70AR3 User manual

Commax
Commax CMP-2BA User manual

Commax
Commax CDV-70A User manual

Commax
Commax CDV-71BE/D User manual

Commax
Commax DR-2GS User manual

Commax
Commax DRC-4BA User manual

Commax
Commax CDV-43KM User manual

Commax
Commax CLS-10 User manual

Commax
Commax DRC-4DB User manual