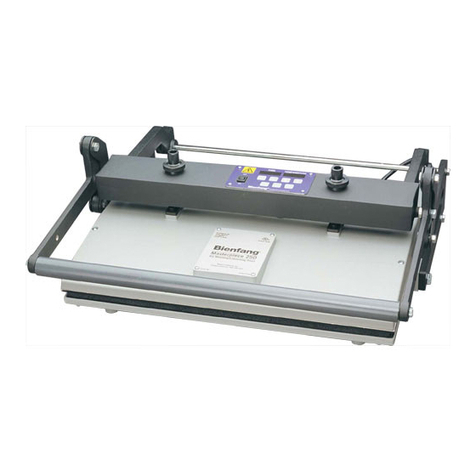
ChemInstruments HL-100 User manual

CHEMINSTRUMENTS
HOT ROLL LAMINATOR
MODEL HL-100/101
OPERATING INSTRUCTIONS
PRODUCT DESCRIPTION.....................................................................................3
Specifications.............................................................................................................3
UNPACKING........................................................................................................................4
ASSEMBLY..........................................................................................................................5
Safety Features...........................................................................................................6
Key Components........................................................................................................7
OPERATION.........................................................................................................................9
Theory of Operation...................................................................................................9
Programmable Heat Controller..................................................................................9
Laminating Procedure................................................................................................10
Exhaust Control Valves .............................................................................................11
OPITIONAL FEATURES.....................................................................................................12
Gap Adjusters.............................................................................................................12
Brake Unwind System ...............................................................................................13
Pneumatic Foot Control.............................................................................................13
MAINTENANCE..................................................................................................................14
Tightening Drive Belt................................................................................................14
Air Connections.........................................................................................................14
Safety Trip Wire Adjustment.....................................................................................15
Cleaning.....................................................................................................................15
TROUBLE SHOOTING........................................................................................................16
WARRANTY ........................................................................................................................17
HL-100.doc 9/29/2010

HL-100 pictured
2

PRODUCT DESCRIPTION
Congratulations on the purchase of your new ChemInstruments HL-100/101 Hot Roll
Laminator. This is a state of the art laboratory laminator with balanced pneumatic pressure top
roll and controlled heat.
The unit has the following features:
•Model HL-100 includes hard coat anodized Teflon coated aluminum top roll
•Model HL-101 includes chrome plated steel top roll
•Selectable laminating speeds to 20 FPM (6 MPM).
•Programmable temperature heat controller.
•Single unwind stand.
•Safety features that include, laminator nip trip wire, and emergency stop (E Stop).
•Optional heat guard kit is available providing guards for the top and bottom laminating
rolls as well as the end cap roll shaft and bearings.
•Optional gap adjusters for precise gap control during laminating
•Optional separate brake unwind stand for additional unwind with brake tension control.
Warning! This equipment can cause injury if not used properly. It is the operator’s
responsibility to observe all safety rules and warnings.
SPECIFICATIONS
•Electrical: 120VAC/14Amp/60 or 240VAC/7Amp/50
•Air Pressure 40 to 100 PSI
•Speed to 20 FPM (6 MPM)
•Width 39” (98 cm) Depth 14” (36cm) Height 30” (76 cm)
•Maximum opening at nip is 2 “ (51mm)
3

UNPACKING
ChemInstruments has made every effort to ensure that the HL-100/101 arrives at your
location without damage. Carefully unpack the instrument and check for any damage that might
have occurred during shipment. If any damage did occur during transit, notify the carrier
immediately.
ensure that the HL-100/101 arrives at your
location without damage. Carefully unpack the instrument and check for any damage that might
have occurred during shipment. If any damage did occur during transit, notify the carrier
immediately.
The ChemInstruments HL-100/101 consists of the following parts:The ChemInstruments HL-100/101 consists of the following parts:
•The laminating frame which includes the laminating station and attached control box.•The laminating frame which includes the laminating station and attached control box.
•Optional equipment if ordered would include, gap adjusters, brake unwind stand, heat
guard kit, along with any customized alterations and/or additions.
•Optional equipment if ordered would include, gap adjusters, brake unwind stand, heat
guard kit, along with any customized alterations and/or additions.
Make sure all of these components are present before discarding packaging material.Make sure all of these components are present before discarding packaging material.
HL-100 pictured
4

ASSEMBLY
Warning! Due to its weight and size, use two people to mover the HL-100/101
laminator.
•The laminator should be located on a sturdy bench or cart suitable for a 200 pound load.
•It is advised that access be provided for both the front and back of the machine.
Warning! Before using the HL-100/101, it is advisable to become familiar with the Key
Components of the laminator. These Key components and a brief description of their
function follow in the next section.
•Carefully remove the Kraft paper from the laminating rolls.
•Attach an incoming air line to the male inlet fixture on the back of the cabinet
•Set the Air Pressure Regulator at 40 PSI for initial start up.
Warning! Only connect this unit to a properly sized circuit to avoid overload problems.
•Plug the laminator into the appropriate AC circuit being careful to not overload the
electrical supply circuit. (Refer to Specifications on page 1 and labeled at power entry on
the HL-100/101 cabinet.)
•Remove the wood blocks between the laminating rolls. This requires the air and
electrical connections to have been made. Push the UP button if the top Heat Laminating
Roll is in the down position and resting on the wood blocks.
•If the optional Gap Adjusters are included, use these to create a gap by threading both
lower half of the Gap Adjuster cylinders down the air cylinder shaft. Lock their position
by threading the top half of the Gap Adjuster down until it contacts the bottom half of the
Gap Adjuster.
•When the laminator is not in use these Gap Adjusters will provide a mechanical stop to
the downward travel of the top Heat Laminating Roll. This will prevent wear and
damage to the rubber cover on the bottom Drive Laminating Roll.
5

•Check the Roll Unwind Bar to make sure it is seated properly in the support frame.
•If the optional Brake Unwind System is provided, check that the Pressure Plate is
position with the slot over the Retaining Pin. (See Photo 1 Optional Brake Unwind)
The HL-100/101 laminator is now ready for use except for setting the temperature level
for the heated roll.
SAFETY FEATURES
The HL-100/101 hot roll laminator should be considered as any other piece of laboratory
equipment. The safety features incorporated in this device are designed to help prevent injury. It
remains the operator’s responsibility to use this and all equipment with caution while following
the manufacturer’s instructions. Basic common sense and caution should be exercise at all times.
Please pay attention to and follow all warnings and cautions as you use this equipment.
There are two basic safety features for this device.
1. TRIP WIRE this safety wire is located in front of the top Heat Laminating Roll and nip
point. When activated, the top roll will travel upward, opening the laminating nip and
removing and pressure between the two laminating rolls. This trip wire is adjustable and
should be tested regularly to insure proper operation. DO NOT REMOVE THIS DEVICE it
is considered a safety violation to hinder the operation of this device in any manner.
2. E-STOP this device is located on the top of the control cabinet for ease of access.
Besides disrupting all power to the equipment when activated, the top Heat Laminating Roll
will travel upward opening the nip point of the two laminating rolls. This switch is not to be
used as an “on/off” switch when operating the HL-100/101 laminator.
6

KEY COMPONENTS (See Photo 1 HL-100)
•MOTOR POWER SWITCH for the drive motor and is located on the front of the
control cabinet
•HEAT POWER SWITCH for the heating element and is located on the front of the
control cabinet.
•AIR REGULATOR located on the top of the control cabinet this control knob and gage
provide regulation of the incoming air pressure.
•PROGRAMMABLE HEAT CONTROLLER located on the front of the control
cabinet this device allows you to set temperature and offset parameters.
•EMERGENCY STOP SWITCH located on the top of the control cabinet, this button
switch when activated switches all power to the laminator off. In addition this disruption
of electrical power will cause the top roll to rise to its “open” position.
•FORWARD/REVERSE SWITCH located on the front of the control cabinet this
switch controls the direction of rotation of the bottom drive roll.
•SPEED CONTROL located on the front of the control cabinet this control regulates the
speed of the drive roll.
•NIP this is the pinch point where the top and bottom laminating rolls meet.
•EXHAUST CONTROL VALVES there are four valves in total. Each valve controls
the rate of exhaust from the Air Cylinder that it is mounted to.
•AIR CYLINDERS mounted vertically at each end of the top Heat Laminating Roll.
These pneumatic cylinders move the top Heat Laminating Roll up and down according to
the UP and Down air control switches
•UP & DOWN SWITCHES located on the front of the control cabinet these push type
switches control the up and down movement of the top Heat Laminating Roll.
•HEATED LAMINATING ROLL this is normally the top Heat Laminating Roll.
•DRIVE LAMINATING ROLL this is normally the bottom laminating roll.
•GAP ADJUSTERS when this option is present they consist of two cylinders at the top of
each Air Cylinder. They provide distance control of the gap between the laminating rolls
at the Nip.
7

•UNWIND STAND located just above and to the side of the top Heat Laminating Roll
this stand provides support for roll material as it is fed into the nip of the laminator.
•LAMINATING PLATFORMS are provided on both sides of the nip for the purpose of
guiding material into the laminating nip.
•AIR INLET CONNECTION consisting of the male component of a “quick disconnect”
pneumatic system. Located on the side of the control cabinet
•GUIDE ROLL can be used to guide unwind material away from heated top Heat
Laminating Roll before being fed into the nip.
Photo 1 HL-100
Motor Power Switch
Heat Power Switch
Air Regulator
Programmable Heat Controller
Emergency Stop Switch
Forward/Reverse Switch
Speed Control
N
i
p
Exhaust Control Valves (4)
Unwind Stand
Air Cylinders (2)
Heat Laminating Roll
Up & Down Switches
Drive Laminating Roll
(Not visible) Air Inle
t
Laminating Platforms
Guide Roll
8

OPERATION
THEORY OF OPERATION
Laminated samples can be prepared with our without heat. Single sample sheets to be
laminated are fed to the Nip from the Laminating Platforms to be laminated with material from
the Unwind Stand. The top Heat Laminating Roll can be controlled to provide heat for heat
activated adhesive material. Laminating pressure is controlled by the Air Regulator. Speed of
the laminating rolls is controlled by the Speed Controller, while direction is selected with the
Forward/Reverse switch. The travel speed of the top Heat Laminating Roll is controlled by the
four Exhaust Control Valves.
Each of the items mentioned above can be found in various sections of this manual with a
detail explanation of their function and method of operation.
PROGRAMMABLE HEAT CONTROLLER
There is a separate manual supplied by the manufacturer of the Heat Controller. Please
refer to this manual for specific instructions on operation.
One of the features of the Programmable Heat Controller is the ability to learn the fastest
most efficient manner to reach the set temperature. This feature is called “Auto Tune”. Before
shipping the HL-100/101 has been Auto Tuned to 250 º F ( 122 º C ).
1. To activate the top Heat Laminating Roll heat, turn the Heat Power Switch on.
2. To change/set the temperature press the SET/ENT button
3. The brightly lit number on the display is the digit that can be changed by pushing the
arrow button.
4. To record the new temperature setting, press the SET/ENT button.
5. When no entry has been made for a period of one (1) minute, the controller will return to
normal operation with the last recorded set point.
Warning! After the heater switch is turned on, the internal temperature of the heated roll will rise
quickly. For the roll temperature to stabilize you should allow 45 minutes before performing
laminations.
9

There are additional features that are described in the supplied manufacturer’s manual.
One of the notable features is the ability to set a temperature “Offset Bias”. This feature allows
you to program the controller to reflect the outside roll surface temperature of the Heated
Laminating Roll as opposed to the internal temperature.
LAMINATING PROCEDURE
There are many ways to use the HL-100/101 hot roll laminator. The following is a basic
description of the principles of laminating. Your particular lamination may require steps in
addition or different than the following.
1. Raise the top Heat Laminating Roll by pressing the Up button.
2. Turn the Heat Power switch on and set the Programmable Heat Control to the desired
temperature. Make sure you follow the manufacturer’s manual instructions and wait 45
minutes before laminating.
3. Load any roll form material on the Unwind Stand.
4. Set the speed for the Drive Laminating Roll.
5. Make sure the Motor Power switch is in the OFF position.
6. Thread the roll form material according to your need to either not preheat or preheat the
web before entering the Nip. (To preheat the web, thread the web directly in contact with
the top Heat Laminating Roll and inside of the Guide Roll. To not preheat the web thread
the material around the Guide Roll before entering the Nip)
7. Place the sheet or other material to be laminated on the Laminating Platform at the entry
point of the Nip.
8. Make sure that the adhesive side of your sample is in contact with the web and position it
in the Nip of the laminating rolls.
9. Press the Down button to lower the top Heat Laminating Roll.
10. Turn the Motor Power switch on to start the laminator.
11. As the sample moves through the laminator it may be necessary to guide the laminated
sheet away from the Bottom Drive Roll. Material has a tendency to follow the cure of the
laminating roll.
12. When finished turn the Motor Power switch off and press the Up button to raise the top
Heat Laminating Roll.
10

Other manuals for HL-100
2
This manual suits for next models
1
Table of contents
Other ChemInstruments Laminator manuals