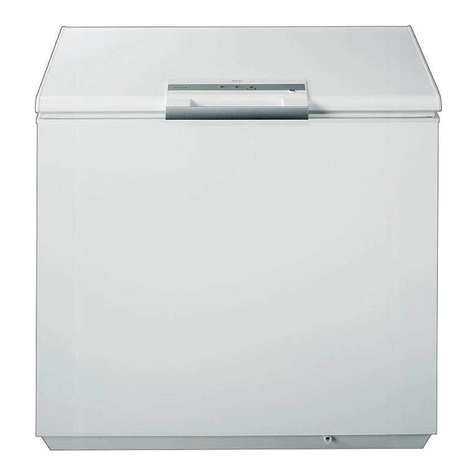
Candy CIF 130 User manual

FREEZER
INSTRUCTION MANUAL
GB

1
Dear customer,
Before placing your new freezer into operation please read these operating instructions carefully.
They contain important information for safe use, for installation and for care of the appliance.
Please keep these operating instructions for future reference. Pass them on to possible new ow-
ners of the appliance.
Notes which are important for your safety or for the proper functioning of the appliance are stres-
sed with a warning triangle and/or with signal words (Warning!, Caution!, Important! ). Please ob-
serve the following carefully.
Supplementary information regarding operation and practical applications of the appliance appear
after this symbol.
Tips and notes concerning economical and environmentally sound use of the appliance are mar-
ked with the cloverleaf.
The operating instructions contain instructions for the correction of possible malfunctions by the
user in the section @Trouble shooting@. If these instructions should not be sufficient, contact yo-
ur local Service Force Center.
Printed on paper manufactured with environmentally sound processes he who thinks ecologically
acts accordingly...
GB

Important safety instructions
Remove transport packaging
Installation
Building in
Positioning
Description of the appliance
Starting up and temperature regulation
Thermostat control
Using the freezer
Defrosting
Switching off the appliance
Cleaning and Care
Trouble shooting
Noises during Operation
Disposal of the appliance
Contents
.........................................
........................................
........................................................
........................................................
........................................................
.........................................
................................
.................................................
...................................................
.........................................................
..........................................
.................................................
...................................................
............................................
...........................................
3
5
5
6
10
10
10
11
13
13
14
14
15
17
17
2
GB

3
Important safety instructions
These warnings are provided in the interests of your safety. Ensure you fully understand them be-
fore installing or using the appliance.
Your safety is of paramount importance. If you are unsure about the meaning of these warnings
contact the Customer Care Department for assistance.
Intended use
The freezer is intended for use in the home.It is suitable for the storage of food at low temperature.
If the appliance is used for purposes other than those intended or used incorrectly,no liability can
be accepted by the manufacturer for any damage that may be caused.
Alterations or changes to the refrigerator are not permitted for reasons of safety.
If you use the refrigerator in a commercial application or for purposes other than the cooling of
foods, the manufacturer accepts no liability for any damages that may occur.
Prior to initial start-up
Check the appliance for transport damage. Under no circumstances should a damaged appliance
be plugged in. In the event of damage, please contact your supplier.
Refrigerant
The refrigerant isobutene is contained within the refrigerant circuit of the appliance,a nat-
ural gas with a high level of environmental compatibility, which is nevertheless flammable.
During transportation and installation of the appliance, be certain that none of the components of
the refrigerant circuit become damaged.
If the refrigerant circuit should become damaged:
avoid open flames and sources of ignition, thoroughly ventilate the room in which the appliance is
situated.
The instructions shall include the warnings:
(R600a)
WARNING—Keep ventilation openings,in the appliance enclosure or in the built-in structure,clear
of obstruction.
WARNING—Do not use mechanical devices or other means to accelerate the defrosting process,
other than those recommended by the manufacturer.
WARNING—Do not damage the refrigerant circuit.
WARNING—Do not use electrical appliances inside the food storage compartments of the reco-
mmended by the manufacturer.
GB

4
WARNING—This appliance is not intended for use by young children or infirm persons unless
they have been adequately supervised by a responsible person to ensure that they can use the
appliance safely .Young children should be supervised to ensure that they do not play with the
appliance.
WARNING—This appliance is not intended for use by persons (including children) with reduced
physical, sensory or mental capabilities, or lack of experience and knowledge, unless they have
been given supervision or instruction concerning use of the appliance by a person responsible for
their safety. Children should be supervised to ensure that they do not play with the appliance.
WARNING—Please keep the appliance away from substance, which can cause ignition.
WARNING—if the supply cord is damaged, it must be replaced by a special cord or assembly
available from the manufacturer or its service agent.
WARNING—before obtaining access to terminals, all supply circuits must be disconnected.
WARNING—Please remove the door before you dispose your refrigerant.
Safety of children
Packaging (e.g. wraps, polystyrene) can be dangerous for children.
There is a risk of suffocation! Keep packaging material away from children!
Make old appliances unusable prior to disposal.Pull out the mains plug, cut off the mains cable,
break or remove spring or bolt catches, if fitted.By doing this you ensure that children cannot lock
themselves in the appliance when playing (there is risk of suffocation!) or get themselves into other
dangerous situations.
Often children cannot recognize the hazards present in household appliances. It is therefore imp-
ortant that you ensure adequate supervision and never let children play with the appliance!
Daily Operation
Containers with flammable gases or liquids can leak at low temperatures.There is a risk of an ex-
plosion! Do not store any containers with flammable materials such as spray cans,fire extinguisher
refill cartridges etc in the freezer.
Do not operate any electrical appliances in the freezer (e.g. electric ice cream makers, mixers etc.).
Before cleaning the appliance,always switch off the appliance and unplug it,or pull the house fuse
or switch off the circuit breaker.
When unplugging always pull the plug from the mains socket, do not pull on the cable.
GB

5
In case of malfunction
If a malfunction occurs on the appliance,please look first in the“Trouble shooting”section of these
instructions. If the information given there does not help,please do not perform any further repairs
yourself.
Under no circumstance should you attempt to repair the appliance yourself. Repairs carried out
by inexperienced persons may cause injury or serious malfunctioning. Contact your local AEG
Service Force Center.
Remove transport packaging
The appliance and the interior fittings are protected for transportation. Pull off the adhesive tape
on the left and right side of the door. You can remove any remnants of adhesive using white spirit.
Remove all adhesive tape and packing pieces from the interior of the appliance.
Installation
Installation Location
Before installing,carefully read the instruction in the end in order to avoid a certain number of
problems.If you want to move your freezer, hold it by the sides or by the base. You should never
lift it by its top.Install the appliance in a dry,well-ventilated room,away from all source of heat.Lea-
ve a minimum gap of 10cm between the top of the freezer and any wall-mounted kitchen units.
If this is impossible, leave 5cm above the appliance and 2.5cm on each side of the appliance.
Make sure that the air vents on your freezer are not covered or blocked.
Electrical connection
Connector characteristics: with earth.
Avoid using adapters or extension leads.
Avoid the cable coming into contact with the compressor.
Avoid trapping the cable under the appliance.
The appliance's electrical installation is earthed. For your safety, connect the appliance to a power
outlet with effective earthing (in conformity with current electrical installation safety standards).
The manufacture declines all liability for damage caused by the absence of an earth connection.
Warning: to avoid a hazard due to instability of the appliance, it must be fixed according to
t
instructions:
220-240V
GB

6
Building in
Dimensions of the recess
Height of housing mm 880
Depth of housing mm 550
Width of housing mm 560
It is necessary that the cabinet has a ventilati-
on recess with the following dimensions :
Depth 50mm
Width 540 mm
For appropriate venting, follow indications in
the figure.
1.Push the appliance into the housing until
stop strip (A) touches the kitchen unit.
2.Press in the joint covers between the appli-
ance and the kitchen furniture (only on the si-
de without hinge)
GB

7
3. Open the door and push the appliance ag-
ainst the side of kitchen furniture opposite to
that of appliance hinges.Fasten the appliance
with 6 screws provided in the kit included with
the appliance. Snap hinge cover (D) into posi-
tion.
4.Apply blanking covers (B) as indicated.
5. Separate parts A,B,C,D as shown in the
figure.
6. Place guide (A) on the side part of the furn-
iture door,up and down as shown in the figure
and mark the position of external holes. After
having drilled holes, fix the guide with the scr-
ews supplied.
GB

8
7. Fix cover ( C ) on guide (A) until it clips into
place.
8. Open the appliance door and the furniture
door at 90°.Insert the small square (B) into
guide (A) .Push together the appliance door
and the furniture door and mark the holes as
indicated in the figure remove the squares and
drill holes with φ2 mm at 8 mm from the outer
edge of the door .Place the small square on
the guide again and fix it with the screws sup-
plied.
9. Should the lining up of the furniture door be
necessary , use the clearance of slots .At the
end of operations, it is necessary to check the
door of the furniture closes properly.
10. Fix cover (D) on guide (B) until it clips into
place.
GB

Reversing the door
The side at which the door opens can be changed from the right side (as supplied) to the left side,
if the installation site requires. Tilt the appliance slightly towards the rear and prop it securely. Un-
screw the door hinge screws and remove the hinge pin bracket. Open the door a little way and
take it out downwards.
Unscrew the upper pin and screw it into place on the opposite side.Fit the door into the upper pin
and close it. Screw the hinge pin bracket securely into place on the opposite side using the screws.
Warning!
When changing the side at which the door opens, the appliance must not be connected to the
mains. Remove plug from the mains beforehand.
9
GB
Table of contents
Languages:
Other Candy Freezer manuals

Candy
Candy CVDS 5162X User manual

Candy
Candy DL1-16 Installation instructions

Candy
Candy CMIOUS 5142 WH User manual

Candy
Candy 37000599 User manual

Candy
Candy CFBO 150E User manual

Candy
Candy 2451 User manual

Candy
Candy CFU 135 A Mounting instructions

Candy
Candy CCHE 155 Manual

Candy
Candy CCF 85 User manual

Candy
Candy CCF 85 User manual

Candy
Candy CHAE1462F User manual

Candy
Candy CV110FF User manual

Candy
Candy CHEST FREEZER User manual

Candy
Candy CUQS 58EW User manual

Candy
Candy CHOF 6174W/N User manual

Candy
Candy CVBN 6182WBA User manual
Candy
Candy CCHA 110 User manual

Candy
Candy CFU 135 NEK/N User manual

Candy
Candy CCTUS 542IWHN User manual

Candy
Candy CVS 5166WK User manual