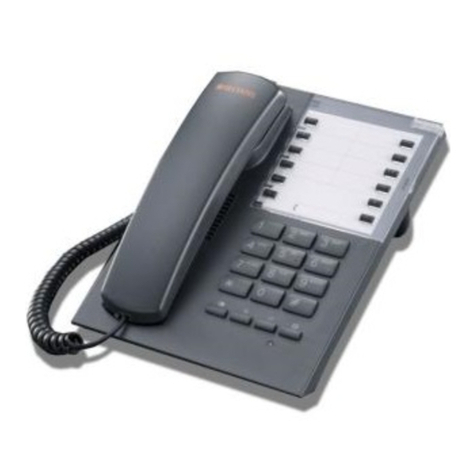
Burnside P350 User manual

D
E
F
7
M4
Redial
89
4
M3
Mute
56
12
M2
M1
Names
Register
SMS
Menu
Select
Mailbox
Clear
Call
3
0
M5
Handsfree
+
#
Wireless
Modules
by Siemens
BURNSIDE
Burnside P350 / P390
desktop mobile phone
user guide


1
Contents
2 Introduction
2 Welcome
3 Setting up
3 Install your SIM card
4 Attach the handset cable
4 Unlock the transit switch
5 Attach the antenna
5 Prepare the power adapter
5 Attach the power adapter
6 Using your phone
6 Switching on
6 Switching off
7 The standby screen
8 Making and receiving calls
10 Managing more than one call
12 Menu options
13 Menu options layout
14 Phonebook
19 Speed dial memory buttons
20 Messages
24 Call register
26 Divert
28 Tones
29 Settings
30 General settings
31 Call settings
32 Security settings
32 Date and time settings
32 Restore settings
33 Status
34 Options
34 Stub antenna
35 Headset
36 Linking to a computer
37 Important safety information

2
Introduction
Welcome
Thank you for choosing the P350 / P390 desktop mobile phone from
Burnside Telecom. Combining the ease of use of a landline phone with the
flexibility of a mobile phone, your phone provides landline simplicity almost
anywhere.
Internal lithium polymer
battery with up to 5
days standby time
Supplied complete with an
autosensing power adapter/
battery charger and a country
specific socket converter
Sturdy handset with
quality microphone
and earpiece
P390 models additionally
support GPRS data
communications.
D
E
F
7
M4
Redial
89
4
M3
Mute
56
12
M2
M1
Names
Register
SMS
Menu
Select
Mailbox
Clear
Call
3
0
M5
Handsfree
+
#
Wireless
Modules
by Siemens
BURNSIDE
Speaker
Backlit
fullsize
display
screen
Large clear alpha
numeric keys for
dialling and writing
text messages
Direct
access to
your
phonebook
and special
contacts
Direct access to:
• Menu
• SMS messaging
• Calls register
• In call muting
• Last number
redial list
Large
menu
control
buttons
Clear
status and
charge
indications
Handsfree
operation
Microphone
A range of
antennae
to suit most
situations

3
Setting up
Install your SIM card
Your SIM (Subscriber Identity Module) card is your identity on the mobile
phone network. It can also store your phonebook contact details. Without a
working SIM card, your phone can only make emergency calls (subject to
network availability).
Note: When handling your SIM card, limit your movements to reduce static
electricity and avoid touching the gold contacts.
1 Ensure that the phone is switched
off. On the rear panel of the
phone, carefully swing open the
SIM slot door.
2 Orientate your SIM card with
its contacts facing downwards
and the notched corner facing
towards the slot.
3 Push the SIM card into the slot
until it clicks into place. Close the
door.
Note: To remove the SIM card,
press it inwards to release and
partially eject it. Then slide it out
of the slot.

4
Unlock the transit switch
When shipped, the phone is locked for transit to prevent it from switching on
accidentally. You need to unlock the phone before it will operate.
1 On the underside of the
phone, locate the recessed
switch near to where the
handset cable attaches.
2 Slide the switch towards the
rear of the phone unit.
The phone will not switch on
at this stage.
Attach the handset cable
1 Locate the handset and the supplied cable.
2 Connect one end of the cable to the socket at the base of the handset
and the other end to the socket in the left side of the phone body.
D
E
F
7
M4
Redial
89
4
M3
Mute
56
12
M2
M1
Names
Register
SMS
Menu
Select
Mailbox
Clear
Call
3
0
M5
Handsfree
+
#
Wireless
Modules
by Siemens
BURNSIDE
Handset cable
Locked
position
Unlocked
position
Transit
switch
Note: An optional headset is available, see the Options section for details.

5
Attach the power adapter
1 Attach the connector from the power
adapter to the socket on the far right
of the rear panel.
2 Plug the power adapter main body
into a nearby mains outlet and en-
sure that the outlet is switched on.
Prepare the power adapter
The supplied power adapter will either be fully specific to your location or
will be an adaptable unit with at least one snap-on plug to suit the mains
power sockets used in your area. If appropriate, you may need to attach the
snap-on plug, if it has not already been fitted.
1 Locate the power adapter main body and the appropriate snap-on plug
(if it has not already been fitted to the main body).
2 Orientate the snap-on plug so
that its underside connection
slots are aligned with the two
metal blades of the adapter
main body, as shown here:
3 Slide the plug into the adapter
main body and press it firmly
into place until you hear a click
(as it snaps into position).
Attach the antenna
The supplied antenna has a magnetic mount
and a two metre cable for remote positioning.
1 Assemble the antenna by screwing the upper
section into the base until it is finger tight.
2 Position the antenna where required, if pos-
sible on a secure metal surface (preferably
iron or steel).
Note: Keep the antenna base away from
monitor screens, televisions, diskettes, credit
cards, etc. because the magnetic base can
affect these items.
3 Feed the antenna cable to the rear of the phone,
attach the connector to the antenna socket
and twist the collar until it is finger tight.
Note: Ensure that the antenna cable
does not cause a trip hazard.
Note: You can use
the status screen to
assist with antenna
positioning - see
page 33.

6
Using your phone
Switching on
1 Ensure that a valid SIM card is installed and that either:
• The power adapter is attached (as discussed in the previous section),
or
• The internal battery has been charged for at least two hours (or
until the display shows ‘charged’) before it is used without mains
connection.
Whenever power is applied, the internal battery will be charged
automatically.
2 On the rear panel, press and hold the
red button for roughly one second, then
release.
• The screen should illuminate and
display an initial message while the
phone prepares itself for operation.
• If the SIM card is configured to use a
PIN (Personal Identification Number)
code, you will be asked to enter it.
Enter the appropriate four digit code
and press the Select button.
Note: take care when entering a PIN code as three successive incor-
rect tries will cause the SIM card to be blocked, requiring a special
unblocking code from your service provider.
• If there is no available network service in the vicinity, the display will
show Searching... If this condition continues, try a different location
for the phone or antenna.
3 The standby screen will be displayed (see opposite).
Switching off
1 Press and hold the red button until the display goes blank.
Notes
During normal use, the phone should only be switched on and off using
the red button. Use the transit switch only after the unit has been turned
off.
If the transit switch is inadvertently moved to the locked position, the
phone will immediately shut off or enter a charging state if the power
adapter is connected.
Red
power
button

7
The standby screen
When there is no call in progress and the menu is not being used, the
phone will show the standby screen. The standby screen provides indica-
tions of the signal strength, battery charge status as well as the time and
date.
The ordinary standby screen will display the network name in addition to
any relevant status icons.
You also have the option to display a large digit clock rather than the net-
work name. See the Settings section for details on enabling the ‘big clock’.
Standby screen with big clock option
enabled (see Settings section)
Standby screen showing all status
items and the network name
Date and
time
All calls
fowarded
icon
Message
received
icon
Missed
call icon
Headset
icon
Power/
battery
status
icon
Signal
strength
icon
Note: The big clock will be temporarily removed from display if special infor-
mation must be shown, such as “SMS inbox full, messages queued” or the
phone is searching for a network connection.

8
Making and receiving calls
Although your phone uses mobile communication technology, much effort
has be made to make basic telephone functions work like a high quality
landline phone, but with the added benefit of many mobile phone features.
Important: If the network connection shows Searching... you will not
be able to successfully make or receive calls. There are many factors that
can affect network availability and for this reason, the phone should not be
considered as a fail-safe resource for making emergency calls.
To make a call by dialling
Before making a call, ensure that the standby screen is displayed:
Normal standby screen
showing the network name
Standby screen with the
big clock option enabled
Whether you are using the handset or the handsfree speaker, you can
choose to either:
• Dial first, then pick up the handset (or press the Handsfree button),
or
• Pick up the handset (or press the Handsfree button) and then dial.
When dialling:
• Remember that this is a mobile phone, you must enter the full phone
number, including area code, even if the contact is in your area.
• To erase the last entered digit: Press and release the Clear button.
• To erase all entered digits: Press and hold the Clear button.
• To enter an international number, press the *button twice (a +sym-
bol will be displayed to represent the international dialling code - You
may also be able use your normal international prefix depending on
your SIM and location.). Then enter the country code (two or more
digits) and the remaining number (with the initial zero of the area code
removed).
• If you picked up the handset/pressed the Handsfree button first, the
phone will begin placing the call a short time after the last digit is
pressed. The time delay (4 seconds as standard) between entering the
last digit and placing the call is determined by the Call delay setting
- see page 30.
You can also use a headset to make and receive calls - see page 35 details.
or
Other manuals for P350
1
This manual suits for next models
1
Table of contents
Other Burnside Telephone manuals