BT EFRAME 200 User manual

BT eFrame 200
7" MULTI MEDIA DIGITAL PHOTO FRAME
User Guide

Got everything?
•BT eFrame 200
•Desktop stand
•Mains power adaptor
•USB cable
•Remote control
•Black plastic frame
(already fitted on frame)
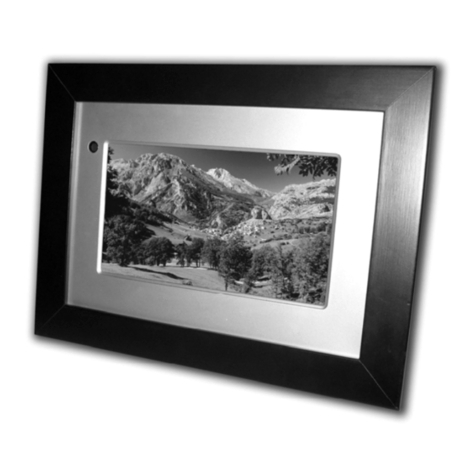
•Brushed aluminium frame
•Superb quality 7 inch display screen
•Create a slide show of your favourite digital photos
•Transfer photos straight from your memory card –
no PC required
•Interchangeable frame
–black & brushed aluminium frames included
•Multi-media functionality
–play Mp3s and Mjpeg videos
•480 x 234 pixel screen resolution with 16m colour display
•Compatible with mostmajor memorycards: SD, MMC, MS
Pro, USB stick
•JPEG, up to 26 Mega Pixels
•Calendar and clock on display screen, plus alarm function
•Remote control operation
•Supports USB 2.0 High Speed memorystick
•Wall mountable
•128MB internal memory allows you to store photos
directly ontothe frame
•Load photos directly from your PC onto your frame via the
USB cable included
•Built in speaker and headset jack
•Auto turn on/off at your desired times
If you experience any problems, please call
the Helpline on 0808 100 9889*
Welcome…
to your BT eFrame 200
*Calls made from within the UK mainland network are free.
Mobile and International call costs may vary.

In this guide
3
Getting to know your digital photo frame
Photo frame . . . . . . . . . . . . . . . . . . . . . . . . .4
Remote control . . . . . . . . . . . . . . . . . . . . . .5
Main menu display . . . . . . . . . . . . . . . . . . . .6
Setting up
Setting up the stand . . . . . . . . . . . . . . . . . .7
How to change between the black
and aluminuim frames . . . . . . . . . . . . . . . . .7
Using your eFrame 200
Switching the frame on . . . . . . . . . . . . . . . .9
Viewing images . . . . . . . . . . . . . . . . . . . . . .10
Slideshow . . . . . . . . . . . . . . . . . . . . . . . . . . .10
Stop viewing the Slideshow . . . . . . . . . . . .10
Photo rotation and Display rotation . . . . . .10
Playing video clips . . . . . . . . . . . . . . . . . . . .11
Clock mode . . . . . . . . . . . . . . . . . . . . . . . . . .12
MP3 mode . . . . . . . . . . . . . . . . . . . . . . . . . .12
Setup mode . . . . . . . . . . . . . . . . . . . . . . . . .13
Copying files . . . . . . . . . . . . . . . . . . . . . . . . .15
Mini USB device unplugging notice . . . . . .16
Help . . . . . . . . . . . . . . . . . . . . . . . . . . . . . . . .17
General information
Safety information . . . . . . . . . . . . . . . . . . . .18
Cleaning . . . . . . . . . . . . . . . . . . . . . . . . . . . .18
Product disposal instructions . . . . . . . . . . .18
Guarantee . . . . . . . . . . . . . . . . . . . . . . . . . . .18
Technical information . . . . . . . . . . . . . . . . .19
If you experience any problems, please call the Helpline on 0808 100 9889*

Getting to know your digital photo frame
4
If you experience any problems, please call the Helpline on 0808 100 9889*
LCDPanel
Remote control receiver
USB port
Memorycard port
Earphone jack
Mini USB port
Power socket
Power
Power indicator
Speaker
Button torelease the
coloured frame insert
Up Down Right Left Enter Esc
Stand
Wall mounting hooks
You can hang your photo frame on the
wall using the wall mounting hooks
(wall fixings are not provided).
Photo frame

5Getting to know your digital photo frame
Remote Control
Time
Slide show
Rotate
Preview
ESC
Enter
Left
Delete
MP3
Previous song
Next song
Standby
Date
Menu
Ratio
Copy
Up
Volume +
Volume -
Right
Information
Down
Play mode
Stop
Play / Pause
Press standby button to turn
the backlight on/off.
Once set from the main menu, you can
toggle between off and two alternative
screen views of the clock.
Photos will be shown automatically one
by one in a slide show.
Takes you back into the main menu and
into sub menus.
Once set from the main menu it allows
you to show or hide the calendar.
Rotation of images can be activated only
when they are displayed in 4:3 mode.
View all image thumbnails in Reading
Photo mode.
Files saved in a memory card can
be copied individually to the
internal memory.
Aspect 4:3, 16:9.
Show image’s resolution.
Music repeat playback.
Play / Pause.
Stop.
Previous song.
Next song.
If you experience any problems, please call the Helpline on 0808 100 9889*

6 Getting to know your digital photo frame
Main menu display
If you experience any problems, please call the Helpline on 0808 100 9889*
Slide show mode / Thumbnail mode MP3 files
Clock mode Set-up

7
Setting up
Follow the diagram below to set-up your frame
Setting up the stand
How to change between the black and aluminium frames
1. Press the EJECTION button to take out the existing frame.
If you experience any problems, please call the Helpline on 0808 100 9889*

8
If you experience any problems, please call the Helpline on 0808 100 9889*
Setting up
2. Reassemble the new frame by fitting it on the middle cover (pay attention to the
mounting direction: the side with a remote control receiver hole).

9
Using your BT eFrame 200
Switching the frame on
1. Plug the mains power adaptor into the side of the frame.
2. To read files from a memory card, insert an appropriate memory card into the side of the frame.
3. Press the POWER button to activate. The main menu is displayed.
Select and press
ENTER.
4. The frame will automatically recognise image or video files saved in a memory card or in
the internal memory, and it will display all image or video thumbnails.
5. To start viewing images or playing video clips, see the “Viewing Images” or “Playing Video
Clips” section.
6. To return to the main menu, press the button or the button on the remote
control. To enter the thumbnail mode again. Select and press ENTER.
7 Todeletean image or video clip from thumb nail mode, press , , or to
select the image or video file that you want todelete. Press on the remotecontrol to
deletethe current image or video file, press to confirm or to exit.
IMPORTANT
When an external card is inserted, the frame will always default to look at the external
card first. To access the internal memory simply remove any external card.
If you experience any problems, please call the Helpline on 0808 100 9889*

10
If you experience any problems, please call the Helpline on 0808 100 9889*
Using your BT eFrame 200
Viewing images
1. After entering the thumbnail mode, press the , , or button (the navigation
buttons on the remote control) to select the thumbnail to view. Press the button to
enlarge the image.
2. To view the previous image, press when an image is enlarged. Press to view the
next one.
Slideshow
This lets you show your pictures off as a continuous slideshow.
1. When in the thumbnail mode, press the button on the remote control,
2. When an image is enlarged, press either the button on the remote control or the
button to enter the slideshow mode.
Stop viewing the slideshow
1. Press to stop at the current full-sized image. To return to the thumbnail mode, press
or the button on the remote control.
Photo rotation & Display ratio:
1When the display ratio is set to4:3, an enlarged image can be rotated by pressing ,
,or the button on the remote control. Press to rotate the current image
clockwise; press to rotate anti-clockwise.
2. To change the display ratio, press the button on the remote control when in the
Reading Photo mode. Or set the ratio in the setup mode. See “Setup Mode” section.
3. Press the button to return to the previous mode or press the button on the
remote control to return to the main menu.
Table of contents
Other BT Digital Photo Frame manuals