ben-e-bike TWENTY E-POWER 2020 User manual

User manual extract for the Model Year 2020
TWENTY E-POWER
TWENTYFOUR-SIX E-POWER
TWENTYFOUR E-POWER PRO
TWENTYSIX E-POWER PRO
TWENTYSEVEN
5
E-POWER PRO
2 BEN-E-BIKE INSTRUCTI N MANUAL
AMPERUM GmbH
Stuttgarter Str. 72
D-78628 Rottweil
www.ben
-
e
-
bike.
net
Dear parents,
This is only an extract of the complete manual of our BEN-E-BIKE's. The full version can be downloaded from our
website "www.ben-e-bike.net!
VALIDITY
This instruction manual is valid for BEN-E-BIKE's of model year 2020. The safety instructions for proper battery use
are explained at the end of this manual.
MARKING OF SAFETEY ADVI E
The purpose of warnings is to draw your attention to possible dangers. These warnings require your full attention
and understanding of the statements. Failure to follow a warning may result in injury to your child or others. The
warnings alone do not prevent hazards. You and your child should follow all warnings to avoid risks when using the
BEN-E-BIKE.
There are warnings in these instructions in the following classifications::
WARNING
The word "WARNING" indicates a hazard with a medium or high degree of risk, which, if not avoided, may result
in death or serious injury..
The Word „ AUTION“ indicates a hazard with a low level of risk which, if not avoided, may result in minor or
moderate injury.
The word „NOTE“ warns of possible material damage.
3 BEN-E-BIKE INSTRUCTI N MANUAL
AMPERUM GmbH
Stuttgarter Str. 72
D-78628 Rottweil
www.ben
-
e
-
bike.
net
THE TFT OLOUR DISPLAY
The TFT colour display of the BEN-E-BIKE (for the TWENTY E-P WER only available as an option)
controls all functions of the electric drive. The three pushbuttons switch on the motor and regulate its
power output. The functions that are important for daily use are explained below.
Explain to your child that he or she should solely focus on the road traffic instead watching the
display!
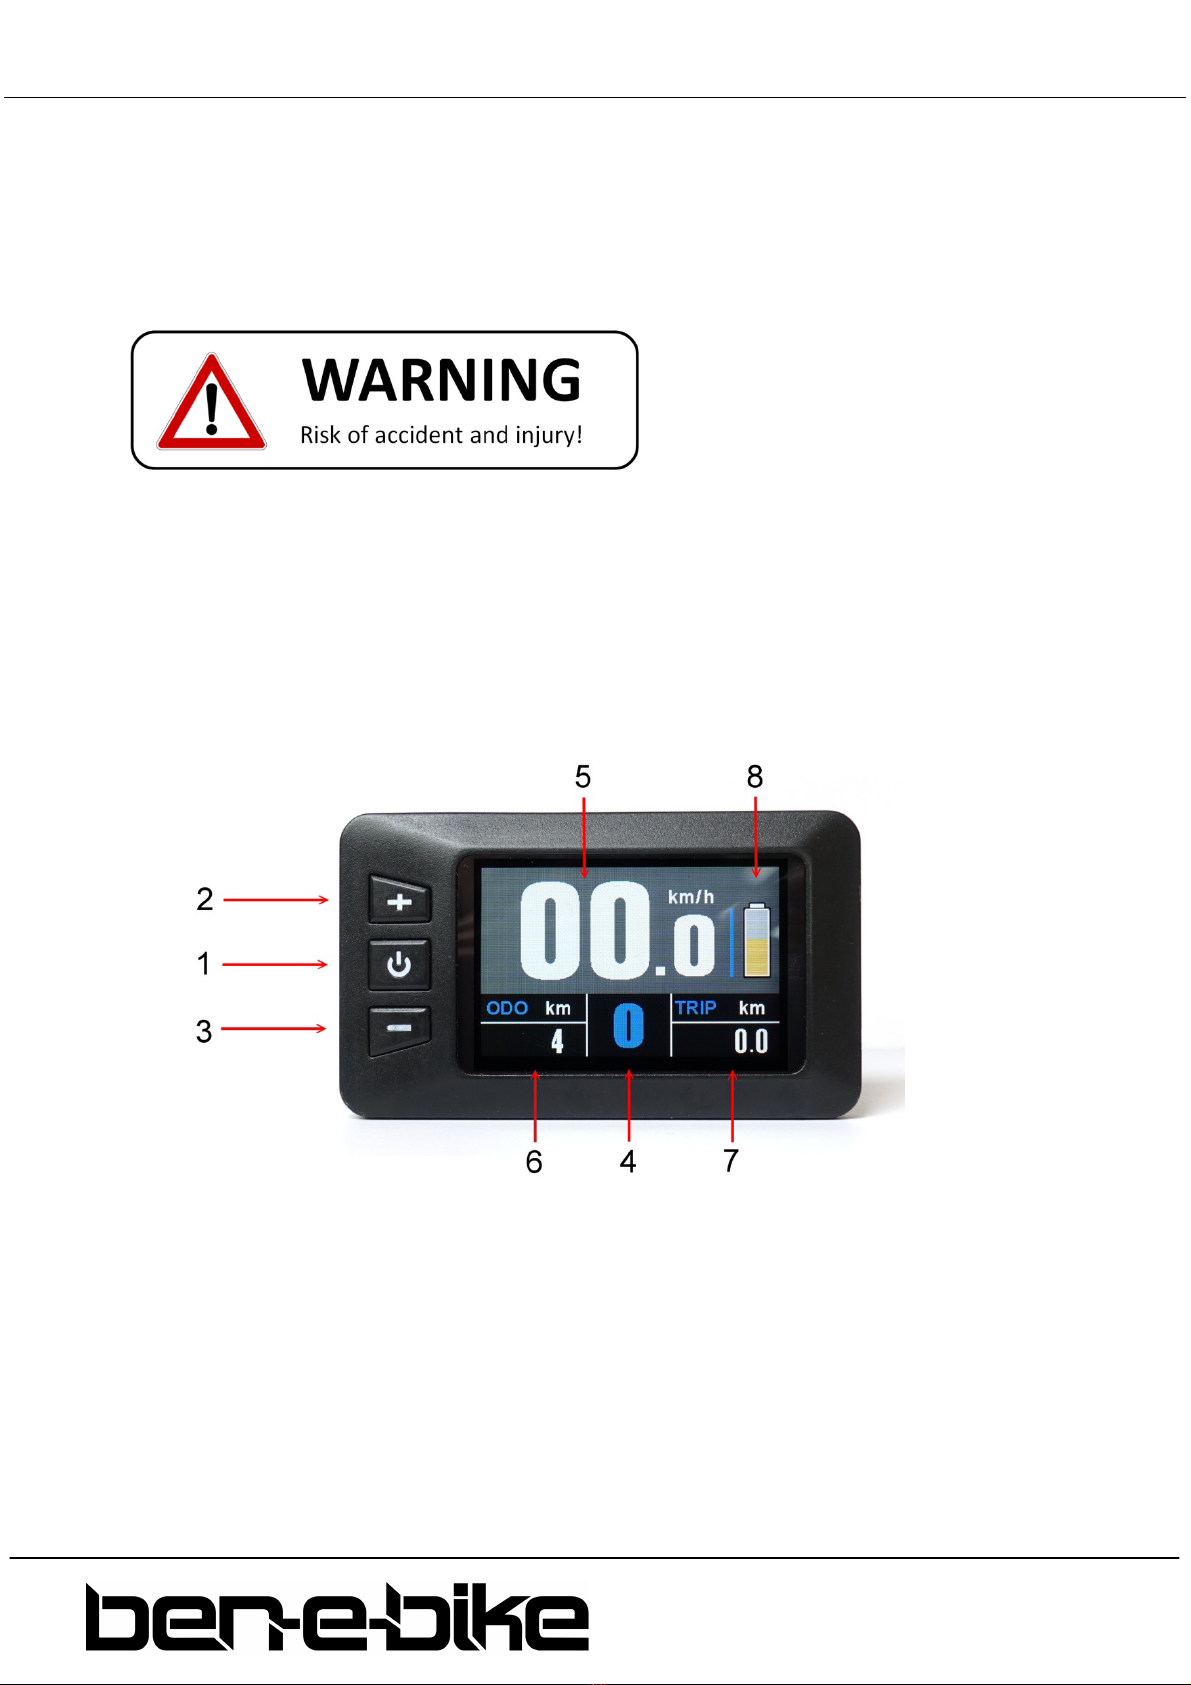
The push buttons and display features:
1. on/off push button
2. push button „+“
3. push button "-"
4. display of the assistance level („0" to "5“)
5. driving speed
6. Total distance
7. single trip distance
8. bar indicator for battery status

4 BEN-E-BIKE INSTRUCTI N MANUAL
AMPERUM GmbH
Stuttgarter Str. 72
D-78628 Rottweil
www.ben
-
e
-
bike.
net
Features
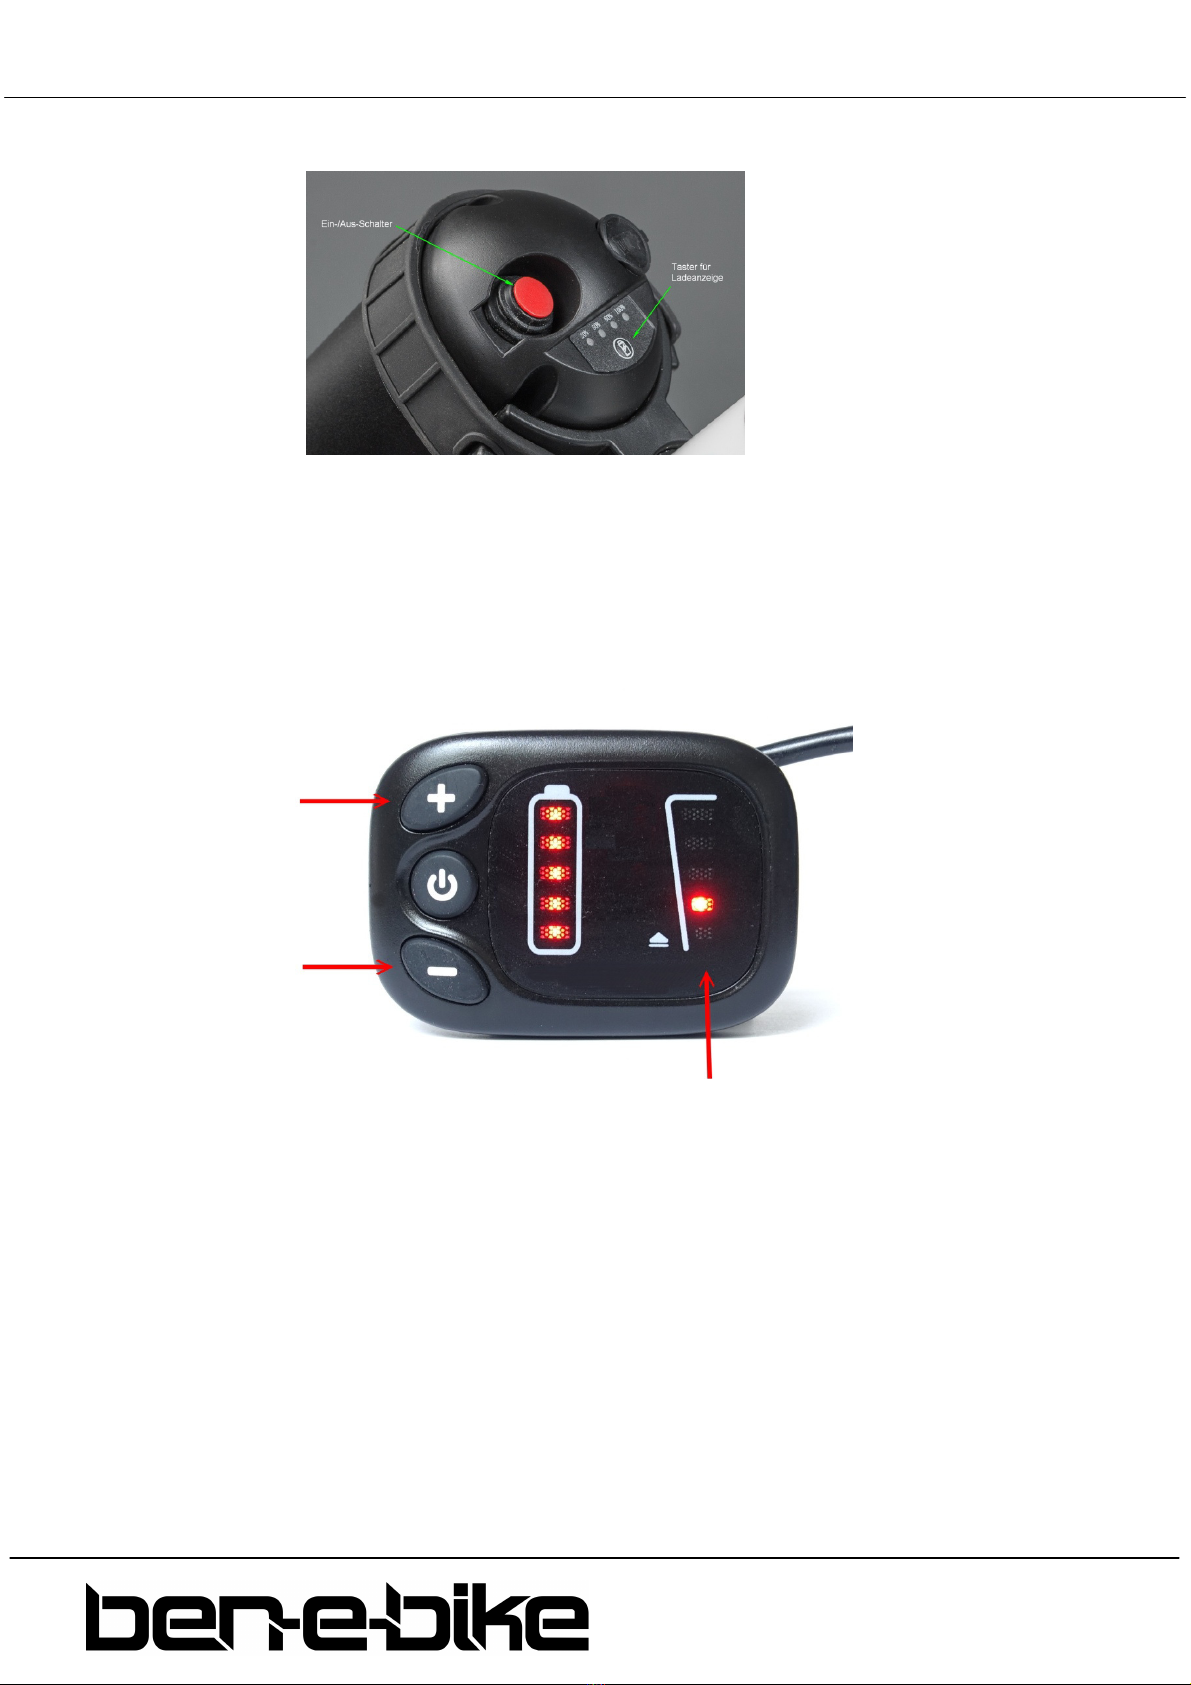
a) Switching the display on and off
It is necessary to switch on the battery first, before you can activate the display!
Press the red switch on the battery:
If the red switch on the battery was already switched on and the battery was not used for more than 30
minutes, the red switch must be switched off and on again after approx. two seconds!
To activate the display keep the middle push button pressed for more than 2 seconds:
Likewise, this button must be pressed for more than 2 seconds to turn off the system again. If the
Ben-E-Bike is parked and no button is pressed on the display or the crank isn't spun for more than 5
minutes, the display automatically shuts off to save the battery.
5 BEN-E-BIKE INSTRUCTI N MANUAL
AMPERUM GmbH
Stuttgarter Str. 72
D-78628 Rottweil
www.ben
-
e
-
bike.
net
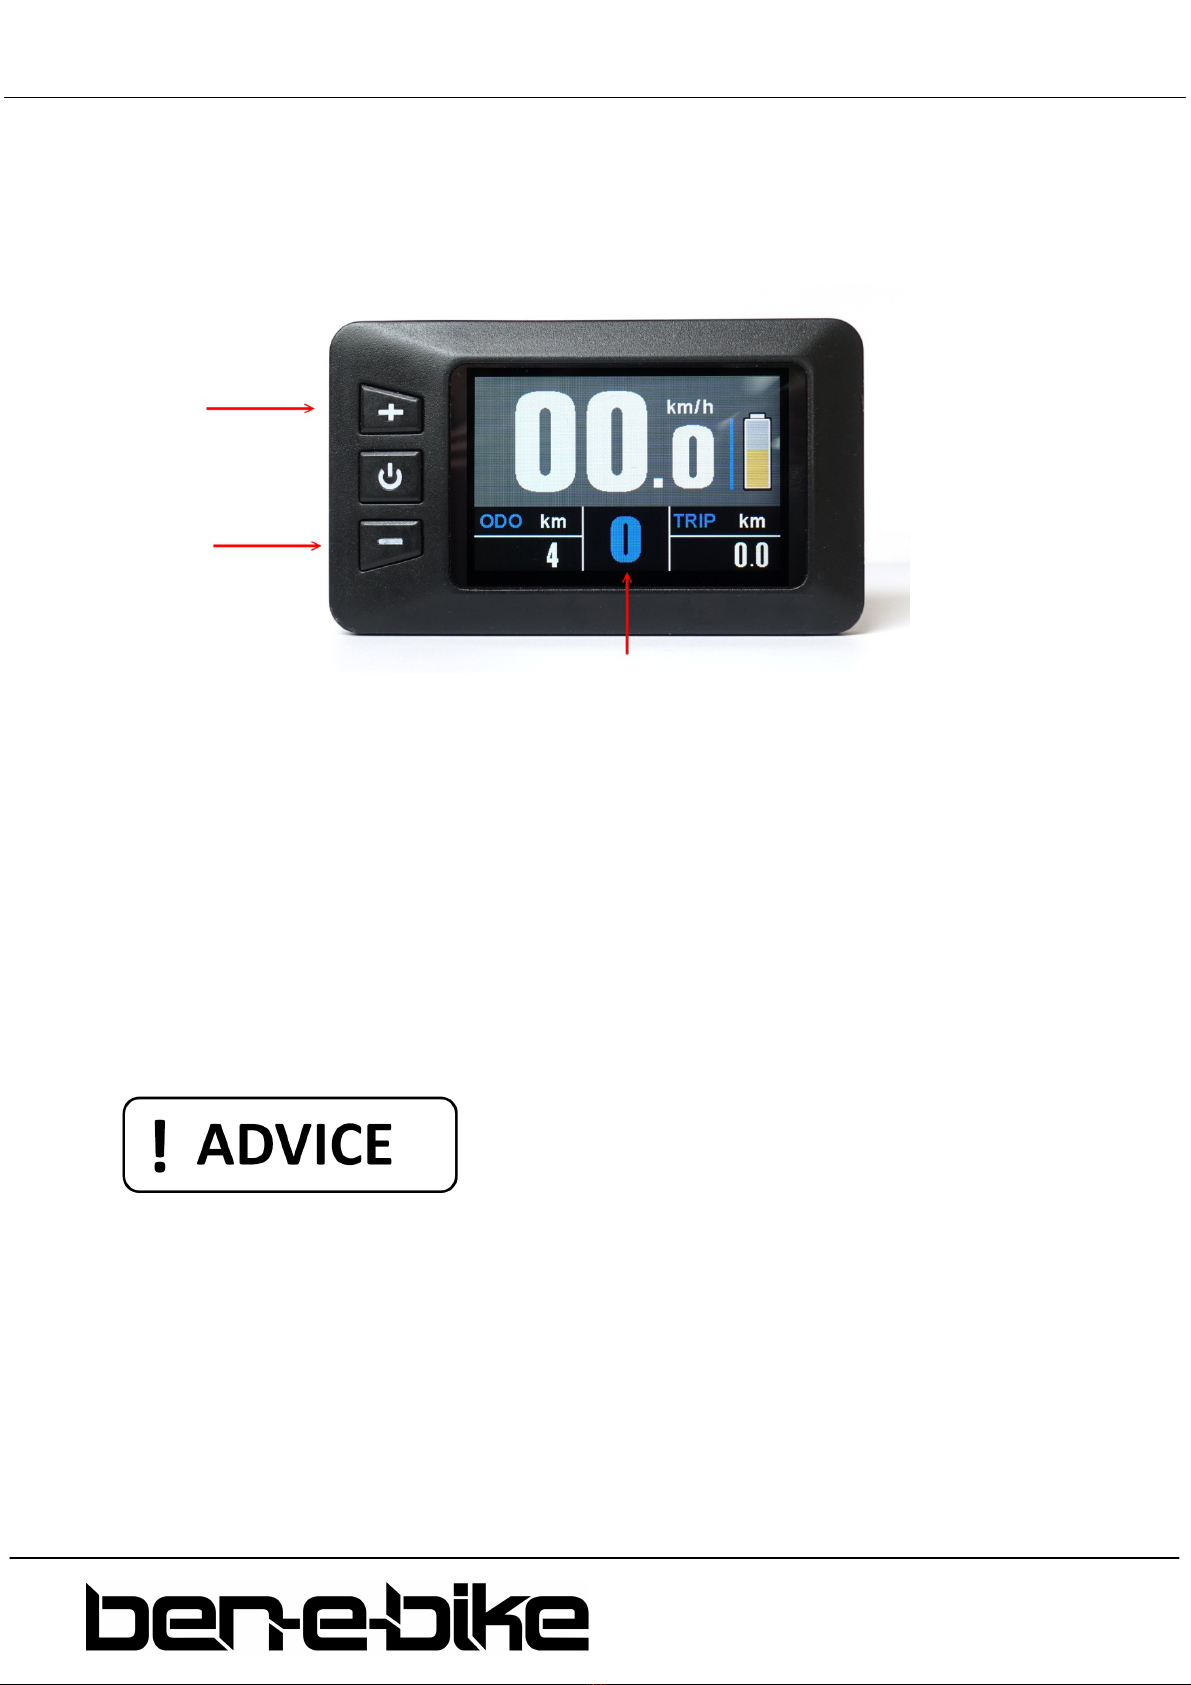
b) Adjusting the motor power
With the two keys "+" and "-" you can set how strong the motor will support. The selected support
level is shown in the top line of the display:
After switching on, the assistance level is always set to "0". This means that the motor is still off and
the BEN-E-BIKE drives like a normal bike. Remember that a BEN-E-BIKE can be pedalled more easily
than most children's bicycles, even without motor support. So you do not always have to choose one
of the levels 1 - 5 to drive fast enough!
Now choose an appropriate support level depending on the path conditions. Here are some tips on
which level is best for each situation:
•levels "0" and "1" are perfect for driving in the plane
•levels "2" and "3" are suitable for light to medium ascents or strong headwind
•level "4" should be sufficient even for steep ascents.
•the highest level "5" is only recommended for extreme "off-road" ascents.
Note: with our PC software, the strength of each support level can be customized!
Always remember that the higher the motor assistance level is set, the quicker the battery will be
discharged. So, if your child drives for comfort only at the highest level "5", the battery is discharged
very quickly.

6 BEN-E-BIKE INSTRUCTI N MANUAL
AMPERUM GmbH
Stuttgarter Str. 72
D-78628 Rottweil
www.ben
-
e
-
bike.
net
c) Turning the lights on
If your bicycle dealer has installed a front and tail light on your BEN-E-BIKE and connected it to the
6Volts output of the motor controller, you can turn it on or off via the display. To do this, press the "+"
button for more than 1 second. A small icon on the display indicates when the light is turned on.
LED headlights need so little power that the battery is therefore hardly charged. So you can confidently
activate the light even during daylight conditions for better visibility.
d) Activating the "walk-assist"
Every BEN-E-BIKE is equipped with a so-called "walk-assist". This can be very convenient if the bike is
needs to be pushed up a hill that is so steep that your child can not drive it anymore. To do activate
the walk-assist, press the "-" button and keep it pressed. The walk-assist will be activated with a delay
of approx. one second. The button must be kept pressed in any case - otherwise the walk-assist will
stop immediately. The walk-assist supports up to a maximum speed of 6 km / h - if it is active, an icon
on the display is shown instead of the assistance level.
The speed of the walk-assist can be adjusted via the PC software - the factory setting is 4 km/h.
7 BEN-E-BIKE INSTRUCTI N MANUAL
AMPERUM GmbH
Stuttgarter Str. 72
D-78628 Rottweil
www.ben
-
e
-
bike.
net
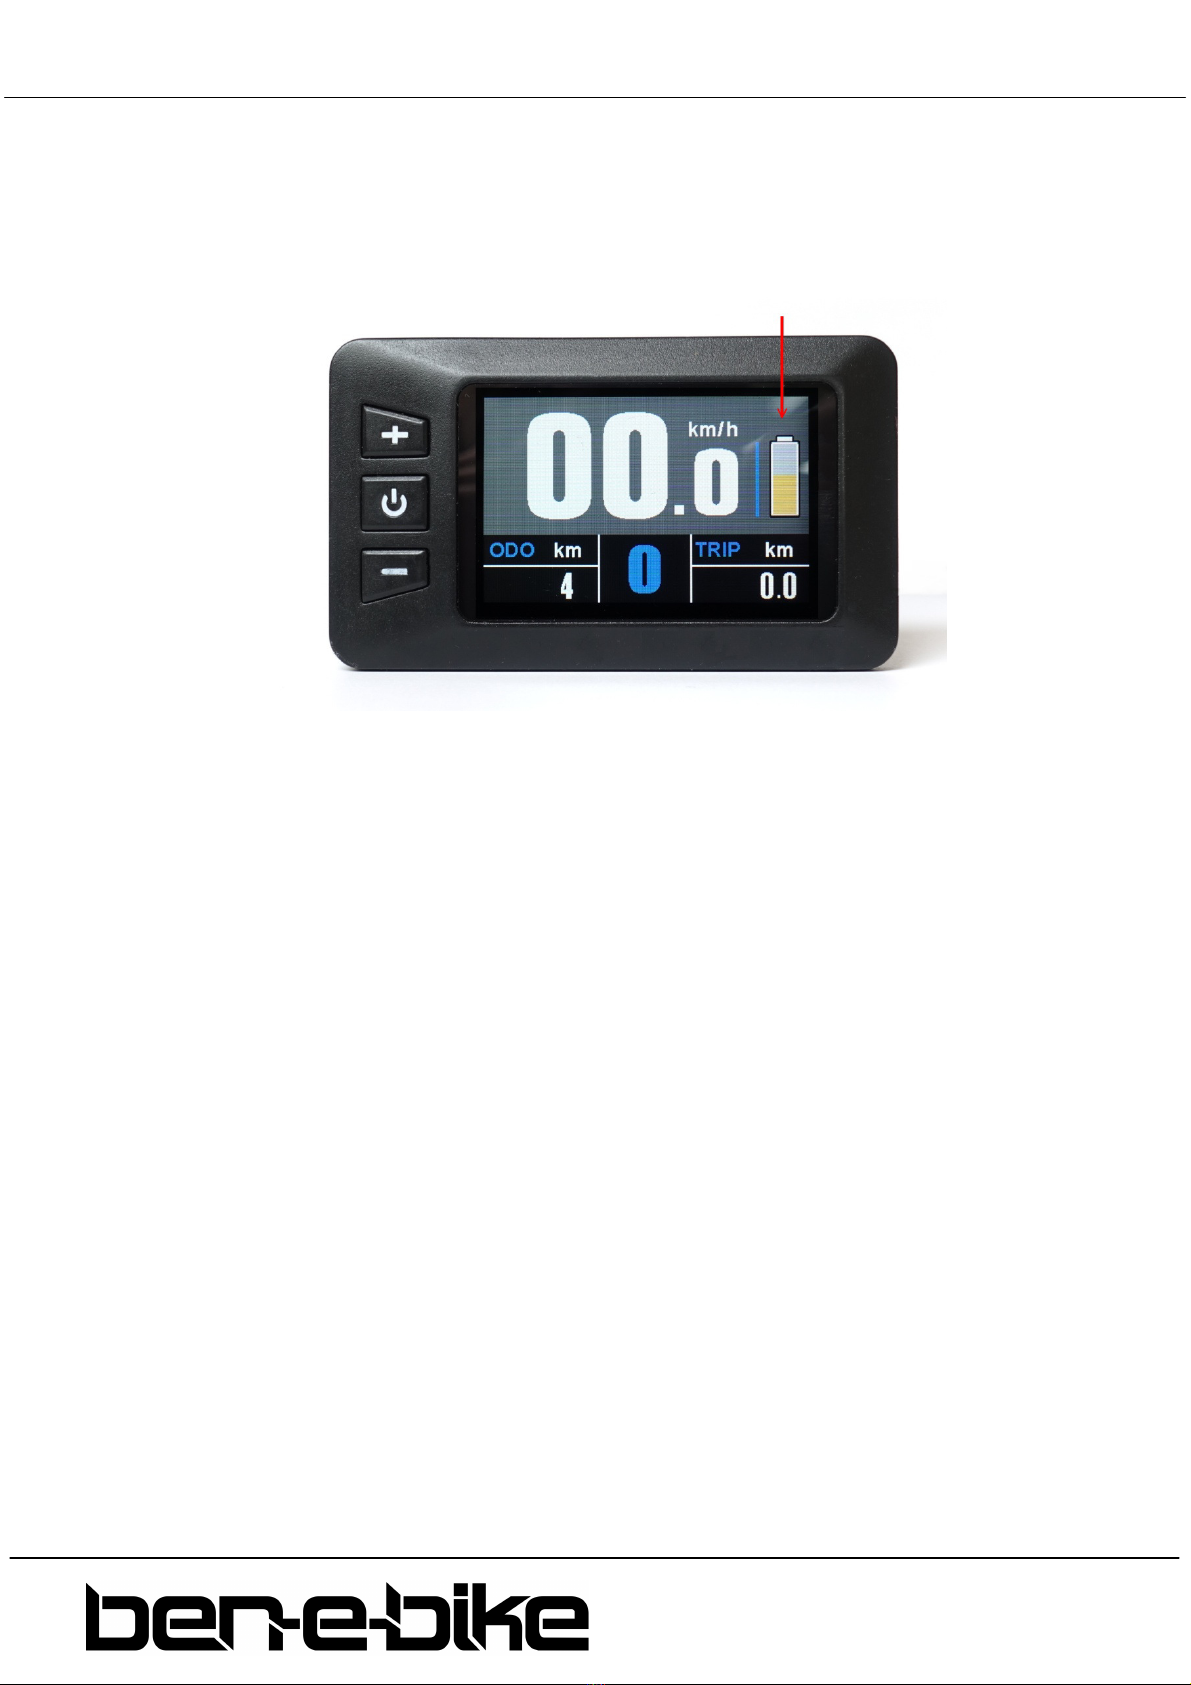
e) Battery status
The display of the BEN-E-BIKE indicates the charging status of the battery. If all five segments are
shown, the battery is fully charged:
If the battery is discharged while driving, the length of the bar is reduced and its colour also changes.
When the battery is fully charged, the bar is shown in green, the colour changes to orange in the
medium charge state and then to red when the battery is very flat. When the bar has completely
disappeared, the battery is already so far discharged that only a few kilometres can be driven with
motor support. As soon as the whole symbol starts to flash, the battery is completely discharged and
the motor support is deactivated until the battery is recharged.
f) Display of the maximum speed, average speed and total driving time
If the maximum speed (MAX) shall be shown at the bottom left of the display, the on / off button
needs to be pressed briefly once. When the on / off button is pressed again, the average speed (AVG)
is shown at the bottom left. Pressing the on / off button again displays the total driving time (Time).
The display can show a maximum of "999.9km" for the daily kilometres - afterwards this setting needs
to be reset.
The values for average speed, maximum speed, daily mileage and daily travel time can be reset to "0"
in the setup menu.

8 BEN-E-BIKE INSTRUCTI N MANUAL
AMPERUM GmbH
Stuttgarter Str. 72
D-78628 Rottweil
www.ben
-
e
-
bike.
net
These display features should not be called while driving - this distracts your child too much. So
please check the average speed and the maximum speed only when stationary!
g) "Display Setting" menu
With the display switched on, hold down the "+" and "-" buttons simultaneously to access the "Display
Setting" menu. You can make the following settings there:
•Reset the trip display counter as well as the maximum and average speed display
•Switching the unit between "kilometres" and "miles"
•Setting the tire size
•Setting the battery type (24 volts or 36 volts)
Use the "+" and "-" buttons to select the desired menu item. Then briefly press the on / off button to
edit the relevant menu item (this is then displayed in yellow instead of white font). Then use the "+"
and "-" buttons to make the setting and confirm using the on / off button.
There are three ways to exit the setting menu:
• automatically after 30 seconds
• keep the on / off button pressed for longer than 2 seconds
• select the menu item "BACK" and confirm briefly with the on / off button.

9 BEN-E-BIKE INSTRUCTI N MANUAL
AMPERUM GmbH
Stuttgarter Str. 72
D-78628 Rottweil
www.ben
-
e
-
bike.
net
THE LED DISPLAY
The LED display of the BEN-E-BIKE (standard only with the TWENTY E-P WER) controls all functions of
the electric drive. The three pushbuttons switch on the motor and regulate its power output. The
functions that are important for daily use are explained below.
The push buttons and display features:
1. on/off push button
2. push button „+“
3. push button "-"
4. LED bar which indicates the status of the battery
Features
a) Switching the display on and off
It is necessary to switch on the battery first, before you can activate the display!
10 BEN-E-BIKE INSTRUCTI N MANUAL
AMPERUM GmbH
Stuttgarter Str. 72
D-78628 Rottweil
www.ben
-
e
-
bike.
net
Press the red switch on the battery:
If the red switch on the battery was already switched on and the battery was not used for more than 30
minutes, the red switch must be switched off and on again after approx. two seconds!
b) Adjusting the motor power
With the two keys "+" and "-" you can set how strong the motor will support. The selected support
level is shown in right LED bar:
After switching on, the assistance level is always set to "0". This means that the motor is still off and
the BEN-E-BIKE drives like a normal bike. Remember that a BEN-E-BIKE can be pedalled more easily
than most children's bicycles, even without motor support. So you do not always have to choose one
of the levels 1 - 5 to drive fast enough!
Now choose an appropriate support level depending on the path conditions. Here are some tips on
which level is best for each situation:
•levels "0" and "1" are perfect for driving in the plane
•levels "2" and "3" are suitable for light to medium ascents or strong headwind
•level "4" should be sufficient even for steep ascents.
•the highest level "5" is only recommended for extreme "off-road" ascents.
Other manuals for TWENTY E-POWER 2020
1
This manual suits for next models
4
Table of contents


