If fixing into a stud wall, locate the studs and consider positioning the Wall Fixing Panel over as many studs
as possible.
Minimum of 2 studs recommended, as well as the 13 additional fixings points ,as detailed in Diagram 2.
Please note suitable fixings for the wall medium should be used. See important notes Page 15.
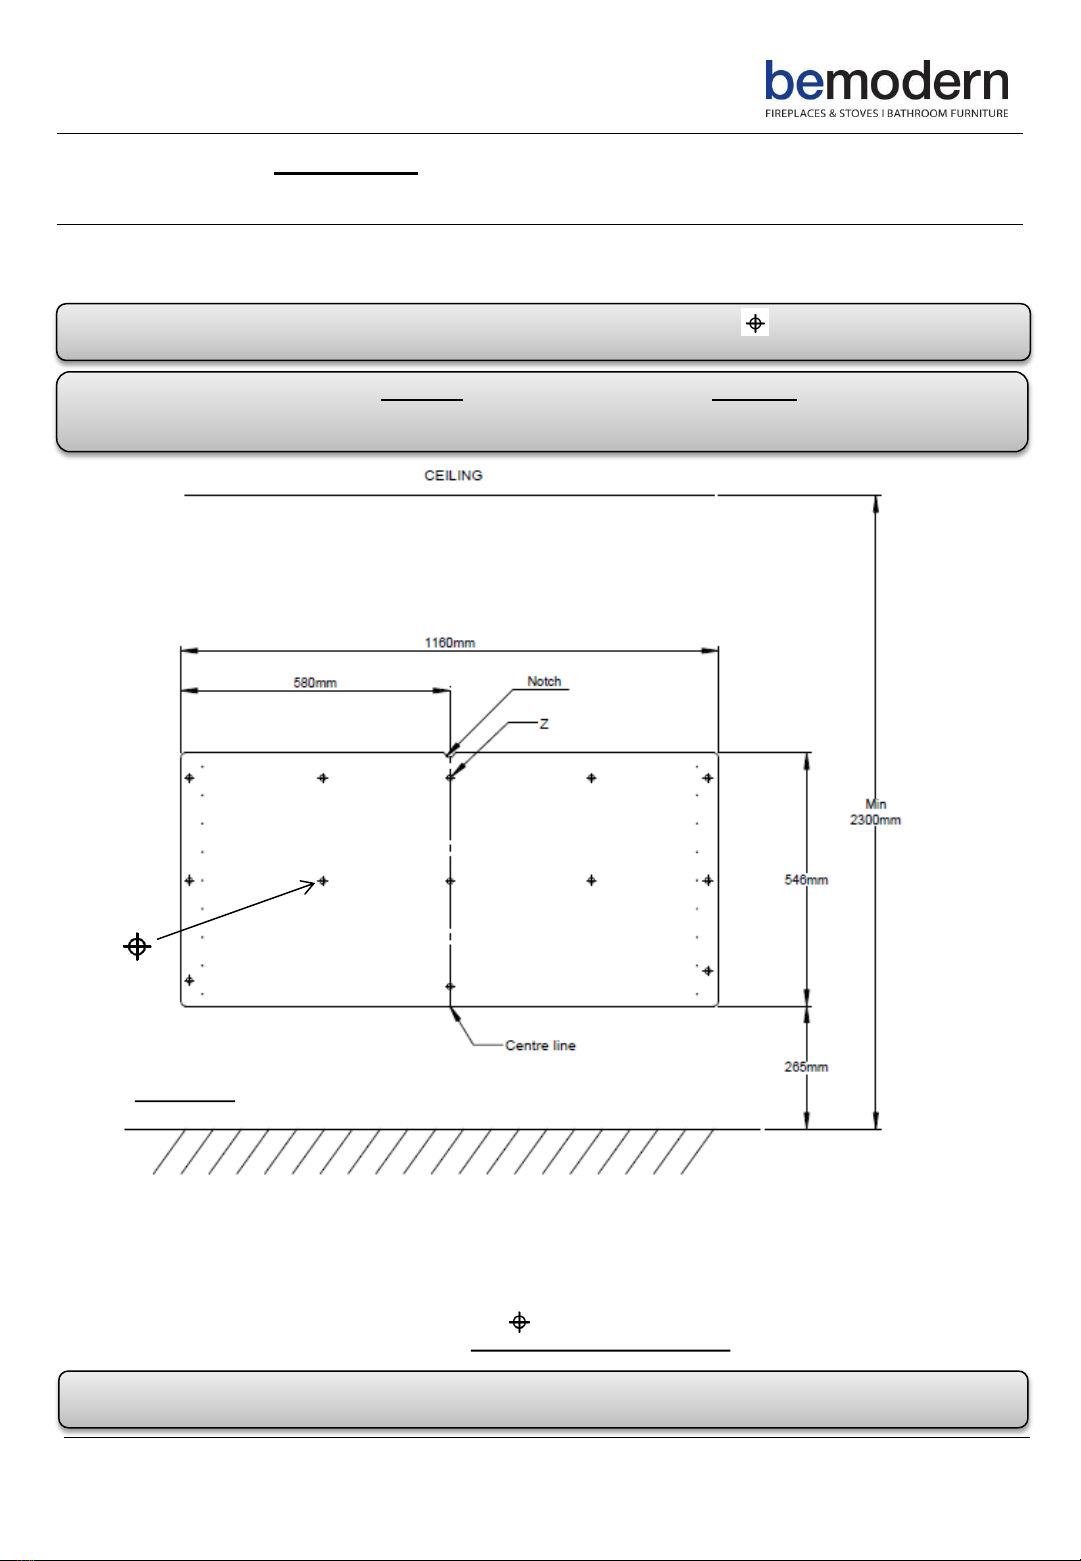
Mark a centre line on Wall Fixing Panel- Component “A”-as shown in Diagram 2.
Decide on the installation location of the chimney breast and fix the Wall Fixing Panel using the
recommended dimensions and fixing points, as shown in Diagram 2.
Position the panel on the wall and mark- Position Z, drill and temporarily fix. Ensuring the panel is level and
plumb, mark and drill the additional fixing points. Finally fix into position, depending on the wall medium
it may be necessary to plug the drilled holes. See important notes Page 15.
Note: The accuracy and fixing of this panel is critical to the whole installation process- Ensure the Wall Fixing
Panel- is plumb and level before proceeding further.
7
200789_1
Installation –Excluding Optional Plinth
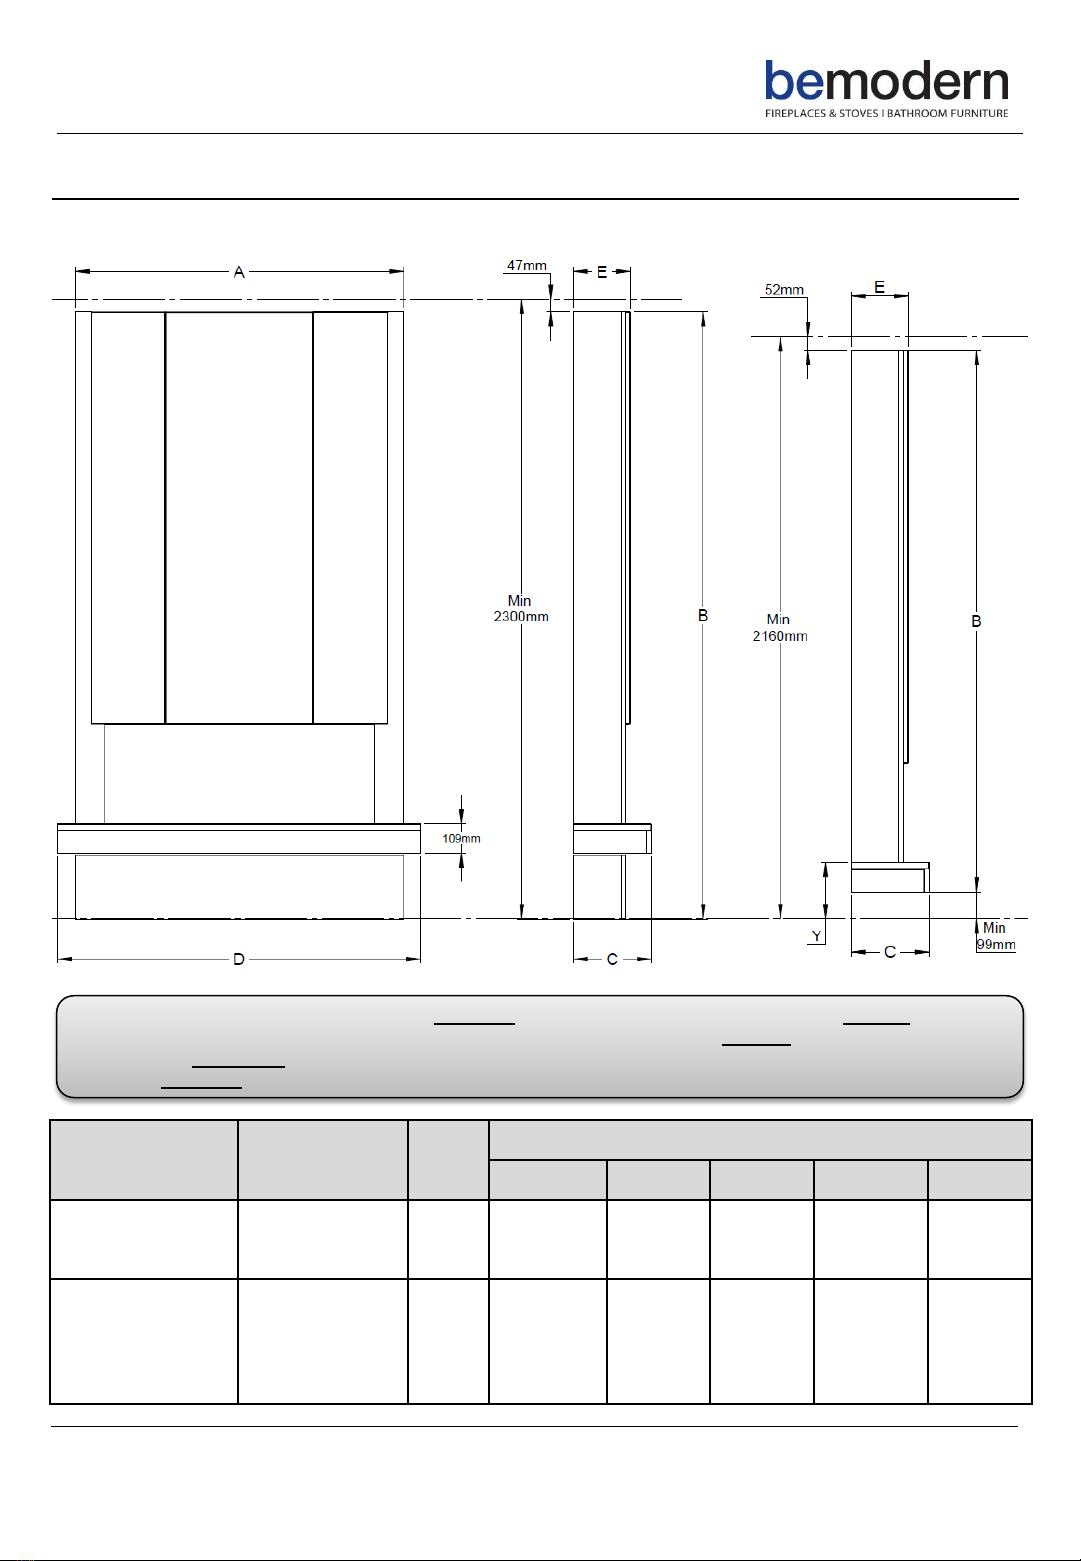
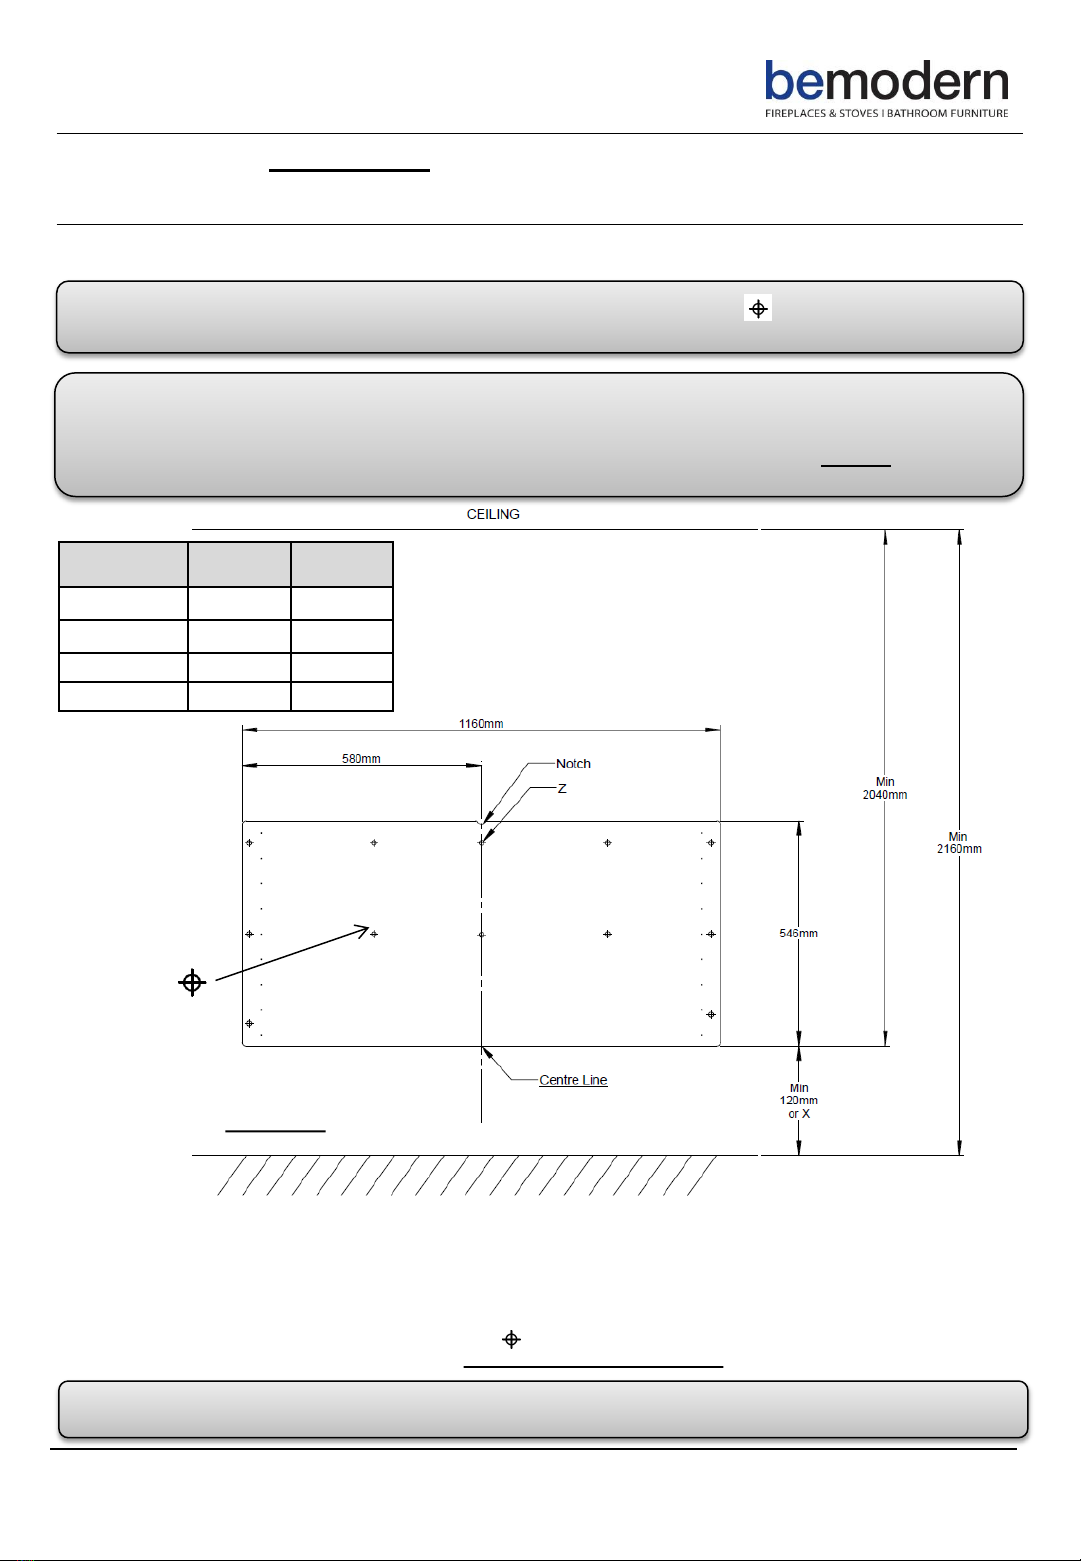
Minimum Ceiling Height Required- 2160mm (As shown on Page 3)
Diagram 2
Note: For ceiling heights between 2160mm and 2300mm we recommended following the installation
dimensions, as detailed in Diagram 2. The critical dimension to adhere to is 2040mm. This will ensure an
approx. 50mm gap between the ceiling and the top of the chimney breast is achieved, which is required
for hanging the decorative panels in a later procedure. Alternatively for ceiling heights greater than
2300mm follow the handy table below or adjust the dimensions accordingly.
A
Req. hearth Top
Height (Y-P3)
Installation
Height(X)
Min Ceiling
Height req.
208mm 120mm 2160mm
350mm 262mm 2300mm
400mm 312mm 2350mm
450mm 362mm 2400mm