Barco MFCD 1218 User manual

MFCD 1218
User Manual
B410019/03
BarcoView
Theodoor Sevenslaan 106
8500 Kortrijk, Belgium
Phone: +32(0)56 23 32 44
Fax: +32(0)56 23 33 74
E-mail: [email protected]
http://www.barcoview.com
BarcoView Inc
3059 Premiere Parkway
Duluth, Georgia, 30097,USA
Phone: +1 678 475 8000
Fax: +1 678 475 8100
E-mail: [email protected]
http://www.barcoview.com
BarcoView LTD
16F-1, Cheng Loong Plaza 33, Min Sheng Road
Section 1, Pan Chiao, Taipei Hsien, Taiwan, R.O.C.
Phone: +886 2 2957 8357
Fax: +886 2 2957 4080
• Read the safety and
operatinginstructionsbefore
operating the apparatus.
•Retainsafetyandoperating
instructions for future
reference.
• Adhere to all warnings on
the apparatus and in the
operating instructions
manual.
• Follow all instructions for
operation and use.
•Thisapparatusconformsto:
UL1950, cUL CAN/CSA
C22.2 No. 950-95, CE
• FCC notice
This equipment has been
tested and found to comply
with the limits of a class B
digital device, pursuant to
Part 15 of the FCC rules.
Theselimitsaredesignedto
provide reasonable
protection against harmful
interference when the
equipment is operated in a
commercial environment.
This equipment generates,
uses and can radiate radio
frequency energy and, if not
installed and used in
accordance with the
instruction manual, may
cause harmful interference
to radio communications.
Operation of this equipment
in a residential area is likely
to cause harmful
interference in which case
the user will be required to
correct the interference at
his own expense.
Power connection
• Warning: This apparatus
must be earthed!
• Power requirements:
connect the apparatus to an
AC voltage as indicated at
its back. Using a lower
voltage, the apparatus will
notbeabletooperate.Using
a higher voltage may
damage the apparatus.
Ifyouarenotsureofthetype
of power supplied, consult
the power company.
•Donotoverloadwalloutlets
and extension cords as this
may result in fire or electric
shock.
•Mainsleadprotection(U.S.:
Power cord): Supply cords
shouldberoutedsothatthey
are not likely to be walked
upon or pinched by items
placeduponoragainstthem,
payingparticularattentionto
cords at plugs and
receptacles.
Water and moisture
• Never expose the
apparatustorainormoisture.
• Never use the apparatus
near water - e.g. near a
bathtub, washbasin,
swimmingpool,kitchensink,
laundry tub or in a wet
basement.
Ventilation
• Do not cover or block the
ventilation openings in the
cover of the set. When
installing the apparatus in a
cupboard or another closed
location,heedthenecessary
space between the set and
the sides of the cupboard.
Installation
• Place the apparatus on a
flat, solid and stable surface
thatcanbeartheweightofat
least 3 monitors. If you use
an unstable cart or stand,
the set may fall, causing
serious injury to a child or
adult, and serious damage
to the equipment.
SAFETY INSTRUCTIONS
© 2002 BARCO nv.Allrights reserved.

MFCD 1218 User's Guide 4
CONTENTS
1. Overview ..................................................................................................... 5
1.1 Introduction .......................................................................................... 5
1.2 Package contents ................................................................................ 6
1.3 Controls and connectors...................................................................... 6
2. Installation ................................................................................................... 8
2.1 Precautions ......................................................................................... 8
2.2 Wall mounting ...................................................................................... 8
2.3 Connecting the signals ...................................................................... 10
2.4 Starting up ..........................................................................................11
2.5 Install the DICOM Optimizer software ................................................11
3. On-screen display (OSD) menus ............................................................ 12
3.1 How to use the OSD.......................................................................... 12
3.2 Description of the menu items ........................................................... 13
Main menu ......................................................................................... 13
Video menu........................................................................................ 14
Color Menu ........................................................................................ 15
Clock Menu........................................................................................ 15
4. Maintenance.............................................................................................. 16
5.Troubleshooting......................................................................................... 16
Appendix A: Possible resolutions .................................................................. 17
Appendix B: Technical specifications ............................................................ 18

MFCD 1218 User's Guide 5
1. OVERVIEW
1.1 Introduction
The MFCD 1218, BARCO’s full color 18” LCD
display, guarantees perfect image quality in
medical imaging applications.
The display combines a TFT (thin film transistor)
liquid crystal display panel structure and a built-in
backlight with inverter for a better picture quality. It
is designed to meet users' needs for performance,
consistency, and outstanding image quality
through a streamlined development process in
which wall-mount functionality provides a variety
of capability.
The image on the display can be adjusted by
means of the extended on-screen menu system
(OSD).
The internal memory can contain settings for 24
different types of video signals (with different
timings). 22 are factory-preset, 2 are user-
definable.
Multi-scan
capabilities The display accepts the most common display
standards. However, it is limited to the following
specifications: The horizontal frequency must be
between 31 and 91 kHz, the vertical frequency
between 56 and 85 Hz, and the maximum
resolution is 1280 x 1024.
The optimum and recommended resolution is
1280 x 1024 / 60 Hz.
Power Saving The monitor comes with a power saving feature;
therefore, you may put the monitor into a power
saving state when it is not in use. This feature
complies with both EPA‘s Energy Star
requirements and European NUTEK/TCO’s power
management guidelines. It conforms to Video
Electronics StandardAssociation (VESA)
approved DPMS power-down signaling method.
This monitor automatically cuts down power
consumption of monitor set when not detecting
Hsync or Vsync signals. This feature is compliant
with VESA DPMS.
MFCD 1218 User's Guide 6
1.2 Package contents
The package should include the following items,
please check. If some of the items are missing,
please contact the reseller you have purchased
the unit from.
- The display with foot
- 12V DC adapter
- European power cord
- American power cord
- Video cable
- S-Video cable (S-Video and composite
video (RCA)) - Optional
- Mounting plate with 8 screws
- This user manual
- CD-ROM containing the DICOM Optimizer
and its User Manual in html format
1.3 Controls and connectors
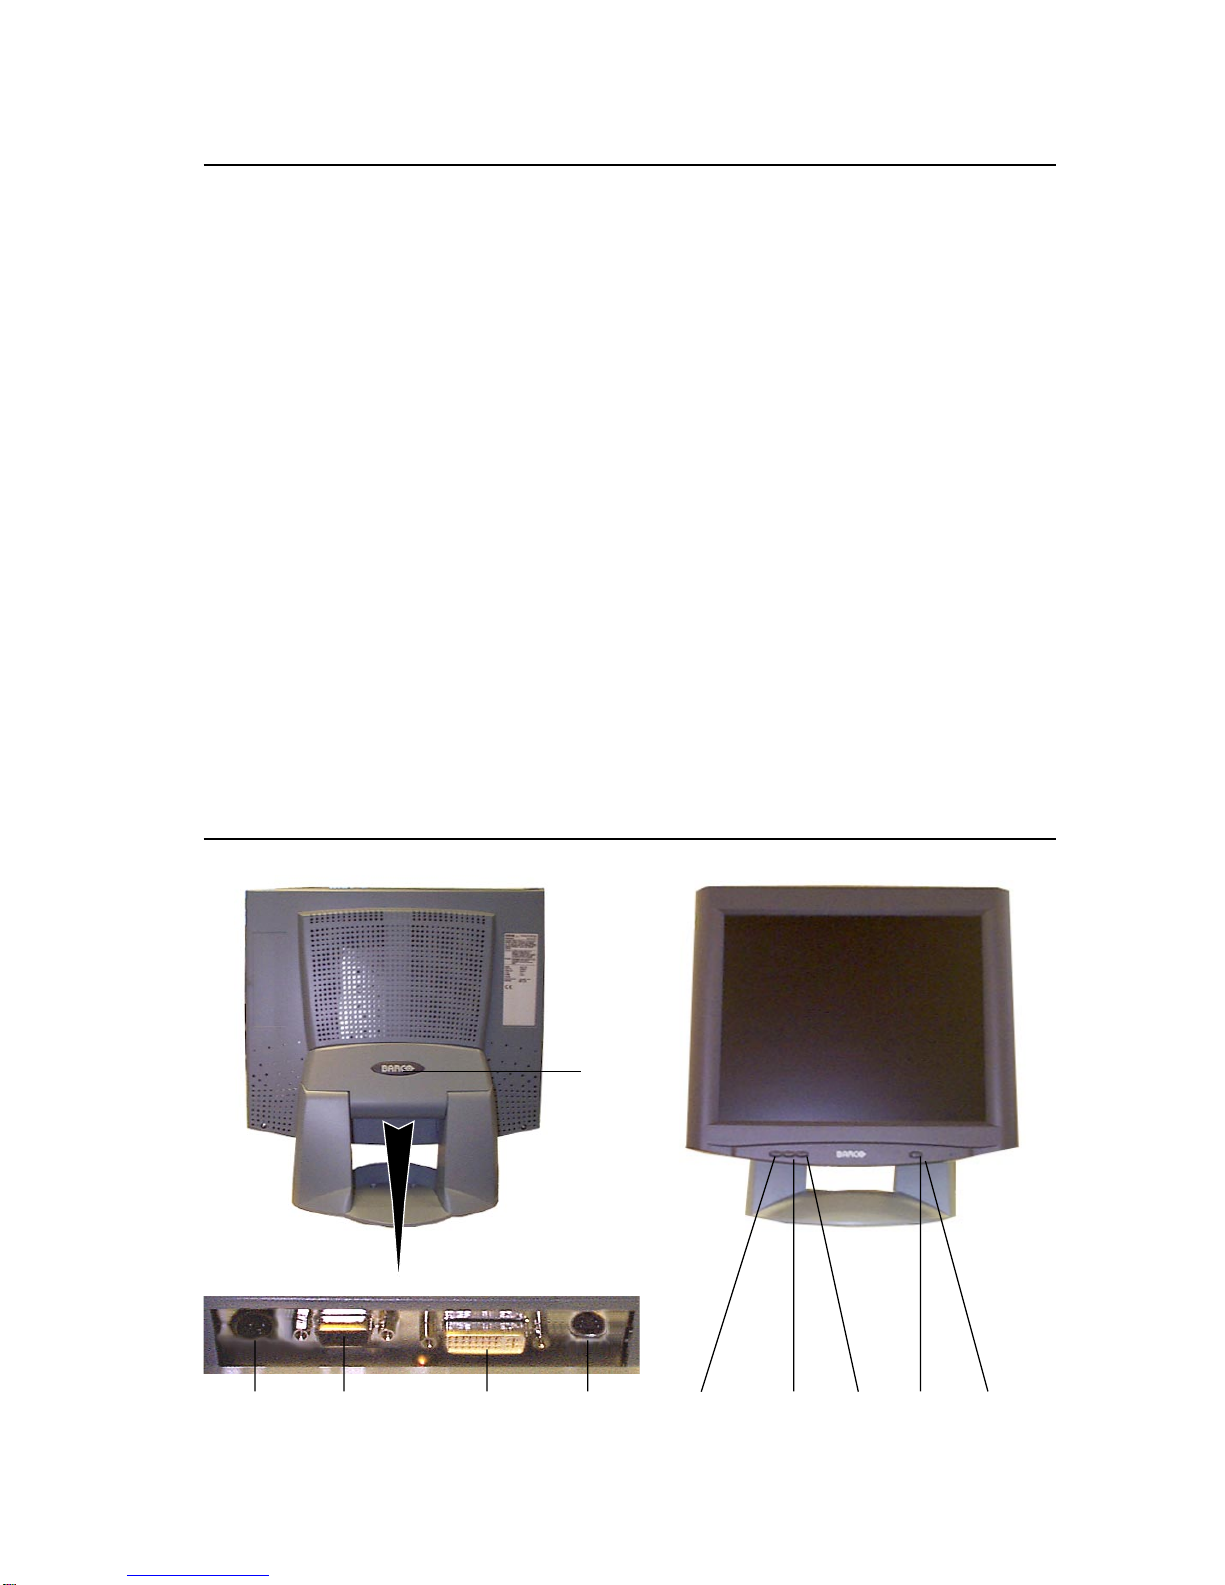
(1) (2) (3) (4) (5) (6) (7) (8) (9)
(10)

MFCD 1218 User's Guide 7
(1) 12V DC power input
(2) Analog video input
(3) DVI input
(4) S-Video input
(5) Menu key
(6) <-> Key
(7) <+> Key
(8) Power LED
The LED is off when the display is off.
The LED is green when the display is on.
The LED is orange when the display is in
power-saving mode (stand-by)
(9) Power key
(10) Push-button to release the panel from the
foot

MFCD 1218 User's Guide 8
• Keep your original packaging. It is designed
for this display and is the ideal protection
during transport.
• Avoid reflections in the flat panel to reduce
eye strain.
• Place the display on a strong and stable
table or desk.
• Keep the display away from heat sources
and provide enough ventilation in case it is
built in a rack or console.
• Make sure computer and display are
switched off before connecting the signals.
2.2 Wall mounting
You can mount the panel to the wall instead of to
the foot, by means of the supplied mounting plate.
If you do not need to mount the panel to the wall,
please skip this item.
Step 1: Remove the panel from the foot
1 Position one hand under the panel at the
front side. Position the other hand at the
rear, under the push-button with BARCO
logo (10).
2 Firmly press down the push-button (10) with
one hand while carefully lifting the panel up
with the other hand.
3 Remove the panel from the foot.
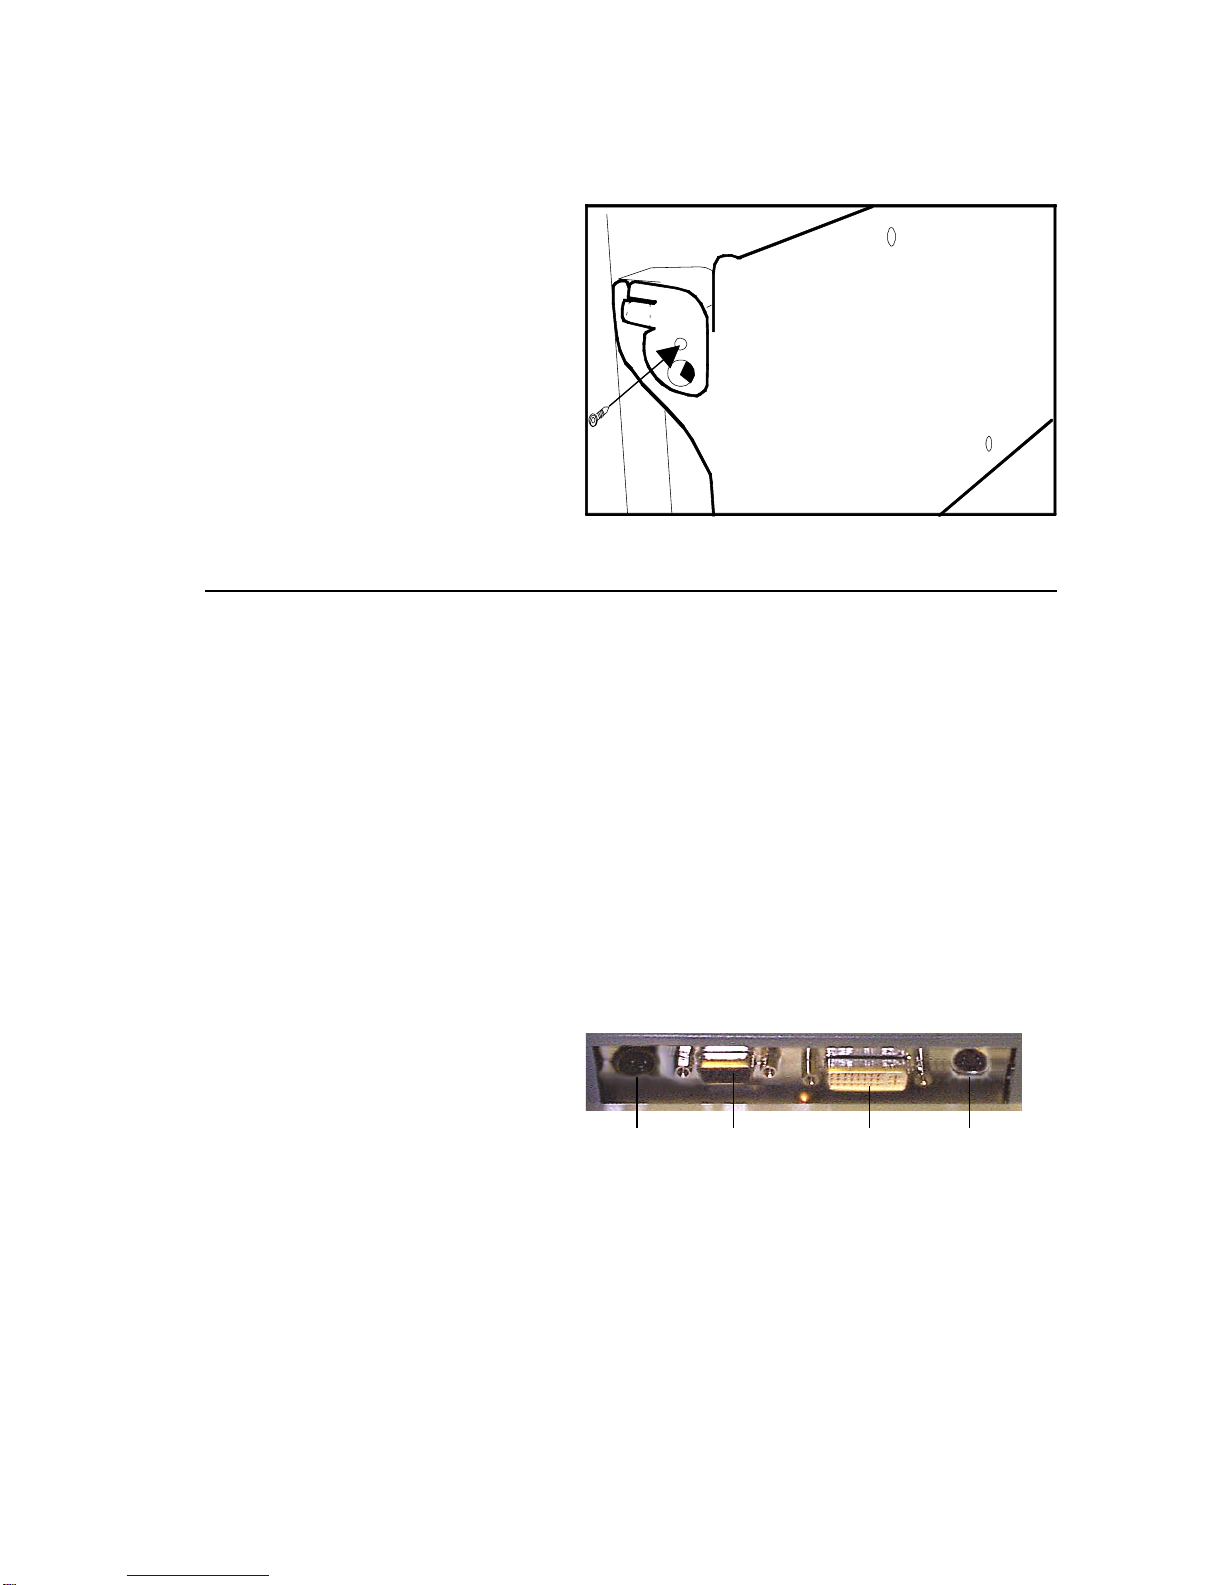
Step 2: Fix the mounting plate to the wall
1 Screw the mounting plate to the wall with
the 4 supplied screws (A).
2.INSTALLATION
2.1 Precautions

MFCD 1218 User's Guide 9
A
B
Step 3: Place the panel on the mounting
plate
1 Place the panel on the mounting plate (C). If
you want to secure the panel to the
mounting plate, place the
panel in the frontmost
notches.
Please make sure that the
four shafts are securely
placed in the notches of the
mounting plate.
2 Slide back the locks at both sides of the
mounting plate (B). In that way, you can
secure the panel to the mounting plate after
placing the panel.
C
MFCD 1218 User's Guide 10
D
2 To secure the panel, slide forward the locks
on both sides of the mounting plate. Lock
the panel with one screw at both sides (D).
2.3 Connecting the signals
To connect the video & sync signals:
1 Connect one end of the appropriate video
cable to the corresponding video input of the
monitor.
Analog video: Connect to input (2)
S-Video: Connect to input (4)
DVI: Connect to input (3)
2 Connect the other end of the video cable to
the video output of your video source.
Analog video: Computer graphics board with
analog video output
S-Video: E.g., S-VHS video player
DVI: Computer graphics board with digital
video output
(1) (2) (3) (4)
To connect the power:
1 Connect one end of the proper power cable
to the AC input of the 12V DC adapter.
2 Connect the 12V supply of the 12V DC
adapter to the DC input (1) of the monitor.
3 Connect the other end of the power cord to
a grounded power outlet.
MFCD 1218 User's Guide 11
2.4 Starting up
Proceed as follows:
1 Switch on the computer.
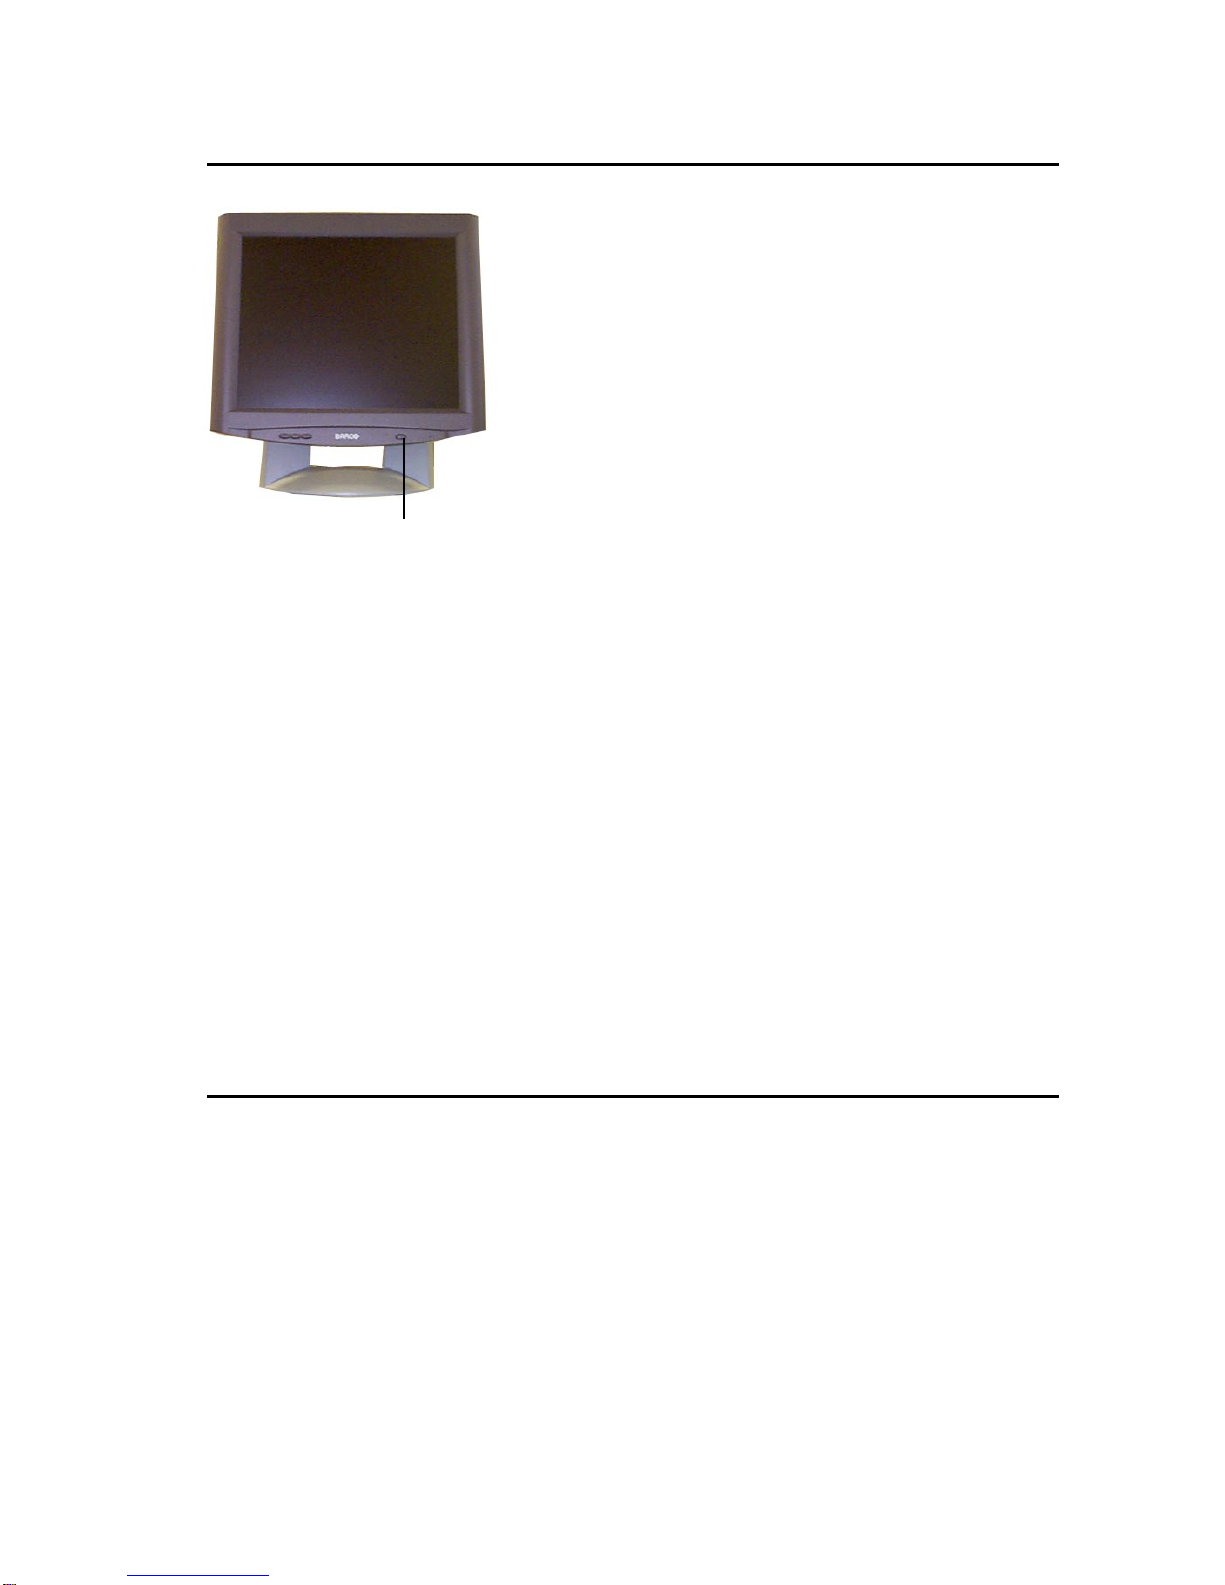
2 Switch on the display by pushing the Power
key (9).
3 If necessary, select a suitable resolution in
the computer operating system. Please refer
to Appendix A, "Possible resolutions" in the
back of this manual.
Note: The recommended resolution for best
image quality is 1280x1024 at 60 Hz.
The microcontroller in the display checks if the
connected video signal has been adjusted before,
and if these adjustments have been stored in the
memory. There are 2 possibilities:
a) The video signal has been adjusted and
stored in the memory.
In this case, the display switches to this memory
location (the so-called mode) and the image will
need no further adjustments.
b) The video signal has not been adjusted and
stored yet.
In this case, the display will auto-size the picture
and store the settings in one of the user modes.
2.5 Install the DICOM Optimizer software
Proceed as follows:
Install the CD-ROM in the CD-ROM drive. The
CD-ROM starts automatically. Please follow the
instructions on the screen.
The CD-ROM contains user instructions about the
usage of the DICOM Optimizer.
(9)
Table of contents
Other Barco Monitor manuals

Barco
Barco DU10P User manual

Barco
Barco Encore Controller SC User manual

Barco
Barco RFD-251 User manual

Barco
Barco MDSC-8255 MNA User manual

Barco
Barco ILite 10 MD User manual

Barco
Barco X 1.2 User guide

Barco
Barco NX--4 Manual

Barco
Barco Nio 5MP User manual

Barco
Barco SLite 10 XP User manual

Barco
Barco Nio 3MP LED User manual

Barco
Barco ILite 6 User manual

Barco
Barco OverView OL510 User manual

Barco
Barco Color Coronis 2MP Manual

Barco
Barco MDRC-1119 TS Owner's manual

Barco
Barco SEER User manual

Barco
Barco Coronis 21-inch Installation & user manua User manual

Barco
Barco NSL-4601 User manual

Barco
Barco LC Series User manual

Barco
Barco MDSC-2232 DDI User manual

Barco
Barco TF-20 Manual