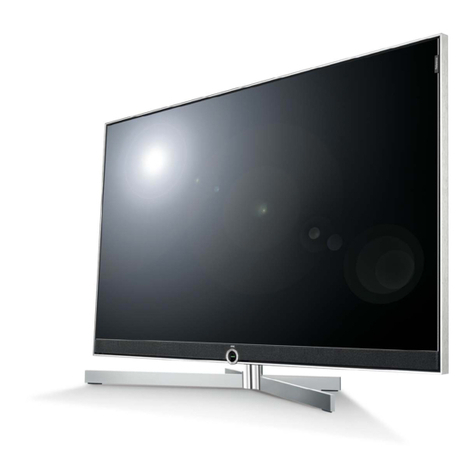
Avera 32AER05 User manual

USER’S MANUAL
32” LED TELEVISION
32AER05

Contents
Introduction
Warning
Caution
Main Unit Description
Remote Control
OSD Basic Adjustment
Specifications
Troubleshooting

Thank you for purchasing AVERA HD LED Television. To get the most out of your
Introduction
INSTALLATION
Locate the receiver in the room where direct light does not strike the screen.
Total darkness or a reflection on the picture screen can cause eyestrain.
Soft and indirect lighting is recommended for comfortable viewing.
Allow enough space between the receiver and the wall to permit ventilation.
Avoid excessively warm locations to prevent possible damage to the cabinet or
premature component failure.
This TV can be connected to AC 100-240V~ 50/60HZ.
Do not install the TV in a location near heat sources such as radiators, air ducts,
direct sunlight, or in closed compartments and closed areas.
Do not cover the ventilation openings when using the TV.
The indicator light will last for about 30 seconds after the power has been turned
off.
Wait until the indicator light goes out before repowering the TV.
new purchase, it is highly recommended that you read this manual before starting the
operation.

Warning
This symbol is intended to alert the user to avoid the risk
of electric shock. This equipment may only be disassembled
by qualified service personnel.
This symbol is intended to alert the user to the presence
of important operation and maintenance instructions in
the literature accompanying the equipment.
Class I structures of equipment should be connected to the grid
power output with a protective earth connection on the socket.
Power plug as a broken appliance broken installations should
be easy to operate.
CAUTION: TO AVOID THE RISK OF ELECTRIC SHOCK.
DO NOT REMOVE COVER (OR BACK).
NO USER- SERVICEABLE PARTS INSIDE.
REFER SERVICING TO QUALIFIED SERVICE PERSONNEL.
CAUTION
RISK OF ELECTRIC SHOCK
DO NOT OPEN

Caution
Caution
High voltages are used in the operation of this product.
Do not open the product's casing. Refer servicing to qualified
service personnel .
Caution
To prevent fire or electrical shock hazard, do not expose the main
unit to rain or moisture do not place objects filled with liquids,
such as vases, on the apparatus.
Caution
Do not drop or push objects into the television cabinet slots or
openings. Never spill any kind of liquid on the television
receiver.
Caution
Avoid exposing the main unit to direct sunlight and other sources
of heat. Do not stand the television receiver irectly on other
products which give off heat: e. g. video cassette players and
audio amplifiers. Do not block the ventilation holes in the back
cover. Ventilation is essential to prevent failure of electrical
components. Do not squash the power supply cord under the
main unit or other heavy objects.

Main unit description
Caution
Never stand on, lean on or suddenly push the product or its stand.
You should pay special attention to children.
Caution
Do not place the main unit on an unstable cart stand,
shelf or table. Serious injury to an individual and
damage to the television may result if it should fall.
Caution
When the product is not used for an extended period of time, it is
advisable to disconnect the AC power from the AC outlet.
Caution
The LED panel used in this product is made of glass and is therefore
breakable. This product must not be dropped or banged. If the LED
Panel breaks be careful of being injured by broken glass.

Main unit description
Control Panel Button Function
VOL+ : Volume up.
VOL- : Volume down.
CH+ : TV channel up.
CH- : TV channel down.
MENU : Press to select the main menu.
SOURCE : Select the input sources.
POWER : Switching Power On/Standby.
TV Terminal Connections
1. HEADPHONE out terminal.
2. Coaxial out terminal.
3. Audio input terminal for component video/composite video.
4. Component video/composite video input terminal.
5. HDMI1 input terminal.
6. HDMI2/MHL input terminal.
7. HDMI3 input terminal
8. VGA input terminal of simulation signal of PC.
9. PC AUDIO input terminal.
10. RF antenna.
11. USB input terminal (Playing JPEG les.)
1 2 3 654 10987 11

(home
)
Press to stop the photo playback.
Press to play forward faster.
Press to view the next photo.
Press to view the previous photo.
.
Press to pause the photo playback.
Press to start the photo playback.
USB Operation
Press to change TV channels.
source.
Press to set the sleep timer.
(aspect ratio).
Press to enter a digital sub-channel number.
# Button Description
(power)
Numbers
Press to enter channel numbers and the parental
control password.
ENTER
MENU
EXIT
Press to close the on-screen menu.
ASPECT
Press to change how the picture looks on the screen
VOL+/–
Press to increase or decrease the volume.
SLEEP
1
2
3
4
5
6
7
8
9
FAVORITE
Press to open the Favorite
INPUT
Press to open the INPUT SOURCE list,
press or on the remote control to select
the video input source, then press ENTER
(return)
Press to navigate in on-screen menus and
to adjust settings.
INFO*
CCD
MUTE
CH /CH
MTS/SAP
PICTURE
AUDIO
# Button Description
10
11
12
13
14
15
16
17
18
19
20
21
22
Press to select the picture mode.
Press to select the sound mode.
Press to stop the photo playback.
Remote Control
In TV mode, press to return to the previous channel.
Press to display TV status information, such as
the channel number, channel name (if available),
or signal
Press to open the ROKU menu. (Not available)
Press to turn closed captioning on or o. You can
select CC Off, CC On, or CC On When Mute
Press to mute the sound. Press again to restore the
sound.
Press to select the audio mode for an analog program.
You can select:
- Mono—Select this option if there is noise or
static on weak stereo broadcasts.
- Stereo—Select this option for programs
broadcast in stereo.
- SAP—Select this option to listen to a
Press to open the on-screen menu.

“PI CT UR E ” menu. A nd press the " E NT E R "button
Installation Guide
Press MENUbutton to display the MAIN OSD MENU; Press / button to select the
ME NU you want; Press E NT E R button to enter the sub menu; Press / button to select the
option and then press / to adjust the value in the sub menu; Y ou can press MENUbutton to
go back to the upper menu or EXIT button to close the OSD.
PICTURE
Y ou can select the type of picture, which best corresponds to your viewing. Press the “ME NU”
button to enter the OSD menu .T hen
press “ / ” button to select the
1. Press “ ” button to select “Picture
Mode”, press “ /” button to select.
2. Press “ / ” button to select
“B rightness” and press the “ / ”
button to enter brightness adjustment
menu to adjust brightness.
3. Press “ / ” button to select
“Contrast” and press the “ / ” button
to enter contrast adjustment menu to
adjust contrast.
4. Press “ / ” button to select “Color” and press the “ / ” button to enter color adjustment
menu to adjust color.
5. Press “ / ” button to select “Tint” and press the “ / ” button to enter hue adjustment menu
to adjust tint.
Note: The 'Tint' item is used in NTSC mode only.
6. Press “ / ” button to select “Sharpness” and press the “ / ” button to enter sharpness
adjustment menu to adjust sharpness.
7. Press “ / ” button to select “Color Temperature” and press the “ / ” button to select.
8. Press “ / ” button to select “A dvanced Setting” and press the “E NT E R / ” button to enter
sub-menu.
to enter the sub-menu.
Retun

a. Press “ / ” button to
“ Aspect R atio” and
“/ ” button to select.
b. Press “ / ” button to
“Noise R eduction” and press the
button to select.
c. Press “ / ” button to
“Dynamic Contrast” and press the
button to select “On” or
“Off”.
SOUND
You can select the type of sound, which best corresponds to your listening.
Press the “ME NU” button
to enter the OSD menu .T hen
press “ / ” button to select
the “SOUND” menu.
1. Press “ ”button to select
“E qualizer Settings” and press the
“E NT E R / ” button to enter sub-menu.
a. Press “ / ” button to select “E qualizer Mode”. Press “ / ” button to select.
b. Press “ / ” button to select “150Hz”. Press “ / ” button to select.
c. Press “ / ” button to select “500 Hz”. Press “ / ” button to select.
d. Press “ / ” button to select “1K Hz”. Press
“/ ” button to select.
e. Press “ / ” button to select “5K Hz”.
Press“ / ” button to select.
f. Press “ / ” button to select “10K Hz”.
Press “ / ” button to select
g. Press “ / ” button to select “ B alance”.
Press “ / ” button to select
select
press the
select
“ / ”
select
“/ ”
And press the E NT E R button to enter the sub-menu.
Return
Return
Return
Table of contents
Other Avera TV manuals