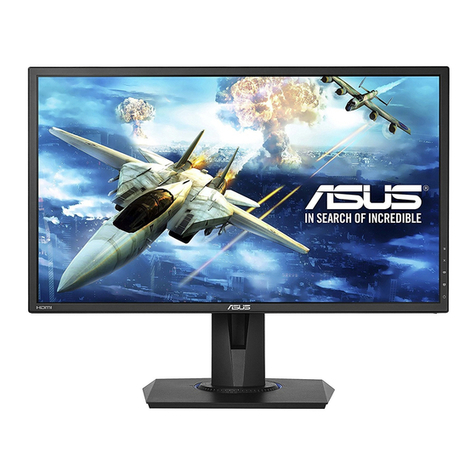
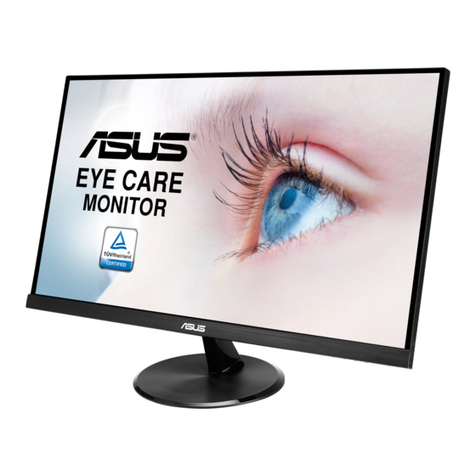
Asus VE247H User manual

VE247/VE248/VE249
Series
LED Monitor
User Guide

ii
Contents
Notices......................................................................................................... iii
Safety information ...................................................................................... iv
Care & Cleaning........................................................................................... v
1.1 Welcome! .................................................................................... 1-1
1.2 Package contents......................................................................... 1-1
1.3 Monitor introduction .................................................................... 1-2
1.3.1 Front view ....................................................................... 1-2
1.3.2 Back view........................................................................ 1-3
2.1 Assembling the monitor base..................................................... 2-1
2.2 Adjusting the monitor.................................................................. 2-1
2.3 Detaching the arm/base
(for VESA wall mount) ................................................................. 2-2
2.4 Connecting the cables................................................................. 2-3
2.5 Turning on the monitor................................................................ 2-4
3.1 OSD (On-Screen Display) menu ................................................ 3-1
3.1.1 How to reconfigure.......................................................... 3-1
3.1.2 OSD Function Introduction.............................................. 3-1
3.2 Specicationssummary(VE249H)............................................. 3-4
3.3 Troubleshooting (FAQ).............................................................. 3-15
3.4 Supported operating modes .................................................... 3-16

iii
Notices
Federal Communications Commission Statement
This device complies with Part 15 of the FCC Rules. Operation is subject to the
following two conditions:
• Thisdevicemaynotcauseharmfulinterference,and
• Thisdevicemustacceptanyinterferencereceivedincludinginterferencethat
maycauseundesiredoperation.
Thisequipmenthasbeentestedandfoundtocomplywiththelimitsfora
ClassBdigitaldevice,pursuanttoPart15oftheFCCRules.Theselimitsare
designed to provide reasonable protection against harmful interference in a
residentialinstallation.Thisequipmentgenerates,usesandcanradiateradio
frequencyenergyand,ifnotinstalledandusedinaccordancewithmanufacturer’s
instructions,maycauseharmfulinterferencetoradiocommunications.However,
there is no guarantee that interference will not occur in a particular installation. If
thisequipmentdoescauseharmfulinterferencetoradioortelevisionreception,
whichcanbedeterminedbyturningtheequipmentoffandon,theuseris
encouragedtotrytocorrecttheinterferencebyoneormoreofthefollowing
measures:
• Reorientorrelocatethereceivingantenna.
• Increasetheseparationbetweentheequipmentandreceiver.
• Connecttheequipmenttoanoutletonacircuitdifferentfromthattowhichthe
receiver is connected.
• Consultthedealeroranexperiencedradio/TVtechnicianforhelp.
The use of shielded cables for connection of the monitor to the graphics card is
required to assure compliance with FCC regulations. Changes or modifications
tothisunitnotexpresslyapprovedbythepartyresponsibleforcompliance
couldvoidtheuser’sauthoritytooperatethisequipment.
AsanEnergyStar® Partner,ourcompanyhasdeterminedthatthis
productmeetstheEnergyStar® guidelinesforenergyefficiency.
Canadian Department of Communications Statement
ThisdigitalapparatusdoesnotexceedtheClassBlimitsforradionoiseemissions
from digital apparatus set out in the Radio Interference Regulations of the
Canadian Department of Communications.
This class B digital apparatus complies with Canadian ICES-003.
This Class B digital apparatus meets all requirements of the Canadian Interference
- Causing Equipment Regulations.
CetappareilnumériquedelaclasseBrespectetouteslesexigencesdu
Réglement sur le matériel brouiller du Canada.

iv
Safety information
• Beforesettingupthemonitor,carefullyreadallthedocumentationthatcame
with the package.
• Topreventfireorshockhazard,neverexposethemonitortorainormoisture.
• Nevertrytoopenthemonitorcabinet.Thedangeroushighvoltagesinsidethe
monitormayresultinseriousphysicalinjury.
• Ifthepowersupplyisbroken,donottrytofixitbyyourself.Contactaqualified
servicetechnicianoryourretailer.
• Beforeusingtheproduct,makesureallcablesarecorrectlyconnectedandthe
powercablesarenotdamaged.Ifyoudetectanydamage,contactyourdealer
immediately.
• Slotsandopeningsonthebackortopofthecabinetareprovidedfor
ventilation.Donotblocktheseslots.Neverplacethisproductnearorovera
radiator or heat source unless proper ventilation is provided.
• Themonitorshouldbeoperatedonlyfromthetypeofpowersourceindicated
onthelabel.Ifyouarenotsureofthetypeofpowersupplytoyourhome,
consultyourdealerorlocalpowercompany.
• Usetheappropriatepowerplugwhichcomplieswithyourlocalpower
standard.
• Donotoverloadpowerstripsandextentioncords.Overloadingcanresultin
fire or electric shock.
• Avoiddust,humidity,andtemperatureextremes.Donotplacethemonitorin
anyareawhereitmaybecomewet.Placethemonitoronastablesurface.
• Unplugtheunitduringalightningstormorifitwillnotbeusedforalongperiod
of time. This will protect the monitor from damage due to power surges.
• Neverpushobjectsorspillliquidofanykindintotheslotsonthemonitor
cabinet.
• Toensuresatisfactoryoperation,usethemonitoronlywithULlisted
computers which have appropriate configured receptacles marked between
100-240VAC.
• Ifyouencountertechnicalproblemswiththemonitor,contactaqualified
servicetechnicianoryourretailer.
Thissymbolofthecrossedoutwheeledbinindicatesthattheproduct(electrical,
electronicequipment,andmercury-containingbuttoncellbattery)shouldnot
be placed in municipal waste. Please check local regulations for disposal of
electronic products.

v
Care & Cleaning
• Beforeyouliftorrepositionyourmonitor,itisbettertodisconnectthecables
and power cord. Follow the correct lifting techniques when positioning the
monitor.Whenliftingorcarryingthemonitor,grasptheedgesofthemonitor.
Donotliftthedisplaybythestandorthecord.
• Cleaning.Turnyourmonitoroffandunplugthepowercord.Cleanthemonitor
surfacewithalint-free,non-abrasivecloth.Stubbornstainsmayberemoved
with a cloth dampened with mild cleaner.
• Avoidusingacleanercontainingalcoholoracetone.Useacleanerintended
forusewiththemonitor.Neverspraycleanerdirectlyonthescreen,asitmay
drip inside the monitor and cause an electric shock.
The following symptoms are normal with the monitor:
• Thescreenmayflickerduringtheinitialuseduetothenatureofthefluorescent
light. Turn off the Power Switch and turn it on again to make sure that the
flicker disappears.
• Youmayfindslightlyunevenbrightnessonthescreendependingonthe
desktoppatternyouuse.
• Whenthesameimageisdisplayedforhours,anafterimageoftheprevious
screenmayremainafterswitchingtheimage.Thescreenwillrecoverslowlyor
youcanturnoffthePowerSwitchforhours.
• Whenthescreenbecomesblackorflashes,orcannotworkanymore,contact
yourdealerorservicecentertofixit.Donotrepairthescreenbyyourself!
Conventions used in this guide
WARNING:Informationtopreventinjurytoyourselfwhentryingto
complete a task.
CAUTION:Informationtopreventdamagetothecomponentswhen
tryingtocompleteatask.
IMPORTANT:InformationthatyouMUSTfollowtocompleteatask.
NOTE:Tipsandadditionalinformationtoaidincompletingatask.

vi
Wheretondmoreinformation
Refer to the following sources for additional information and for product and
software updates.
1. ASUS websites
TheASUSwebsitesworldwideprovideupdatedinformationonASUS
hardwareandsoftwareproducts.Refertohttp://www.asus.com
2. Optional documentation
Yourproductpackagemayincludeoptionaldocumentationthatmayhave
beenaddedbyyourdealer.Thesedocumentsarenotpartofthestandard
package.

1-1ASUSVE247/VE248/VE249SeriesLEDMonitor
1.1 Welcome!
ThankyouforpurchasingtheASUS®LEDmonitor!
The latest widescreen LED monitor fromASUS provides a crisper, broader, and
brighterdisplay,plusahostoffeaturesthatenhanceyourviewingexperience.
With these features, you can enjoy the convenience and delightful visual
experiencethatthemonitorbringsyou!
1.2 Package contents
Checkyourpackageforthefollowingitems:
LEDmonitor
Monitor base and screw
Warrantycard
Quick start guide
1xPowercord
1xVGAcable
1xDVIcable
1xAudiocable
Ifanyoftheaboveitemsisdamagedormissing,contactyourretailer
immediately.

1-2 Chapter 1: Product introduction
1.3 Monitor introduction
1.3.1 Front view
VE247N/
VE247D/
VE248N/
VE248D
1
S/A Volume/Down Menu Brightness/Up Input Select Power Key
S Volume/Down Menu Brightness/Up A Power Key
SContrast/Down Menu Brightness/Up APower Key
2 643 5 1
VE247H/
VE248H/
VE249H
VE247T/
VE247S/
VE248T/
VE248S
1. , , Button:
• Usethishotkeytoswitchfromfivevideopresetmodes(StandardMode,
Theater Mode, Game Mode, Night View Mode, Scenery Mode) with
SPLENDID™VideoEnhancementTechnology.( , )
• ExittheOSDmenuorgobacktothepreviousmenuastheOSDmenu
isactive.( , )
• Automaticallyadjusttheimagetoitsoptimizedposition,clock,andphaseby
pressingthisbuttonfor2-4seconds(forVGAmodeonly.)( , )
2. , Button:
• Press this button to decrease the value of the function selected or move
left/downtothepreviousfunction.
• ThisisalsoahotkeyforVolumeadjustment.( )
• ThisisalsoahotkeyforContrastadjustment.( )
3. MENUButton:
• Turns on the OSD menu.

1-3ASUSVE247/VE248/VE249SeriesLEDMonitor
• Pressthisbuttontoenter/selecttheicon(function)highlightedwhilethe
OSD is activated.
4. Button:
• Press this button to increase the value of the function selected or move
right/uptothenextfunction.
• ThisisalsoahotkeyforBrightnessadjustment.
5. Button:
• Pressthisbuttontocyclethroughtheavailableinputsources.
Press (InputSelectbutton)todisplayHDMIsignalsafteryouconnect
HDMI cable with the monitor.
6. Powerbutton/powerindicator
• Pressthisbuttontoturnthemonitoron/off
• The color definition of the power indicator is as the below table.
Status Description
Blue ON
Amber Standbymode
OFF OFF
1.3.2 Back view
34 5 6 6
1 1
VE247T/
VE248T
VE247N/
VE248N
VE247D/
VE248D
VE247S/
VE248S
VE247H/
VE248H/
VE249H
523
Screw holes for
VESA wall mount
Rear connectors
Kensington lock
slot

1-4 Chapter 1: Product introduction
Rear connectors (Pleasereferto3.2Specicationssummaryformodels)
1. AC-IN port. This port connects the power connector from the bundled power
cord.
2. Earphone jack
3. Audio-in port.ThisportconnectsPCaudiosourcebythebundledaudio
cable.
4. HDMIport. This port is for connection with an HDMI device.
5. DVI port.This24-pinportisforPC(PersonalComputer)DVI-Ddigitalsignal
connection.
6. VGA port.This15-pinportisforPCVGAconnection.
TheVESAwallmountkit(100mmx100mm)ispurchasedseparately.
Other manuals for VE247H
1
This manual suits for next models
15
Table of contents
Other Asus Monitor manuals

Asus
Asus VW192CD User manual

Asus
Asus VG278HR Series User manual

Asus
Asus XG27AQMR User manual

Asus
Asus MK221H User manual

Asus
Asus VG278QR User manual

Asus
Asus VS228D User manual

Asus
Asus VG289Q1A Series User manual

Asus
Asus VW228TLB User manual

Asus
Asus VS228NL-P User manual

Asus
Asus VG247 Series User manual

Asus
Asus PA32U Series User manual

Asus
Asus PA24US Series User manual

Asus
Asus MB16AHV User manual

Asus
Asus BE27A Series User manual

Asus
Asus VG248QE User manual

Asus
Asus MX279H User manual

Asus
Asus SD324-YB User manual

Asus
Asus VP247NA User manual

Asus
Asus Republic of Gamers ROG STRIX User manual

Asus
Asus MB14AHD User manual