Askey CDR8011 Series User manual

CDR8011 Series Manual
iDVR800
Quick Start Guide

ii CDR8010 – Quick Start Guide
Important Notes to Read Before Use
The CDR8011 operates on a voltage of 5 V DC. To power up the product, connect it to a cigarette
lighter socket.
The CDR8011 accepts SD cards formatted to FAT32 only. For optimum results, format the SD card
before initial use with the CDR8010.
Operating environment: Charge Temperature 0~60C; Discharge Temperature 0~50C
The CDR8011 may not be able to use the Global Positioning System (GPS) in the following areas:
Indoor parking lot
Tunnels
While under multi-layer highways
Between closely positioned high buildings and trees
Safety Instructions
For users’ attention, scenario-specific safety instructions are provided in the following three boxes
throughout the document. Following these instructions will help prevent untoward incidents in the use
of the CDR8011.
CAUTION WARNING NOTE
Failure to follow the instructions
provided under “Caution” will lead
to data loss.
Failure to follow the instructions
provided under “Warning” will
lead to serious injury or death, and
property damage.
Instructions provided under
“Note” provides insights for
prudent use of the product.
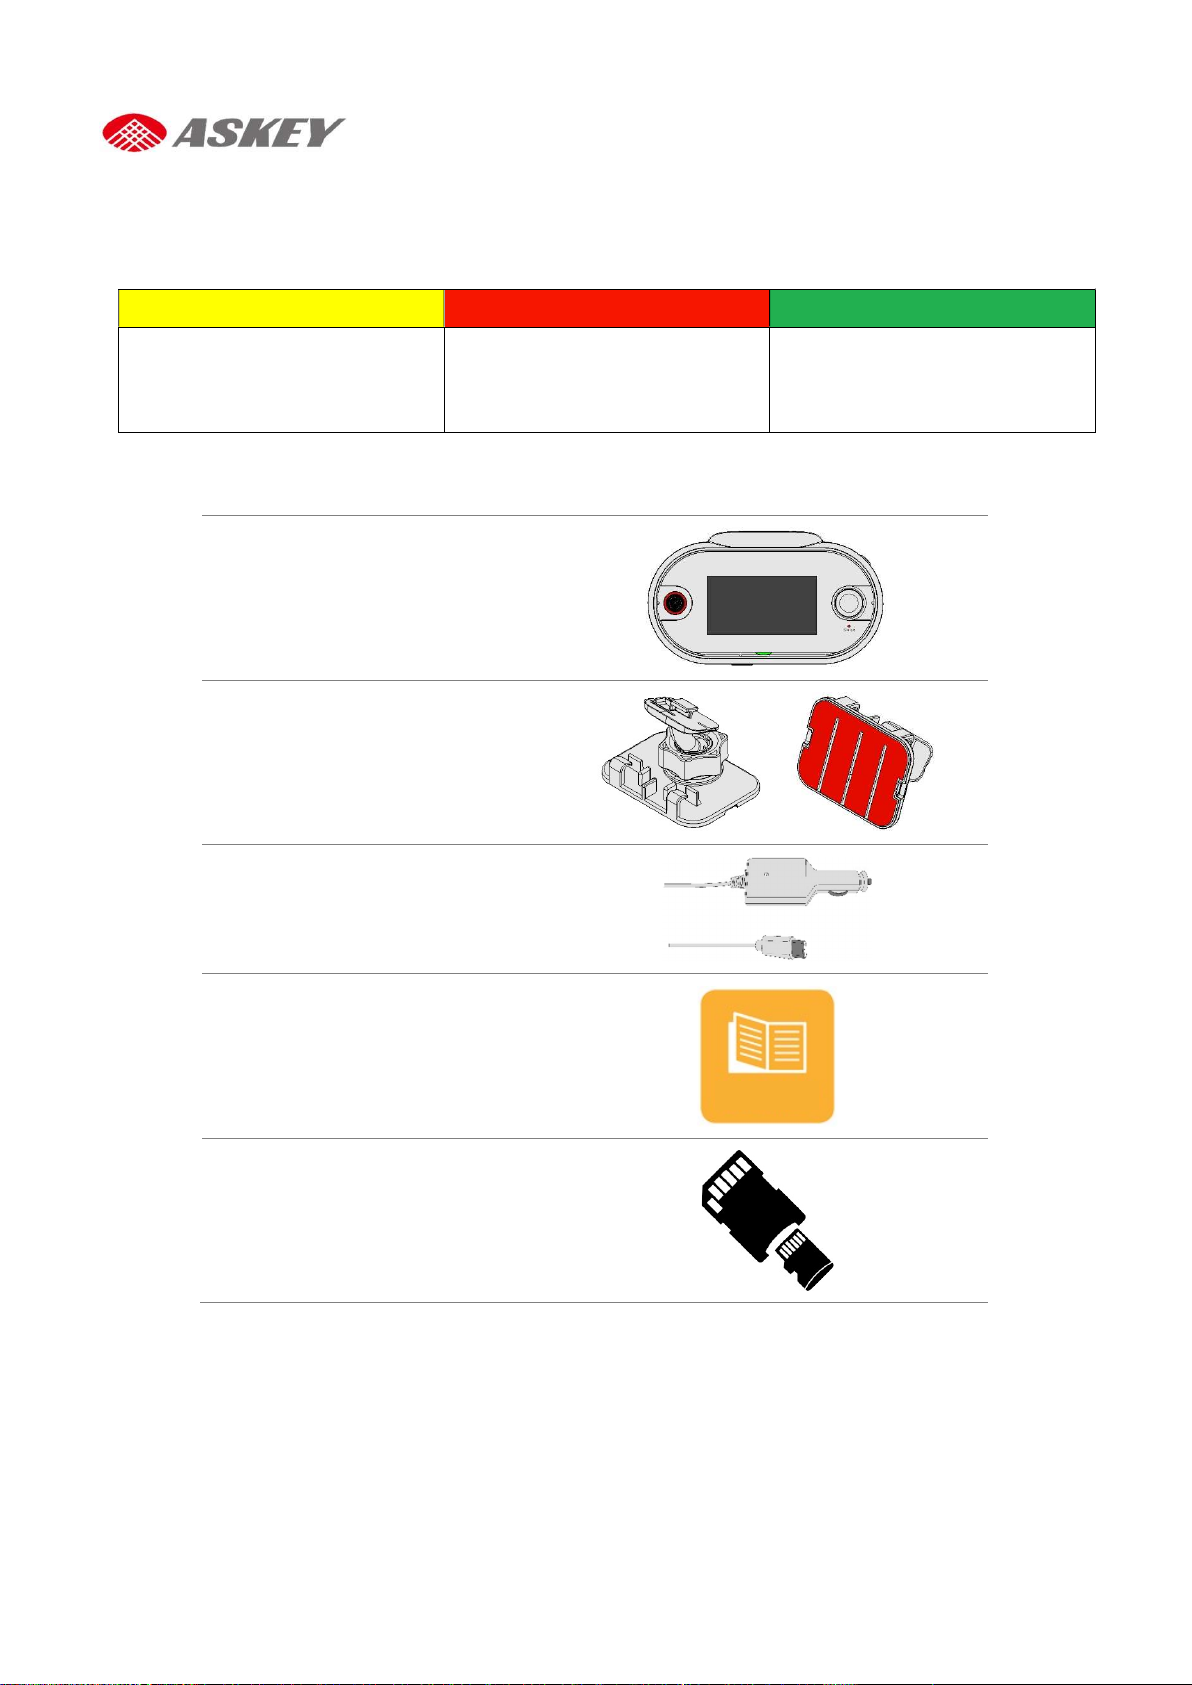
Package Contents
CDR801
1
Connected Car CAM
Mount Bracket
USB Type C to Cigarette Car Char
ger
Quick Start Guide
Micro SD card and SD Card Adaptor
QSG
2 CDR8010 – Quick Start Guide
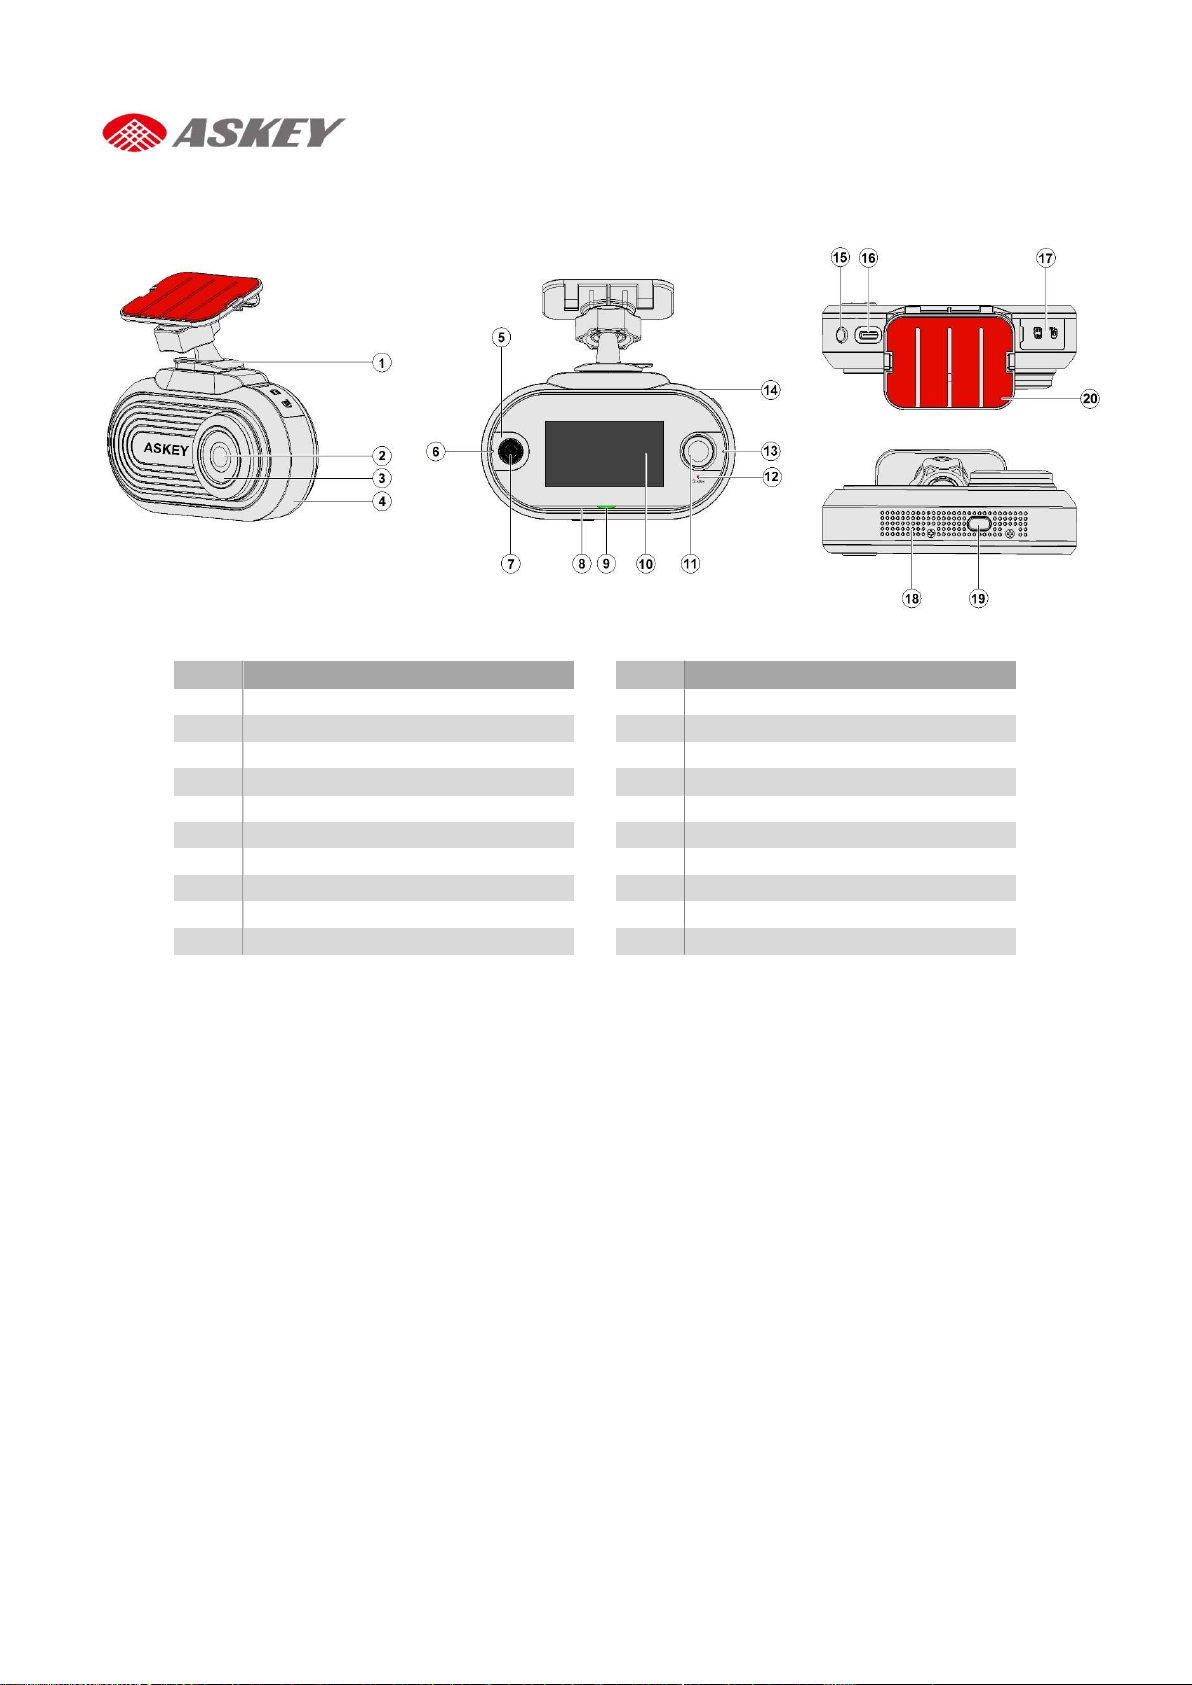
Overview
Device Overview
No.
Description No.
Description
1
Bracket
11
Rear Camera
2
Front Camera
12
Status Light
3
Metal Decoration
13
Microphone 3
4 Front Housing
14 Rear Housing
5
E
-
Call Light Guide
15
Power Button
6
Microphone 1
16
USB Type C
-
Port
7 E-Call Button
17 SD Card Cover
8
Microphone 2
18
Speaker Opening
9 Alexa Light Guide
19 Mute Button
10 Touch Panel
20 Film
Getting Started
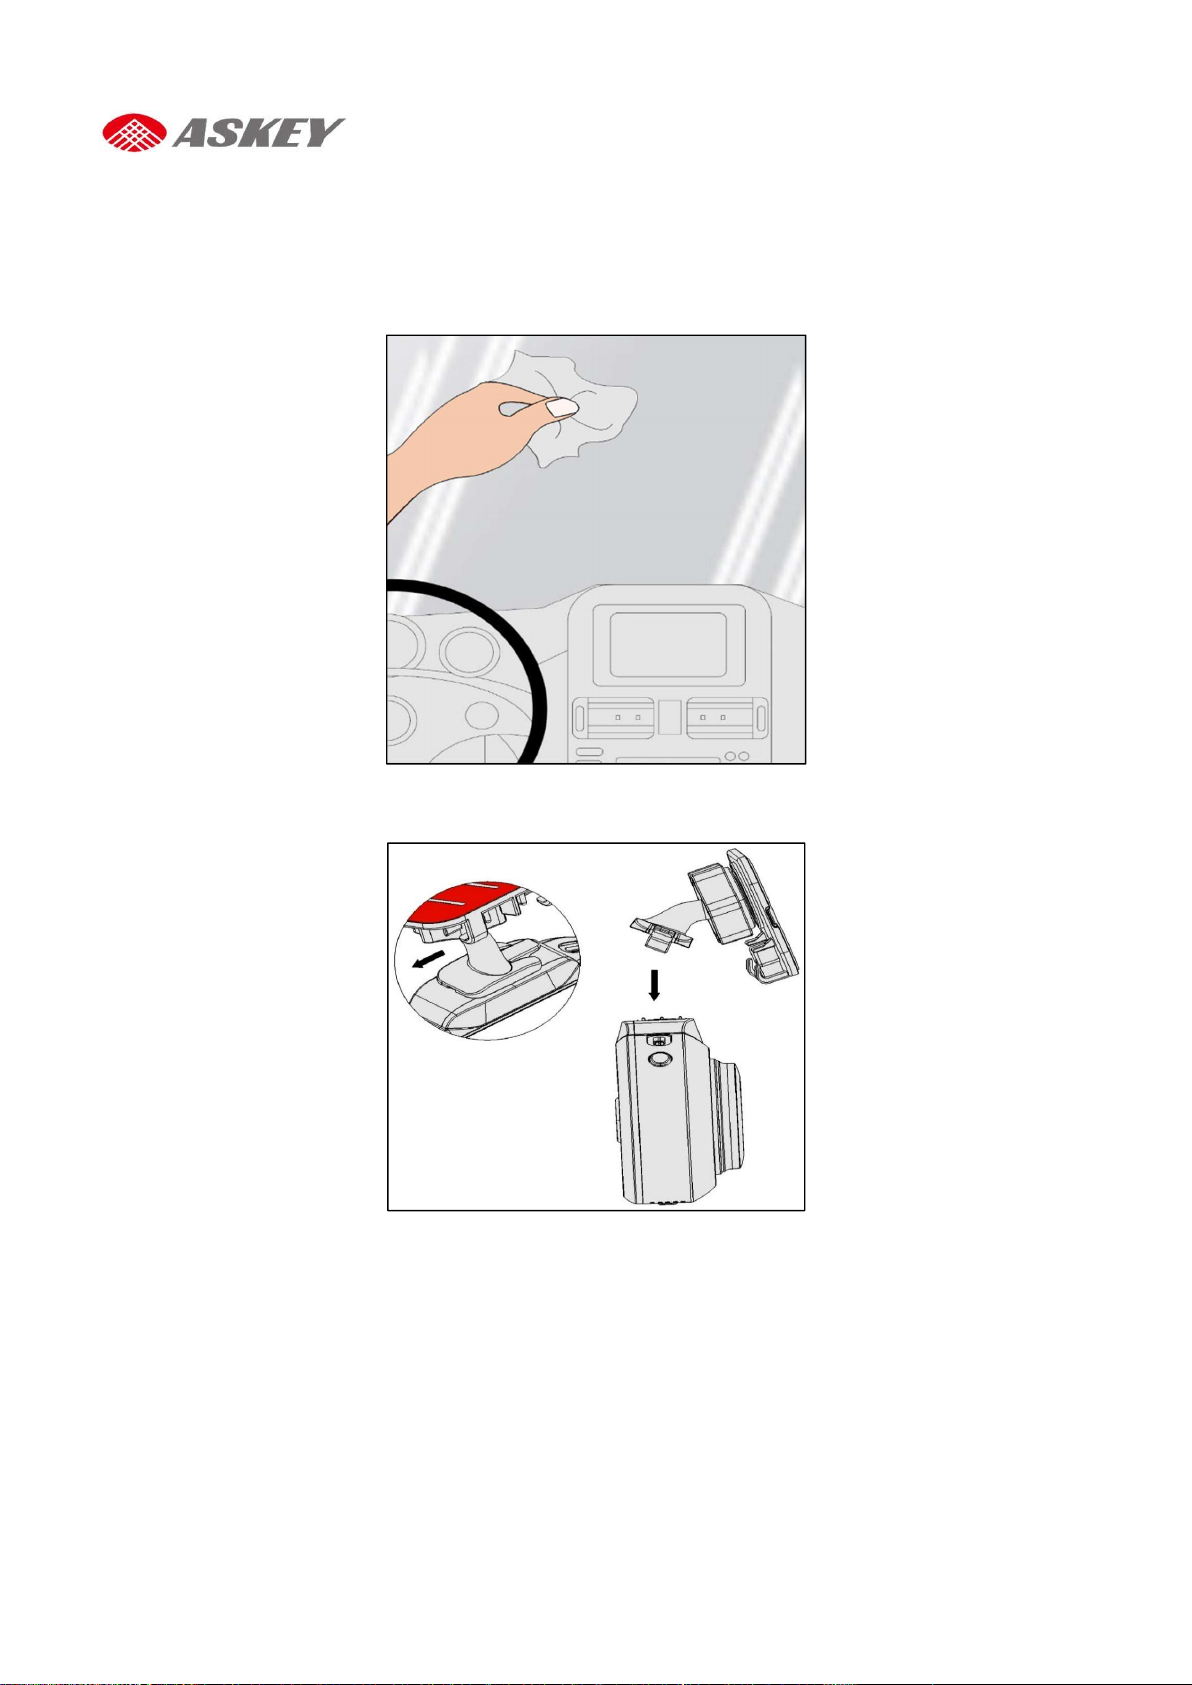
Mounting Instructions
Step 1: Clean the windshield area properly using a soft cloth. Apply a glass cleaner liquid to the cloth, if
required.
Step 2: Lock the mounting bracket into the mounting slot of the device.
4 CDR8010 – Quick Start Guide
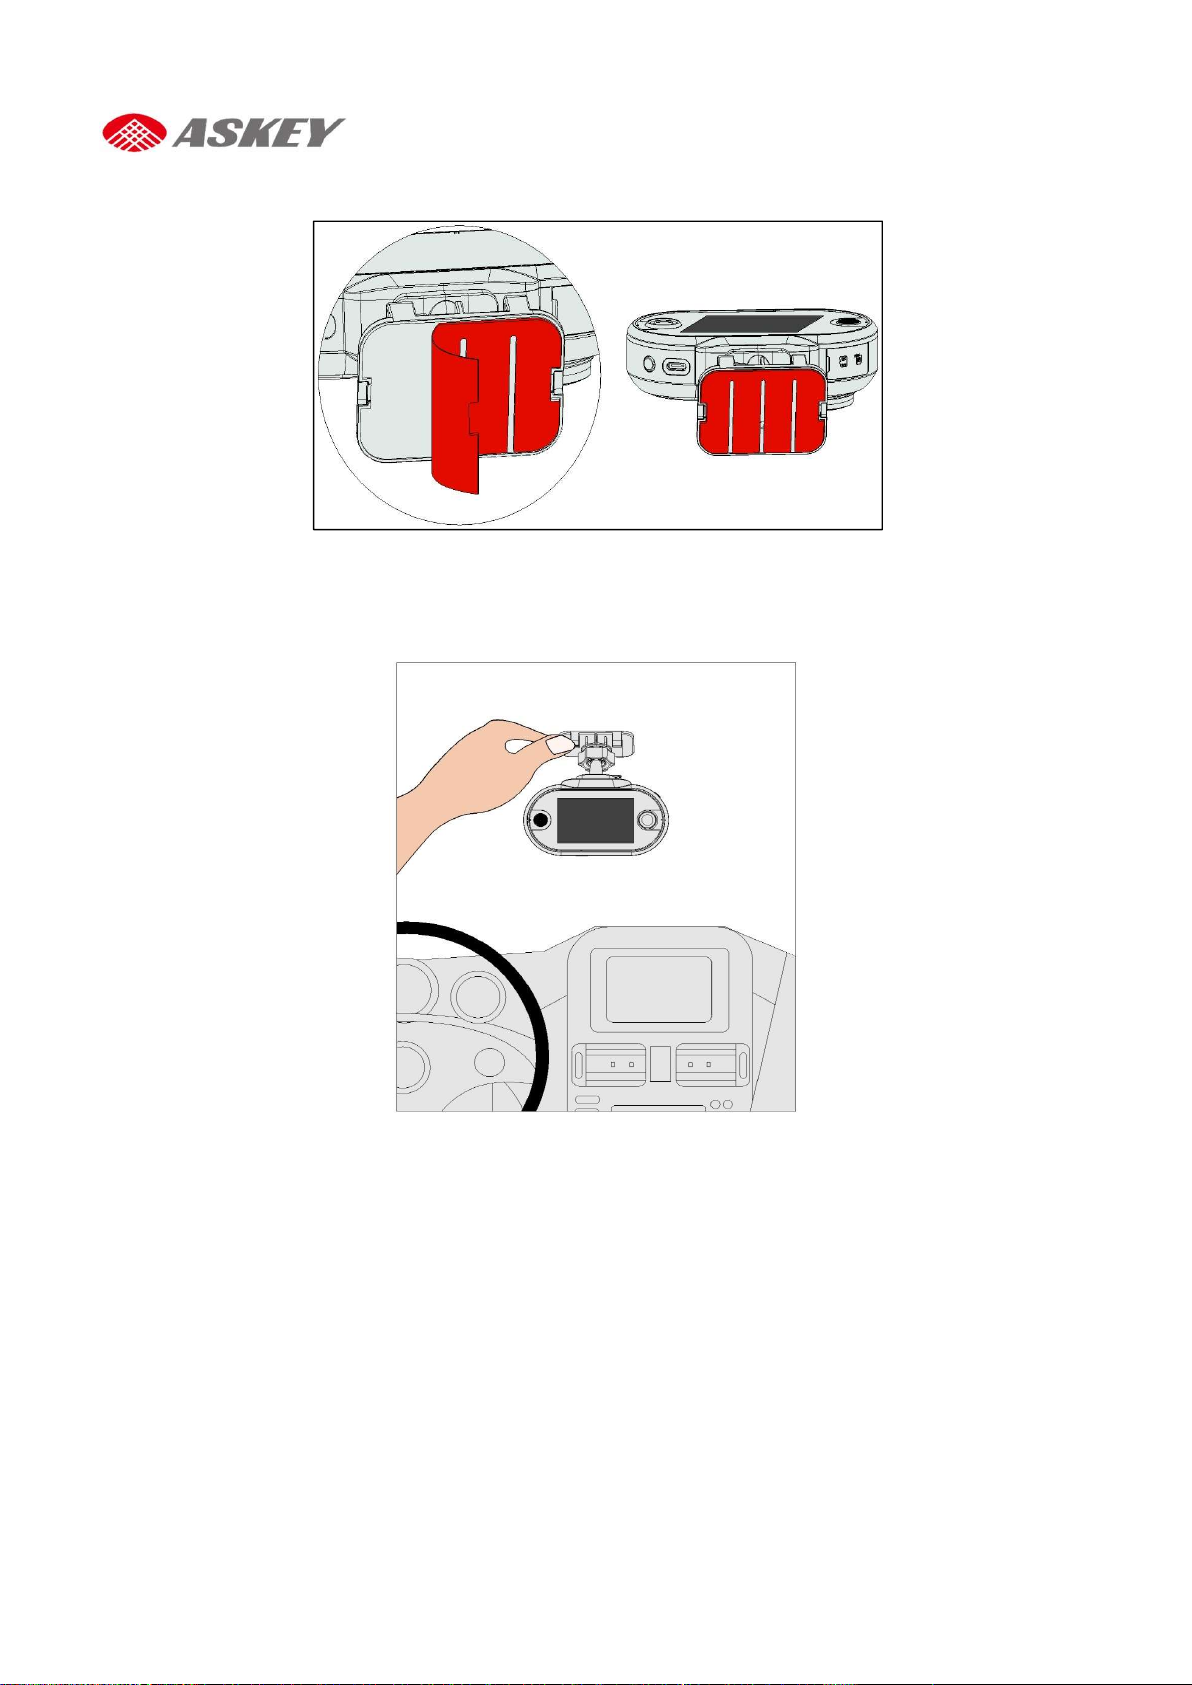
Step 3: Peel off the film from the upper surface of the mounting bracket.
Step 4: Position the mounting bracket on the windshield; press the bracket with your thumb to against the
windshield.
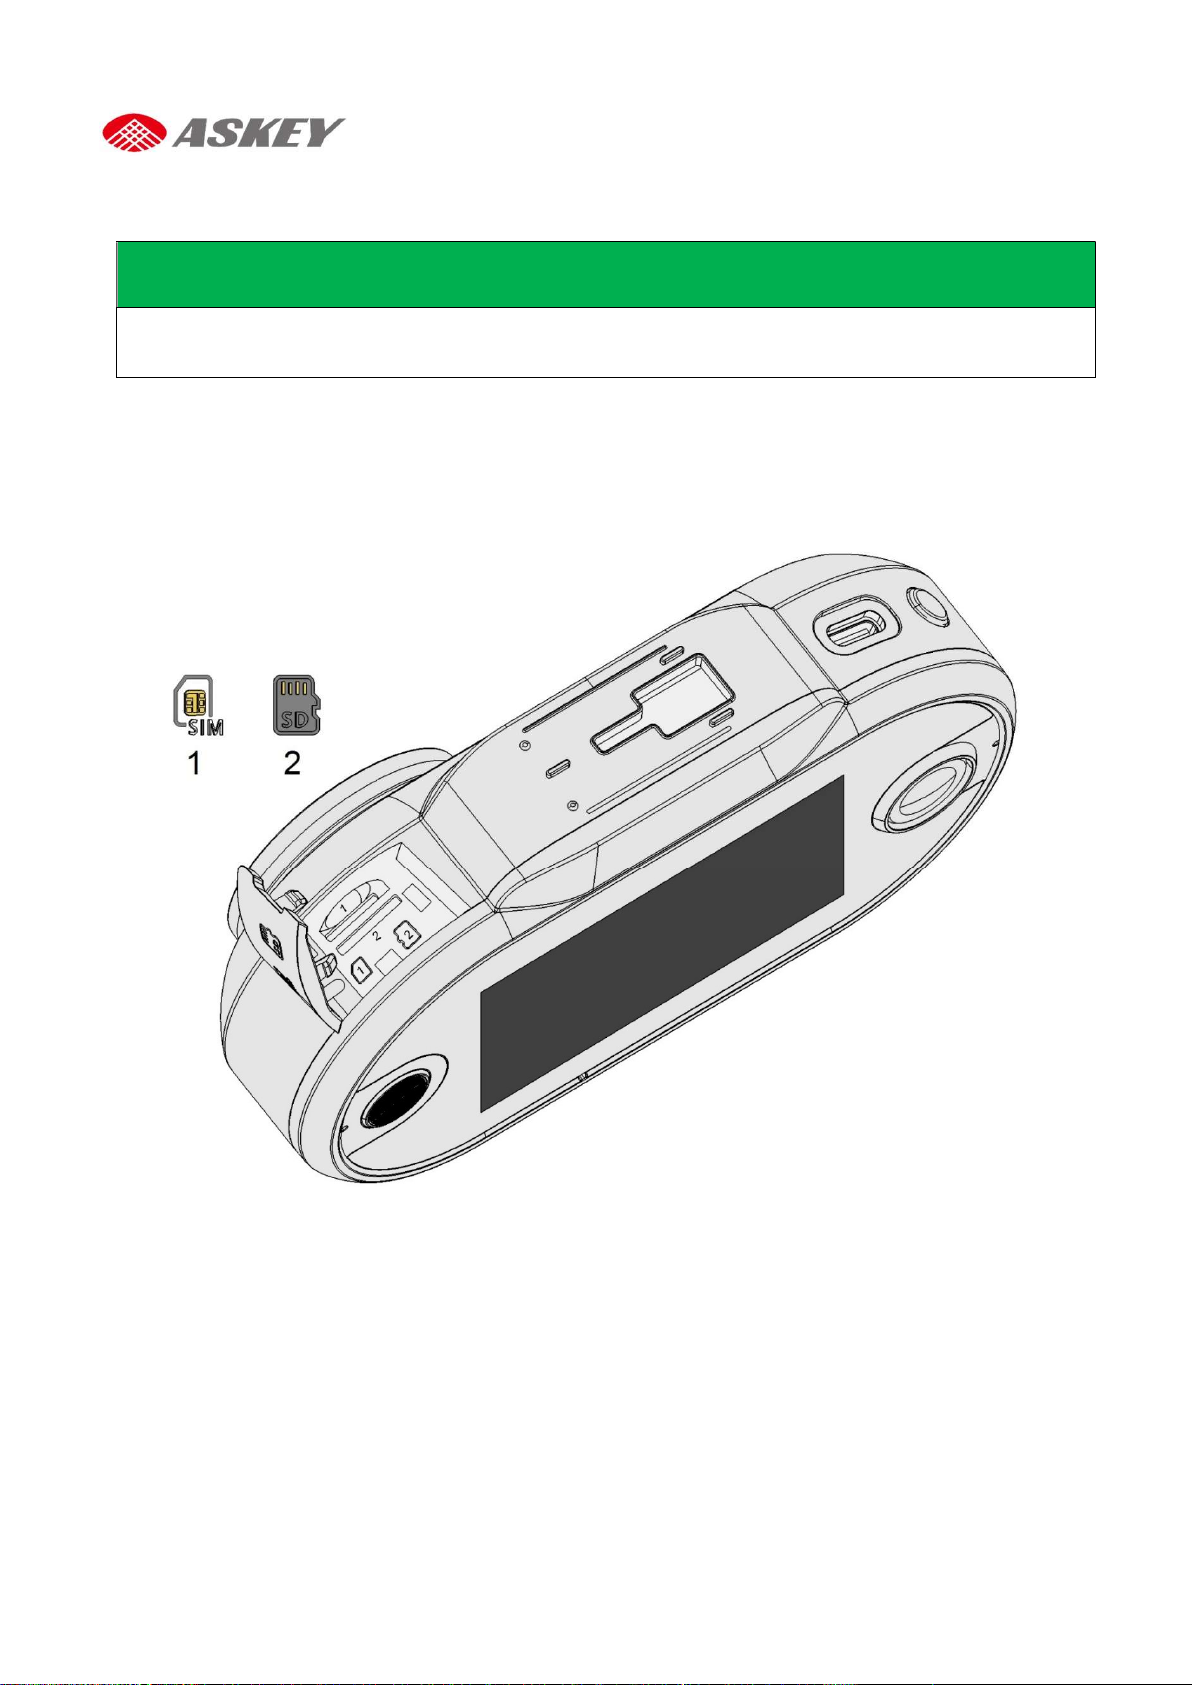
Insertion of SD Card and SIM Card
NOTES
The CDR8011 does not function without SD card.
The CDR8011 supports only Nano sim cards (LTE/3G).
To insert the SIM card (1)/ SD card (2):
1. Open the SD card cover.
2. Place the SIM card (1)/ SD card (2) in the slot per orientation marking.
3. Push the SIM card (1)/ SD card (2) into the slot.
4. Close the SD card cover properly.
6 CDR8010 – Quick Start Guide
Activation and Battery Charge
NOTES
Make sure that SD card is inserted into the CDR8011. If the SD card is not inserted, you cannot activate
the CDR8011.
Always use the attached car charger to activate and charge the CDR8011.
To activate and charge the CDR8011:
1. Plug one end of the charger into device’s USB Type C-Port.
2. Plug the other end of the charger into the cigarette lighter socket of your vehicle.
3. When the vehicle’s engine starts, the CDR8011 turns on and the built-in battery begins to charge.
When the ignition key is turned off and the vehicle’s engine stops, the CDR8011 goes to “Sleep” mode
3 seconds later. Note that while in “Sleep” mode, the CDR8011 consumes battery power.
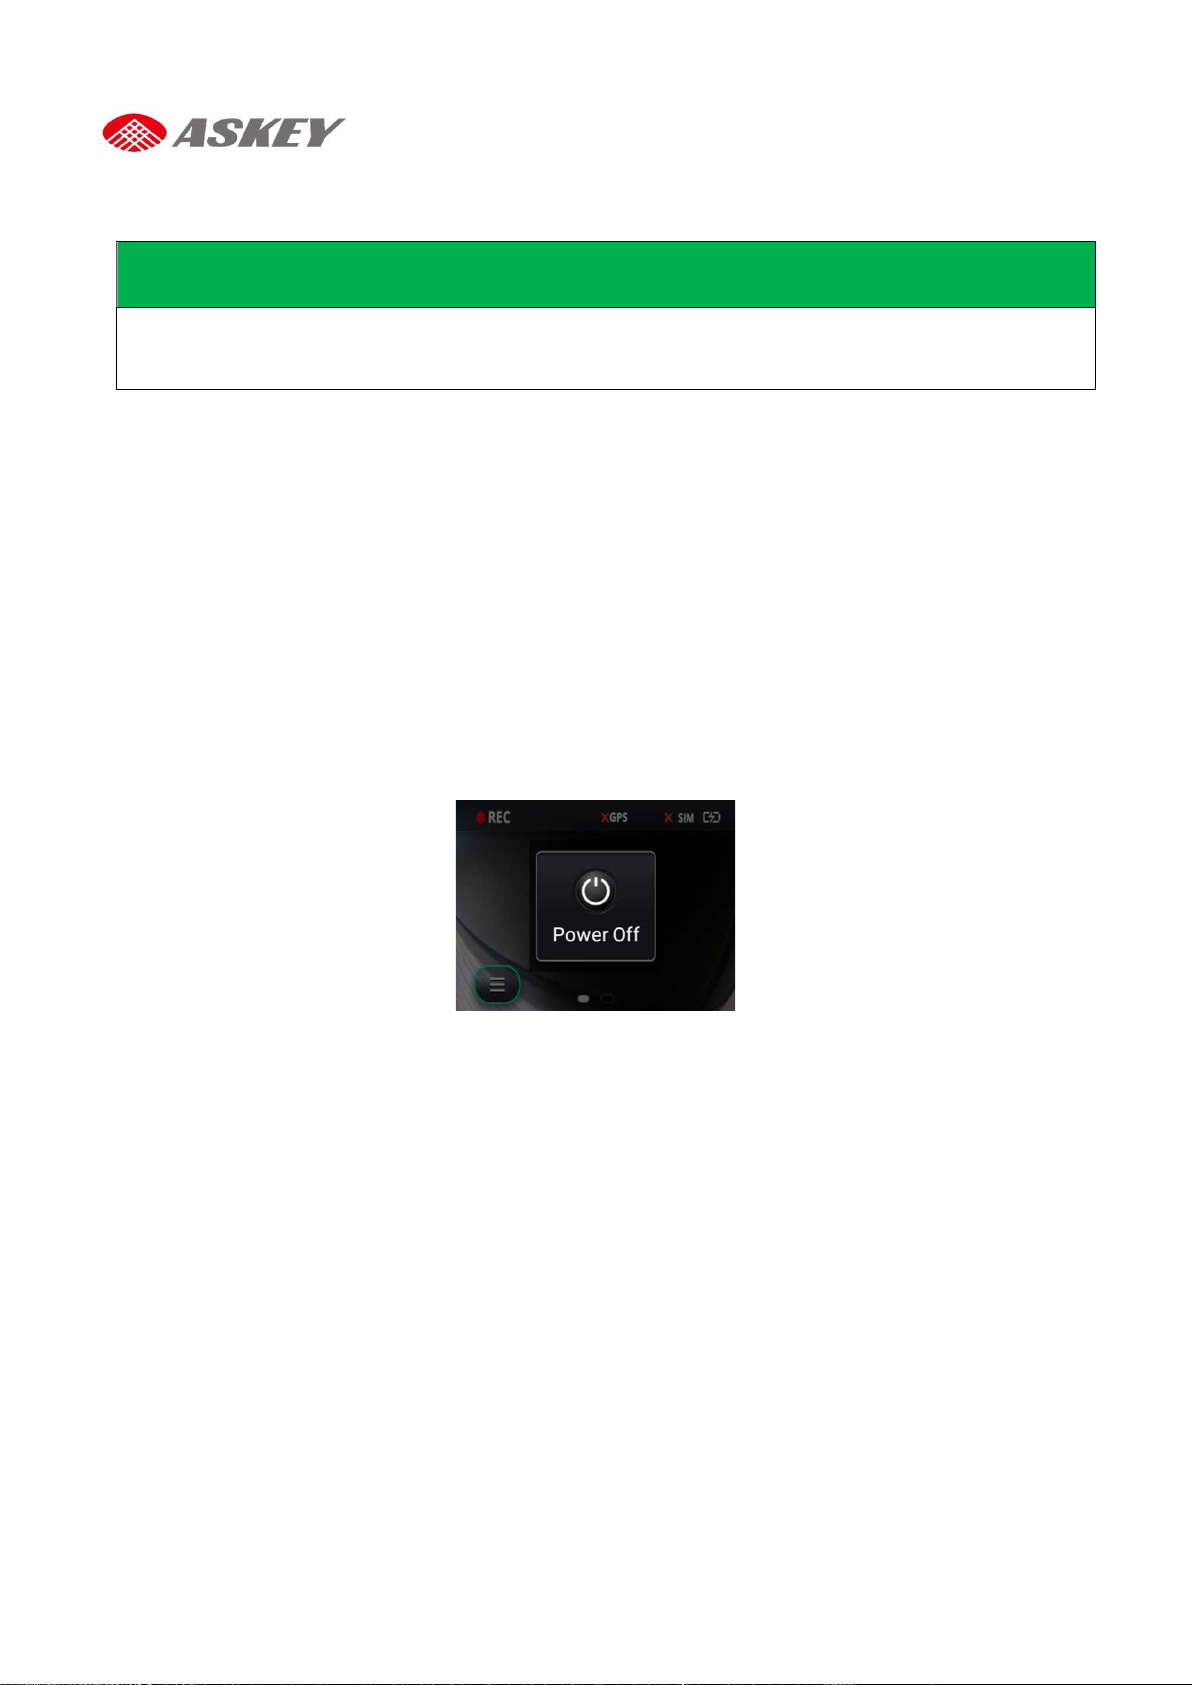
Manual Power Off
To turn CDR8010 off manually:
1. Press the “Power Off” button and Hold for 3 seconds. The “Power off” confirmation dialog box
displays on touch screen.
2. On the confirmation dialog box, touch:
Touch “Power off” to turn off the device.
Touch other areas on the display to cancel.

Screen Icons/Buttons
Icons/Buttons/
Indicators Description
Icons/Buttons/
Indicators Description
Main menu
Impact
Firmware update
available (dot on Main
menu)
E-call Answer/End buttons
Recording ON icon
Wi
-
Fi connection status with
signal strength
Recording error/OFF
icon
Bluetooth on/off
Recording event icon
Hotspot on/off
No SIM card
Front cam recording icon
No GPS signal
Rear cam recording icon
3G/4G Cellular
connection
Back button
Battery Charge Level
,
25%, 50% and 75%
Play button
Battery Charge in
progress
Pause button
Broken cameras
8 CDR8010 – Quick Start Guide
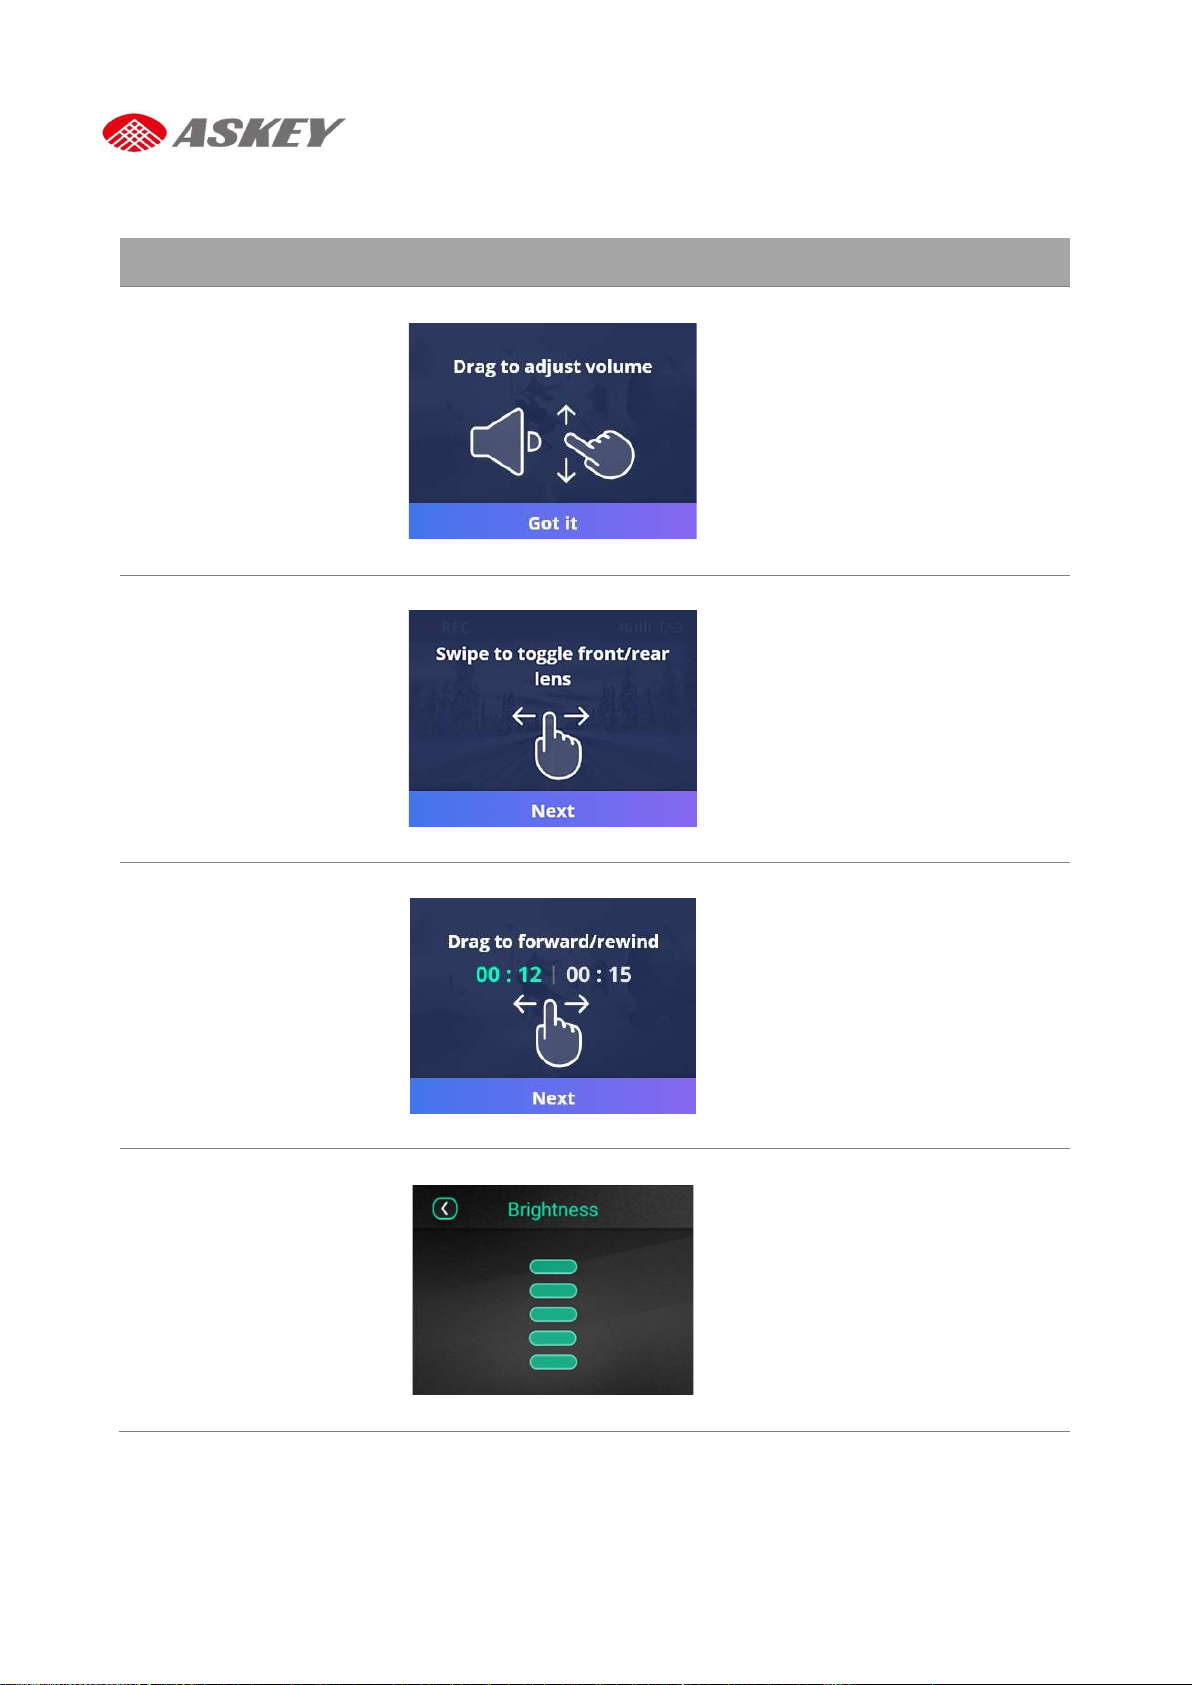
Touch Screen Operations
Description Operation Example Action
Volume Adjustment
(from Default
Recording Screen)
Swipe up to increase the
volume.
Swipe down to decrease the
volume.
Toggle between
Cameras (from
Default Recording
Screen)
Swipe right to use the rear cam.
Swipe left to use the front cam.
Forward or Rewind
Video (from Playback
option)
Swipe right to forward.
Swipe left to rewind
Screen Brightness
Adjustment (from
Display option)
Swipe up to increase the
brightness.
Swipe down to decrease the
brightness.
This manual suits for next models
1
Table of contents
Other Askey Dashcam manuals


