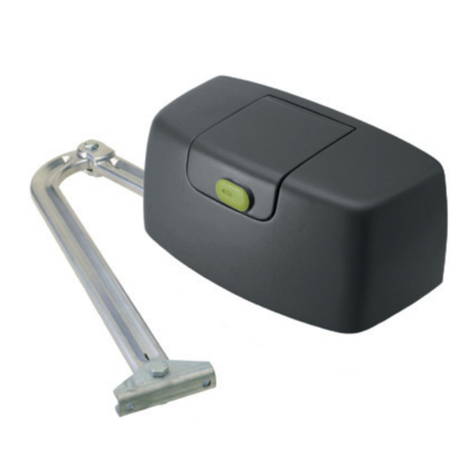
Apollo 7500ETL User manual

Model 7300
INSTALLATION MANUAL
APOLLO Gate Operators, Inc.
Model 7500ETL
Residential & Heavy Duty Commercial Slide Gate Operator
08/18/09
Requires installation of 4”x4” mounting post (not supplied)

22
CONTENTS
IMPORTANT SAFETY INSTRUCTIONS ............................................................. 3
Applications ........................................................................................................ 4
Pre-Installation Checklist .................................................................................. 5
Parts Identification ............................................................................................. 6
Post Installation .................................................................................................. 7
Operator Installation .......................................................................................... 8
Chain & Chain Bolt Installation ......................................................................... 9
Wiring Instructions ………………………………………………………………..…. 10
Internal Limit Adjustment .................................................................................. 11
Quick Release Operation ................................................................................... 12
Current Sense Adjustment …………………………………………………………. 13
Control Board .................................................................................................... 14-18
Siren Connection ………………………………………………………………….…. 19
.
Radio Receiver Options ………………………………………………………….…. 20
Warranty .............................................................................................................. 21

33
WARNING - To reduce the risk of injury or death:
READ AND FOLLOW ALL INSTRUCTIONS.
Installation should be performed by a professional installer.
Required welding should be performed by a qualified welder.
Should electricity be required, use a certified electrician only.
Any device that requires 120 Volts AC should be U.L. approved.
Ensure the gate and rollers meet U.L. standards.
All rollers should be covered to prevent injury. Install control devices such as keypads
far enough away (5 feet or further) from any moving parts of the operator and gate to
prevent possible injury.
A secondary entrapment device such as loop detectors, edge switches, and beam
detectors are highly recommended and required to meet the UL325 standard.
The “CAUTION AUTOMATIC GATE” signs should be clearly visible from both sides of
the gate.
Review with the owner all safety concerns including:
Do not operate the gate unless area around gate is in full view.
Never let children operate or play with gate controls. Keep the remote control
away from children.
Always keep people and objects away from the gate. NO ONE SHOULD CROSS
THE PATH OF THE MOVING GATE.
Test the gate operator monthly (see STEP 7 Programming the current sensitiv-
ity). The gate MUST reverse on contact with a rigid object or stop when an ob-
ject activates the non-contact sensors. After adjusting the force or limit of
travel, retest the gate operator. Failure to adjust and retest the gate operator
properly can increase the risk of injury or death.
Explain operation of the emergency release.
Always insure that the gate has closed securely before leaving area.
Arrange with local fire and law enforcement for emergency access.
Use the emergency release only when the gate is not moving.
Always disconnect the battery or power source when making adjustments or
repairs to any part of the gate or operator.
KEEP GATES PROPERLY MAINTAINED. Read the owner’s manual. Have a
qualified service person make repairs to gate hardware.
The entrance is for vehicles only. Pedestrians must use separate entrance.
SAVE THESE INSTRUCTIONS
IMPORTANT SAFETY INSTRUCTIONS

44
APPLICATIONS
The Apollo Model 7500 Slide Gate Operator is designed to handle a slide gate up
to 33 feet in total length (30 foot gate with 3 foot tail) and 1,000 lbs. A professional
fence or gate dealer is recommended to assure proper installation. Apollo Gate
Operators are available only through qualified dealers with an outstanding
reputation in the fence and gate industry. These dealers will be able to recommend
the proper equipment for particular applications. Apollo Gate Operators are 12 Volt
DC (Direct Current) powered. A 12 Volt sealed battery (33 ampere hour minimum) is
recommended. There are several advantages with 12 Volt DC systems:
Low voltage virtually eliminates risk of electrical shock.
Battery powered operators can provide up to 200 operations in the event of
power outages.
The battery may be recharged with a trickle charger or by solar energy
(Electrical battery chargers should have a class 2 transformer rating).
If a trickle charger is used and a standard electrical outlet is not readily available, a
licensed electrician will be required for proper electrical hook up.
The following table should be used as a guide for capacity of operation of operators
only, additional options may reduce the the daily usage. Please note that the charge
capability of solar panels will vary with different geographical locations. All solar
panels and battery chargers are designed for use with a 12 volt battery.
Daily Cycles 1-10 1-20 1-40 1-60 1-80 80+
5 watt solar panel *
10 watt solar panel *
20 watt solar panel (requires 5310 regulator) *
30 watt solar panel (requires 5310 regulator) *
40 watt solar panel (requires 5310 regulator) *
1.5 amp battery charger *
10 amp battery charger *
Note: Double the amount of solar panels for Dual Gate Operators.

55
PRE-INSTALLATION CHECKLIST
The following checklist should be used before beginning installation:
•Verify that the proper operator has been selected for this application.
•Verify proper installation and operation of the gate.
1. Are all rollers covered with a protective housing?
2. Are the rollers servicable?
3. Does the gate roll free and level?
4. Will the gate require a locking device?
5. Are the main posts sturdy enough to handle the gate & operator?
•Determine the general location of the operator, chain brackets, and solar
panel (if used).
1. Is there a suitable location for the operator?
2.Can the solar panel (if used) be mounted in an unobstructed area facing
south?
3. Will additional solar panel cable be required?
4. Is electricity available (if required)?
•Consider safety and access options. Recommend if needed.
1. Will there be chidren or animals in the area?
2. Are safety loops, edge switches, or photo eye detectors required?
3. How can the gate be opened in emergencies?
4. How will visitors enter and exit?
5. Will vehicles (and trailers) have sufficient room off roadway to operate any
control devices such as keypads?

66
PARTS IDENTIFICATION
Chain Brackets
(2 each)
#40 Roller Chain (30 feet)
Master Chain Links
(2 each)
Operator
5/16 Washers,
Lock Nuts, & Nuts
(8 each)
5/16 U Bolts
(4 each)
Chain Bolts with hardware
(2 each) Base Plate
Mounting Hardware
3/8” bolt, 2 washers,
lock washer and nut
(4 each)
#273G
CAUTION Signs (2 each)

77
POST INSTALLATION
A 4” x 4” square post (not supplied) is recommended as a pedestal for the operator. The required
depth of the post will be determined by the size of gate and type of soil at the installation location.
Since the operator will be moving the gate, a substantial depth is required for operator rigidity. If you
are not sure how deep to set the post, contact a local fence installer for a recommendation.
1. Position the gate closed.
2. Check that there is at least two feet of gate (or tail) that is not over the driveway.
3. Set the post to the dimensions in Fig. A. The post should be level and square to the gate.
4. The top of the post should be 2-1/2 inches below the intended chain height.
8-1/2”
15”
w a l l o r f e n c e
gate in closed position direction to open gate
Fig. A
D
R
I
V
E
W
A
Y
4”x 4” POST LOCATION

88
OPERATOR INSTALLATION
STEP 1. Weld the base plate onto the 4”x 4” post as shown. The slotted holes
should be perpendicular to the gate.
The base plate should be level and parallel to the gate.
STEP 2. Bolt the main chassis on to the base plate using the four 3/8”
bolts, washers, lock washers and nuts.
STEP 3. Assemble chain bracket
with 5/16” U-bolt & hardware to each
end of the gate as shown. Do not
tighten at this time.
STEP 4. Align both chain bracket slots with the bottom teeth of the idler
sprockets.
Tighten all hardware.

99
CHAIN & CHAIN BOLT INSTALLATION
STEP 1. Position the gate so that the operator is in the center of the
gate. Connect chain bolt to the chain bracket as shown on both ends of
the gate.
STEP 2. Attach the chain to the chain bolt using the master chain link. Do not
tighten the chain bolts .
Note: A chain breaking tool may
be required to reduce the chain to
the proper length.
STEP 3. Check chain align-
ment with idler sprockets.
Tighten both chain bolts
allowing 1 inch of chain sag
per every 10 feet of chain.
Align chain parallel
to the gate
Idler sprocket
Note: The gate should have
physical stops in the open and
closed position to limit over travel.

1010
Wiring Instructions
STEP 2. Connect the two ring terminals on the connector end of the cable to the battery. The battery
charger or solar panel should be installed at this time.
Plug the connector into the Master connector on the circuit board.
STEP 1. Determine which direction the gate will open. The factory units are plugged into INPUT B
for right hand opening as shown in Fig. 1.
For left hand opening, disconnect from INPUT B and plug into INPUT A on the surge board as
shown in Fig. 2.
Fig. 1
Right Hand Opening Fig. 2
Left Hand Opening
Right Side Installation
Red
Black
Green
Orange
White
Left Side Installation
Red
Black
Green
Orange
White
Table of contents
Other Apollo Gate Opener manuals

Apollo
Apollo 1550ETL Operating instructions

Apollo
Apollo 1500 User manual

Apollo
Apollo Hyppo User manual

Apollo
Apollo 1550ETL User manual

Apollo
Apollo 7100ETL User manual

Apollo
Apollo 3500 ETL Operating instructions

Apollo
Apollo 7100 User manual

Apollo
Apollo 7000ETL User manual

Apollo
Apollo METROetl User manual

Apollo
Apollo 7300ETL User manual