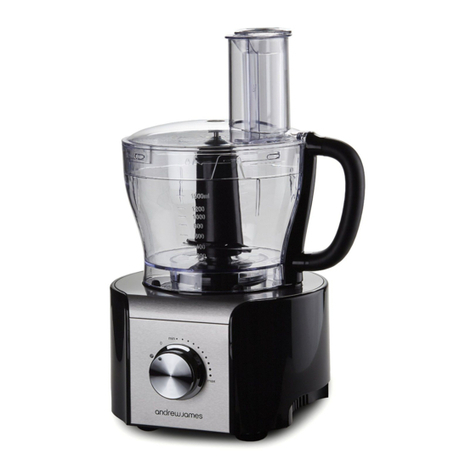
Andrew James AJ001326 User manual

1
Thank you for your purchase. We hope that you are sased with
your new Andrew James product.
To fully and safely enjoy the benets of your new product, please read the
manual fully before use and keep safe for future reference.
Food Processor with Blender

2
Appliance informaon
Approximate dimensions (mm)
Diagram not to scale
Voltage (v) 220-240
Frequency (Hz) 50/60
Power (w) 700
Cable length 110cm
Product weight 3.5Kg
Fuse 13a
Processor bowl capacity • 2 Litre air capacity
• 1.4 Litre liquid capacity
Blender jug capacity 1.8 Litre
436
230
260

3
Safety informaon
When using any electrical appliance, basic safety precauons should
always be followed, including the following;
• This appliance is intended for indoor, household use. Unintended
use or operaon may result in personal injury, damage to property
or damage to the appliance that will void the warranty.
• This appliance can be used by children aged from 8 years and
above and persons with reduced physical, sensory or mental
capabilies or lack of experience and knowledge if they have been
given supervision and/or instrucon concerning safe use of the
appliance and the understanding of hazards. Children shall not play
with the appliance. Cleaning and user maintenance shall not be
made by children unless they are older than 8 years old and
supervised.
• Keep the appliance and its cord out of reach of children less than 8
years old.
• Never handle or operate any appliance with wet or moist hands.
• Do not immerse appliance, cord or plug in water or other liquids.
Take care whilst cleaning.
• If the appliance has fallen in water do not reach for it, immediately
switch the appliance o at the mains and unplug it.
• Ensure that the cord is not in a posion where it can be pulled or
tripped over accidentally. Never use the cord to carry or pull the
appliance. Do not let the cord hang over the edge of a table or
counter.
• Keep the cord away from heated surfaces.
• Do not use the appliance if it has malfunconed, been dropped or
damaged in anyway. If the unit has been damaged take the unit for
examinaon and/or repair by an authorised service agent.
• Do not aempt to open the appliance, repair or modify the
appliance, use the appliance for unintended applicaons or use
accessory aachments not recommended by the manufacturer.
Failure to follow these instrucons may result in re, electrical
shock, or risk of injury to persons.

4
• Do not place the appliance near a naked ame, hot gas or electric
burners, or any appliances generang heat.
• Always remove the plug safely from the socket aer use. Do not
pull from the cord.
• Ensure that all packaging is removed before use.
Appliance specic safety informaon
• Incorrect use or misuse may result in injury.
• Switch o and unplug the appliance when not in use, when
changing accessories or mixing ingredients with utensils
• Do not push food with ngers, or other objects (like knives), always
use the enclosed pusher.
• Accessory blades are very sharp. Handle carefully during assembly,
emptying the bowl and during cleaning aer use.
• Remove accessory blades before pouring contents from the bowl
• This appliance is not dishwasher safe.
• Do not use the product with wet hands
• Do not aempt to use non-standard aachments.
• Liquids should be allowed to cool to room temperature before
blending.
• This appliance includes a safety interlock switch which prevents
operaon unless the bowl and cover are securely installed.
• This appliance incorporates a protecve device against high motor
temperatures. If the motor temperature becomes too high, the
unit will turn o automacally and will resume operaon when the
motor has cooled suciently.
• If the protecve device operates, switch o and allow to cool for a
minimum of 15 minutes.
• Before removing the lid from the bowl or the bowl from the base,
switch o and wait unl the components stop rotang.

5
• Do not use the lid interlock to Start or Stop the processor, always
use the ON/OFF speed control.
• Do not place this appliance on or near any gas or electric burner or
inside a heated oven.
Rated Run Time (RRT)
Warning: Do not exceed the Rated Run Time.
• Electrical appliances intended for food preparation are designed
with sealed enclosures or with small openings in the enclosure to
prevent contamination.
• The lack of openings in the enclosure restricts airflow and
increases the internal operating temperatures. A Rated Run Time
(RRT) is stated to prevent overheating and potential damage.
• The RRT for this appliance is:
• 3 minutes chopping/processing
• 30 seconds for Blending
• Periods of continuous use should not exceed the RRT.
• Allow the appliance to rest for 5 minutes after each period of use.
• Exceeding the Rated Run Time is an abusive condition where
the appliance may overheat indicated by an increased enclosure
temperature and possible odour.
• Switch o and allow the appliance to cool.

6
1. Control Dial 10. Disc Holder
2. Motor Base 11. French Fries Disc
3. Drive Sha 12. Chopper Disc
4. Processing Bowl 13. Kneading Disc
5. Blade Adapter 14. Emulsifying Disc
6. Cover 16. Blender Measuring Cup
7. Pusher 17. Blender Jug Cover
8. Slicing Disc 18. Blender Jug
9. Shredder Disc
Appliance components illustraon
Before rst use
• Unpack the appliance and remove all packaging.
• Wash all parts of the appliance thoroughly before rst me use. Refer to
cleaning and maintenance.
• Ensure that the capacies are not exceeded.

7
Chopper Disc
The chopping blade is the most versale of all the aachments and the length of
the processing me will determine the texture achieved. For coarser texture use
the pulse control.
Use the chopping blade for cake and pastry making, chopping raw and cooked
meat, vegetables, nuts, pate, dips, pureeing soups and to also make crumbs from
biscuits and bread. It can also be used for yeasted dough mixes. Use the kneading
tool for kneading dough, parcularly yeasted mixes.
Assembly
Posion the drive sha on motor base.
Slot the processing bowl over the drive
sha and turn clockwise to lock into
place on the motor base.
Place the blade adaptor onto the drive
sha.
4. Take the chopping blade and place onto
the blade adaptor.
5. Place cover onto the bowl and turn
clockwise unl the cover interlocks on
bowl.
6. Use the pusher to push food into feeding
chute.
Disassembly
1. Switch o the appliance.
2. Remove the bowl cover by clasping the
feeding tube and rotang the bowl cover
an-clockwise to unlock it from the bowl.
3. Remove the chopper blade and blade
adapter to empty the ingredients.
4. Unlock the bowl from the power unit by
rotang it an-clockwise using the
handle.
5. Remove the drive sha and clean the appliance as instructed in the cleaning
secon of the manual.
How to use

8
Kneading Disc/Emulsifying Disc
Assembly
Posion the drive sha on the motor base.
Slot the processing bowl over the
drive sha and turn clockwise to
lock into place on the motor base.
Place the blade adaptor onto the
drive sha.
Take the required disc and place
onto the blade adaptor, the bigger
blade should go on rst.
Place cover onto the bowl and turn
clockwise unl the cover interlocks
on bowl.
Use the pusher to push food into
feeding chute.
Disassembly
1. Switch o the appliance.
2. Remove the bowl cover by clasping
the feeding tube and rotang the
bowl cover an-clockwise to unlock
it from the bowl.
3. Remove the disc and blade adapter
to empty the ingredients.
4. Unlock the bowl from the power
unit by rotang it an-clockwise
using the handle.
5. Remove the drive sha and clean
the appliance as instructed in the cleaning
secon of the manual.

9
Slicing Disc, Shredder Disc & French Fries Disc
Choosing Your Disc
1. Take your desired disc and slot over the central plasc cylinder of the disc holder
2. Gently push down on the disc unl you hear it lock into place
Changing Disc
1. Gently pull the hook over the clip
2. Repeat “choosing your disc” instrucons above
Assembly
1. Posion the drive sha on motor base
2. Slot the processing bowl over the drive
sha and turn clockwise to lock into place
on the motor base
3. Place disc holder onto the drive sha
4. Place cover on bowl
5. Turn cover clockwise unl cover interlocks
on bowl.
6. Put food into the feeding chute. Use
pusher to push the food down for
processing
Disassembly
1. Switch o the appliance.
2. Remove the bowl cover by clasping the
feeding tube and rotang the bowl cover
an-clockwise to unlock it from the bowl
3. Remove the disc holder to empty the
ingredients
4. Unlock the bowl from the power unit by
rotang it an-clockwise using the handle
5. Remove the drive sha and clean the
appliance as instructed in the cleaning
secon of the manual

10
Blender
• Use the blender for pasta sauces, soups, milkshakes etc.
• Do not use the machine connuously for more than 30 seconds on this funcon.
The motor should be allowed to cool down for at least 1 minute. Only use for a
maximum of 3 mes before leng the machine cool down fully.
• Do not put hot liquids into the blender as this will cause the jug to crack. Please
ensure that the temperature of the ingredients do not exceed 30°C above room
temperature.
• Allow the jug to warm up to room temperature before adding warm liquids.
Assembly
1. Aach the blender to the motor unit by rotang clockwise unl it is locked into
place.
2. Remove the lid by gently pulling, place in the ingredients and replace the lid back
on the jug by reversing the acon.
3. Turn the control dial to your required seng.
Disassembly
1. Remove the jug from the motor unit by rotang an-clockwise using the handle.
2. Li the lid o the appliance and pour out the ingredients.
3. Clean as instructed in the cleaning secon of the manual.
Table of contents
Languages:
Other Andrew James Food Processor manuals