
Alpine ALP411-V Quick start guide

1
VERTICAL
DIAPER
CHANGING
STATION
ALP411-V
OPERATION AND
INSTALLATION GUIDE

Known in the industry for excellent products, Alpine Industries is a manufacturer of
innovative, solution-based products for the commercial and institutional markets
worldwide. Combining commitment to the customer, design innovation and skilled,
dedicated workforces, they have produced a range of products that are an essential
part of every commercial facility. Every product is designed to the highest standards,
enabling you to get your requirements done in a reliable and cost-eective way.
THANK YOU
FOR YOUR
PURCHASE.

1 Important Safety Information
2 Parts List
3 Installation Instructions
9 Operation Instructions
10 Cleaning and Maintenance
11 Warranty
TABLE OF CONTENTS

1
• Failure to follow these warnings and the installation instructions
could result in serious injury or death.
• Read all instructions before installing diaper changing station.
Keep these instructions. DO NOT discard.
• A stud MUST be located and used for at least one side of the
diaper changing station.
• The diaper changing station is no stronger than the anchors or walls
to which they are attached and, therefore, MUST be firmly secured in
order to support the weight they are intended to support. Contact an
architect or building contractor if any questions.
• Child should never be left unattended.
• Avoid serious injury from falling or sliding out. Always use restraint
system.
• Adding excessive weight such as parcels, packages, or accessories
to the unit or to the bag hooks that exceed the total weight limit of
50 pounds (22.7 kg) may cause the unit to be unstable or may cause
a hazardous unstable condition to exist.
ADULT INSTALLATION REQUIRED.
READ ALL INSTRUCTIONS BEFORE ASSEMBLY
Unpack carton and identify all parts (See Parts List on left hand page.)
IMPORTANT SAFETY INFORMATION
A.D.A. COMPLIANCE
306.3 Knee Clearance, 307.2 Maximum Protruding Objects,
308.2 Forward Reach, 308.3 Side Reach, 309.4 Operation,
902.3 Work Surface Compliant when properly installed.
WARNING:
!
IMPORTANT SAFETY INFORMATION

2
306.3 Knee Clearance, 307.2 Maximum Protruding Objects,
308.2 Forward Reach, 308.3 Side Reach, 309.4 Operation,
902.3 Work Surface Compliant when properly installed.
PARTS LIST
3” WOOD SCREWS (4) 3” MACHINE SCREWS (2)
3/4” FINISHING
WASHERS (4)
3/4” FLAT WASHERS (4)
3/4” FLAT WASHERS (4)
TOGGLE ANCHORS (2)
DOOR/WALL PLATE
To be mounted on the
outside of the restroom door
FOR USE WITH WOOD STUDS FOR USE WITH TOGGLE ANCHORS
1 ¼” CAPS (6)

3
INSTALLATION INSTRUCTIONS
ADULT INSTALLATION REQUIRED.
TOOLS NEEDED:
• Level
• Measuring tape
• Power drill with 7/32”, 1/8”, and 1/2” masonry bits
• Power screwdriver with bull nose phillips bit
READ ALL INSTRUCTIONS BEFORE ASSEMBLY
Unpack carton and identify all parts (See Parts List on left hand page.)
1. Locate wood stud where left side of changing station will be mounted
to the wall.
2. Measure up 57.5’’ (146cm) from the floor and mark the wall. This locates
the position for the top left attachment hole.
NOTE: Mark on wall MUST be in center of wood stud.
3. Align hole in top left corner of changing station with mark on wall and
hold in place.
4. Using a level and measuring tape, mark the remaining three (3) holes.
After marking holes, set changing station down on ground.
5. Use a power drill and appropriate bit to drill four (4) holes in the wall.
This may require 2 people.
NOTE 1:
FOR WOOD STUDS:
- If finished wall surface is tile or masonry over wood studs,use a 7/32”
masonry bit for the pilot hole until you hit the wood stud, then change
to 1/8” bit.
- Use wood screws, finishing washers and flat washers (See Figure A
on Page 4).

4
FIGURE A
WALL
FLAT WASHER
WOOD
STUD
CHANGING
STATION BACK
INSTALLATION INSTRUCTIONS
WOOD SCREW
MOUNTING HOLE
FINISHING WASHER

5
INSTALLATION INSTRUCTIONS
NOTE 2:
FOR USE WITH TOGGLE ANCHORS:
- If finished wall surface has wood studs that are not 16” on center,
has metal studs, or has an underlying surface of concrete block, use
1/2” bit.
- Use machine screws and flat washers (See Figure B on Page 6).
- For holes NOT located in a wood stud, toggle anchors Must be used
(See Parts List on page 2). See “Using Toggle Anchors” section.
6. Align holes in changing station with drilled holes and secure top left
corner of changing station to wall stud using the appropriate screw and
washer. Continue to secure the three (3) remaining corners using the
appropriate screws and washers as described in NOTE 1 or NOTE 2.
7. Ensure all four (4) screws are tight and snap caps over screw heads.
ALL 4 OF THESE LOCATIONS
MUST BE USED FOR SAFE
INSTALLATION. THE LOWER HOLES
ENSURE INSTALLATION THROUGH
THE METAL BRACKETS.
WARNING
!

6
INSTALLATION INSTRUCTIONS
FIGURE B
WALL
FLAT WASHER
WOOD
STUD
CHANGING
STATION BACK
MACHINE
SCREW
TOGGLE ANCHOR
7
INSTALLATION INSTRUCTIONS
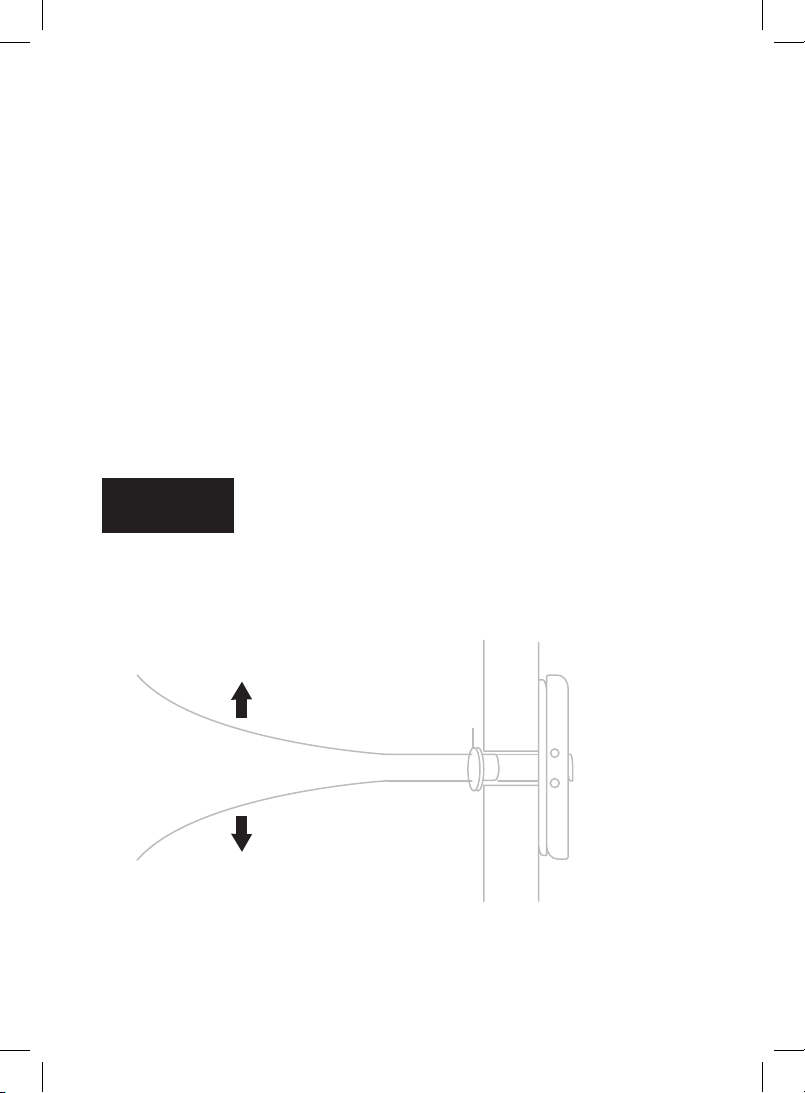
USING TOGGLE ANCHORS:
1. Insert metal end of toggle anchor into 1/2” hole.
2. Slide zip strip down snugly against wall.
3. Snap o break-away pieces of toggle anchor (See Figure C Below).
5. Ensure all four (4) screws are tight and snap caps over screw heads.
4. Align holes in changing station with toggle anchors and secure top
left corner of changing station to wall using machine screws and flat
washers. Continue to secure the three(3) remaining corners using
machine screws and flat washers.
ZIP STRIP
BREAK AWAY
PIECES
BREAK AWAY
PIECES
TOGGLE
ANCHOR
BEHIND
WALL
WALL
FIGURE C
Table of contents
Other Alpine Baby Accessories manuals


