Model This Instruction Covers
If uncertain about any of the information in this instruction,
or if questions or problems arise, contact the Allmand
service department at 1-800-562-1373, or contact through
the Allmand website, www.allmand.com
• Maxi-Lite II V-Series
Kit Contents
Allmand Parts & Service
Locate and identify the kit contents using the table below.
Ref Description Qty
1. 1/2-13 nyloc hex nut 4
2. 1/2-13 x 1-1/4 hex head bolt 4
3. 1/2 at washer 4
4. Conssin LED light 4
5. Conssin 4-LED drivers panel assembly 1
6. LED light CSA stop bracket 4
7. LED driver input cord 2
8. LED driver output cord 2
9. 2 wire lever locks 8
10. 8” cable tie 8
2 www.allmand.com
These kit instructions cover the conversion of metal halide
SHO lights to Conssin LED lights for Maxi-Lite V-Series.
Kit Instructions Description
1. Shut down the unit and allow ample time for engine
and lamps to cool. Refer to operator’s manual.
Before Kit Installation
DANGER
Electrocution Hazard
• Attempting to install the kit without rst shutting down
the unit will result in death or serious injury. Shut down
the unit before installing the kit.
WARNING
Burn Hazard
• Contact with hot surfaces of the engine and lamps
could result in death or serious injury. Always keep
clear of the engine, lamps and other hot areas of the
light tower.
2. Disconnect the battery, black negative (-) cable rst,
followed by red positive (+) cable. Refer to operator’s
manual.
DANGER
Electrocution Hazard
• Attempting to install the kit without disconnecting the
battery will result in death or serious injury. Disconnect
the battery before installing the kit.
3. Maxi-Lite II unit must be equipped with 725 light relays
prior to Conssin LED light conversion kit installation.
If 725 light relays are not present on unit, contact
Allmand Parts & Service for more information.
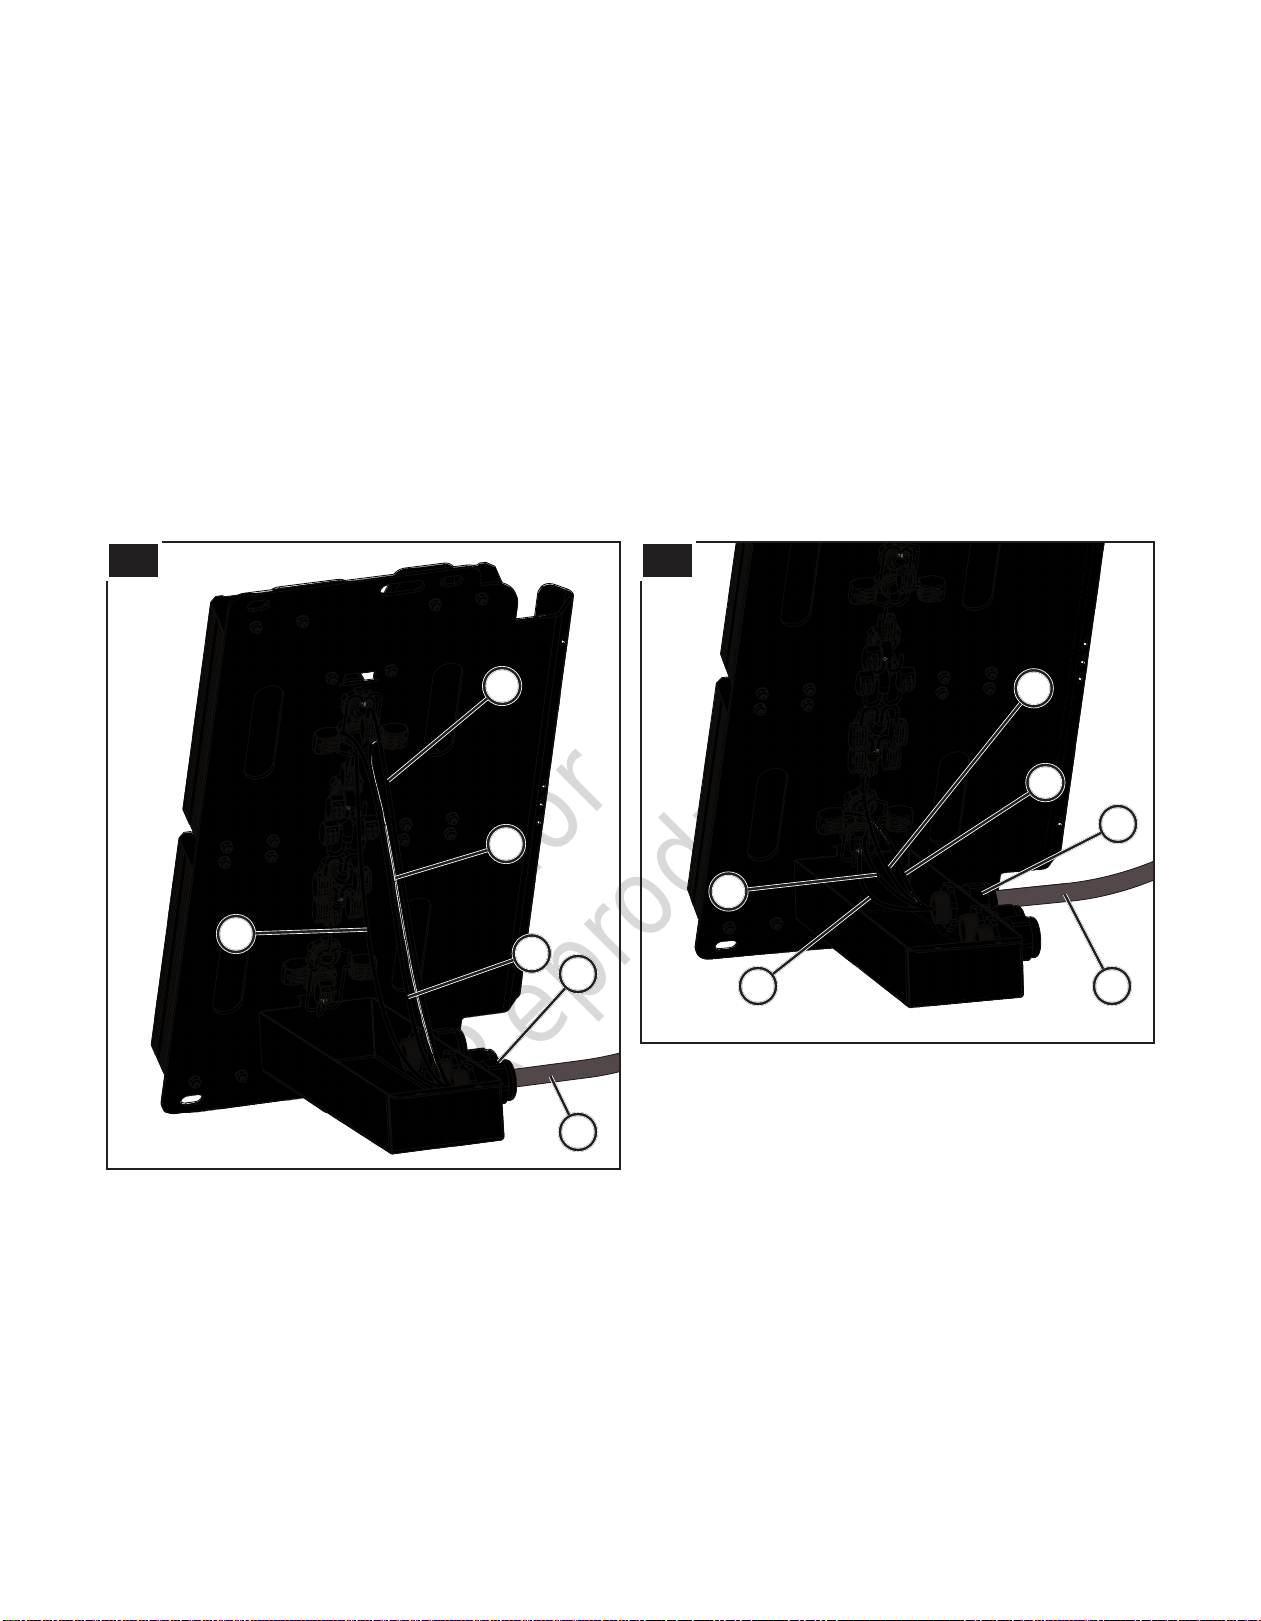
Kit Installation: Subassembly
1. Conssin LED light subassembly. Steps for assembling
the LED light CSA stop bracket to the Conssin LED
light are as follows:
a. From the kit contents install the LED light CSA stop
bracket (A, Figure 1, Ref. 6) onto the Conssin LED
light yoke bracket (B, Figure 1, Ref. 4) using the 1/2-
13 nyloc hex nut, 1/2-13 x 1-1/4 hex head bolt, and
1/2 at washer (C, Figure 1, Ref. 1, 2, & 3).
b. Repeat step on another Conssin LED light. On the
other two repeat the same step, but on the opposite
side of the light yoke bracket.
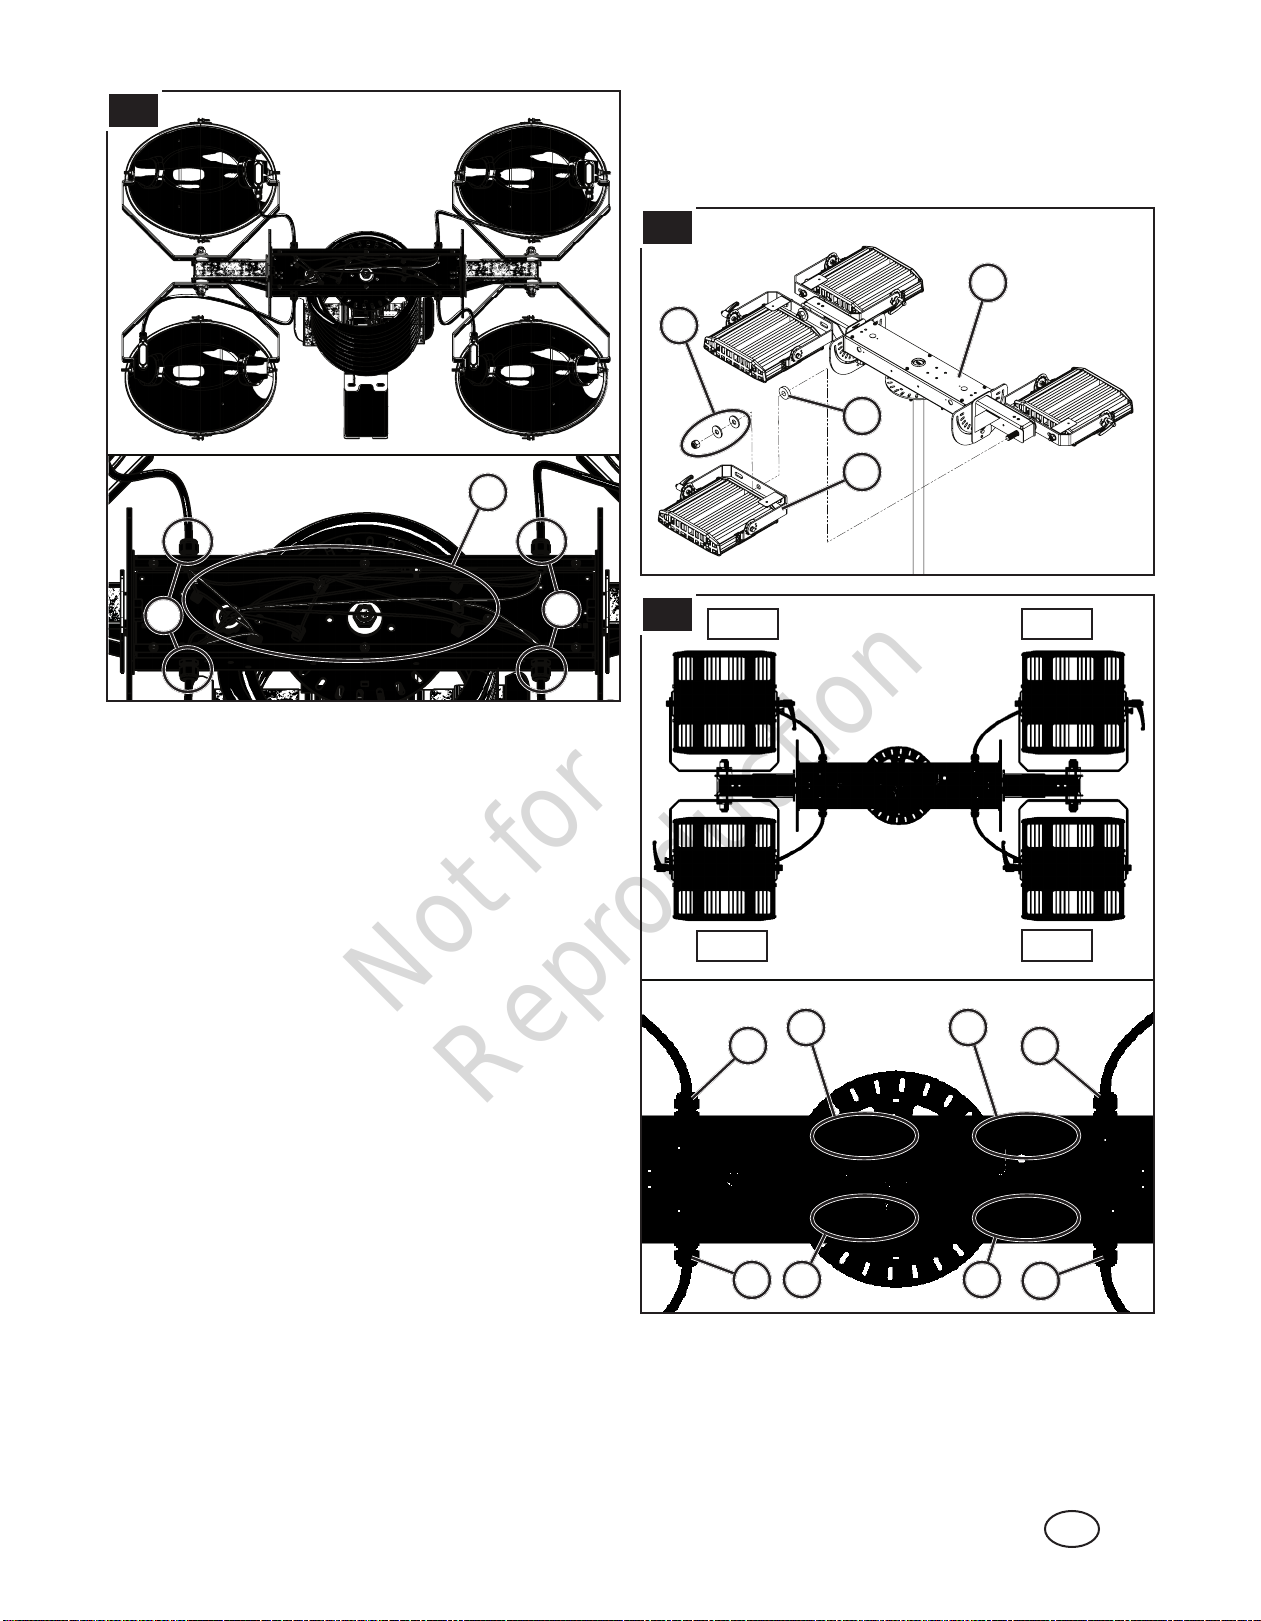
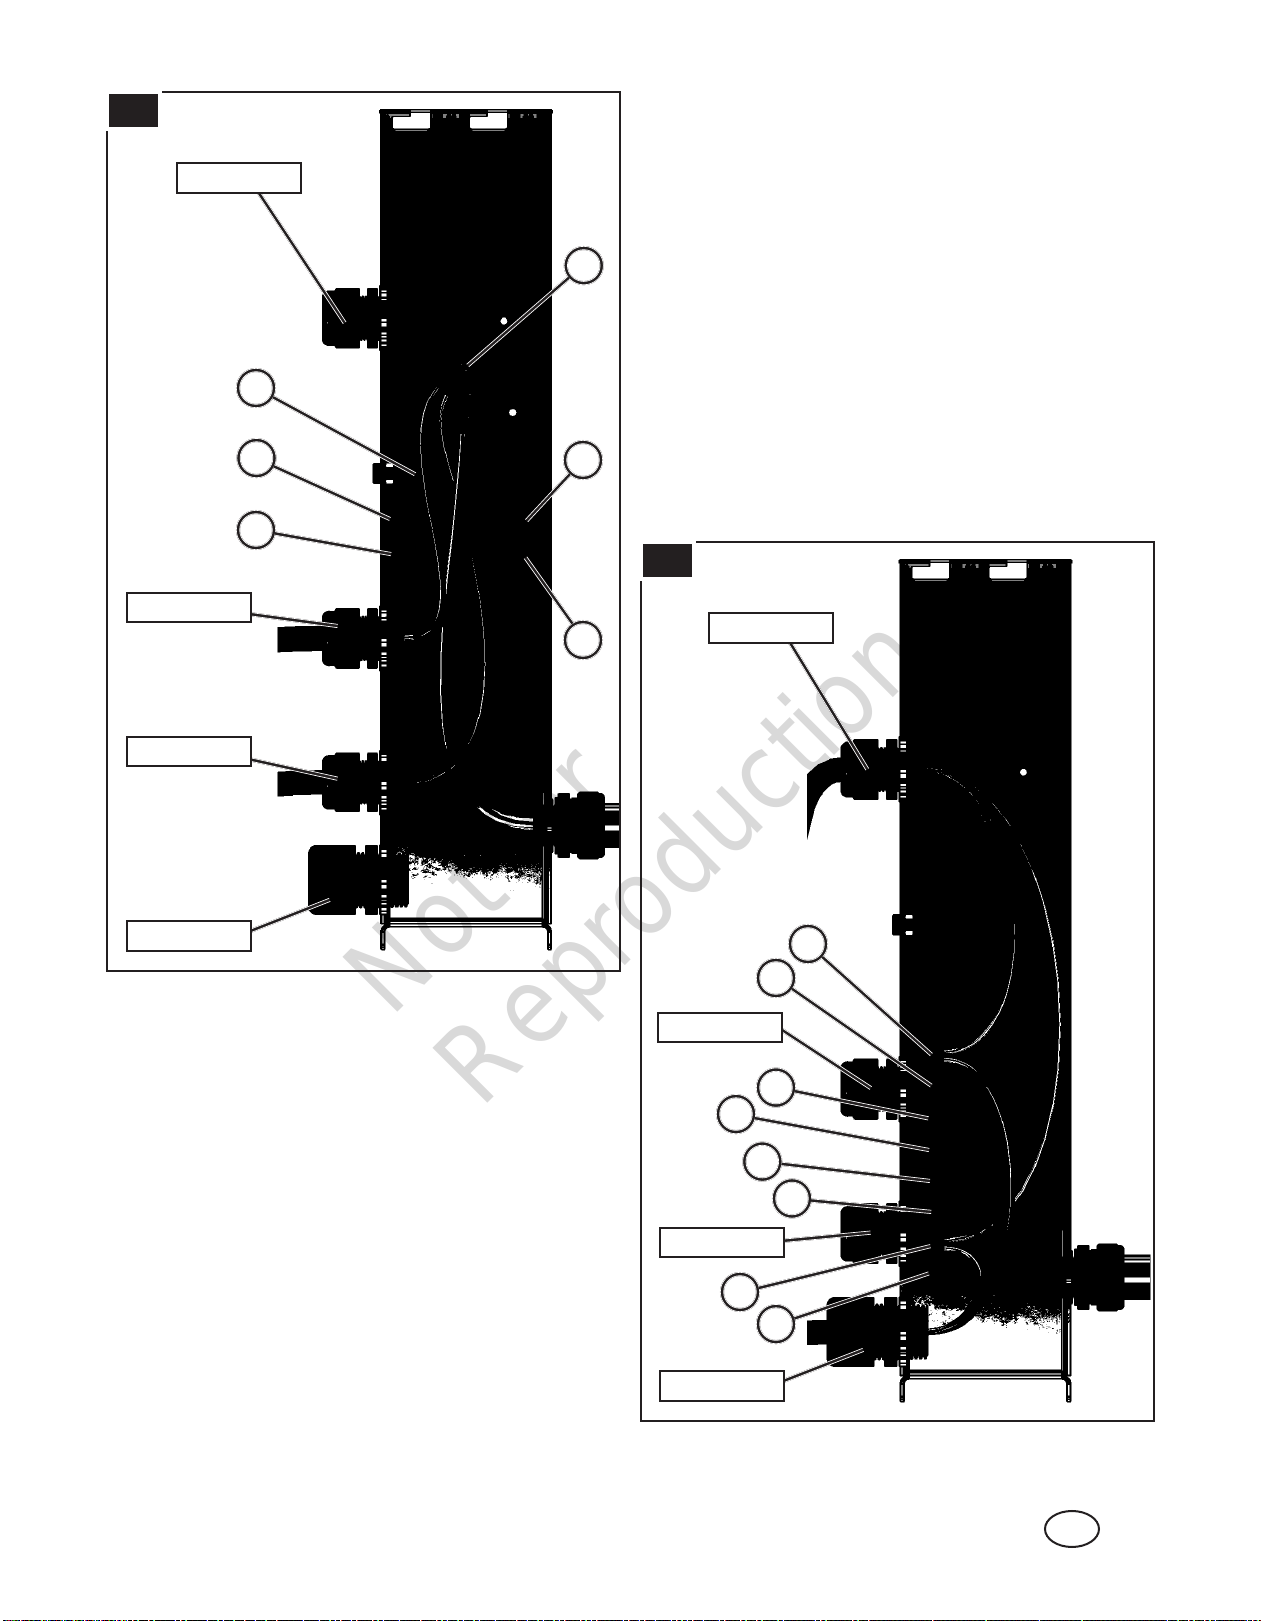
2. Locate the Conssin 4-LED drivers panel assembly
(D,Figure 2a, Ref. 5) from the kit contents. The LED
drivers on the panel are numbered #1 through #4 as
shown in Figure 2a. Remove the hardware (E, Figure
2b) securing the LED driver junction box (F, Figure 2b)
to the LED driver panel. Set hardware aside as it will
be used in step 7. Open junction box.
1
AC
C
B