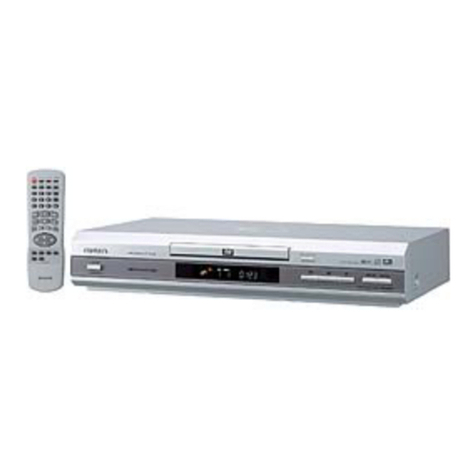
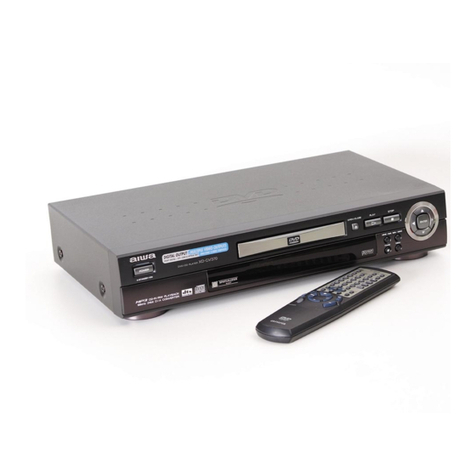
Aiwa XD-DW1 User manual

SERVICE MANUAL
DATA
DVD PLAYER
XD-DW1
S/M Code No. 09-002-339-7R1
AU(S),AHC(S)
REVISION
This Service Manual is the “Revision Publishing” and replaces “Simple Manual”
XD-DW1 AU(S),AHC(S)(S/M Code No. 09-002-339-7T1).
• BASIC DVD MECHANISM : DV21
If requiring information about the IC DESCRIPTION & IC BLOCK DIAGRAM,
see Supplement Service manual of XD-DW1 AU(S),AHC(S)(S/M Code No. 09-002-339-7S1).

2
TABLE OF CONTENTS
SPECIFICATIONS .................................................................................................................................. 3
PROTECTION OF EYES FROM LASER BEAM DURING SERVICING ................................................ 4
Precaution to replace Optical block......................................................................................................... 4
DISASSEMBLY INSTRUCTIONS...................................................................................................... 5-15
ELECTRICAL MAIN PARTS LIST ................................................................................................... 16-21
TRANSISTOR ILLUSTRATION ............................................................................................................ 21
LCD DISPLAY....................................................................................................................................... 22
WIRING-1 (MAIN: COMPONENT SIDE) ........................................................................................ 23, 24
WIRING-2 (MAIN: 2ND LAYER) ..................................................................................................... 25, 26
WIRING-3 (MAIN: 3RD LAYER) ..................................................................................................... 27, 28
WIRING-4 (MAIN: CONDUCTOR SIDE) ........................................................................................ 29, 30
SCHEMATIC DIAGRAM-1 (MAIN 1/8)............................................................................................ 31, 32
SCHEMATIC DIAGRAM-2 (MAIN 2/8)............................................................................................ 33, 34
SCHEMATIC DIAGRAM-3 (MAIN 3/8)............................................................................................ 35, 36
SCHEMATIC DIAGRAM-4 (MAIN 4/8)............................................................................................ 37, 38
SCHEMATIC DIAGRAM-5 (MAIN 5/8)............................................................................................ 39, 40
SCHEMATIC DIAGRAM-6 (MAIN 6/8)............................................................................................ 41, 42
SCHEMATIC DIAGRAM-7 (MAIN 7/8)............................................................................................ 43, 44
SCHEMATIC DIAGRAM-8 (MAIN 8/8)............................................................................................ 45, 46
WIRING-5 (TFT/FR1/FR2/BATT1/BATT2: COMPONENT SIDE)................................................... 47, 48
WIRING-6 (TFT/FR1/FR2/BATT1/BATT2: 2ND LAYER)................................................................ 49, 50
WIRING-7 (TFT/FR1/FR2/BATT1/BATT2: 3RD LAYER)................................................................ 51, 52
WIRING-8 (TFT/FR1/FR2/BATT1/BATT2: CONDUCTOR SIDE)................................................... 53, 54
SCHEMATIC DIAGRAM-9 (TFT) .................................................................................................... 55, 56
SCHEMATIC DIAGRAM-10 (FR1/FR2) ................................................................................................ 57
VOLTAGE INFORMATION .............................................................................................................. 58-61
WAVE FORM ................................................................................................................................... 62-65
ELECTRICAL ADJUSTMENT.......................................................................................................... 66-71
INITIALIZE MODE................................................................................................................................. 71
IC BLOCK DIAGRAM....................................................................................................................... 72-75
MECHANICAL PARTS LIST 1/1 ........................................................................................................... 76
MECHANICAL EXPLODED VIEW 1/1............................................................................................ 77, 78
ACCESSORIES/PACKAGE LIST ......................................................................................................... 79

3
SPECIFICATIONS
Power supply 120 V AC, 60 Hz <AU(S)>
100-240 V AC, 60 Hz <AHC(S)>
Power consumption 18 W
Weight Main unit: 970 g (33.95 oz)
Battery pack: 520 g (18.2 oz)
External dimensions 165 (W) *180 (H) *51 (D) mm
(6 1/2*7 1/8*2 1/8in.)
Signal format NTSC <AU(S)>
NTSC/PAL <AHC(S)>
Supported discs DVD video discs
12 cm (single-sided single-layer, single-sided double-layer,
double-sided double layer)
8 cm (single-sided single-layer, single-sided double-layer,
double-sided double layer)
Compact discs (CD-DA, video CD) <AU(S)>
12 cm and 8 cm discs
Compact discs (CD-DA, video CD, Super VCD) <AHC(S)>
12 cm and 8 cm discs
S1 video output Y output: 1 Vp-p (75 ohms, sync negative)
C output: 0.286 Vp-p
Video output Video composite output
1 Vp-p (75 ohms, sync negative)
RCA jacks
Audio output DOWN MIXING AUDIO OUTPUT connector
1.5 Vrms (1 kHz)
2 RCA jacks (L/R)
Fiber optical connector (IEC 958)
Audio output characteristics Frequency range:
CD/VCD: 20 Hz to 20 kHz
DVD: 4 Hz to 22 kHz (48 kHz sampling)
Wow and flutter: unmeasurable
Operating conditions 5˚C to 35˚C (41˚F to 95˚F)
•
Design and specifications are subject to change without
notice.

4
PROTECTION OF EYES FROM LASER BEAM DURING SERVICING
VAROITUS!
Laiteen Käyttäminen muulla kuin tässä käyttöohjeessa mainit-
ulla tavalla saattaa altistaa käyt-täjän turvallisuusluokan 1 ylit-
tävälle näkymättömälle lasersäteilylle.
VARNING!
Om apparaten används på annat sätt än vad som specificeras i
denna bruksanvising, kan användaren utsättas för osynling
laserstrålning, som överskrider gränsen för laserklass 1.
Caution: Invisible laser radiation when
open and interlocks defeated avoid expo-
sure to beam.
Advarsel:Usynling laserståling ved åbning,
når sikkerhedsafbrydere er ude af funktion.
Undgå udsættelse for stråling.
CAUTION
Use of controls or adjustments or performance of procedures
other than those specified herein may result in hazardous
radiation exposure.
ATTENTION
L'utilisation de commandes, réglages ou procédures autres que
ceux spécifiés peut entraîner une dangereuse exposition aux
radiations.
ADVARSEL!
Usynlig laserståling ved åbning, når sikkerhedsafbrydereer ude
af funktion. Undgå udsættelse for stråling.
This Compact Disc player is classified as a CLASS 1 LASER
product.
The CLASS 1 LASER PRODUCT label is located on the rear
exterior.
This set employs laser. Therefore, be sure to follow carefully the
instructions below when servicing.
WARNING!
WHEN SERVICING, DO NOT APPROACH THE LASER EXIT
WITH THE EYE TOO CLOSELY. IN CASE IT IS NECESSARY TO
CONFIRM LASER BEAM EMISSION. BE SURE TO OBSERVE
FROM A DISTANCE OF MORE THAN 30cm FROM THE
SURFACE OF THE OBJECTIVE LENS ON THE OPTICAL
PICK-UP BLOCK.
CLASS 1
KLASSE 1
LUOKAN 1
KLASS 1
LASER PRODUCT
LASER PRODUKT
LASER LAITE
LASER APPARAT
Precaution to replace Optical block
(DV21)
Body or clothes electrostatic potential could ruin
laser diode in the optical block. Be sure ground
body and workbench, and use care the clothes
do not touch the diode.

5
DISASSEMBLY INSTRUCTIONS
A
B
A
PLATE, BOTTOM ASSY
1. CABI, BOTTOM ASSY
(1) Remove screws A (*7) and B (*2), and remove the PLATE, BOTTOM ASSY from the unit.
(2) Remove the screws A (*3) on the CABI, BOTTOM ASSY side and disassemble the unit into the CABI, TOP ASSY and CABI,
BOTTOM ASSY.
(3) Remove the connectors connected to each of CN551, CN552, CN701, CN702, CN800 and CN802, and remove each of the
KNOB, SL N/P and PLATE, OPTICAL and KNOB, SL POWER knobs.
Note During Assembling:
Twist the connectors to be connected to CN551 and CN552 clockwise five times, then insert them.
Be careful of the upward and downward directions of the wiring and KNOB, SL N/P and PLATE, OPTICAL and KNOB, SL
POWER.
CONNECTOR (CN701)
CONNECTOR (CN702)
CONNECTOR (CN551)
CONNECTOR (CN800)
CONNECTOR (CN552)
CONNECTOR (CN802)
PLATE, OPTICAL
KNOB, SL N/P
KNOB, SL POWER
A
A
BOTTOM SIDE
BOTTOM SIDE
OUT SIDE
CABI, TOP ASSY
CABI, BOTTOM ASSY

6
A
HINGE, FRICTION
CABI, MONITOR ASSY
THREE CONNECTORS
HOLE
CABI, TOP ASSY
A
CABI, MONITOR FOOT, MONITOR
LCD, TFT
FF-CABLE
LCD POWER SUPPLY CONNECTOR
2. CABI, MONITOR ASSY
(1) Remove the screws A (*2) and remove the HINGE, FRICTION.
• Before disassembling, fully open the CABI, MONITOR ASSY. When assembling the ASSY, leave it open.
(2) Remove the CABI, MONITOR ASSY from the unit.
• Remove the three connectors from the holes.
(3) Remove the screws A (*2) under the FOOT, MONITOR
and remove the CABI, MNT while sliding it in the
direction of the arrow.
Note During Assembling:
Be careful not to pinch the wires and not to intertwist
each wire.
(4) Pull the LCD, TFT in the direction of the arrow and
remove the LCD power supply connector and FF-
CABLE, 30P 0.8 TFT from the PWB, TFT, then remove
the LCD, TFT.
Note During Assembling:
Be careful not to disconnect the two wires.

7
CLAW
CLAWS
PWB, TFT
CONN, ASSY, 2P
EARTH-MT
PLATE, 8-10-0.5
KNOB, LEVER OPEN POWER, UNIT
SPR-P, MONITOR
A
(5) Remove the three claws and remove the PWB, TFT. Then, remove the CONN ASSY, 2P EARTH-MT.
Note During Assembling:
Be careful not to touch the SFR of the PWB, TFT.
(6) After removing the POWER, UNIT, remove the screws A (*2). Then, remove the SPR P, MONITOR and the KNOB, LEVER
OPEN.
Note During Assembling:
Confirm that the PLATE, 8-10-0.5 at the right edge of the POWER UNIT is securely fixed. If it is not fixed securely, fix it again.

8
3. DVD MECHANISM and PWB, MAIN
(1) Remove the FFC connected to CN300 and CN301.
• Do not remove the FFC connected to CN200.
(2) Lift up the DV21 ASSY gently and remove the HLDR, MECHA in the direction of the arrow.
• Do not remove the FFC connected to CN200.
FFC (CN300)
FFC (CN301)
CN200
(Do not remove this.)
DV21 ASSY
HLDR, MECHA
CN200
(Do not remove this.)

9
WIRE (BLACK)
LUG PLATE
CN200
FFC
FFC (CN200)
SHORT
DV21 ASSY
PWB, MAIN
CABI, BOTTOM ASSY
(3) Solder the two short lands of the FFC connected to CN200 to short them.
(4) Remove the FFC connected to CN200.
• To unlock, pull the brown portion of CN200 to the front.
(5) Remove the wire (black) soldered on the lug plate of the DV21 ASSY.
Note During Assembling:
Be careful of wiring (route it under the HLDR, MECHA.)
(6) Remove the PWB, MAIN from the CABI, BOTTOM ASSY.

10
A
B
HINGE, OPEN DISC
SPR-P, LID-JP
SPR-T, DISC COVER
SHAFT, LID DISC
CABI, TOP ASSY
PLATE, DISC ASSY
W-L, 2.6-3.7-0.3
CONN ASSY, 9PWHT60MM-SM1
CONN ASSY, 7PWHT60MM-SS2
KEY, PLAY ASSY
KEY, STOP
KEY, STOP ASSY
PWB, FR1
PWB, FR1
WIRE
(BROWN)
PWB, FR2
SHLD-SH, EARTH
A
A
CABI, TOP ASSY
4. OPERATION PWB
(1) Remove the CONN ASSY, 7PWHT60MM-SS2, CONN ASSY and 9PWHT60MM-SM1.
(2) Remove the wire (brown) coming from the PWB, FR1.
Note During Assembling:
Stick securely the SHLD-SH, EARTH connecting the rear side of the CABI, TOP ASSY and the aluminum portion of the
WINDOW.
(3) Remove the screws A (four each) and remove the PWB, FR1 and PWB, FR2.
(4) Remove the KEY, STOP ASSY.
(5) Remove the KEY, PLAY ASSY and KEY, STOP from the PWB, FR1.
• Take extra care when handling the CABI, TOP ASSY whose rear side is coated by conductive paint.
5. CABI, TOP ASSY
(1) Remove the screw B (*1) on the rear side of the CABI, TOP ASSY and remove SPR-P, LID-JP and HINGE, OPEN DISC.
(2) Remove the screw A (*1) on the rear side of the CABI, TOP ASSY and remove the SHAFT, LID DISC.
(3) Remove the PLATE, DISC ASSY.
(4) Remove the SPR-T, DISC COVER and washer on the rear side of the PLATE, DISC ASSY.
Other manuals for XD-DW1
3
Table of contents
Other Aiwa DVD Player manuals