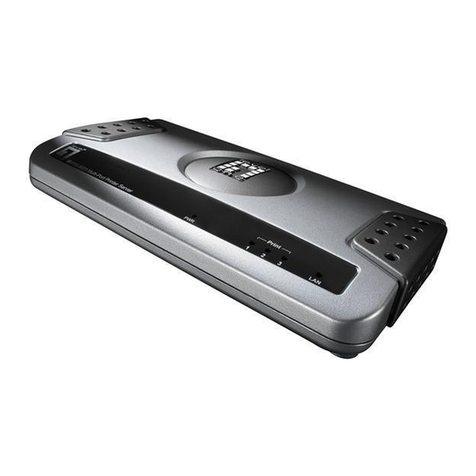
AirLive WFP-101U v2 User manual

Wireless Multi-function
WFP-101U v2
Print Server

Table of Contents
List of Lan
g
ua
g
es
Ma
g
yar
Polski
Portu
En
g
lish
WFP-101U v2
Česky
..................
Deutsch
...............
Español
Ελληνικός
Italiano
................
................
...............
............
guês
.............
Русский
..............
.............
Slovensky
日本語
.................
...............
................
144
51
9
16
23
30
37
58
65
72
79

English
Declaration of Conformity
We, Manufacturer/Importer
OvisLink Corp.
5F., NO.6, Lane 130, Min-Chuan Rd., Hsin-Tien City, Taipei County, Taiwan
Declare that the product
Wireless Multi-function Print Server
AirLive WFP-101U v2
is in conformity with
In accordance with 89/336 EEC-EMC Directive and 1999/5 EC-R & TTE Directive
Clause Description
■EN 300 328 V1.7.1(2006-05) Electromagnetic compatibility and Radio spectrum Matters (ERM); Wideband transmission equipment operating in the
2.4GHz ISM bandAnd using spread spectrum modulation techniques; Part 1:technical Characteristics and test conditions
Part2:Harmonized EN covering Essential requirements under article 3.2 of the R&TTE Directive
■ EN 301 489-1 V1.6.1(2005-09) Electromagnetic compatibility and Radio spectrum Matters (ERM); Electromagnetic compatibility (EMC) standard for
■ EN 301 489-17 V1.2.1(2002-08) radio equipment and Services; Part 17:Specific conditions for wideband data andHIPERLAN equipment
■ EN 50371: 2002 Generic standard to demonstrate the compliance of low power Electronic and electrical apparatus with the basic restrictions
related to human exposure to electromagnetic field (10MHz – 300GHz)-General public
■EN 60950-1: 2001+A11:2004 Safety for information technology equipment including electrical business equipment
■CEmarking
Manufacturer/Importer
Signature: ______________
Name : Albert Yeh____
Position/ Title : Vice President
Date: 2008/5/5_____
1
WFP-101U v2 English

2 WFP-101U v2
English
English
Note on the FCC standard
This equipment has been tested and found to comply with the limits for a Class B digital device pursuant to Part
15 of the FCC Rules. These limits are designed to provide reasonable protection against harmful interferences
when the equipment is operating in a commercial area. This equipment generates uses and may radiate radio
frequency energy, and if not installed in accordance with the user guide, may cause interference in the
transmission of radio communications. If operating in a residential area, it is probable this equipment will cause
harmful interference, in which case the user will be required to try to correct this interference using his own
means.
Note on CE Marking
This is a Class B product. In a residential area this product may cause radio interference, in which case the user
can be required to take the appropriate measures. OvisLink Corp. hereby declares that AirLive WFP-101U v2
meets the basic requisites of directive 99/05/CE, and is therefore liable for the accuracy of these data:
OvisLink Corp.
5F, No.6 Lane 130,
Min-Chuan Rd, Hsin-Tien City,
Taipei, Taiwan
TEL: +886-2-2218-6888
Warranties
This product has undergone various quality controls to ensure proper operation.
This product is covered by a two-year warranty for countries inside European Union. For other countries, the
warranty period is one year only. In the event of any manufacturing fault or breakdown, it will be repaired by
OvisLink Corp. Please contact your supplier for details on the procedure to follow. This warranty shall not be
applicable in the event of damage caused by improper use of the product, accidents, faulty handling or
manipulation nor any future incompatibility with third party products.

English
Important Information
Before you start, you should have:
One computer with Windows 2000 SP4 or above and Windows XP SP1 or above
One Antenna
One MFP or printer with USB port and an Installation CD
One Category 5 Ethernet Cable
One USB Cable
Product Layout LED Indicator
3
WFP-101U v2 English

4 WFP-101U v2
English
English
Hardware Installation
1. Unpack the MFP Server package and verify that all the items listed in the previous section are provided.
2. Plug the USB cable to the MFP Server with the MFP or printer that you want to share on the network.
3. Connect the MFP Server to your network by attaching the network cable to the network port of the MFP
server.
4. Connect the power adapter to the MFP Server. The MFP Server will perform the Power-On-Self-Test
(POST) after it is powered on. When the Status LED is unlighted, the MFP Server is ready.
Note:
You must use the power adapter shipped along with the MFP Server, do NOT use any other power
adapter from other sources.
To prevent the compatibility problem between MFP Server and a few MFP or printer, it is
recommended that you power on the MFP Server before the MFP or printer.

English
Software Installation
Before you start, you should check your computer’s operating system. This program can be run in Windows 2000
SP4 or above and Windows XP SP1 or above. Please follow the steps below to start installation. For the installation
procedures in Windows 98SE/ME/NT and other operating systems, please refer to the manual of the MFP Server
Tip:
You have to uninstall all the MFP server drivers and utilities if you have installed the previous version.
Steps below to start MFP Utility installation:
1. Insert the print server’s Installation CD into the CD-ROM drive.
2. Click utility from the Auto-Run menu screen.
Once executed, the Setup program will extract files to launch the InstallShield Wizard; then, follow it step by step to
complete the installation process and begin to setup the printer
After installation process has finished, The “MFP Server Configuration” screen is displayed. If you want to
configure the MFP Server, please click Next directly. Or you can select “No, I will configure the MFP Server later”
and click Next to complete the installation. The following steps are for MFP Server Configuration
5
WFP-101U v2 English

6 WFP-101U v2
English
1. The MFP Server List will auto search
the MFP Servers in the network. Select
the MFP Server you want to setup and
click Next to continue.
2. Enter the User Name and Password of the
MFP Server you have selected to login the
MFP Server. The default User Name is
admin; default Password is airlive.
English

English
3. Set the Alias Name and the MFP Server
Description to the MFP Server here.
Click Next.
Note: You can define the location or other
information of the MFP Server easily to find
the MFP by filling MFP Server Description.
4. Setup the IP address of the MFP Server
and click Next.
7
WFP-101U v2
English

8 WFP-101U v2
English
English
Note: For WFP-101U v2, if you have a
DHCP server or router already in the
Network, please choose DHCP.
Otherwise, please enter the IP manually
5. Please begin to set the Wireless
network setting when you install the
WFP-101U v2 Print Server.
For detail settings to MFP Printer Server, please refer to the user’s manual for reference.
Table of contents
Languages:
Other AirLive Print Server manuals

AirLive
AirLive WFP-101UV2 User manual

AirLive
AirLive P-203N User manual

AirLive
AirLive MFP-101U User manual

AirLive
AirLive P-201 User manual

AirLive
AirLive WFP-151U User manual

AirLive
AirLive WP-201G V2 User manual

AirLive
AirLive MFP-101U User manual

AirLive
AirLive WFP-101U User manual

AirLive
AirLive P-201 User manual