AirLive WMU-6000FS User manual
Quick
SetupGuide
WMU-6000FS
Portable Wireless AP Storage
English ●●●
Español ●●●
Русский ●●●
Português ●●●
Deutsch ●●●
Slovensky ●●●
Česky ●●●
日本語 ●●●
43
29
36
15
22
1
8
50

1
1
English
Portable Wireless AP Storage
WMU
-
6000F
S
Important Information
Hardware Configuration
English
Ports Description
Power 5V / 3A Power inlet.
USB1 / USB2 The ports where you can connect to any USB storage.
LAN Automatically MDI / MDIX LAN port can sense the cable
type when connecting to Ethernet-enabled computer,
network of hub, switch, or router.
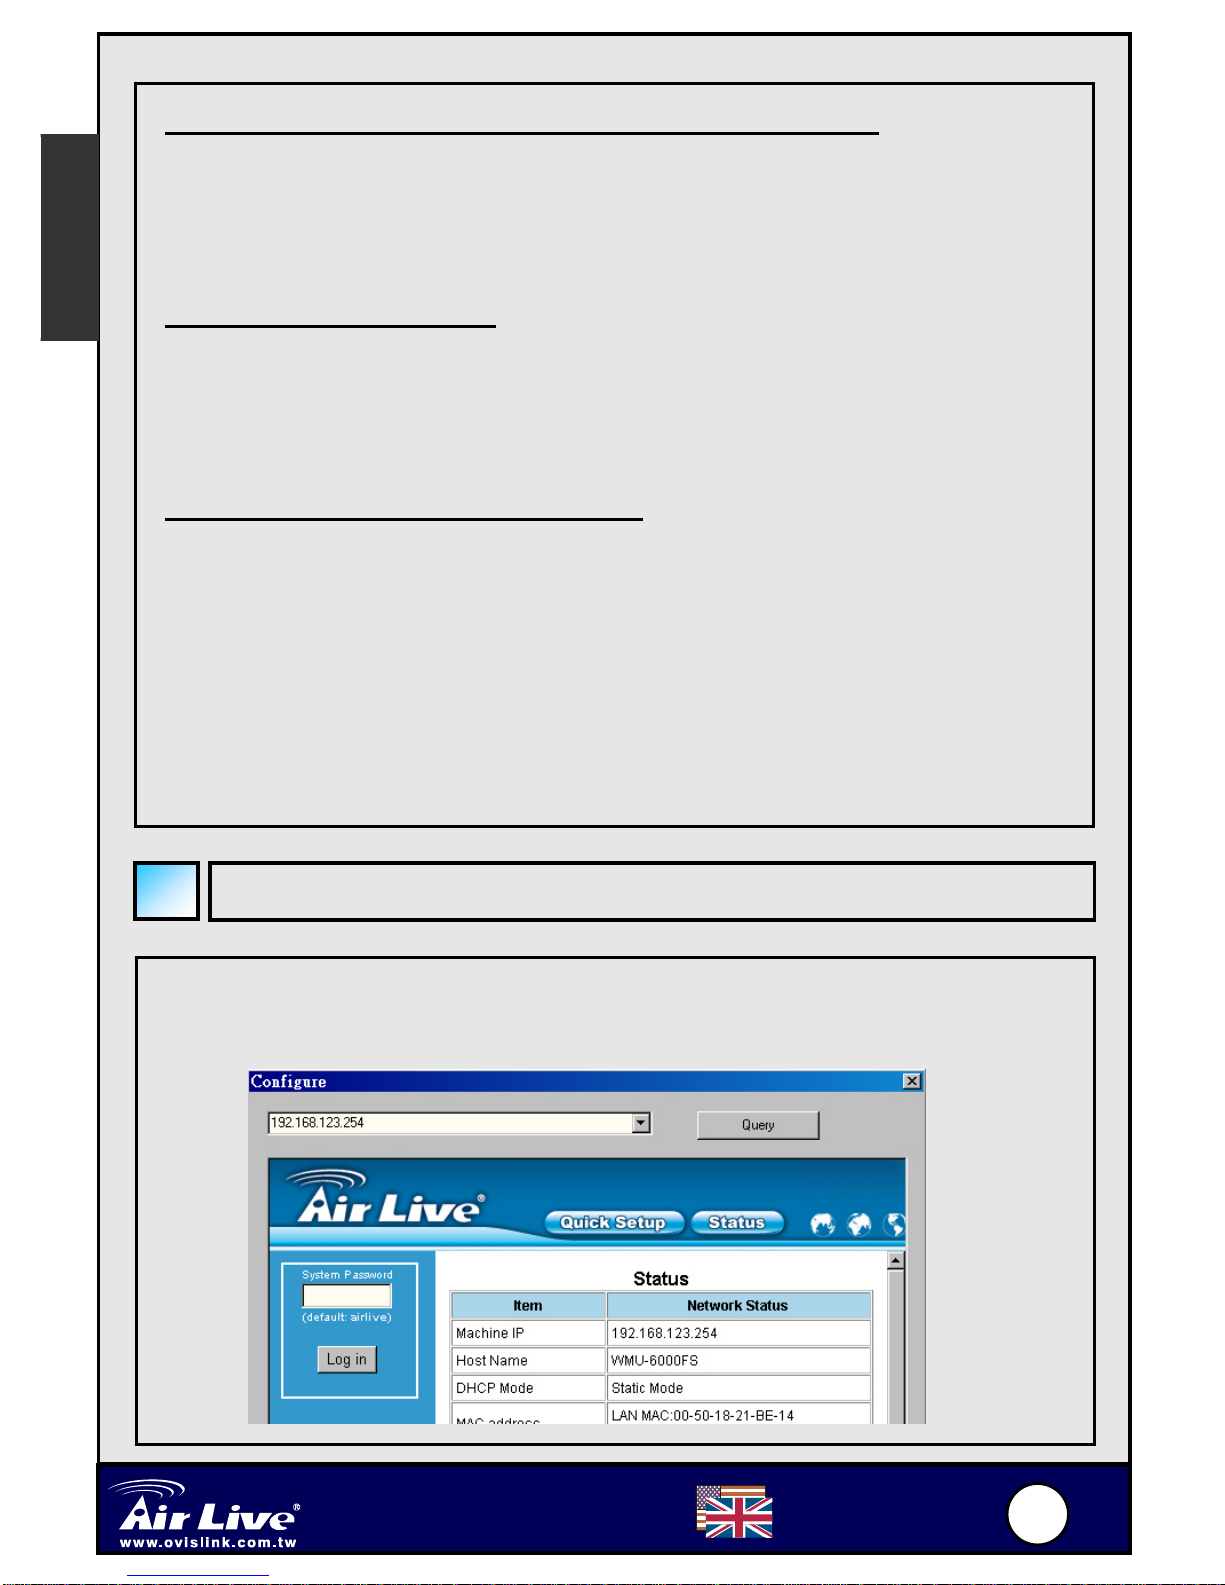
Default IP is 192.168.123.254
Default is password: airlive
Default Channel: 6
For detail explanation , please refer to the manual for more
information

2
2
English
Portable Wireless AP Storage
WMU
-
6000F
S
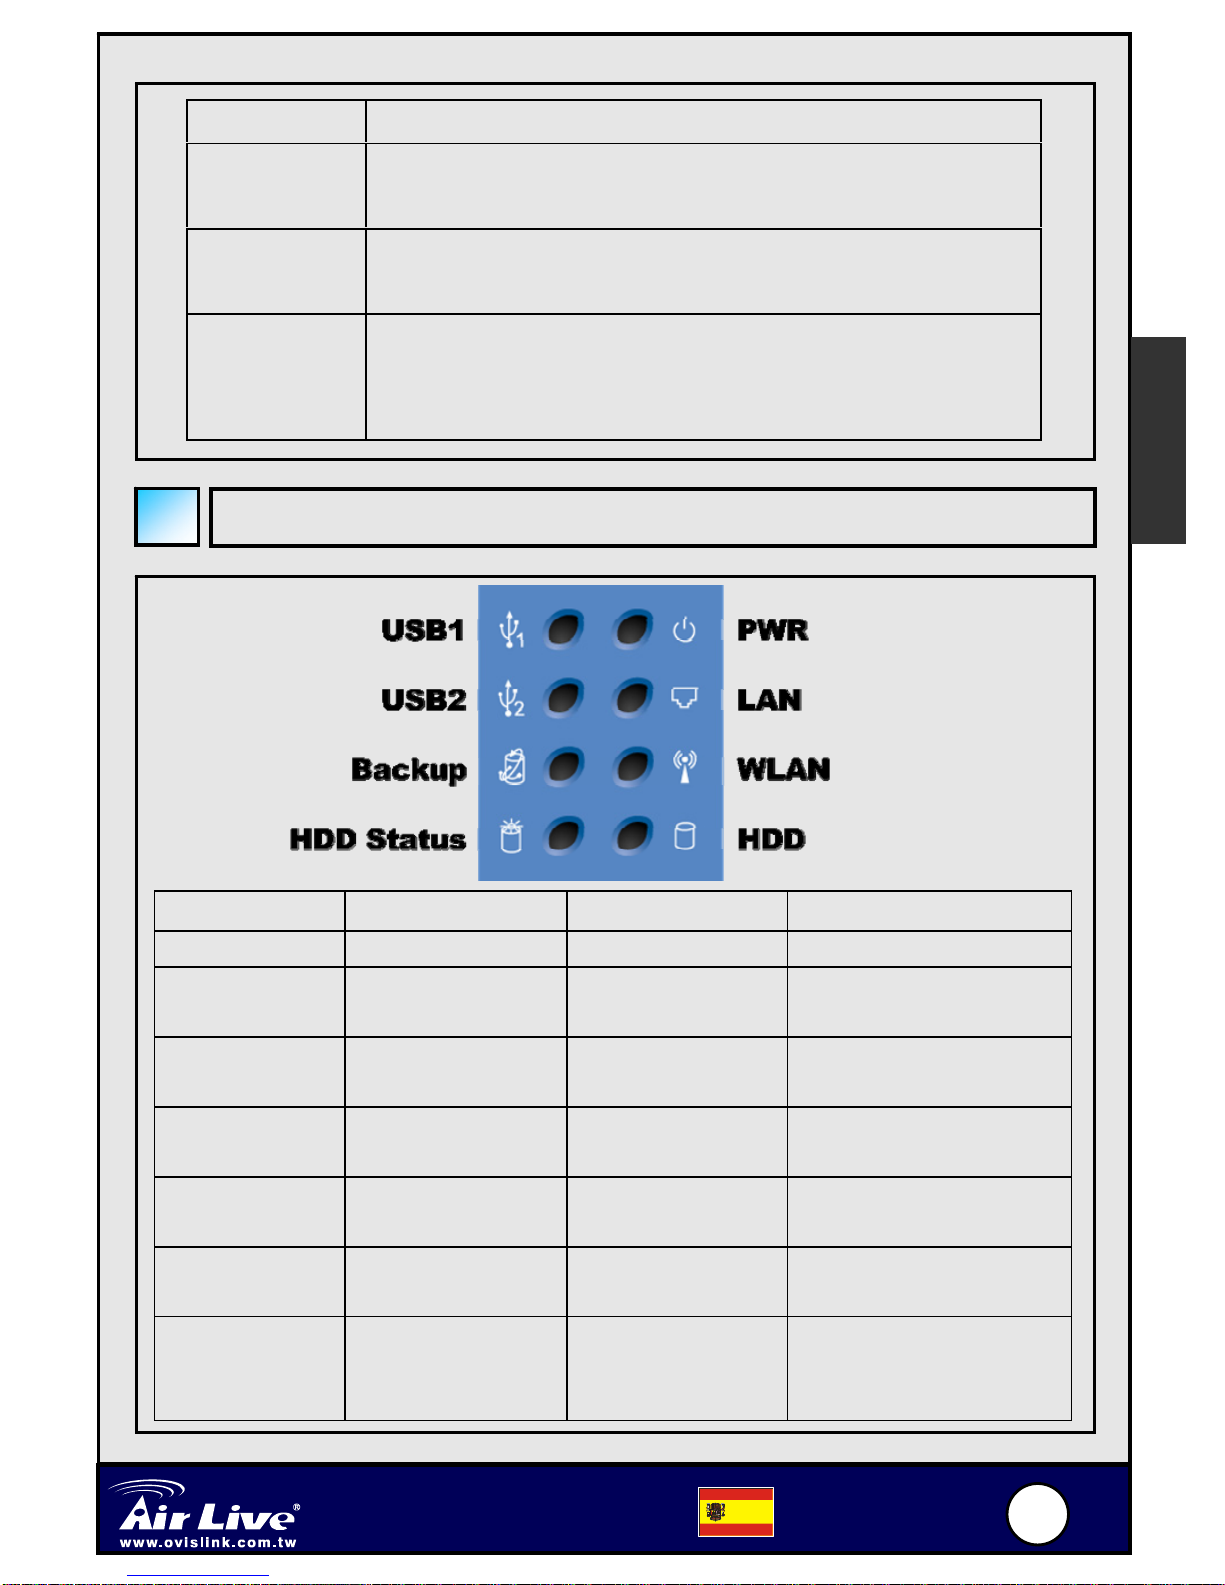
LED Indicators
English
Buttons Description
Shutdown Press the button about 4 seconds to shut down the
whole system before power-off.
Backup Press the button over 4 seconds to copy data from USB
device to HDD.
Reset Press the buttons of “Shutdown” and “Backup”
simultaneously over 6 seconds to reset the system
setting to factory default.
LED Off On Blinking
PWR Power off Power on
LAN No device Linked In use.
WLAN No packet On Transmitting
HDD Not in use HDD read/write
USB 1 /
USB 2
No device USB drive ready
Backup Backup files from USB to
HDD.
HDD
Status
No HDD HDD full or error More blinking quickly,
fewer available HDD
capacity.
3
3
English
Portable Wireless AP Storage
WMU
-
6000F
S
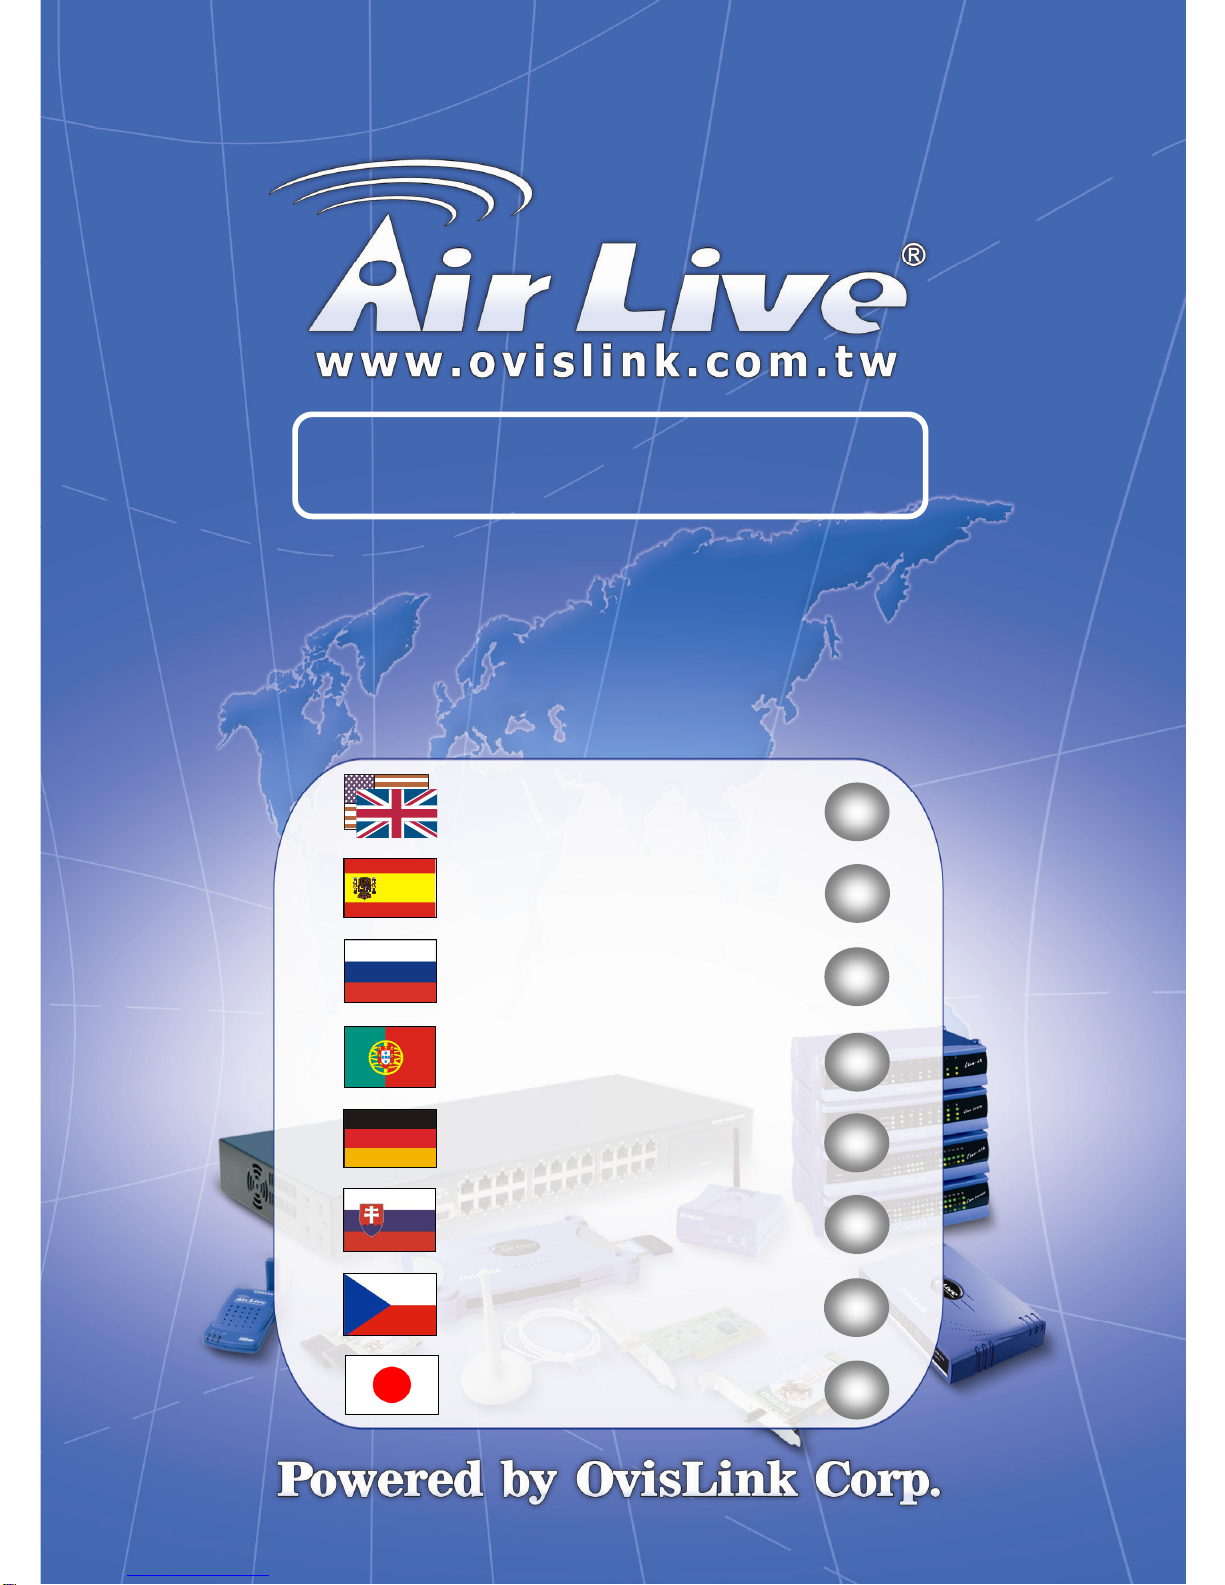
1. Use one hand to hold on the AP
Storage, and the other hand to open the
upper cover carefully.
2. Remove the upper cover.
3. Insert the 2.5” hard drive into the slot.
Make sure the hard drive connecting
pins and the connectors are properly
aligned.
4. Put the upper cover back and assemble
the cover tightly.
5. Fasten the screws to make sure the
hard drive would not loosen.
Hard Disk Installation
English

4
4
English
Portable Wireless AP Storage
WMU
-
6000F
S
Check TCP/IP settings:
Step 1: Select the “My Network Places” on the Desktop Menu, and click the
right button of mouse to choose the “Properties”.
Step 2: Choose the “Properties” of Local Area Connection.
Step 3: Check the “Client for Microsoft Networks”,“File and Printer
Sharing for Microsoft Networks”, and “Internet Protocol
(TCP/IP)” are installed or not. If not, please install those
communication protocols.
English
Making Connections
Wired Ethernet settings:
Use one Ethernet cable to connect the AP Storage and your computer
directly. Then follow the steps below to connect the AP Storage under the
wired Ethernet environment.
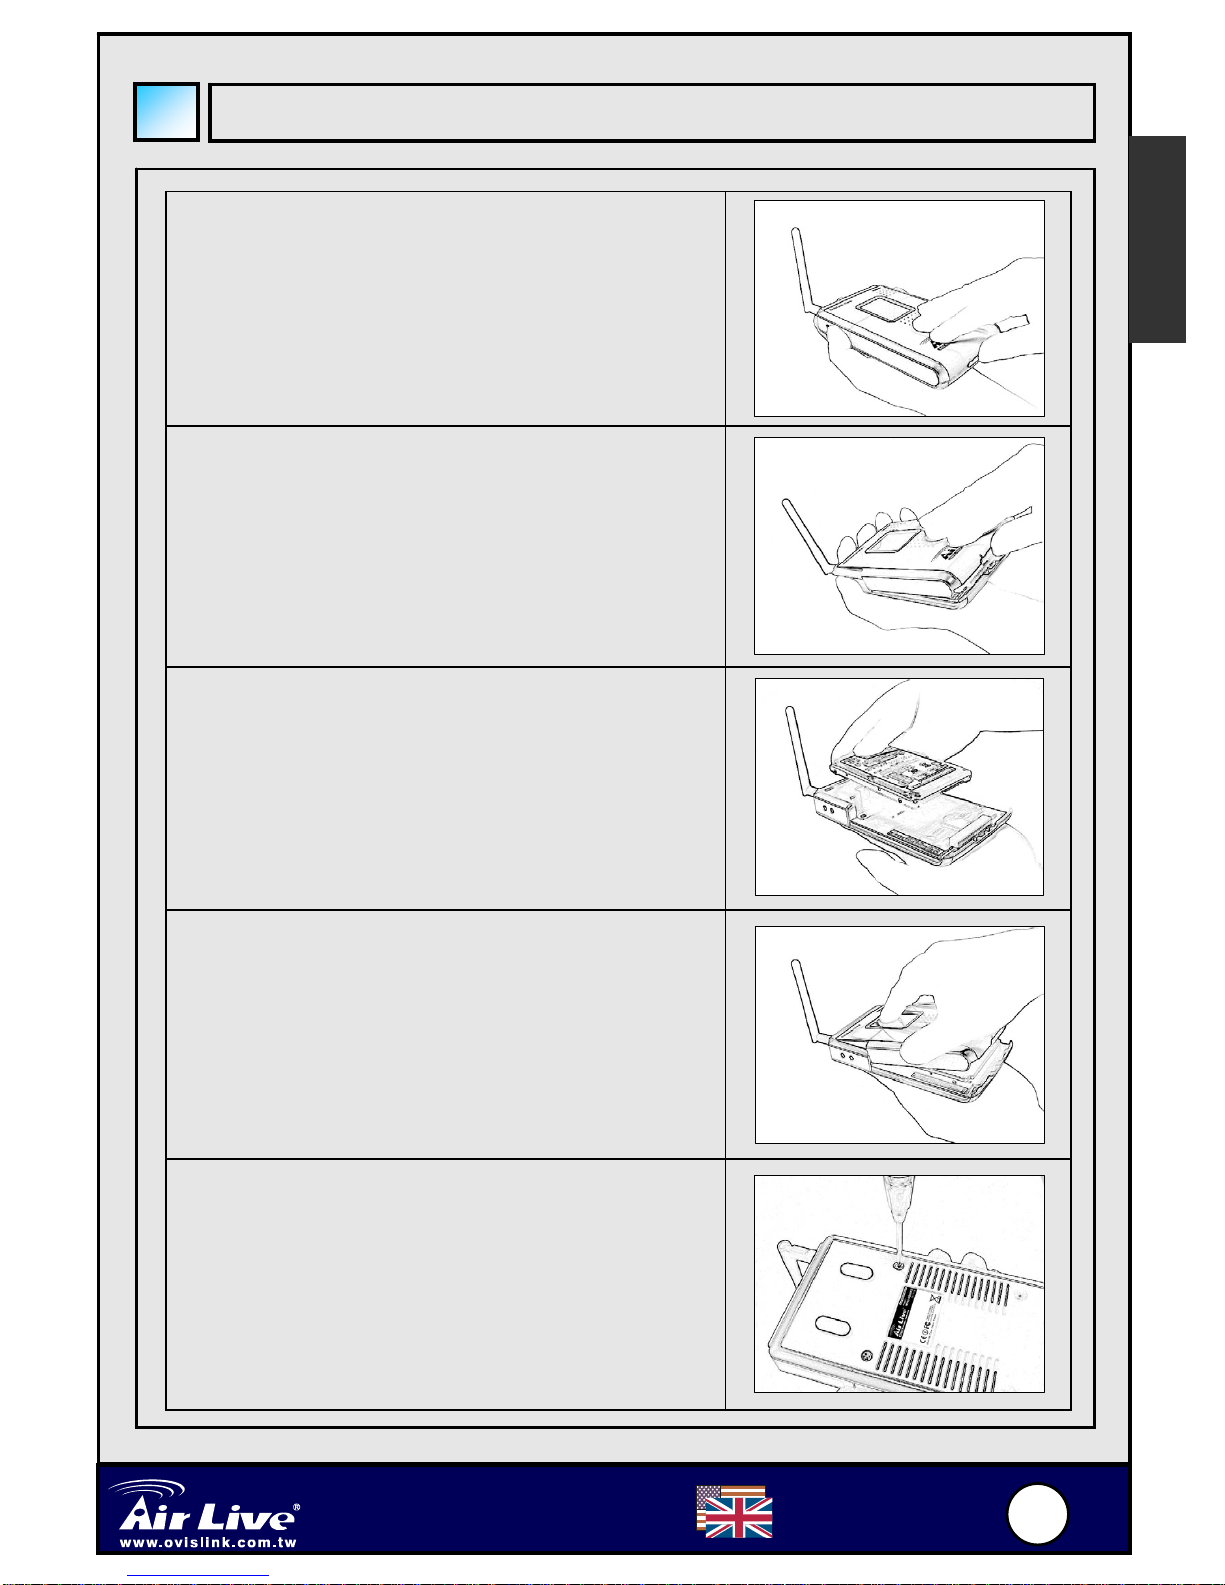
Find the Internet Protocol (TCP/IP) Properties from the My Network
Places and check the Properties of Local Area Network Connection. And
click the “General” icon and assign one IP address which can be from
192.168.123.1 to 192.168.123.253. Here we use the 192.168.123.88 as the
IP address. The Subnet mask must be: 255.255.255.0 and the Default
gateway must be: 192.168.123.254. Then click “OK” button to complete
TCP/IP setup.
5
5
English
Portable Wireless AP Storage
WMU
-
6000F
S
English
Wireless connection:
Follow the steps below to connect the AP Storage in a wireless environment.
Step 1: Enabling the WLAN card first, and check the Wireless Network
Connection properties from My Network Places.
Step 2: Select the Wireless Networks icon after entering the “Wireless
Network Connection Properties”. You will find the “AP_Storage”
in the Available networks, then select the AP_Storage, and click
Connect button to connect.
We strongly recommended that you enable wireless encryption feature,
or add ACL rules on AP Storage. Otherwise, everyone can connect to it
wirelessly and access data in your hard drive.
File Sharing
The AP Storage can be a shared network hard drive in an existing wireless or
wired network environment. The users in the same network area can read or
write data from the device as required. The following various steps are for
users to start using the network hard drive.
6
6
English
Portable Wireless AP Storage
WMU
-
6000F
S
Finding the WMU-6000FS
English
Accessing the network hard drive via My Network Places
Select the “My Network Places” and type the address of “\\ AP_Storage”
and press “Enter”, then you will find the Storage icon.
Searching the computers
Open “My Computer” on the desktop menu, and use the “Search” function
to search the computer of “AP_Storage”.
Search the “Entire Network” manually
Open Windows Explorer, and then click the My Network Places icon.
Double click the Entire Network to view the components of the network.
Select and click the Microsoft Windows Network icon, then the various
network components showed in the list. The default Workgroup of AP Storage
is Mshmoe.
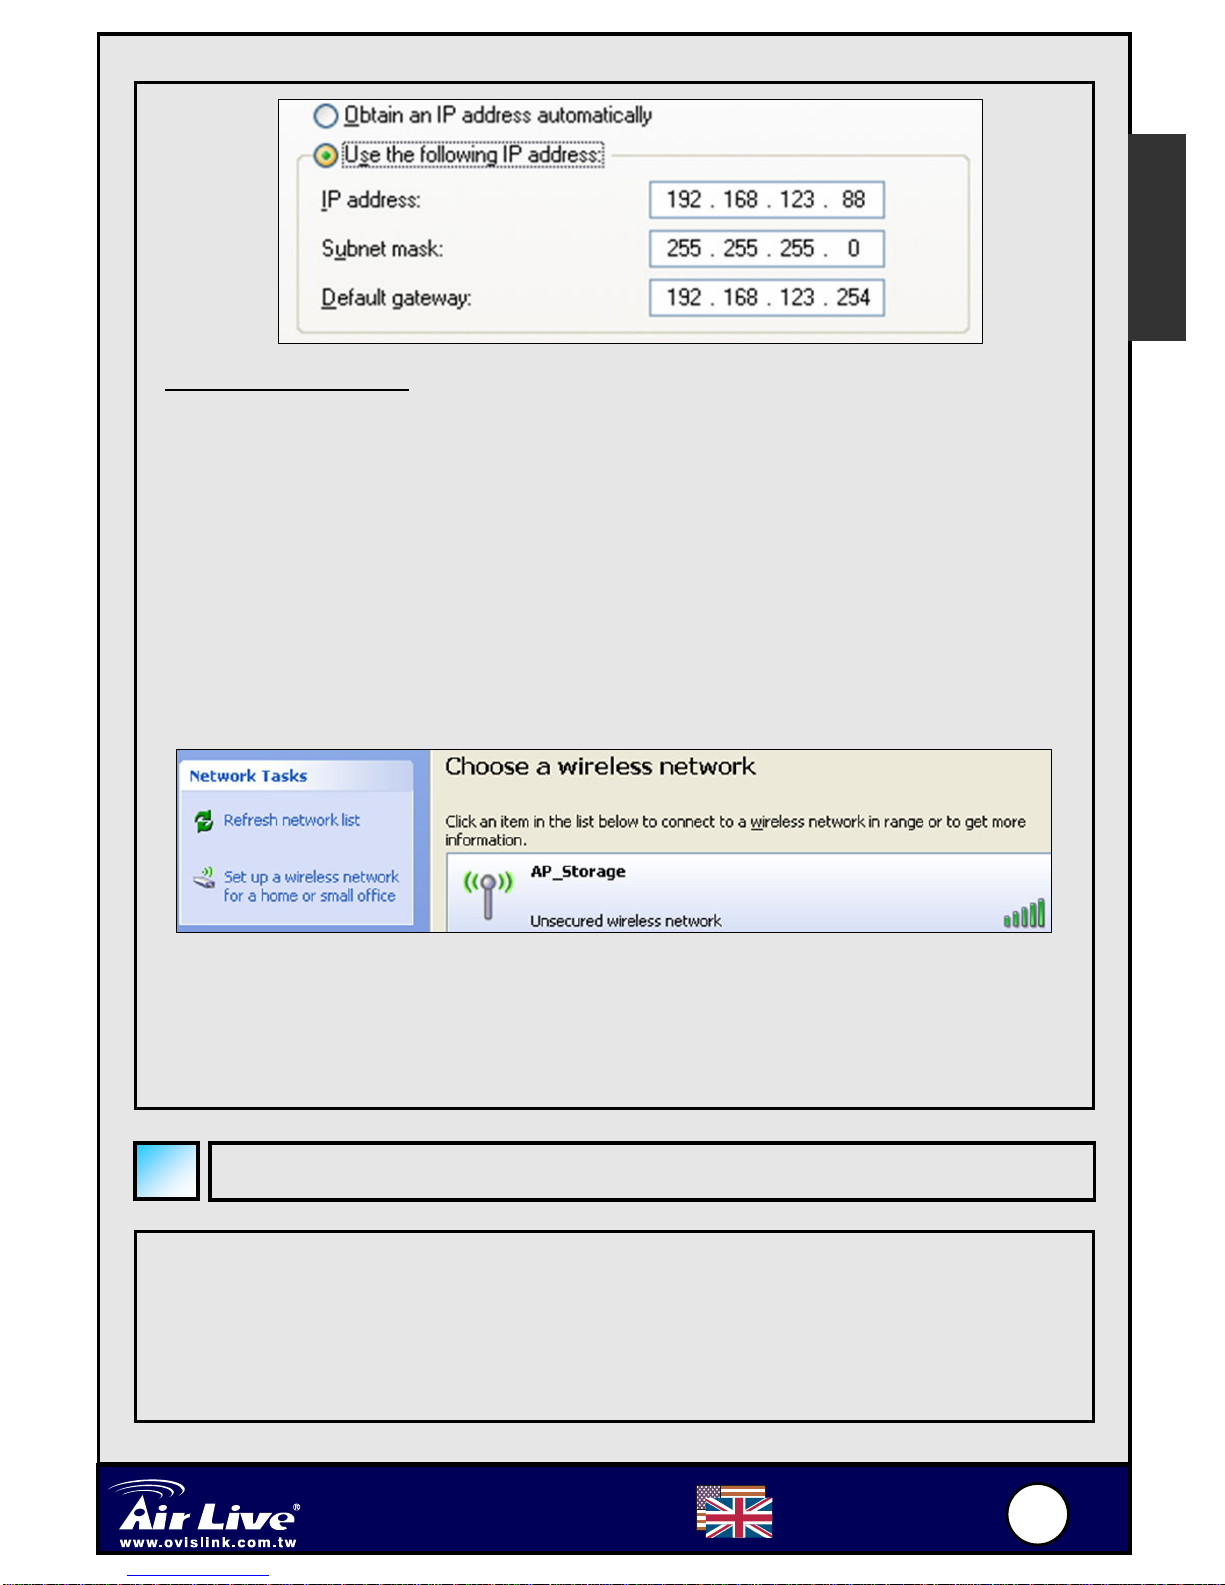
If your WMU-6000FS is under the DHCP environment, please using the utility
on the CD-ROM to find the device.

7
7
English
Portable Wireless AP Storage
WMU
-
6000F
S
The WMU-6000FS use LPR protocol to allow certain USB printers to be
shared on the network. For Setup Instruction, please read the complete
User's Guide on the CD. For printers that are compatible with WMU-6000FS,
please visit our website at http://www.airlive.com for more details.
English
Print Server Setup

8
8
Unidad de Almacenamiento
Inalámbrica Portátil AP Storage
WMU-6000FS Español
Información Importante
Hardware Configuration
Puertos Descripción
Fuente Entrada de voltaje de 5V / 3.
USB1 / USB2 Puertos para conectar unidades de almacenamiento
USB.
LAN Puerto LAN con funcion Automática MDI / MDIX detecta
el tipo de cable cuando se conecta un PC con puerto
Ethernet, hub, switch o enrutador.
IP por defecto 192.168.123.254
Clave por defecto: airlive
Canál por defecto: 6
Para información detallada por favor remitirse al manual
Español
9
9
Unidad de Almacenamiento
Inalámbrica Portátil AP Storage
WMU-6000FS Español
LEDs Indicadores
Butones Descripción
Shutdown Presione este botón por 4 segundos para cerra el
sistema completo antes de apagarlo.
Backup Presione este botón por 4 segundos para copiar la data
del dispositivo USB a un Disco Duro.
Reset Presione los botones de “Shutdown” y “Backup”
simultaneamente por 6 segundos para reiniciar a la
configuración por defecto de fábrica.
LED Apagado Encendido Titilando
PWR Apagado Encendido
LAN Equipo sin
conexión Equipo
conectado En uso
WLAN No hay
paquetes Transmitiendo
HDD Sin uso Disco leyendo
/escribiendo
USB1/USB2 Sin conexión Disco USB
listo
Backup Respaldo de Disco
USB a Disco Duro
Estado del
Disco Duro No hay disco Disco lleno
o con error Titila más rápido:
menos disco
disponible
Español
Other manuals for WMU-6000FS
1
Table of contents
Languages:


 user manual")


