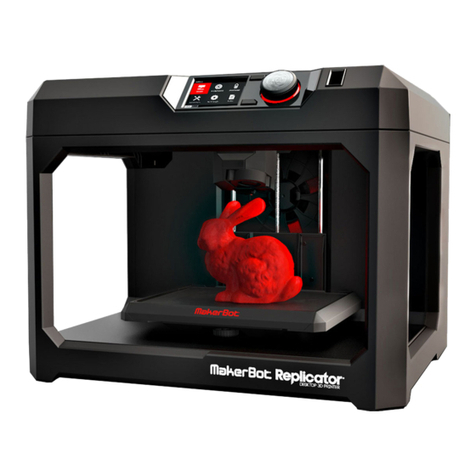
Afinia H400 User manual

User Manual
V 0.1
Download the full user manual at www.afinia.com/support

Index
Chapter 1 Product Description
Chapter 2 Prepare for Your First 3D Print
Chapter 3 Machine Settings
Chapter 4 Print Settings
Chapter 5 Calibration and Other Options
Chapter 6 Techniques and Troubleshooting

Safety Precautions
1\ The Afinia H400 3D printer requires the power adapter provided by the original
manufacturer, otherwise the machine could become damaged or cause a hazard. Please
keep the power adapter away from water and out of high temperature environments.
2\ During printing, the nozzle of the printer will
reach 260°C and the print platform could reach
over 70°C. Please do not touch these parts with
your bare hands while they are hot—not even
with the heat resistant gloves included with the
machine—as the temperature could damage
the gloves and injure your hands.
3\ During printing, the printhead and other
mechanical parts move at high speeds.
Touching these parts while they are moving
could cause injuries.
Warning label:
High Temperature,
do not touch!
Warning Label:
Moving parts, do not
touch!
4\ Please wear goggles when removing the supporting material from models and detaching
models from the perf board.
5\ When printing with ABS and PLA, the plastics will create a light odor. Please run the printer
in a well-ventilated environment. We also suggest you put the printer in an environment with
a stable temperature as unwanted cooling could cause adverse effects to the print quality.
When the printer is extruding filament, make sure there is enough space between the
print head nozzle and the platform. Otherwise the nozzle could become blocked.
Printing Environment
As light odor will be produced during printing, please run the printer in a well-ventilated
environment and keep the doors closed on the printer.
The Afinia H400's ideal working temperature is between 15°C and 30°C with a relative
humidity between 20–50%. Printing at temperatures out of this range could cause adverse
effects to the printing process. When using the “Extrude” function, keep at least 50mm
between the nozzle and the platform. If too close, the nozzle may become blocked.

Afinia 1-Year Limited Warranty
Below is the one-year limited warranty included with this Afinia product. Afinia prides itself on its outstanding
product line and its technical support. If for some reason, your product fails, Afinia, a division of Microboards
Technology, LLC, stands behind its warranty and assures you the best service possible in a quick and timely
manner.
Afinia warrants to the original purchaser that this product is free from defects in material and workmanship.
Afinia will for one year, at its option, repair or replace at no charge for parts and labor from the date you
purchased the product from an authorized Afinia reseller. Nozzles and Cell/Perf Boards are warranted for
ninety (90) days.
- Warranty registration must be completed within 30 days of receipt of the product in order to validate the
warranty.
- Afinia, a division of Microboards Technology, LLC, reserves the right to determine the validity of all warranty
claims.
- Warranty is void if the product serial number has been altered or removed.
- Warranty is void if the product has been misused or damaged or if evidence is present that the product was
altered, modified, or serviced by unauthorized service people.
The above stated warranty is exclusive and replaces all other warranties, express or implied, including those of
merchantibility and fitness for a particular purpose. Afinia, a division of Microboards Technology, LLC, will not
be liable for any other damages or loss, including breach of warranty or negligence.
This product has been thoroughly tested and inspected at the factory prior to shipment. Nevertheless, inspect
your product completely for any damage or loss of parts that may have occurred during shipment. Notify the
delivering carrier promptly if damage claims are to be filed.
Afinia reserves the right to modify or update its product without obligation to replace any equipment delivered
prior to any such change.
Compliance FCC CE ROHS
FCC ID:
This device complies with Part 15 of the FCC Rules. Operation is subject to the following two conditions: (1)
this device may not cause harmful interference, and (2) this device must accept any interference received,
including interference that may cause undesired operation.
Changes or modications not expressly approved by the party responsible for compliance could void the user’s
authority to operate the equipment.
NOTE: This equipment has been tested and found to comply with the limits for a Class B digital device,
pursuant to Part 15 of the FCC Rules. These limits are designed to provide reasonable protection against
harmful interference in a residential installation. This equipment generates, uses, and can radiate radio
frequency energy and, if not installed and used in accordance with the instructions, may cause harmful
interference to radio communications. However, there is no guarantee that interference will not occur in a
particular installation. If this equipment does cause harmful interference to radio or television reception, which
can be determined by turning the equipment off and on, the user is encouraged to try
to correct the interference by one or more of the following measures:
- Reorient or relocate the receiving antenna.
- Increase the separation between the equipment and receiver.
-Connect the equipment into an outlet on a circuit different from that to
which the receiver is connected.
-Consult the dealer or an experienced radio/TV technician for help.
Unpacking
Remove the cushioning foams from the inside
the printer before use.
Rear View

Package Content
Afinia H400 Spool and Toll Holder
Protective Gloves Power Adapter Power Cable Scraper
USB Cable Hex Keys
2.0mm, 2.5mm
Plier
ABS Filament
Nozzle Wrench Perforated Print Board
(Perf Board) Flex Print
Board
Print Head Nozzle
1-1

Product Description
Front Side
Magnetic Top Lids
Back Door
Front Door
Handle
LCD Touch Screen Initialization Button
Back Side
Filament Insertion Hole
Back Door
Power Switch
Power Supply Connector
USB Connector
1-2

Filament Spool Holder
Spool Hold Lid
Filament Guiding Tube
Filament
Filament Spool
Tool Drawer
1-3

Installation of Print Board
Slide print board into the
platform
2-1

Print Head Installation 2-2
Cooling Adjustment
knob
Open front door, back door
and top covers
Nozzle
Print Head Mount
Print Head Mounting
Plate (on rear of extruder)

Print Head Installation 2-3
Slide the print head
into the slots.
Plug in the print head cable.
Table of contents
Other Afinia 3D Printer manuals