AEL DC-132U User manual

AELDigitalCameraDC-132U
User’sManual

Copyright
Brands and product names are trademarks or registered trademarks of
their respective companies.
Disclaimer
AEL makes no warranty of any kind regard to this material, including, but
not limited to, the implied warranties of merchantability and fitness for a
particular purpose. AEL assumes no responsibility for any error that may
appear in this document. AEL makes no commitment to update nor to
keep current the information contained in this document.
Taking care of your camera
• Do not use your camera over the following environmental range:
A. Temperature: 0°C to 40°C, relative humidity: 45%-85%.
• Do not use or store your camera in environments listed below:
A.Direct sunlight.
B.High humidity and dusty places.
C.Next to the air conditioner, electric heater or the other heat sources.
D.In a closed car that in directly under the sun.
E.Avoid shaky places.
• If your camera becomes wet, wipe it with dry cloth as soon as
possible.
• Salt of seawater may cause severe camera damage.
• Do not use organic solvents, such as alcohol, etc., to clean your
camera.
• If the lens or viewfinder is dirty, please use the lens brush or soft cloth
to clean the lens. Do not touch the lens with your fingers.
• To prevent electrical shock, do not attempt to disassemble or repair
your camera by yourself.
• Water may cause a fire or electric shock. Therefore, please store your
camera in a dry place.
• Do not use your camera outdoors when it is raining or snowing.
• Do not use your camera in the water.
• If the foreign substance or water gets in your camera, please tum the
power off immediately and disconnect the batteries and the
transformer. Remove the foreign substance or water, and send it to the
maintenance center.
1

Introduction to AEL Digital Camera DC-132U
AEL Digital Camera DC-132U equipped with the following features:
• Small size for easy carriage and convenience of use
• High resolution: 1280 X 960 pixels in digital camera mode
• Onboard 8 MB memory
• Mode selectable flash light
• Built-in self-timer
• Fixed focus
• Electronic shutter
• Easy recognizable LCD screen for camera and image handling
• USB interface for easy and quick connection to PC
• Automatic power-off system
• Operation modes:
Digital camera mode for taking photos
PC camera mode for using the camera as an image capturing device for PC
Video camera mode for capturing motion clips with a PC
Sound recording mode for recording sound
2

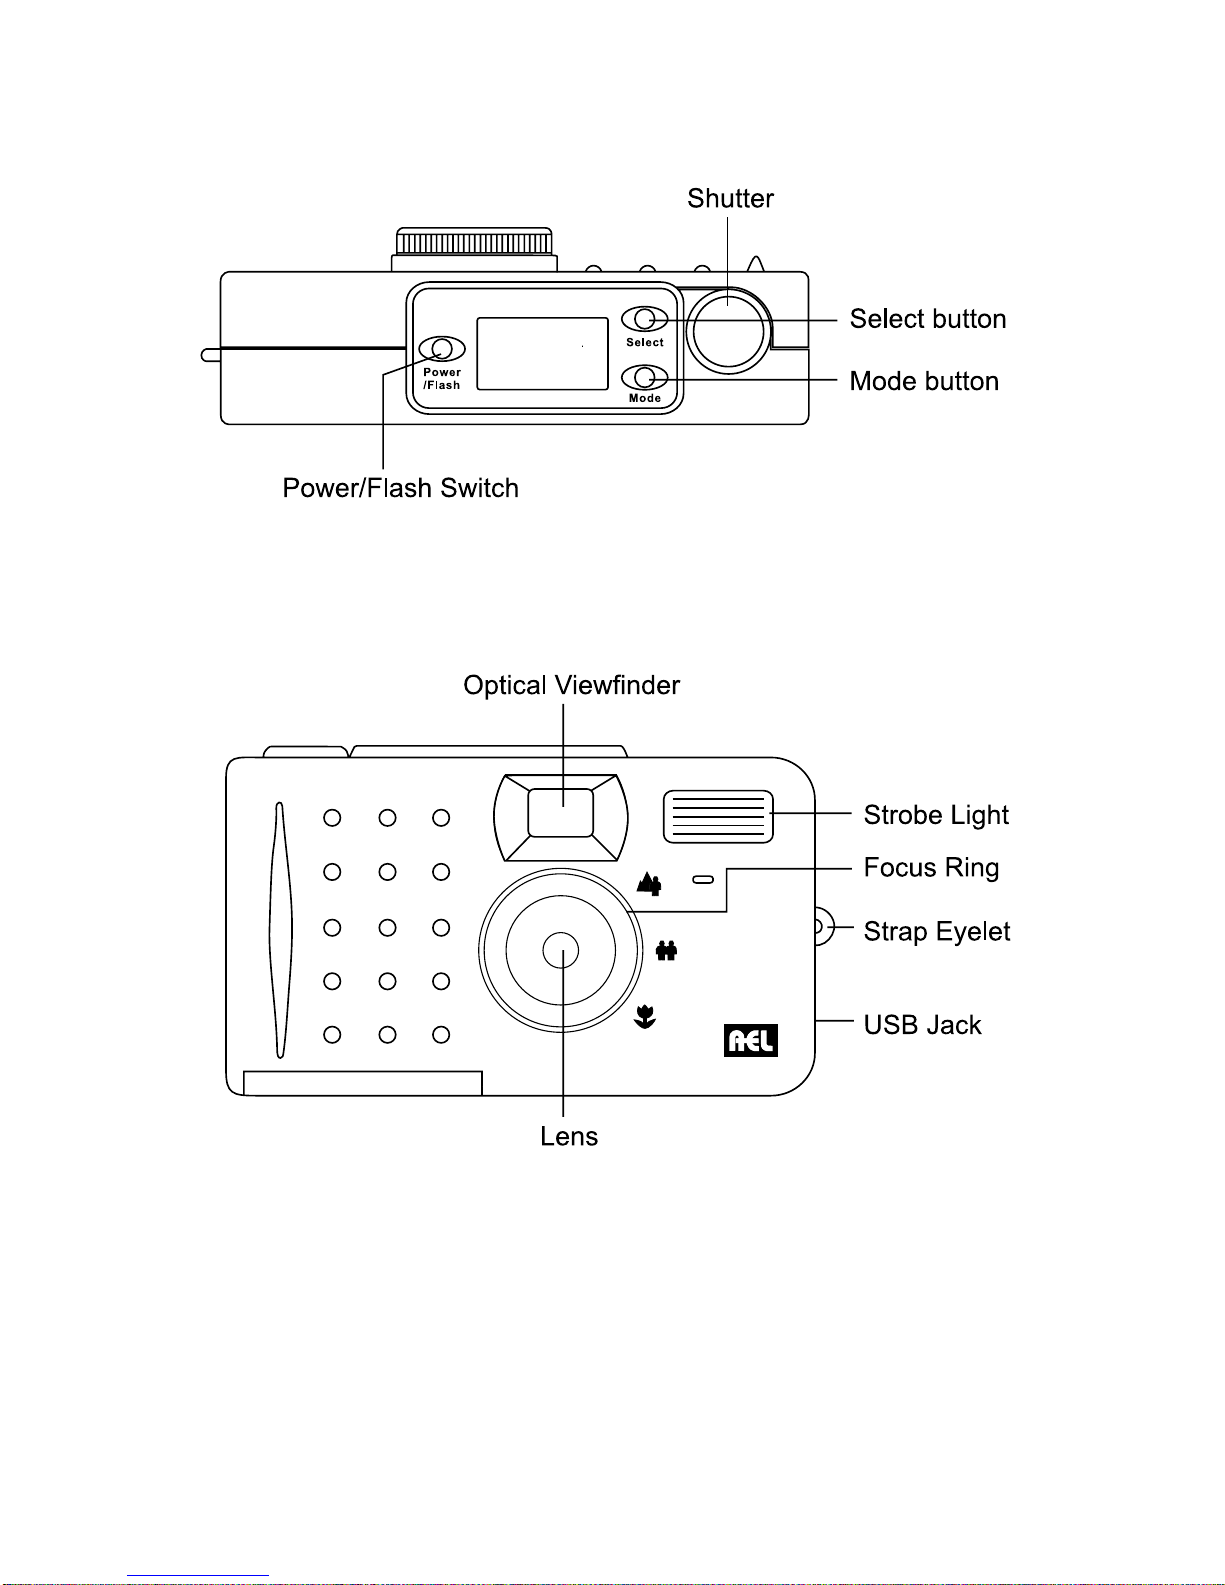
Touring Your Camera
3

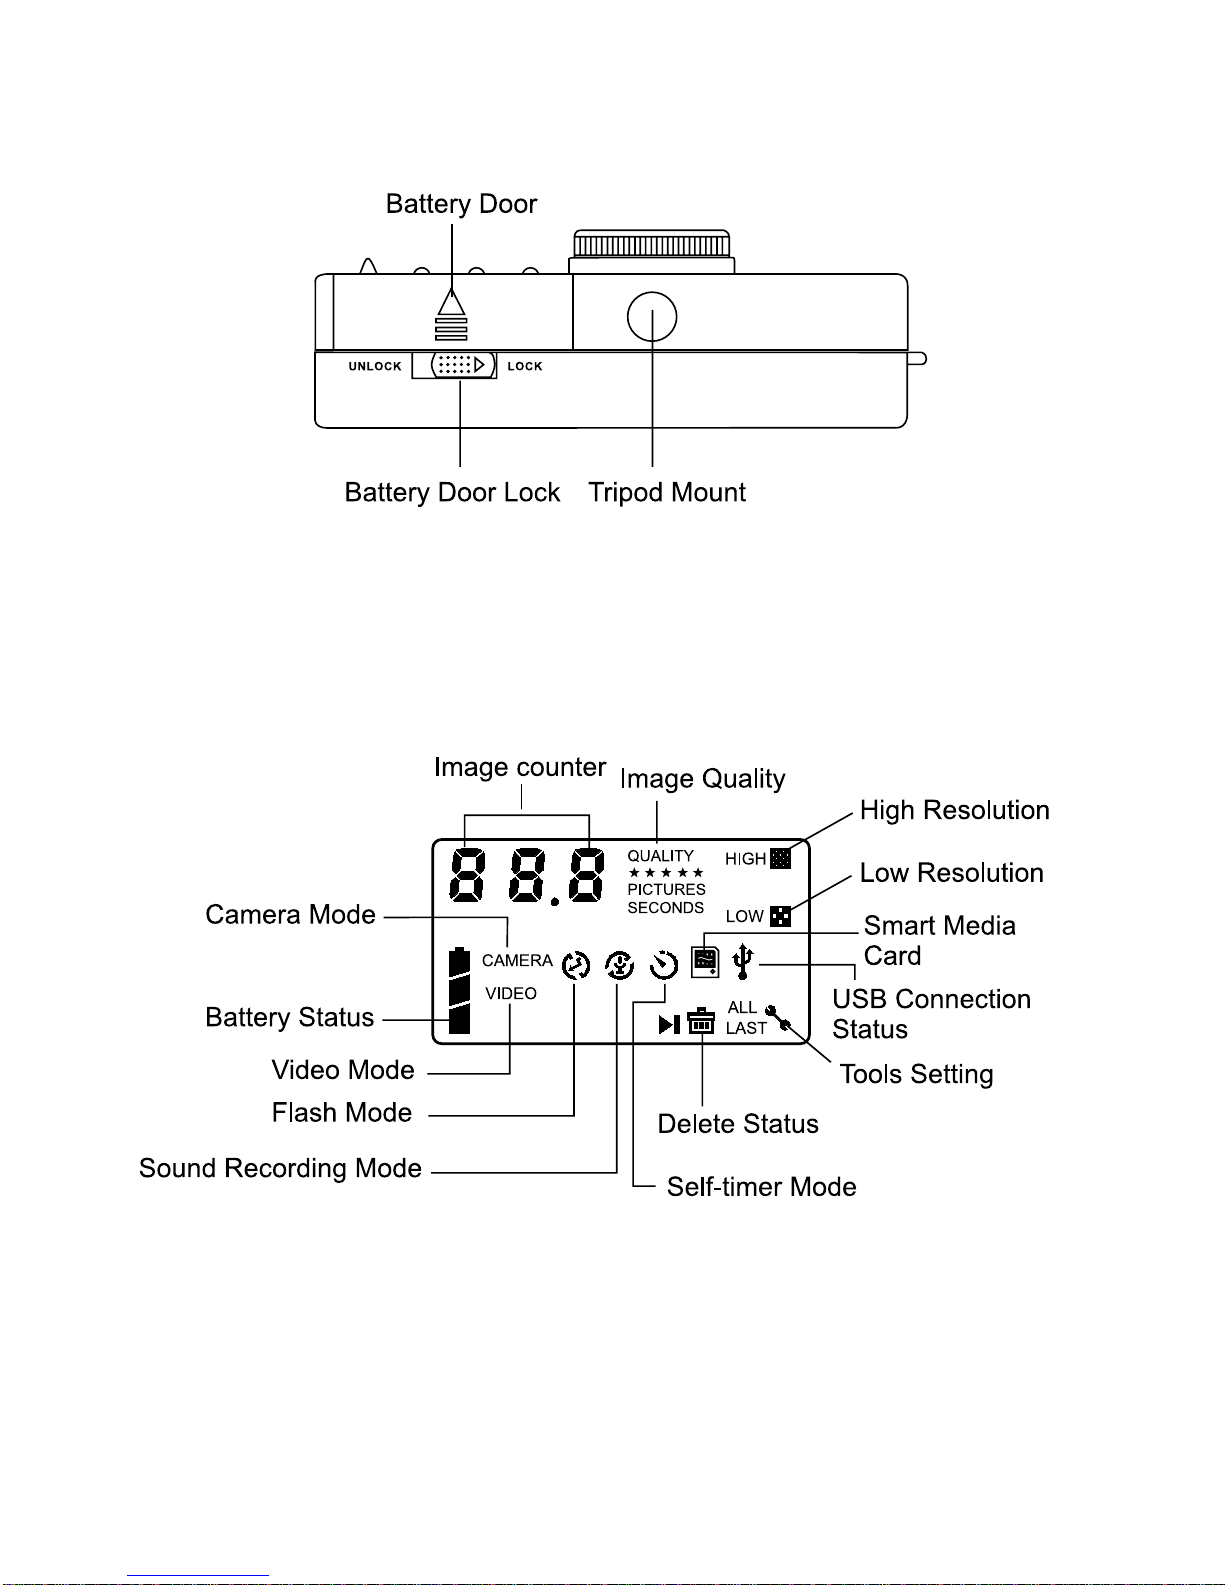
Bottom View
4
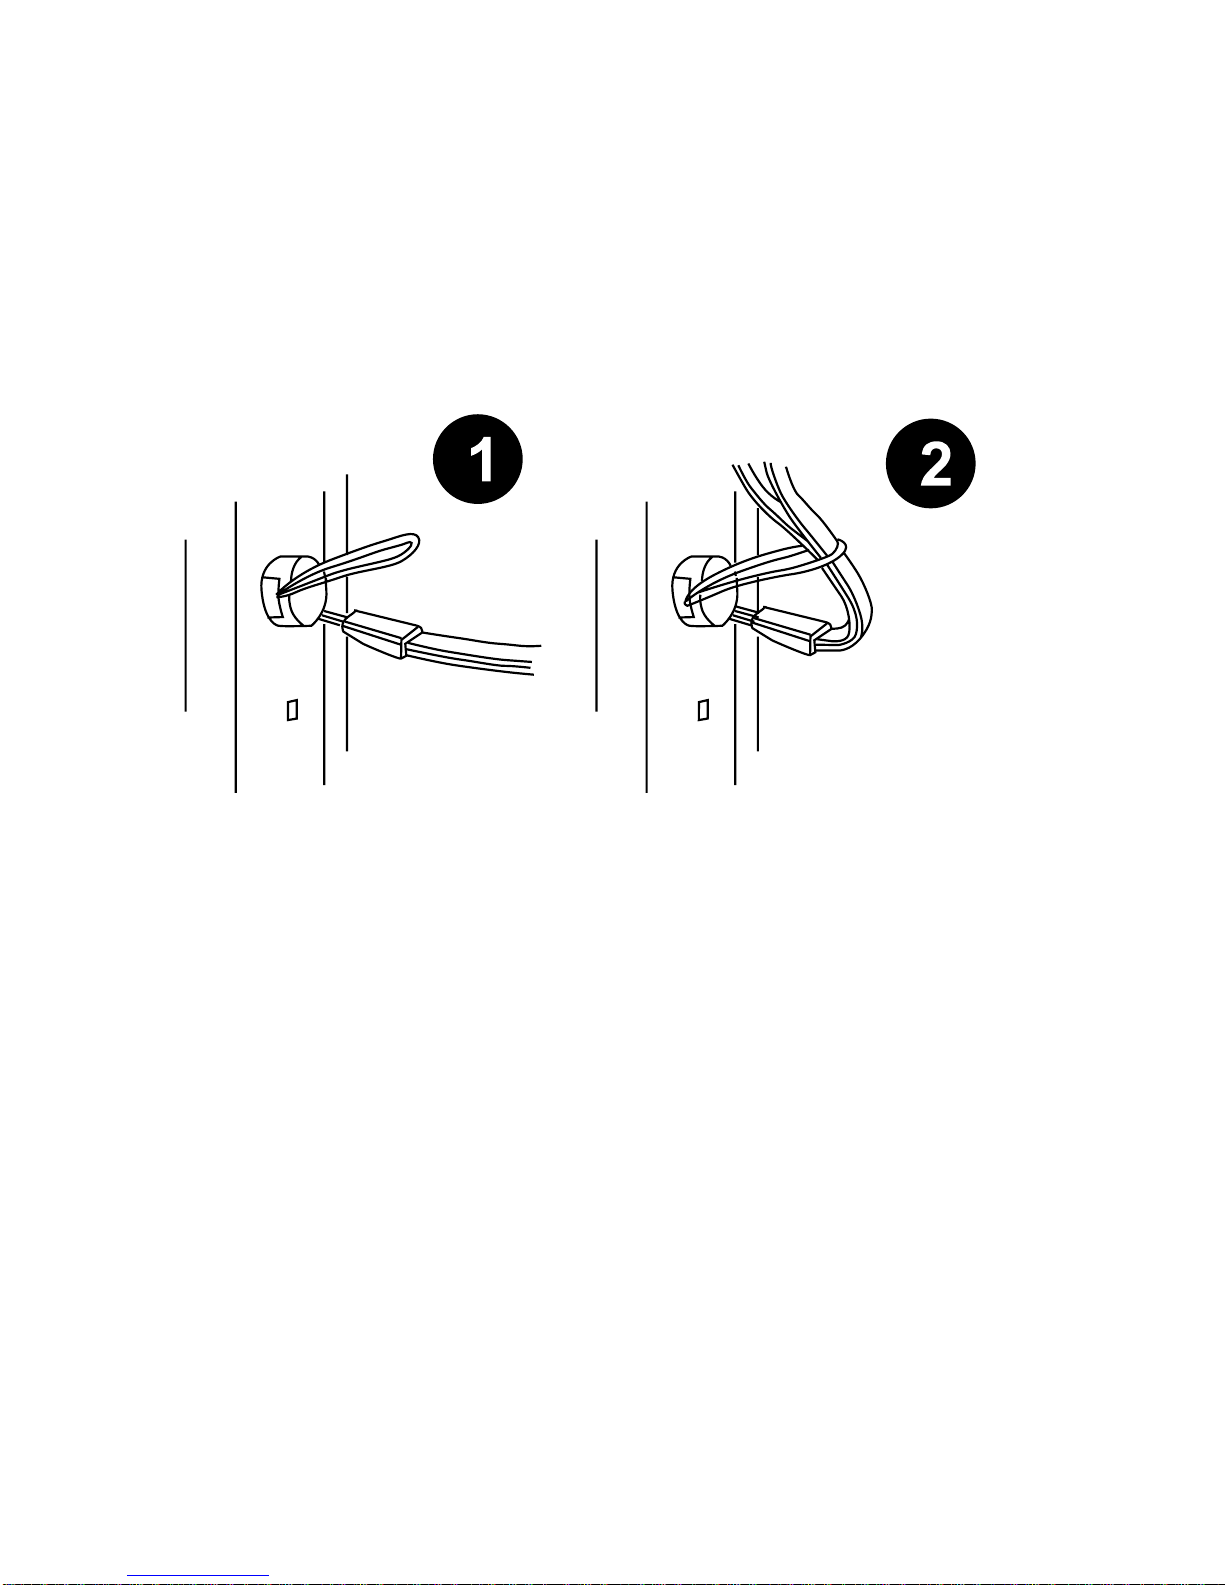
The Status Display

Preparing the Camera for Using
Installing batteries and strap
1.Open the battery door and insert four AAA alkaline batteries into the
compartment.
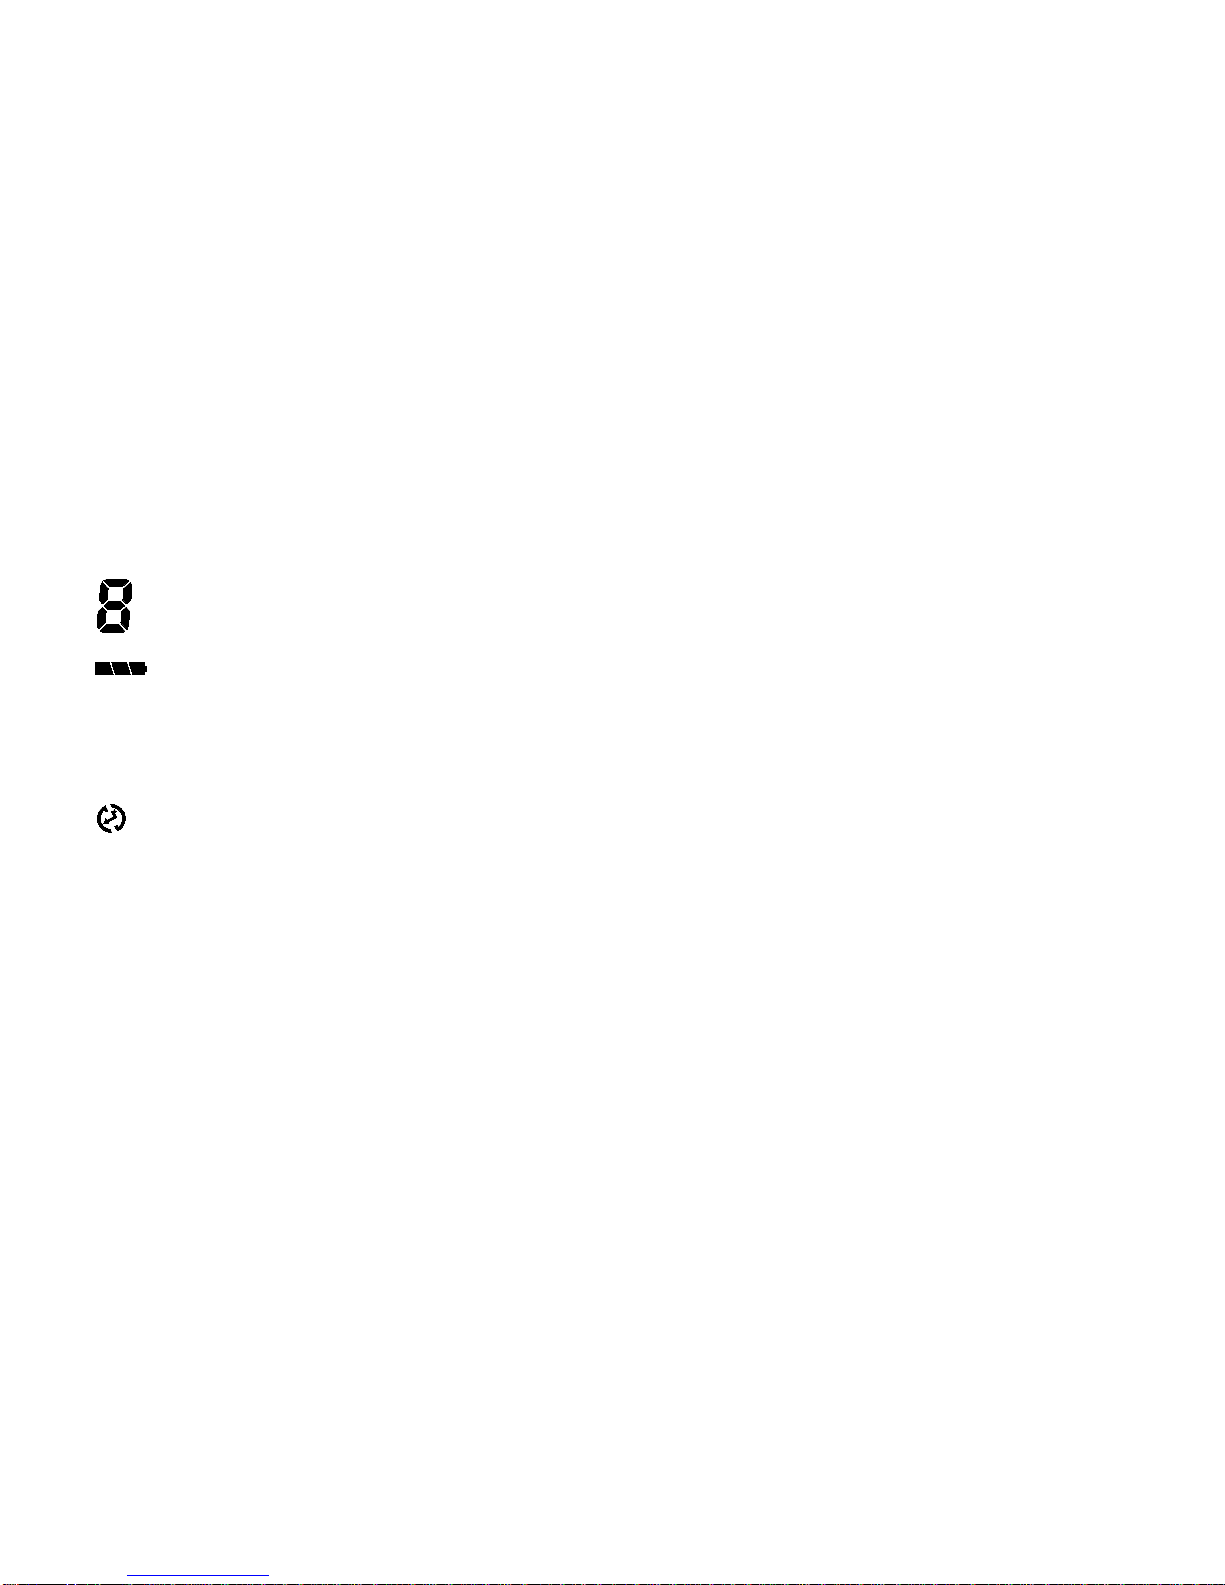
2.Refer to the illustration below to install the strap.
3.Now you are ready to use your camera!
5

Installing Digital Camera Software
The CD that accompanies your camera contains the digital camera driver
bundled with valuable image-editing software.
1. To install digital camera software:
Insert the utility CD into the CD-ROM drive. The software installation
menu will appear automatically.
NOTE:
1. If the software installation menu does not automatically display, open
Windows Explore and double-click the “Autorun.exe” icon in the
CD-ROM directory.
2. If your Operating System is Windows XP, please feel comfortable to
continue the installation process when the below dialog box appears
on the screen. (In Windows 2000/NT, the same dialog box may also
occur. Please feel comfortable to continue the installation process.)
6

2.Click Install TWAIN DRIVER on the menu. Follow the on-line
instructions to complete the driver intallation.
Note: You may be prompted to restart the computer at this point. Do not
restart your computer until all the software has been installed.
3.Click on other items on the menu to install the hundled application
software.
7
4.A desktop shortcut of the program is automatically created after
successful installation. Restart your computer when you have
finished installing all of the above software.
SOFTWARE DESCRIPTION
DirectX 8.1
DirectX gives developers the tools to
create amazing games for the Windows
operating system and allows users the
multimedia power to run the latest
cutting-edge games.
Acrobat Reader Install this software program to open
document files in .pdf format.
Aurasee You can use this application program to
easily manage your pictures.
1-Visit This software program allows you to use
your digital camera as a video camera for
video conferencing.

Using Your Camera
AEL Digital Camera DC-132U provides 4 different operation modes:
Digital camera mode, video camera mode, Sound recording mode, PC
camera mode. With these modes, you can not only use Digital Camera
DC-132U to take photos, but capture and show images in various ways
by connecting to your PC.
1.The digital camera mode
In digital camera mode, you can take photos, view and download them
from your camera and save them as files.
2.Taking pictures
• Press the POWER button for 3 seconds to turn on the power of the
camera. The camera beeps once and enters camera mode.The status of
camera will appear on the status display.
:The counter that indicates the number of photos taken. You can
choose to let the counter display in another way.
:Indicates the battery status. If the battery power becomes low, the
battery icon will become empty.
Camera :This icon indicates the DC-132U is in digital camera mode. You
can change the mode setting by pressing the MODE button.
:This icon indicates the flash mode is set to flash off mode. You can
change the flash mode setting by pressing the Power/Flash button.
Quality :This icon indicates the compression setting is set to “Fine”. You
can change the compression setting by pressing the Pix/- button.
2. Look through the viewfinder to determine the object to be taken. Make
the object appear in the center of the viewfinder.
3. Press the shutter. The image will be taken with a beep sound and the
BUSY indicator will flash, indicating that the camera is saving the
image to memory.
4. When the indicator becomes off, you are ready to take the next photo.
Note:Do not press the POWER button when the BUSY indicator flashes.
After the shutter is pressed, hold the camera still until the BUSY indicator
becomes OFF to prevent blurred images.
To save battery power, if the camera power is turned on and not used
for 1 minutes, it will be turned off automatically.
8

3.Turning off the camera
Press and hold the POWER button of the camera for 3 seconds. The
camera beeps once and the power will be turned off.
9
Deleting the last photo taken
1.Press the “Mode” button 5 times. The icon “ ” will appear on the
status display. It indicates the camera is in Erase mode.
2.Press the “Select” button, the camera will beep once and the BUSY
indicator will flash, then the last photo taken will be deleted.
Deleting all photos
1.Press the “Mode” button 6 times. The icon “ ” will appear on the
status display. It indicates the camera is in Erase mode.
2.After choosing to delete all the photos saved in camera memory, press
the “SELECT” button. The camera will beep once and the Busy
indicator will flash, then all photos saved in camera memory will be
deleted.
Downloading photos from camera
1.Turn on the power of the camera by pressing the “Power” button.
2.Connect the camera to PC using the USB cable. When connected, the
USB connection status icon and the number of images in camera
memory will appear on the status display.
The video camera mode
In video camera mode, you can shoot video by pressing the shutter
button.
Shoot videos without sound
1.Press the POWER button for 3 seconds to turn on the power of the
camera. The camera beeps once and enters camera mode.
2.Then press the “Mode” button 2 times. The icon “VIDEO” and “ ”
will appear on the status display. It indicates the camera is in video
camera mode(no sound). The status of camera will appear on the
status display as follow shows.
3.After entering the video camera mode, press the shutter button and
the camera starts to shoot video. It will show “RECORD TIME” on the
status display at the same time and the Busy indicator will also keep
on flashing. These activation will keep on until you stop shooting.
Press the shutter button again to stop shooting video.
4.In this mode, you can shoot video until your smart media card was full.
Table of contents
Other AEL Digital Camera manuals