Activinsights GENEActiv User manual

GENEActiv
Instructions for Use
Document ID MAR-013-v1
Activinsights, Unit 11, Harvard Industrial Estate, Kimbolton, Cambridgeshire, PE28 0NJ, United Kingdom

2
1. Overview
a) About GENEActiv................................................................. 3
b)TechnicalSpecication ......................................................... 4
2. Getting Started
a) System Requirements .......................................................... 5
b) What’s Included.................................................................... 5
3. Charging
a) Charging ............................................................................... 6
b) LED Signals.......................................................................... 7
4. Device Setup & Conguration
a) Installing Software ................................................................ 8
b) Software Overview ............................................................... 9
c) Device Setup ........................................................................ 10
i) Measurement Frequency ............................................. 10
ii) Time Settings .............................................................. 10
iii) Recording Start Mode ................................................ 10
iv) Subject Info ................................................................ 11
v)Conguration............................................................... 11
vi) Quick Setup................................................................ 12
5. Data Collection & Extraction
a) Extracting Data..................................................................... 13
b) Reading Data........................................................................ 14
i) Data Converter & Data Analysis .................................. 14
ii)Understanding.binles............................................... 15
iii)Understanding.csvles ............................................. 16
6. Cleaning & Storing ................................................................. 17
7. Regulatory Standards ............................................................ 18
8. Getting More Help................................................................... 19
Table of Contents

3
About GENEActiv
GENEActiv is a body-worn accelerometer and data logger. It is a wristwatch-like battery-operated
activityrecordingdevice.Itisacompactandlightweightdevicewhichcanalsobewornatdierent
body locations.
The device is intended to be used for the acquisition of data related to limb or body movements
during daily living and sleep.
The motion sensor (accelerometer) inside GENEActiv records the occurrence and degree of motion.
The device’s relative movement data is stored internally.
The captured data can be further downloaded through the charging cradle and the software.
GENEActiv also incorporates a light sensor to record luminous intensity (lux) of white light.
Overview

4
Technical Specification
Physical Parameters
Size 43mm x 40mm x 13mm
Weight 16g (without strap)
Main Housing Material PC/ABS (medical device grade)
Light Guide Material PC (medical device grade)
Data Contact Material Gold-plated
Strap PU resin
Battery Type Rechargeable lithium ion polymer
Environmental Protection
Moisture Ingress Water-resistant to 10m (IP67 – 1m 24hrs)
Material Ingress Dust tight (IP67)
Operating Temperature 5 to 40 deg C
Mechanical Impact 0.5m drop resistant
Measurement Capabilities
Memory 0.5Gb non-volatile
Logging Frequencies Selectable 10-100Hz
Maximum Logging Periods 30 days @20hz, 7 days @100hz
Internal Clock
Type Quartz Real Time Clock
Frequency 32.768kHz
Accuracy +/- 20ppm ( +/- 1.7s per day)
Acceleration Measurements
Sensor Type MEMS
Range +/- 8g
Resolution 12 bit (3.9mg)
Light Measurements
Sensor Type Silicon photodiode
Wavelength 400 to 1100 nm
Range 0 - 3000 Lux typical
Resolution 5 Lux typical
Accuracy +/- 10% @ 1000 Lux calibration
Event Logger
Sensor Type Mechanical membrane switch
Temperature Measurements
Sensor Type Linear active thermister
Range 0 to 60 deg C
Resolution 0.25 deg C
Accuracy +/- 2 deg C
Measurement Frequency Every 30s minimum
USB Connection
Device USB USB 2.0 Full Speed
Charging Cradle Format 4 unit cradle USB 2.0 High Speed
Charge Time 90% @ 2 hours, 100% @ 3 hours
Data Download Time Maximum 20 minutes for 4 concurrent units

5
a) System Requirements
InordertoruntheGENEActivPCsoftwareyoumusthavethefollowingWindowsPCspecication:
• PC with Intel Core i3 Processor, 2GB Memory
• Windows 10
• .NET Framework 4.7.2
b) What’s Included
• GENEActiv single device with black resin wrist strap
• Spring bar tool with pins
• 4-up charger/download cradle with USB cable
To successfully use the GENEActiv, you must have access to the 4-up charger/download cradle to
connect to the PC via USB cable.
Additional body straps and accessories are available upon request.
Getting Started

6
a) Charging
Once you have received your GENEActiv device(s) allow them to fully charge in the cradle for 3
hoursbeforeconguringwiththesoftware.
This can be done via the USB port on your computer or using a USB wall plug. We recommend
using a wall plug when charging your devices so that it does not interfere with the GENEActiv
software. It is essential that the power supply provides 500mA on every port to ensure the devices
fully charge.
A red light on the device will indicate that the device is charging. After 3 hours, once a green light
ashes,thisindicatesthatthedevicecanbecheckedbythesoftwaretoensurethebatteryisfull
andthedeviceisreadyforconguration.TheLEDlightsarejustvisualindicators-itisessentialto
check the battery level in the GENEActiv PC software for a reliable reading. When fully charged,
unplugandremovedevicesfromthecradleifyouarenotconguringstraightaway.
IMPORTANT: DO NOT leave GENEActiv devices on charge for longer than 3 hours at a time.
Following a full 3 hours charge, the GENEActiv should have over 90% battery, prior to deployment.
Charging & Storing

7
b) LED Signals
When not recording, the battery charge level can be checked by pressing the button on the device.
See diagram below for LED indicators.
AgreenashindicatesthatthedeviceisOKtogointostorageifitisnolongerinuse.Aredashor
noashatallmeansthatthedeviceshouldbecharged(thisfunctionisnotavailableifadevicehas
beenconguredtorecord).
To ensure that a device is fully charged, it must be left in the cradle for a full 3 hours before
deployment. To check the battery level, connect the device to the software. It should show at least a
90% battery level before deploying.
Green Flashing = check battery
level in software (after 3 hours charge)
Constant Red = communicating
Flashing Red = charging
Long Flash (in button start mode) = recording started
Short Flash (when uncongured) = battery good for storage
Long Flash (in button start mode) = recording stopped
Short Flash (when uncongured) = battery needs charging
8
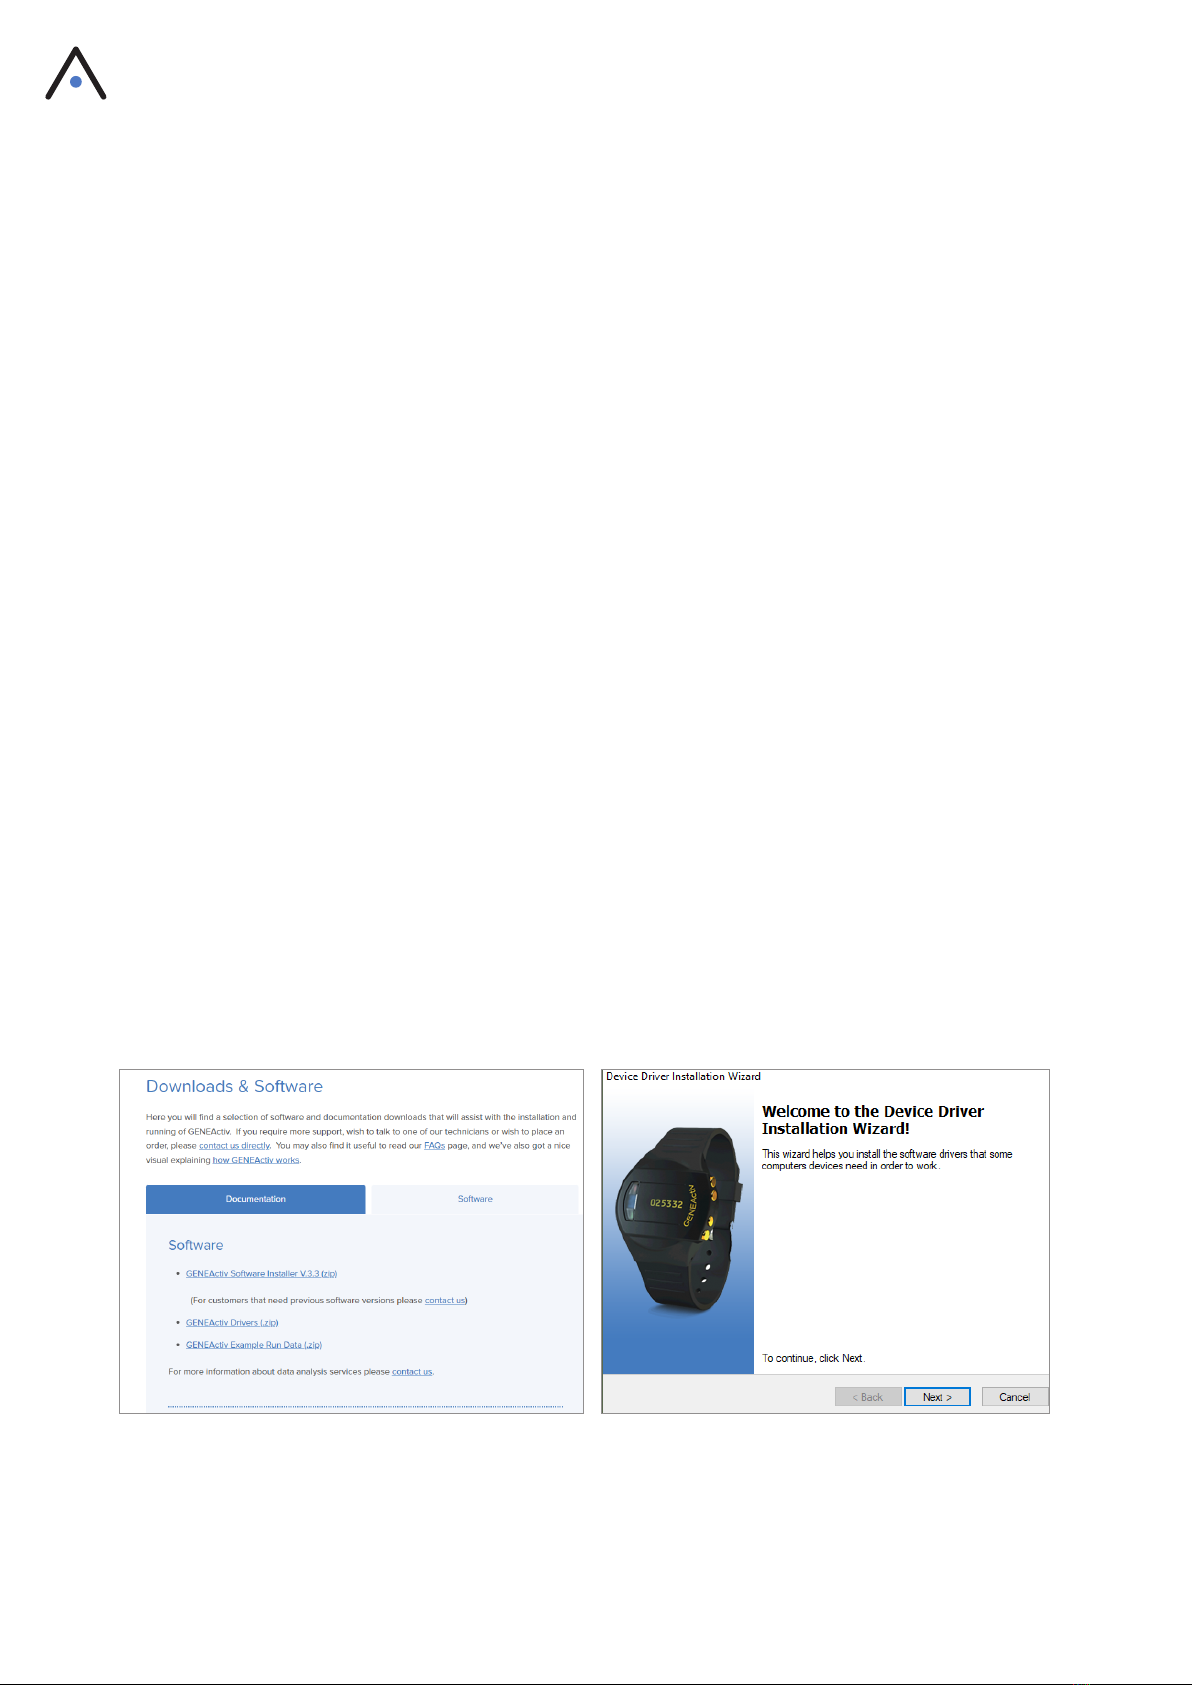
a) Installing Software
DownloadtheGENEActivPCsoftwarefromtheActivinsightswebsite:
www.activinsights.com/expertise/geneactiv/downloads-software.
It is important that once the GENEActiv software has been downloaded, users also need to
download the ‘GENEActiv Drivers’ (.zip) from the Activinsights website.
ToinstalltheGENEActivDrivers:
• Connect cradle via USB cable
• Insert device into cradle
• Navigate to the local drivers folder
• Doubleleftclickthe‘install.bat’le
• Follow the automatic pop-up Wizard steps
• Once complete, the GENEActiv serial number will appear listed at the top of the GENEActiv
PC software.
Ifdevicedoesnotappearinsoftware,drivershavenotinstalledcorrectly.Inthisinstance:
• Open device manager
• Find GENEActiv device, should be listed as Geneactiv_01
• Right click device and select update drivers
• Point the installation dialog to the drivers folder on the desktop
• Drivers should install
• Device manager should now list GENEActiv V1.1
• GENEActiv device serial number should appear in software
Device Setup & Configuration
Download the Software and Drivers from
the Activinsights Website.
Follow the installation wizard on your PC.

9
b) Software Overview
Once you have completed the installations, open the software and click the ‘Advanced Mode’ checkbox
in the bottom right hand corner. You will then see the main dashboard and the menu along the left-hand
side. Connect one or more devices via the cradle.
1. Device Capabilities
This tab displays information about the device(s) connected and existing stored data.
2. Cong. Setup
ThistaballowstheGENEActivdevice(s)tobeconguredanddetailsofthetrialandtestsubjectto
be entered on the device.
3. Data Extractor
Thisiswhereyouwillgotoextractthedataoncerecordinghasnished.
4. Data Converter
TheDataConverterallowsyoutoconvertoneormore.binlesinto.csvlesthatcanbereadby
the GENEActiv viewer and Excel. The convertor can combine the data for up to 5 devices to have
asingletimestamp.Thecombine.binlesfunctionisnotrecommendedfortrialsofmorethana
coupleofhoursduethedataprocessingtimeandlesize.Dataconversionscantakeupto15
minutes to complete.
5. Data Analysis
TheDataAnalysistaballowsyoutoview.binand.csvlesandzoominonaparticularsection.
Thissubsectioncanthenbesavedasarawdata.csvle.
Ensure the
Advanced Mode
box is checked.

10
c) Device Setup
Once the device is connected, you will see the device number(s) displayed in the panel at the top of
the screen.
i). Measurement Frequency
Choose your Measurement Frequency (hz). The Maximum Measurement Period will be automatically
calculated. The Maximum Measurement Period will depend on the frequency selected below.
ii). Time Settings
Choose which time setting the device should use. This should be the Local PC Time (unless the PC
time is known to be wrong, in which case the Manual Time setting can be used instead). The Time
Setup dictates the timestamps for the measurement period.
iii). Recording Start Mode
Therearethreedierentstartmodes:
‘On Button Press’ means that recording will start after the
device is removed from the charger cradle and the button
(hidden under the serial number) on the device is pressed.
Inthismodethegreenlightwillgivealongerashwhenthe
button is pressed to indicate recording has started.
When this mode is selected, the option to ‘Allow Stop &
Restart’ will also appear. Leaving this unselected means that
once recording starts, the button becomes inactive so recording
cannot be accidentally interrupted.
The button will not interrupt recording, but instead will be used
as an event marker only, when required.
Measurement Frequency Max. Measurement Period (Days)
20 30
25 28
30 21
40 18
50 15
60 12
66.7 11
75 10
85.7 9
100 7
Other manuals for GENEActiv
2
Table of contents