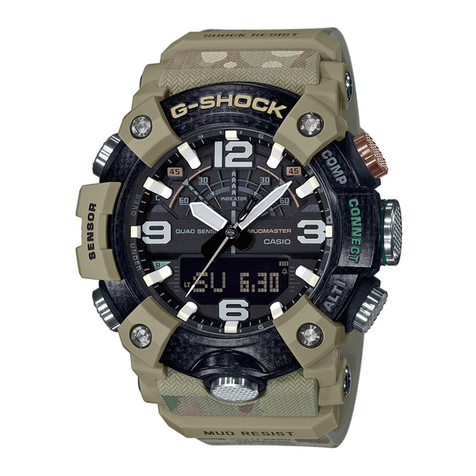
ActiGraph CentrePoint Insight Watch User manual

User Guide
CentrePoint Insight Watch
Activity Monitor: CentrePoint Insight Watch | Revision: 0 | Released: 10/19/2018

2actigraphcorp.com
10/19/2018 | Revision: 0
CentrePoint Insight Watch
The CentrePoint (CP) Insight Watch from ActiGraph captures and records continuous, high resolution acceleration
data, which are converted into variety of objective physical activity and sleep measures within the cloud-based
CentrePoint software system. This manual provides instructions on how to setup, deploy, and upload data from
the CentrePoint Insight Watch to the CentrePoint software system.
Dimensions
Weight
Sample rate
Battery life
Data storage
Specifications
1.97 x 1.35 x 0.41 in
14 grams
32 Hertz (default) - 256 Hertz
30 days*
30 days/512 MB
Dynamic range
Communication
Water resistance
Wear location
Warranty
+/- 8G
USB, Bluetooth® LE 5
1 meter, 30 minutes
Wrist
1 year
*At 32 Hz (default) sample rate.
User Guide
CentrePoint Insight Watch
Activity Monitor: CentrePoint Insight Watch | Revision: 0 | Released: 10/19/2018
Contents
Overview…………………………………………………………………………………………………………………………………………………………………
What You’ll Need…………………………………………………………………………………………………………………………………………………………
Getting Started……………………………………………………………………………………………………………………………………………………………
Assigning the Insight Watch to a Subject………………………………………………………………………………………………………………………………
Information for Subjects…………………………………………………………………………………………………………………………………………………
Uploading Data to CentrePoint………………………………………………………………………………………………………………………………………
Unassigning the Insight Watch…………………………………………………………………………………………………………………………………………
Lost or Broken Activity Monitors…………………………………………………………………………………………………………………………………………
Frequently Asked Questions……………………………………………………………………………………………………………………………………………
Regulatory Information…………………………………………………………………………………………………………………………………………………
2
3
4
6
11
13
14
15
17
18
Overview

3actigraphcorp.com
10/19/2018 | Revision: 0
What You’ll Need
PC + ActiSync Software CentrePoint Account
CentrePoint Insight Watch
USB Cable
CentrePoint Data Hub + Power Cable (optional)
Wall Charger (optional)
Charging Dock

4actigraphcorp.com
10/19/2018 | Revision: 0
Getting Started
Allow firewall access to the following URLs
Contact your local IT department prior to assigning activity monitors to ensure you have firewall access to the URLs
listed below.
ActiSync service:
https://studyadmin-actisync-service.actigraphcorp.com
Blob Azure Storage:
https://acticlouduploadsprod.blob.core.windows.net
1Main Web Portal:
https://studyadmin.actigraphcorp.com
2CentrePoint account setup
Using the invitation link provided by ActiGraph or your study
sponsor, create a CentrePoint username and password.
Install ActiSync software
Download the ActiSync software from:
https://actigraphcorp.com/actisync
Double click the file to open and follow prompts to complete
installation.
System Requirements
OS Windows 7 or later | CPU Dual core processor | HDD 20MB, USB 2.0
1
2
3

5actigraphcorp.com
10/19/2018 | Revision: 0
Getting Started (Continued)
Charge Insight Watch
The Insight Watch should be fully charged before assigning it to a
subject. It takes 2-3 hours to fully charge the device.
Connect the charging dock to the PC or a wall outlet using the
appropriate cable.
Connect the Insight Watch to the charging dock by pulling the
plastic tab away from the dock and inserting the device with
the screen facing up and the button on the opposite side of
the cable port.
The Insight Watch is fully charged once a solid battery icon
appears on the screen.
1
2
3
4
Note: An Internet connection is not required to charge the
activity monitors.
Battery Life Specifications: The battery life of the Insight Watch is
approximately 30 days.*
*At 32 Hz (default) sample rate.

6actigraphcorp.com
10/19/2018 | Revision: 0
Assigning the Insight Watch to a Subject
Assign the Insight Watch to a new subject
Verify that ActiSync is running on the PC by checking for a small icon in the taskbar.
Connect the charging dock to the computer using the provided USB cable and insert the Insight Watch into the
charging dock.
Once connected, the ActiSync icon will turn yellow and a dialog box will open. Select “Assign the subject
now.”
Enter your CentrePoint login information to open the CentrePoint web page in your browser.
1
4
3
2
1

7actigraphcorp.com
10/19/2018 | Revision: 0
Assigning the Insight Watch to a Subject (Continued)
Complete the Device Assignment form and select “Assign Device to a New Subject.” Wait for progress bar
to indicate that assignment is complete.
5

8actigraphcorp.com
10/19/2018 | Revision: 0
Assigning the Insight Watch to a Subject (Continued)
Remove the Insight Watch from the charging dock. Wait for the activity monitor to go from halt mode
into active mode, as indicated by the running man icon in the upper left corner of the screen. This takes
approximately 90 seconds. The Insight Watch is now collecting data and can be given to the subject.
Active Mode
The Insight Watch is
collecting data.
Halt
Stop icon will be
displayed if the
Insight Watch is not
collecting data.
6
Note: To assign an activity monitor to an existing subject (such as in the case of a lost or broken device),
complete steps 1-4 above, and scroll to the bottom of the page. Select the corresponding subject
identifier from the list, then select “Assign Device to an Existing Subject.” Wait for the progress bar to
indicate that assignment is complete.

9actigraphcorp.com
10/19/2018 | Revision: 0
Assigning the Insight Watch to a Subject (Continued)
Pair the Insight Watch with a CentrePoint (CP) Data Hub
(If you are not using a CP Data Hub, skip ahead to Information for Subjects)
The CP Data Hub passively acquires collected raw accelerometry data from the Insight Watch and transmits to the
cloud-based CentrePoint system over a cellular network.
Connect the adapter end of the power cable into the back of the CP Data Hub and plug the other end into
a wall outlet.
Connect the charging dock to the USB port on the CP Data Hub using the USB cable.
Insert the Insight Watch into the charging dock. Once connected, a progress wheel will appear on the screen
indicating that an upload has begun. When the upload is complete, a checkmark will appear on the screen.
2
1
2
3
Upload in Progress
Upload Complete
Warning Sign
If you see a warning sign on the screen of the Insight Watch, remove it from the charging dock and insert again.
Make sure you see a checkmark on the screen before proceeding to the next step.

10 actigraphcorp.com
10/19/2018 | Revision: 0
Assigning the Insight Watch to a Subject (Continued)
Verify connection by logging into your CentrePoint account and selecting the “Subjects” tab from the left
menu. Select the desired subject from the list.
You will be directed to the “Subject Details” page. Select the “Subject Timeline”tab, and verify that an upload
has occurred via Data Hub USB. The Insight Watch and the CP Data Hub are now paired.
Remove the Insight Watch from the charging dock. Give the Insight Watch, charging dock, CP Data Hub, USB
cable, and power cable to the subject.
4
5
6
Other manuals for CentrePoint Insight Watch
1
Table of contents
Other ActiGraph Watch manuals