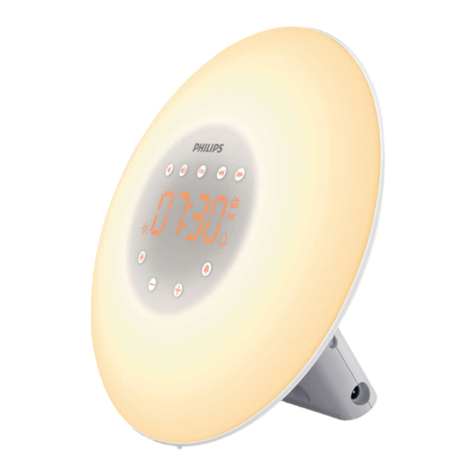
Accenda Sunshine User manual

USER MANUAL
VR500-1.1

2
Table of contents
Welcome...........................................................................................................................3
Button description...........................................................................................................4
Display description .........................................................................................................5
Battery Installation.........................................................................................................6
Setting the clock..............................................................................................................7
Announcing the time .......................................................................................................7
Setting the alarm.............................................................................................................8
Using Alarm 3...................................................................................................................9
Ending an alarm & Snoozing...........................................................................................10
Displaying alarms ...........................................................................................................10
Recording voice memos..................................................................................................11
Voice Operation................................................................................................................12
Checking your alarms with voice commands ...............................................................14
Training the Alarm clock..................................................................................................15

SUNSHINE USER MANUAL 3
Welcome.
Thank you for purchasing the Sunshine Voice Interactive Alarm Clock. With the
Sunshine, you can set up to three different alarms, leave voice memos, use the
built-in-night light, even turn on your TV. All of these features and much more are
available at the touch of a button, or from the sound of your voice!
Before operating Sunshine, please read this manual thoroughly. It contains
important set up and operation instructions regarding your Sunshine Voice
Interactive Alarm Clock, and should be retained for future reference.
While your Sunshine Voice Interactive Alarm Clock comes preprogrammed to recognize
voice commands right out of the box, for best results it is recommended that you
teach it to recognize your own voice using the friendly training feature. Please see
“Training the Alarm Clock” on page 15.

4
CENTER KNOB
Press to announce time of day.
Press and hold to set time.
Press to Snooze.
Turn to select hours or
minutes while setting time.
ALARM CONTROL
Press to cancel an active alarm.
Press and hold to disable alarms.
NIGHT LIGHT BUTTON:
Turns the Night Light on and off
ALARM BUTTONS
Display and set up to 3 alarms
SPEAKER
PLAY
Play Memo
Play Alarm
REC
Press and hold to
record a memo
LED
“Listen” LED
illuminates when
Sunshine is waiting
for a voice command
or response
MICROPHONE

SUNSHINE USER MANUAL 5
ALARM CONTROL
Press to cancel an active alarm.
Press and hold to disable alarms.
ALARM BUTTONS
Display and set up to 3 alarms
SAY KEYWORD
On When Voice
Recognition is active
MEMO
New memo
when blinking
RECORD
Recording
a memo
LO BATT
On when battery is low
DISPLAY MODE
CLOCK
DAYS
BELL
On if any alarms
are active
MICROPHONE

6
Battery Installation
Open the door at the bottom of your alarm clock. Install 3 alkaline
C batteries (not included) in the base as shown below.
The clock display will flash to indicate that the time of day has
not been set. It will also play the greeting “Accenda Alarm Clock.”
Plug the power cord into the back of your alarm clock and plug
the power adapter into a 110 VAC wall receptacle.
Note: AC operation is recommended for long term use. The batteries
will retain the time-of-day, your alarm settings and provide full
functionality for a number of weeks, enabling you to use your
alarm clock in the event of a power failure or when traveling.
Note: Backlight runs on AC operation only. Backlight will not work
during battery operation without use of AC power adapter.
Use of the AC power adapter is recommended for voice operation.
BATTERY DOOR
3 “C” BATTERIES
Insert batteries according
to diagram

SUNSHINE USER MANUAL 7
Setting Your Sunshine Alarm Clock
Setting the Time
1. Press and hold the center knob (FIG 1) for 2 seconds.
2. The SET TIME icon will light up and the one of the days of the
week will flash (FIG 2). Turn the knob right or left to select
the current day. When the current day is blinking, press the
center knob.
3. The hours digit(s) will now blink (FIG 3). Turn the center
knob left or right to select the current hour. The AM and PM
icons will change as you adjust the hours digits past 12.
Press the center knob when the correct hour and AM/PM
settings are displayed.
4. The minutes digit(s) will now blink (FIG 4). Turn the center
knob left or right to set the minutes. Press the knob once
more. The time and day are now set.
Announcing the Time
If you press the center knob while the time is displayed, your
Sunshine Alarm Clock will announce the time of day.
FIG 1
FIG 2
FIG 4
FIG 3

8
Setting the Alarm
The Sunshine Alarm Clock provides up to three separate
alarms, each with its own unique sound or recorded message.
Each alarm is set individually. See next page for alarm sounds.
1. Press and hold the 1, 2or TV alarm button (FIG 5) for 2
seconds. The SET icon and the selected alarm number will
appear, and the day of the week icons will flash (FIG 6).
Turn the knob to the right or left to select your choice of
days of the week for this alarm to sound (Keep turning the
knob to choose your alarm to go off every day, weekdays
only, weekends only, or a specific day only. The days will
flash accordingly to identify these options.) After you make
your selection press the center knob to save the setting.
2. The hours digit(s) will now blink (FIG 7). Turn the center
knob left or right to select the desired hour. The AM and PM
icons will change as you adjust the hours digits past 12.
Press the center knob when the desired hour and AM/PM
settings are displayed.
3. The minutes digit(s) will now blink (FIG 8). Turn the center
knob left or right to set the minutes. Press the knob once
more. The time and day for the selected alarm are now set.
4. The alarm clock will prompt you, “Do you want to record a
message?” Say “Yes” within 3 seconds if you want to record
a 3 second message to be played back at the selected
time. The alarm clock will then say, “Record your message
<beep>”. Record your 3-second message after the beep.
“Meeting at downtown office today.”
FIG 5
FIG 6
FIG 7
FIG 8
FIG 9

SUNSHINE USER MANUAL 9
Setting the Alarm (cont’d)
THREE DIFFERENT ALARMS, THREE DIFFERENT SOUNDS
If you do not record an alarm message, the alarm clock will
substitute a sound in addition to announcing the time when
the alarm goes off.
Alarm 1: Rooster
Alarm 2: Nature
Alarm 3 (TV button): TV power + Fog Horn (see next paragraph).
ALARM 3 IS SPECIAL
At the designated time, alarm 3 will send a remote control signal
to turn on any TV that is within range of the alarm clock. It will
then automatically “snooze” for 10 minutes and then announce
the time and your personal message or make a fog horn sound.
No programming is needed for this feature. Sunshine will auto-
matically recognize any television in the room.
IMPORTANT: The path between TV and Sunshine must be clear
and unobstructed. The back of Sunshine must face your television.
TV
SUNSHINE
TV MUST BE
WITHIN THIS FIELD
180º
LED
TOP VIEW OF SUNSHINE

10
Snoozing, Ending or Disabling an Alarm
SNOOZING
To snooze an alarm, press the center knob (FIG 10) while the
alarm is sounding. You may also snooze an alarm using your
voice. See Voice Operation (pg 12).
ENDING
To end an alarm while it is sounding, press and hold the center
knob (FIG 10) for 2 seconds or press the ALARM button
(FIG 11). The alarm will go off again at the selected time.
DISABLING
To disable an alarm, so that it will not go off until you re-enable it,
press the 1, 2or TV alarm button (FIG 12) at any time the alarm
is not sounding, then immediately press the ALARM button
(FIG 11). The bell icon will turn off. The alarm time and
message is still saved so this alarm can be re-activated without
setting the alarm time again. You can re-activate an alarm by
pressing the 1, 2or TV alarm button (FIG 12) then pressing the
ALARM button (FIG 11) while the alarm setting is displayed.
Reviewing Your Alarm Settings
CHECKING ALARM TIME
To display an alarm, press the 1, 2or TV alarm button
(FIG 12). The reminder* number will light up (FIG 13).
The Sunshine Alarm Clock will display the alarm setting
for 5 seconds then return to displaying the time.
* The Alarm is referred to as “Reminder” in the LCD display.
CHECKING CUSTOMIZED ALARM MESSAGE
If you want to hear the recorded message for an alarm, press the
PLAY button (FIG 14) while the alarm setting is showing.
NOTE: While displaying an alarm, the bell icon will be displayed
if that alarm is active. While the current time-of-day is displayed,
the bell icon will be on if any of the 3 alarms are active.
FIG 11
FIG 14
FIG 12
FIG 10
FIG 13
This manual suits for next models
1
Table of contents