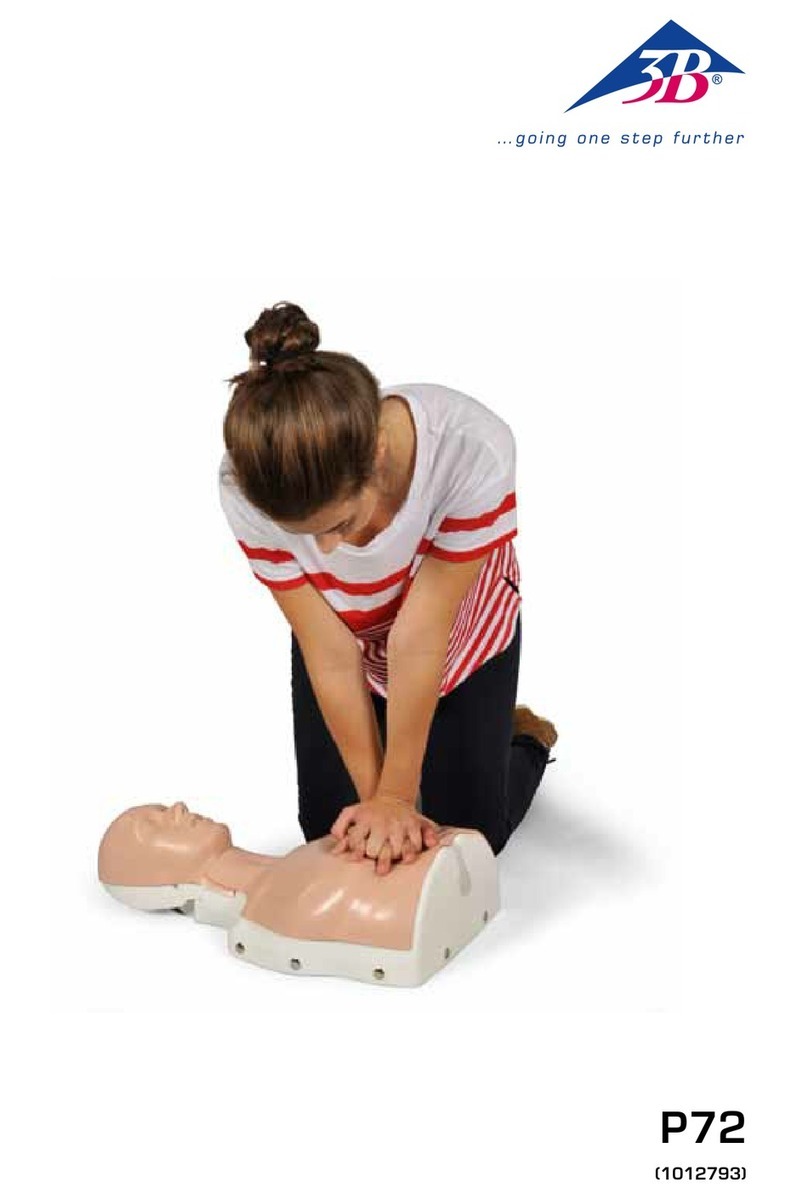
3B BASICBilly P72 User manual

…going one step further
P72, P72/1
(1012793)
P72
P72/1

®
2

®
Deutsch
3
English .......................................................................................................... 4
Deutsch ......................................................................................................... 8
Español ....................................................................................................... 12
Français ...................................................................................................... 16
Português .................................................................................................... 20
Italiano ....................................................................................................... 24
Japa ........................................................................................................... 28
Русский ..................................................................................................... 32
中文 ........................................................................................................... 36
Türkçe ......................................................................................................... 40
................................................................................................................... 44

®
4
English
BLS-Simulator BASICBilly™
1 BASICBilly™consists of 4
2 Assembly 5
2.1 Changing the springs 5
2.2 Changing the air bag 6
3 Cleaning and care 6
4 Possible exercises 7
5 Product information 7
6 Guarantee and Certifications 7
7 Consumables, accessories and replacement parts 7
BASICBilly™is a Cardiopulmonary Resuscitation (CPR) training model for the education of non professio-
nals. The simulator is compliant with the latest CPR guidelines (AHA and ERC). Thanks to its robust construc-
tion, its easy use and realistic handling, it is suitable for both medical training and for teaching in schools,
clubs and for first aid courses.
It offers all the necessary features to learn about the life-saving algorithm, comprising of cardiac massage
and ventilation for adults and children. Its features are:
• Torso with shoulders and the necessary anatomical features to find the ideal pressure point for cardiac
massage
• Head with airways for mouth-to-mouth and mouth-to-nose ventilation
• Head tilt to open the airways
• Mask ventilation is also possible
• Realistic thoracic spring force and the required compression depth of 5 cm prepare the trainee for the
situation with a real person
• Using two springs with differing levels of spring force to demonstrate algorithms for both adults and
children
• An audio feedback indicates that the required compression depth has been reached
• Low-priced disposable airways ensure hygienic use and easy care of the mannequin
• The materials used meet the DIN EN 71-3/9 Toy Safety Directive
• BASICBilly™is developed and manufactured in Germany
1 BASICBilly™ consists of
1 Basic body with removable thorax
2 Springs (red = adult; green = child)
2 Telescopic guides (red = adult; green = child)
2 Face skins
1 Thorax skin
2 Sets of jaw insert + lung bag socket
10 Lung bags (5 = adult; 5 = child)
1 Disinfectant
1 Carrying bag with combined training mat

®
®
English
5
EnglishEnglish
2 Assembly
2.1 Changing the springs
BASICBilly™can be used in adult or in child mode. To do this, change the springs to alter the thorax
resistance for cardiac massage, and change the lung bags for artificial ventilation.
• Place the BASICBilly™on a flat, even surface.
• First of all, remove the face skin by releasing the attachments 1, 2, 3 and 4. To do this, pull down on
the button tabs on the skin at the designated points:
BLS-Simulator BASICBilly™
1
1
2
2
3
3
4
4
• Do the same for the torso skin.
• Once the press studs placed around the white thorax have been undone you can remove the skin.
• Place the springs (red = adult ; green = child ) into the holder and fit the telescopic guide (red point =
adult; green point = child).
• To assemble the torso, do the above in reverse order. To put on the thorax, first of all tilt the head
back and push the neck piece of the thorax forward before fixing it in place.

®
English
6
BLS-Simulator BASICBilly™
2.2 Changing the lung bag
• Place the BASICBilly™on a flat, even surface.
• Remove the face skin first of all by releasing the four attachments. To do this, pull down on the button
tabs on the skin at the designated points:
Magnets
• Do the same for the torso skin.
• Remove the jaw insert that is attached with magnets and take off the lung bag socket inside.
• Now, pick up one of the lung bags provided.
• Push the upper end of the lung bag (start of the simulated trachea) over the round opening of the lung
bag socket (make sure, that the lung bag alignes with the flat surface of the lung bag socket).
• Place the jaw insert on to the lung bag socket (the magnets will help to reconnect easily).
• Tilt the head back and reconnect the jaw insert (complete with lung bag and lung bag socket) with the
head. While bringing the head back to initial position, make sure to flatten the lung bag over the tho-
rax.
• Then attach the torso skin, followed by the face mask, with the button tabs (see above).
3 Cleaning and care
All parts that come into contact with the trainees breath, such as the face masks, jaw inserts and the
lung bag sockets can be disinfected with the disinfectant supplied.

®
English
7
BLS-Simulator BASICBilly™
The disposable airways (lung bags) also ensure that the simulator is particularly hygienic to use. The disin-
fectant provided has been tested with the simulator material. We recommend to use our tested disinfectant
(#1013579), to prevent any damage to the product.
4 Possible exercises
• Freeing up the airways
Head tilt to open the airways.
• Finding the compression point
Realistic anatomical characteristics ensure that the correct compression point can be easily found.
• Compression depth
An audio feedback indicates that the required compression depth has been reached this varies accor-
ding to which spring has been chosen (red = adult; green = child).
• Ventilation
Ventilation can be carried out as mouth to mouth, mouth to nose, or using a ventilation mask (can be
ordered separately #1013678). If done correctly, the skin on the thorax will rise visibly.
5 Product information
Size: L59 x H15 x W32
Weight: 2.4 kg
Avoid storing the device in direct sunlight.
6 Guarantee and Certifications
3 year guarantee, but not for consumables and worn parts.
7 Consumables, accessories and replacement parts
Product Article noQuantity per Set
Lung bags, Adult 1013573 25
Lung bags, Adult 1017695 75
Lung bags, Child 1013576 25
Lung bags, Child 1017696 75
Spring 340N (red), Adult 1013577 1
Telescopic guide adult 1017699 1
Spring 280N (green), Child 1013578 1
Telescopic guide child 1017700 1
Resuscitator with 1 disposable Face Mask 1013678 1
Disposable Face Masks 1013677 5
Disinfectant- 40 gr. bags 1013579 1
Face skins 1013582 5
Face skins, dark 1018563 5
Set Jaw insert + Lung bag socket 1017698 1
Thorax Skin 1013587 1
Thorax Skin, dark 1018564 1
Carrying bag with combined training mat 1018565 1

®
Deutsch
8
BLS-Simulator BASICBilly™
1 BASICBilly™Lieferumfang 8
2 Montage 9
2.1 Auswechseln der Federn 9
2.2 Auswechseln des Lungenbeutels 10
3 Reinigung und Pflege 10
4 Übungsmöglichkeiten 11
5 Produktdaten 11
6 Garantie und Zertifizierungen 11
7 Verbrauchsmaterial, Zubehör und Ersatzteile 11
BASICBilly™ist ein Übungsmodell für die Herz-Lungenwiederbelebung (CPR) in der Laienausbildung. Der
Simulator erfüllt die neuesten Richtlinien zur CPR (AHA und ERC). Dank seiner robusten Bauweise, seiner
einfachen Handhabung und der realistischen Anwendung eignet er sich sowohl für die medizinische
Ausbildung als auch für die Breitenausbildung in Schulen, Vereinen und Erste-Hilfe-Kursen.
Er bietet alle geforderten Eigenschaften, die es erlauben, den lebensnotwendigen Algorithmus aus
Herzdruckmassage und Beatmung am Erwachsenen oder Kind einzustudieren. Seine Merkmale sind:
• Torso mit Schultern und notwendigen anatomischen Merkmalen zum Auffinden des idealen
Druckpunktes für die Herzdruckmassage
• Kopf mit Atemwegen für eine Mund-zu-Mund- und Mund-zu-Nase-Beatmung
• Überstrecken des Kopfes zum Freimachen der Atemwege
• Auch die Maskenbeatmung ist möglich
• Realistische Rückstellkräfte des Brustkorbes und eine nach den Leitlinien geforderte Eindrucktiefe von
5 cm bereiten den Übenden auf die Situation am Menschen vor
• Zwei Federn zu Simulation verschiedener Rückstellkräfte für die Darstellung am Erwachsenen
oder am Kind
• Akustisches Signal bei Erreichen der geforderten Eindrucktiefe
• Preisgünstige Einweg-Lungenbeutel sorgen für hygienische Anwendung sowie eine bequeme
Reinigung und Pflege der Puppe
• die verwendeten Kunststoffe entsprechen der Spielzeugrichtlinie DIN EN 71-3/9
• BASICBilly™ist in Deutschland entwickelt und hergestellt worden
1 BASICBilly™ Lieferumfang
1 Grundkorpus mit abnehmbaren Brustkorb
2 Federn (rot = Erwachsene; grün = Kind)
2 Teleskopführungen
2 Gesichtsmasken
1 Thoraxhaut
2 Sets aus Gesichtseinsatz mit Lungenbeutelhalter
10 Lungenbeutel (5 = Erwachsene; 5 = Kind)
1 Desinfektionsmittel
1 Tragetasche mit kombinierter Trainingsmatte

®
9
Deutsch
2 Montage
2.1 Auswechseln der Federn
BASICBilly™kann im Erwachsenenmodus oder im Kindermodus genutzt werden. Hierzu sind die
Federn für den Thoraxwiderstand bei der Herzdruckmassage und die Lungenbeutel zum Beatmen aus-
zuwechseln.
• Legen Sie dafür BASICBilly™auf eine gerade, ebene Unterlage.
• Entfernen Sie zunächst die Gesichtshaut durch Lösen der Befestigungspunkte 1, 2, 3 und 4, indem die
Haut entsprechend der Knopf-Ösenkonstruktion an den genannten Punkten nach unten gezogen wird:
BLS-Simulator BASICBilly™
1
1
2
2
3
3
4
4
• Gleiches erfolgt nun mit der Torsohaut.
• Nach dem Öffnen der rund um den weißen Brustkorb angeordneten Druckknopfverbindungen kön-
nen Sie diesen abheben.
• Legen Sie die Feder (rot = Erwachsene; grün = Kind ) in die Halterung und setzen die zugehörige
Teleskopführung (roter Punkt = Erwachsene; grüner Punkt = Kind) auf.
• Zum Zusammensetzen gehen Sie in umgekehrter Reihenfolge vor. Zum Aufsetzen des Brustkorbes
überstrecken Sie zunächst den Kopf und schieben das Halsstück des Brustkorbs vor, bevor Sie diesen
arretieren.

®
Deutsch
10
BLS-Simulator BASICBilly™
2.2 Auswechseln des Lungenbeutels
• Legen Sie dafür BASICBilly™auf eine gerade, ebene Unterlage.
• Entfernen Sie zunächst die Gesichtshaut durch Lösen der vier Befestigungspunkte, indem die Haut ent-
sprechend der Knopf-Ösenkonstruktion an den genannten Punkten nach unten gezogen wird:
Magnete
• Gleiches erfolgt nun mit der Torsohaut.
• Entnehmen Sie den mit Magneten fixierten Gesichtseinsatz und ziehen den innenseitig gelegenen
Lungenbeutelhalter ab.
• Nehmen Sie nun einen der beigefügten Lungenbeutel zur Hand.
• Schieben Sie das obere Ende des Lungenbeutels (Beginn der simulierten Luftröhre) über die runde
Öffnung des Lungenbeutelhalters. (Vergewissern Sie sich, dass der Lungenbeutel bündig am
Anschlussstück anliegt.)
• Verbinden Sie den Gesichtseinsatz mit dem Lungenbeutelhalter (die Magnete erleichtern das Anbringen).
• Neigen Sie den Kopf nach hinten und bringen Sie den Gesichtseinsatz (zusammen mit dem
Lungenbeutel und Lungenbeutelhalter) wieder am Kopf an. Bringen Sie den Kopf wieder in die
Ausgangsposition und stellen Sie dabei sicher, dass der Lungenbeutel flach auf dem Brustkorb ausge-
breitet ist.
• Abschließend befestigen Sie zunächst die Torsohaut, dann die Gesichtsmaske entsprechend ihrer
Knopf-Ösenkonstruktion (siehe oben).
3 Reinigung und Pflege
Alle Teile, die mit dem Atemstrom der Auszubildenden in Kontakt kommen, wie Gesichtsmasken,
Gesichtseinsätze und Lungenbeutelhalter, können mit dem beigefügten Desinfektionsmittel desin-
This manual suits for next models
2
Table of contents
Languages:
Other 3B Science Education Product manuals