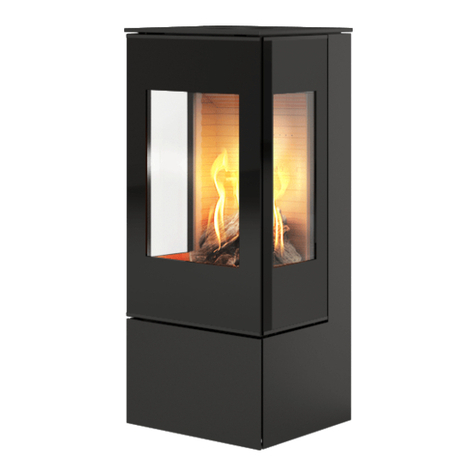
RIKA ALPHA II User manual

Die Seele Ihres Heimes
RIKA-KAMINÖFEN
MANUAL
ALPHA II

Fig. 1
Fig. 2

Fig. 3
Version: Stahlmantel
Version: Steel casing
Versione: rivestimento in acciaio
Version: Manteau en acier

Fig. 4
Fig. 6
Version: Speckstein
Version: Whetstone
Versione: rivestimento in steatite
Version: stéatite
Fig.

Fig. 7
Fig. 8
Fig. 9 Fig. 10
Fig. 11
Fig. 12
Kohlendioxid
Carbon dioxide
Anidride carbonica
Dioxyde de carbone Sauerstoff
Oxygen
Ossigeno
Oxygène
Wasser
Water
Acqua
Eau
CO
2
O
2
H2O
CO2
25 cm
≈7 cm
≈1,6 kg

.GUARANTEE
4.CLEANING AND MAINTENANCE
3.OPERATION
EXPLANATION OF SYMBOLS
2. INSTALLATION OF THE APPLIANCE
1. IMPORTANT INFORMATION
LIST OF CONTENTS
Important instructions
Practical advice
Use the fold out plan for assistance
Overview of technical data and spare parts 19
General warning and safety instructions 20
Before installing the appliance 20 - 21
INFORMATION ON HEATING PRACTICE
Suitable fuels and quantities 22
Fuel quantities 22
Maximum fuel quantities 22
Clean combustion 23
Burning of wood 23
Changing the draw plate 24
Inserting the whetstone panels 24
Connecting to the chimney 24
Firing up 25
The ash drawer 26
Actuation of the vibrating grate 26
Damper settings for nominal heating performance 26
General maintenance 27
TROUBLESHOOTING
What to do if . . . ? 28
We guarantee 55 - 56
Guarantee card 55 - 56
18

TECHNICAL DATA
(Fig. 1)
As a domestic heater of construction type 1,
this unit can be connected to a flue that has
already been provided for use with other
ovens and hearths using solid or liquid fuels,
provided that the dimensions of the flue are
not at variance with the requirements of
DIN 4705, Part 3.
The owner of the small firing equipment or
person responsible for the disposal of the
small firing equipment is required to retain
the technical documentation and to present
it on demand for inspection by the authori-
ties or the chimney sweep.
PACKAGI NG
Your first impression is important to us!
- The packaging of your new domestic
heater offers excellent protection against
damage. Nevertheless, damage can occur to
the heater and the accessories during trans-
portation.
Therefore please check your heater on receipt
to ensure it is complete and free from damage!
Inform your dealer of any shortfalls without
delay!
The wood in the packaging is not surface
treated and can therefore be burnt in your
heater.
The cardboard and sheeting (PE) can be
disposed of at public refuse disposal facilities
for re-cycling.
- The packing used for your domestic
heater is largely environmentally neutral.
SPARE PARTS - OVERVIEW
(Fig. 3 - 6)
DESCRIPTION
01 Cover
02 Flue gas connection
03 Heat retainer plate (for steel casing version)
04 Secondary air damper
05 Ash drawer
06 Primary air damper
07 Clamping bolts
08 Bushing
09 Tension spring
10 Upper oven hinge
11 Lower oven hinge
12 Door glass
13 Door handle
14 Screw (Handle)
15 Cast door
16 Screw for vibrating grate
17 Vibrating grate panel
18 Draw plate
19 Fire clay side
20 Floor grate
21 Wood conveyor
22 Vibrating grate lever
23 Vibrating grate actuator
24 Heat retainer plate (for whetstone version)
25 Whetstone carrier plate
26 Whetstone side casing
TECHNICAL DATA
Dimensions (mm) and weights (kg)
eight
Width
Depth
Weight
Weight with whetstone casing
Smoke flue outlet diameter
Nominal heating power (DIN 18891)
Maximum heating power
Lowest heating power
Nominal heating time
(Wood and wood briquettes)
Combustion air requirement
Space heating capacity (m3) -
dependent on house insulation
905
51 6
395
135
165
130
6 kW
8 kW
3 kW
0.75 h - 1.0 h
–
50 - 110
Exhaust gas mass flow g/s closed
Exhaust gas temperatur °C closed
Minimum delivery pressure at
Nominal heating power, mbar closed
at 0.8 x Nwl
–
280°
0.12
0.08
Exhaust gas values for multiple use of the
chimney in accordance with DIN 705, Part
3/chimney dimensions to DIN 705, Part 2
ENGLISH
19
Subject to technical and optical modifications as well as typographical errors and misprints.

1. IMPORTANT INFORMATION
ENGLISH
2
GENERAL WARNING AND
SAFETY INSTRUCTIONS
The introductory general warning and
safety instructions must be unconditio-
nally observed
➧Before commissioning the heater, read
this handbook thoroughly in its entirety.
➧Only an approved means of transport,
with adequate load carrying capacity must
beused to transport your heatingappliance.
➧Your heating appliance is not suitable for
use as a ladder or supporting platform.
➧The burning of fuel releases heat energy,
leading to considerable heating of the
surface of the heating appliance, the doors,
the door and operating handles, the door
glazing, the smoke flue and in some circum-
stances, the front wall of the appliance
Contact with these components without
appropriate protective wear, such as heat
protective gloves, or actuating means, must
be avoided.
➧Make your children aware of these special
dangers and ensure that they do not have
access to the appliance when it is in use.
➧Burn exclusively the approved heating
materials stated in the section on “Clean
combustion”.
➧The combustion or introduction of readily
combustible or explosive matter, such as
empty spray cans and the like, into the
combustion chamber, or their storage in
close proximity to the appliance is strictly
forbidden, due to the danger of explosion.
➧No loose or bulky or easily flammable
clothing should be worn when attending
the heating process.
SAFETY DISTANCES (Minimum distances) Fig. 2
1. For non-combustible objects
a > 100 mm b > 400 mm c > 100 mm
2. For combustible objects and supporting walls
in reinforced concrete
a > 200 mm b > 800 mm c > 200 mm
➧The placing of non-heat resistant objects
on or near the heating appliance is prohi-
bited.
➧Do not dry items of washing on the
appliance.
➧Framesorracksfordryingitemsofclothing,
or similar, must be placed at an adequate
distancefrom the heating appliance -
Danger of fire!
➧When operating your heating appliance,
the use of easily flammable and explosive
substancesin thesame oranadjoining room
is prohibited.
BEFORE INSTALLING THE APPLIANCE
1.1 Floor load capacity:
Before installing the appliance, make sure
that the load carrying capacity of the floor
sub-structure is adequate to withstand the
weight of the heater.
1.2 Smoke flue connection
Smoke flues are a special source of danger
in view of the poisonous gas outlet and fire
hazard. Engage the services of a franchised
dealer for their location and installation.
Whenconnecting your fluetothe heaterin
thevicinityofwoodcladwalls,pleaseobserve
the appropriate installation guidelines.

21
ENGLISH
1.3
Be sure to note the build-up of flue gases
under unfavourable weather conditions
(Weather inversion) and the flue draft
behaviour.
If too little air for combustion is taken in,
this can lead to fumes in the room in which
the appliance is located, or result in the
escape of flue gases. In addition, damaging
deposits can be formed in the appliance
and in the chimney.
In the event of the escape of fumes, let the
fire go out and check that all the air inlet
openings are unobstructed and that the
flue gas ducting and flue are clean. In case
of doubt, advise a registered chimney
sweep, since inadequate draft conditions
may be associated with your chimney.
1.4
Before adding new fuel, rake the existing
incandescent residue into a single bed of
material.
1.5
Only use the tool specified in our range of
accessories for the purpose of raking the
materialtogetherandensurethatnoglowing
ashes fall from the combustion chamber
onto combustible material.
1.6
Brown coal briquettes, separated by about
a finger’s breadth should be laid in a single
layer on the glowing material.
1.7
Whenopeningthedoors onyourappliance
and when actuating the controls, use the
tools provided with your heater for these
purposes, i.e. the protective gloves and the
operating tools.
1.8
Heating appliance - Construction type 1
(BA 1):
This must only be operated with the fire-
box door closed.
1.9
The fire box door must only be opened for
the charging of fuel and must then be clo-
sed again, otherwise this can lead to the
endangering of other fire places/heating
appliances also connected to the chimney.
1.9.1
When the appliance is not being used, the
firebox door should be kept closed.
1.10
The use of wet material as fuel, with too
much throttling, can lead to sooting-up of
the chimney, i.e. to the deposit of easily
flammable substances such as soot and tar,
possibly leading to a chimney fire.
Should this occur, close all air inlets and
flaps. Call the fire service and withdraw to a
place of safety, together with all the
occupants of the building.
Caution: Due to the size of the fire box door,
it is necessary, particularly during heating up,
when the flames are high, not to open the
door too abruptly, in order to prevent the
emergence of flames from the appliance.

ENGLISH
22
INFORMATION ON HEATING PRACTICE
SUITABLE FUELS AND QUANTITIES
Your appliance is basically suitable for
the burning of dry chopped firewood. In
addition, you can burn fuels such as wood
briquettes and brown coal briquettes.
Use only dry material for burning. The
burning of refuse of any kind, particularly
plastics, will damage your appliance and the
chimney and is prohibited by the statutory
regulations on emissions.
FUEL QUANTITIES
The appliance is designed with a flat firing
layout, due to its style of construction. This
means that only one layer of fuel must be
placed on the existing glowing embers
when re-charging. Please note, that if a
greater quantity of fuel is added to your
firing appliance, it will output more heat
and will heat up in excess of the intended
design limits. This may result in damage to
the appliance.
MAXIMUM FUEL QUANTITIES
Wood: (Fig. 9, 10)
2 logs approx. 0.8 kg
Brown coal briquettes:
3 items approx. 0.5 kg
Wood briquettes (Broken):
2 items approx. 0.8 kg
Control of the power output of your appli-
ance is obtained by means of the air intake
damper. Since the power of your firing
applianceis also dependenton the chimney
draft, thisairintakedamper mustberegula-
tedinaccordancewithyourownexperience
of the operation of the system.
Operation of the secondary air intake regula-
tor, the primary air intake regulator and the
vibrating grate lever, must only be undertaken
using the claw tool provided.
Other manuals for ALPHA II
1
Table of contents
Other RIKA Wood Stove manuals


Popular Wood Stove manuals by other brands


WoodPro
WoodPro WS-TS-1500 owner's manual
Contura
Contura C 586W installation instructions

Nordpeis
Nordpeis N-20 T user manual

Palazzetti
Palazzetti EVA GENERAL INFORMATION - WARNINGS - INSTALLATION - MAINTENANCE

Lopi
Lopi 1250 Republic owner's manual

Panadero
Panadero CAPRI 3V Usage and maintenance instructions