Passione 3D MB339 edf 90mm User guide

MB339 edf 90mm –Mounting instruction
➢Materials / items required for assembly:
-Bonding/glue: Cyanoacrylate medium, activator for cyanoacrylate and cyan spouts dispensers;
-Finishing sandpaper 500/320;
-1 x Carbon tube diameter 12 mm (1mt);
-1 x Carbon tube diameter 6 mm;
-1 x Carbon tube 4 mm;
-Ethyl alcohol
-Cloth for ethyl alcohol (for cleaning surfaces to be bonded)
➢Preparative surfaces before bonding:
The MB339 model is composed of several sections, which need to be glued together
Each section before being glued must be sanded very quickly to further refine the plan already created by
the press, so that it is smooth and free of debris that might not do well pave surfaces. (Use abrasive paper
500/320).
Afterwards degrease with cloth soaked in ethyl alcohol the surfaces before bonding.
The above operations are very fast to perform, are indications to make the perfect job for the KIT assembly.
Use the cyanoacrylate medium to glue the sections between them, to avoid frittering of glue, use the cyan
spouts dispensers for medium cyan and apply the glue in the edge inside of the plane (not to exaggerate
with the amount, the cyanoacrylate on this type of materile has a strong seal and performs as a weld

between the glued parts) use the activator to accelerate the drying of the glue. It is important to use the
activator and nebulize in small quantities to avoid too rapid drying of the glue.
Once pasted section, in the inner part of the fuselage wipe across the board always with cyanoacrylate
medium, the sections have been designed to allow the creation of this bonding also internally in the fuselage.
For facilitate the gluing of fusolsgr, divide the fuselage into two parts as in the following picture:

And then subsequently bonding the two sections as follows:
A practical tip is to make the front section for the front landing gear before bonding, see photo below:
In particular photo assembly of the front retractable maker, use the dowel shown in photos for the
installation of the machine in the front section. NB: the dowel has a direction, see the perfect 90 ° angle
position of the leg once extended. Use for attaching the machine screws with self-locking bolt tightening on
the upper part of the front section.
The KIT of landing gear system is available in the online shop of Passione 3D made for the MB339 also the
springs are calibrated with the right force to properly support the model during all phases of takeoff /
landing.

➢Installation of wings :
Before proceeding with the bonding of the first wing section, engage in the central section of the fuselage
carbon tube diameter 12 mm diameter and 4mm diameter that it will use to keep the correct positioning
axis of the first section of the wing. NB. The 4mm diameter carbon not cross inside the fuselage and it must
be inserted up to the inner rib of the central section of the fuselage and must pass across the first section of
the wing, see following pictures.
Proceed with the bonding with cyanoacrylate medium of the first section highlighted in red as picture :
We proceed with the assembly of the remaining wing sections:

Engage and glue the carbon diameter 4mm in the wing sections
Connect the wing sections respecting the left and right side, before gluing the two sides with cyanoacrylate
medium remember always to use abrasive paper 500/320 to remove on the surface the residualand
degrease the parts to be bonded with ethyl alcohol in order to remove the glue used during the printing
phase

Help also with the engagement of carbon tube diameter 12 mm to align the wings and facilitate the
bonding
Wing detail, carbon tube diameter 12 mm at this point can also be removed

Bonding of the lock system for the wing, take the dowel and add it to the newly assembled wing seat and
glue with the use the cyanoacrylate medium
Glued the dowel proceed with the insertion of the wings in the section attached to the fuselage and with the
aid of a tip with a diameter of 4mm pierce the dowel and proceed with the gluing of the bolt on the opposite
side, see the following picture:

At this point, the wing can be mounted directly on the fuselage see next photo, use the M4 screw supplied
At this point you can also screw the wing machine
➢Assembly of moving parts :
All moving parts of the model are arranged for housing the hinges provided in the kit:
Detail of the flap and aileron

Glue the sections of the flap and aileron.
NB: To use the flap diameter carbon 4mm as shown in the picture, This last section It must not be glued
because it allows the removal of the wing and the part of the flap that remains attached to the fuselage as
shown in the following pictures.
Details of the wing hinges with bonding
Details of the flap with bonding of the hinges
Dettaglio dell’ala assemblata con relativi servi
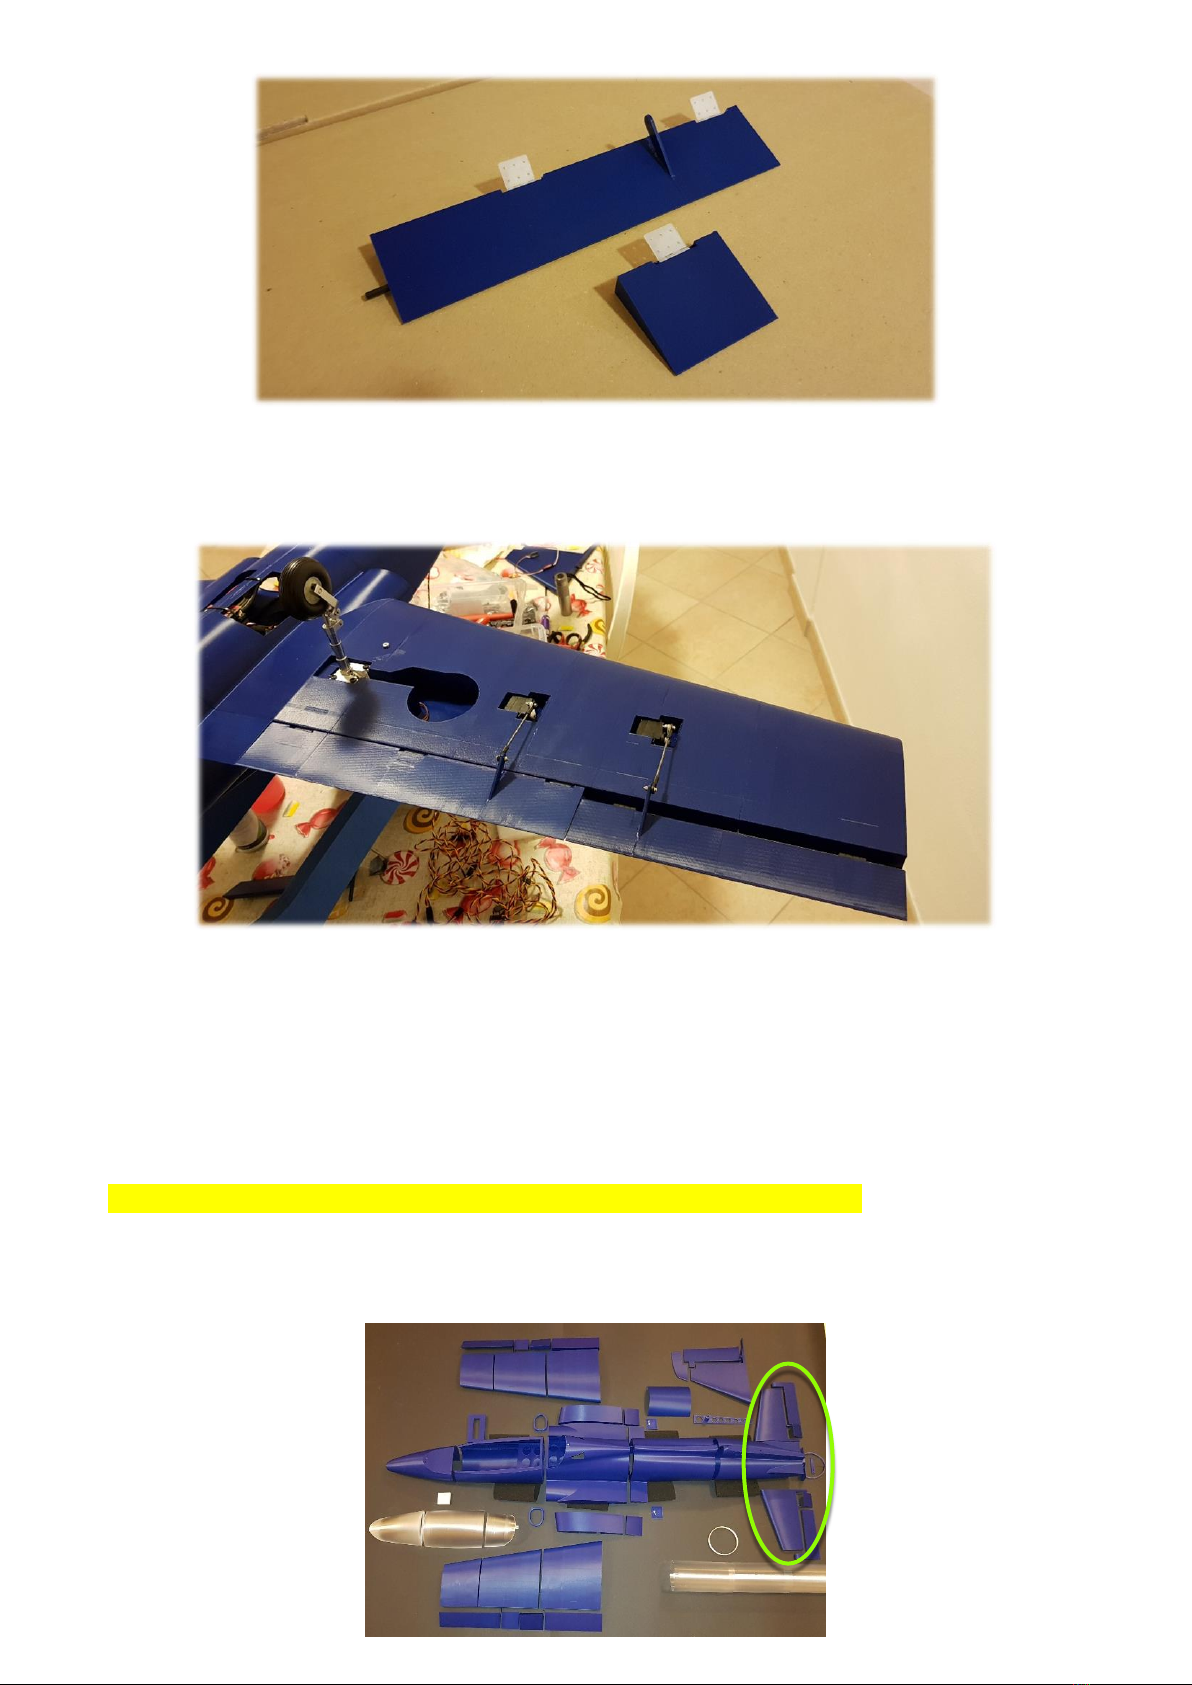
➢Assembly tail ( horizontal stabilizer ) and rudder ( vetical stabilizer ) :
For the assembly of tails and the rudder it must be a carbon tube diameter 6mm (which will be passing
through both tail ) and a tube with 4mm diameter that will only use exclusively for the alignment of the
tail to the rest of the fuselage then not passing, see photos next page.
Note : All parts must be glued to each other subsequently with medium cyan.
The photos on the next page are the same as the version of KIT dell'MB339 EDF 70mm steps and bonding
shown are identical to EDF 90mm version
Other Passione 3D Toy manuals


