PartySpace FORO FOHACH2000BL User manual
Partyspace bv - Potteriestraat 67 - 8980 Beselare - BEL GIUM - Ph one +32 (0)57 36 03 30 - Fax +32 (0)57 48 79 61 - BTW BE 0830 189 64 3
FOHACH2000BL
FOHACH2000CR

PLEASE READ THE FOLL OWING SAFETY GUIDELINES CAREFULLY BEFORE OPERATION AND
INSTALLATION
REPAIRS SHOULD ONLY BE DONE BY A QUALIFIED TECHNICIAN.
1. Do not move the appliance when it is in operation.
2. Maintenance and repair should be carried out by a qualified person.
3. Improper installation, adjustment, alteration can cause personal injury or property damage.
4. Do not attempt to alter the unit in any manner.
5. Never replace or substitute the regulator with any regulator other than the factory-
suggested replacement.
6. Do not move the heater after it has been turned off until the temperature has cooled down.
7. Adults and children should stay away from the high temperature surface to avoid burns or
clothing ignition.
8. Children should be carefully supervised when they are in the area of the heater.
9. Clothing or other flammable materials should not be hung on heater or placed on or near
the heater.
IMPORTANT SAFETY MEASURES
3FØRO FOHACH2000BL FOHACH2000CR - MANUAL
EN
This appliance is not intended for use by persons (including children) with reduced physical,
sensory or mental capabilities, or lack of knowledge, unless they have been given supervision or
instruction concerning use of the appliance by a person responsible for their safety.
1. Read the instructions before installation and use. This appliance must be installed and
stored in accordance with the regulations in force.
2. Do not move the appliance when it is in operation.
3. Keep the instructions for future reference.
4. Do not connect the gas c ylinder directly to the appliance without regulator.
WARNING
DO NOT ADJUST WHEN HOT!
Heater must be installed at least 1.8 m above the floor.
Do not use this appliance again if the cable was destroyed.
Unit must not be modified in any way.
EN
ATTACHMENT TO A CEILING
4FØRO FOHACH2000BL FOHACH2000CR - MANUAL
The heater should be assembled to a concrete ceiling. The supplied mounting parts are not
suitable for other surfaces.
1. Drill a hole with a diameter of 8 mm in the ceiling.
2. Push the self tapping hook screw in the drilled hole.
3. Tighten the hook firmly.
4. Hang the heater with the chain to the screw. Ensure that the distance between ceiling and
the heater is at least 30 cm. The height between the floor and the heater must be at least
1.80 m.
5. Route the power cable alongside the chain to the socket. The power cable must be
attached to the chain with a pull strap, but make sure it does not make contact with the
first three links of the chain. The power cable must under no circumstances touch the
heater. The heater should not be hung up by the power line.
ATTACHMENT TO A GAZEBO
Make sure the frame of the tent in which the heater is suspended, is sufficiently strong to
support the weight of the heater.
1. Hook the chain to the heater.
2. Wind the chain several times around the frame and attach the other end, just like the first,
also to the heater. Make sure that the distance between the point of suspension and the
heater is at least 30 cm. The height between the floor and the heater must be at least 1.80
m.
3. Make sure the heater hangs securely.
EN
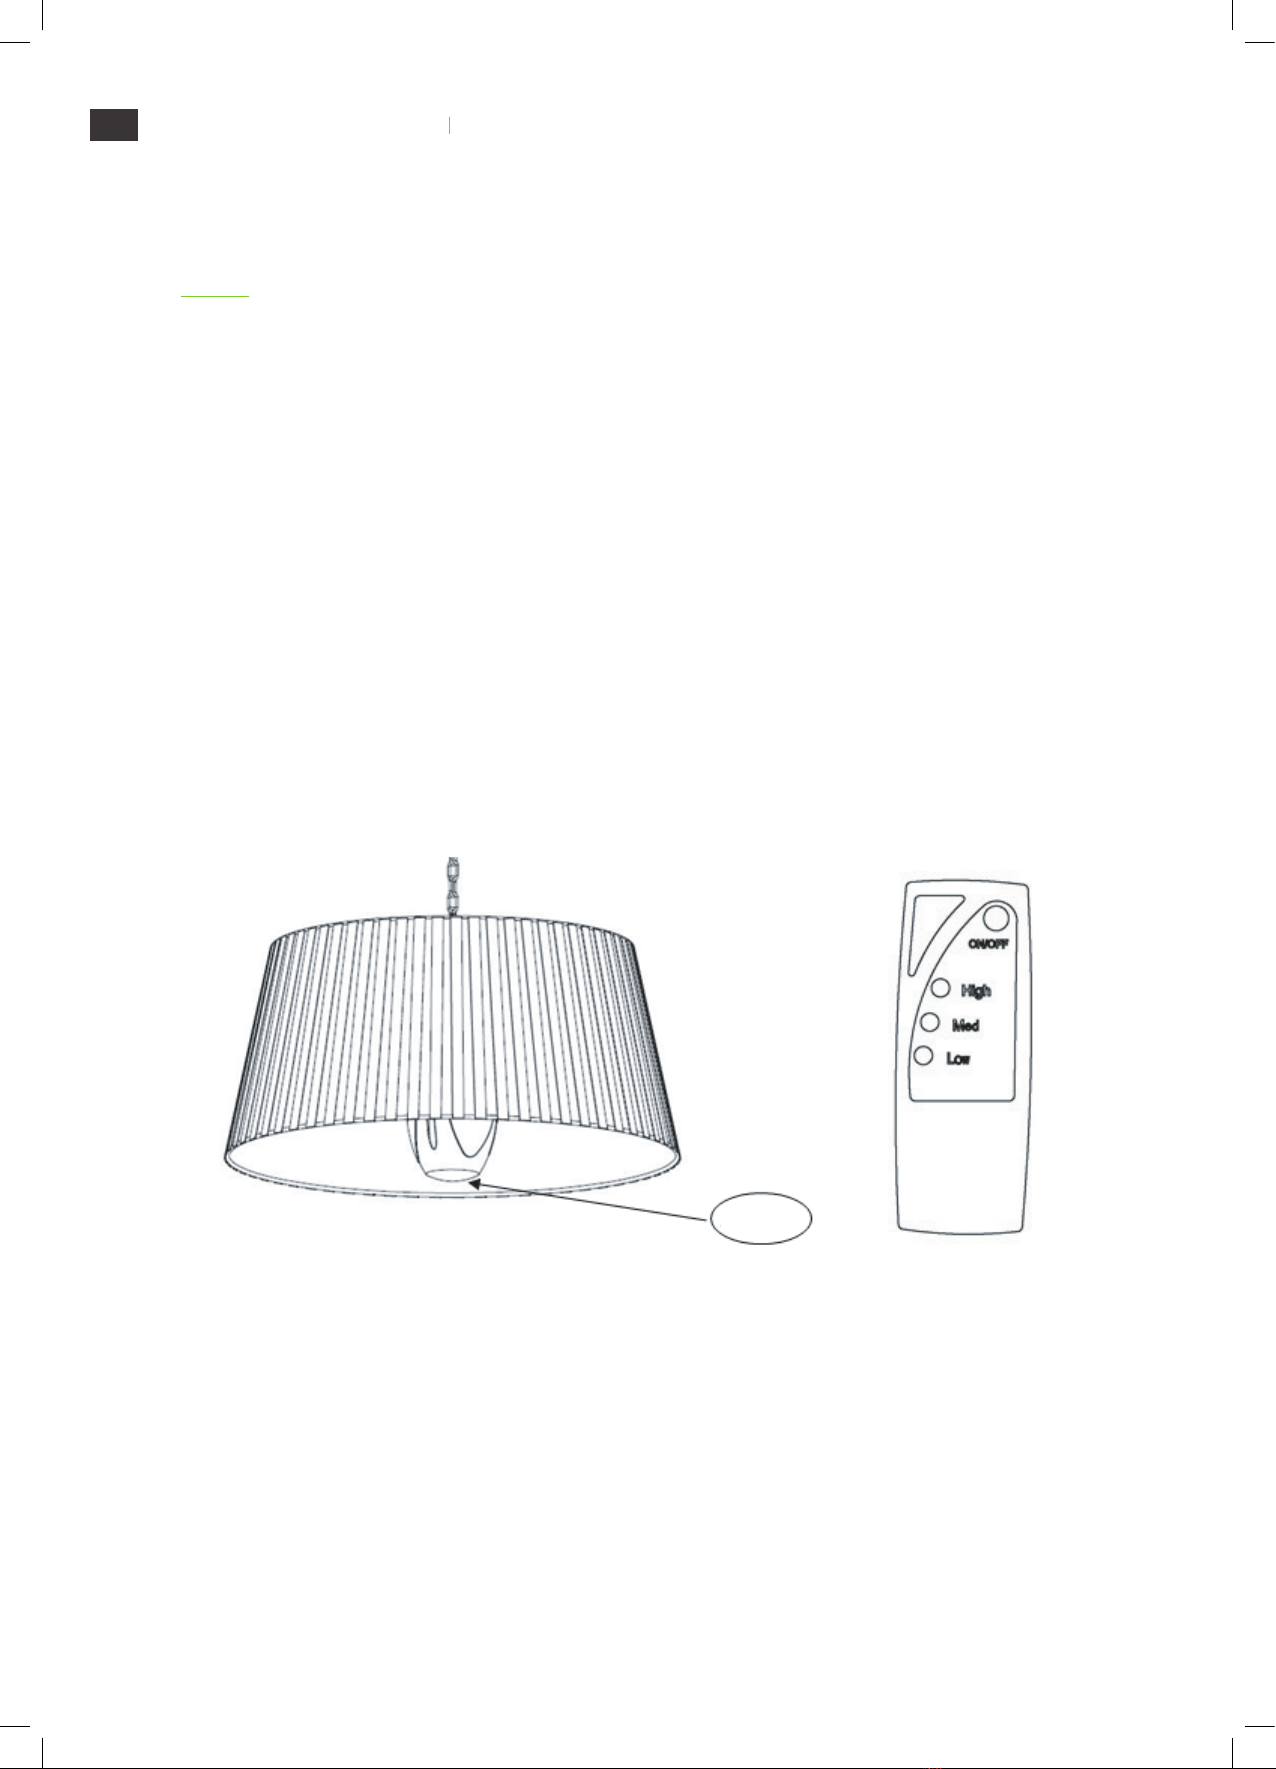
TURNING THE HEATER ON AND OFF
•Insert the plug into a socket.
•Please turn on the switch on heater first.
•Please point the remote controller directly to sensor window on your heater. Please press ON/OFF on
the remote controller to use the heater. To adjust power, please press HIGH, MED or LOW for desired
heat.
•To turn off the heater, press ON/OFF button again on the remote controller. For a long period of
inactivity, please turn off the switch on heater, and pull the plug off.
•After using the heater, it always must be turned off with the button, the cord or the remote control
and the power plug must be pulled out of the socket.
•Allow the heater to cool completely before moving and storage.
•Never use the heater when there are bad weather conditions like rain, snow, hail, or a thunderstorm.
•Pay attention that, no combustible material due to wind or other environmental influences covers or
obstructs the appliance, such as curtains, marquees, flags, plastic foil etc.
SENSOR
5FØRO FOHACH2000BL FOHACH2000CR - MANUAL
EN
CLEANING AND MAINTENANCE
•In an environment with salty air such as at the seaside, corrosion occurs earlier than usual. Check the
heater regularly on corroding parts and have those parts repaired immediately.
•Always turn off the circuit breaker and let the unit cool completely before maintenance.
•To keep the heater clean, the outer shell may be cleaned with a soft, damp cloth. You may use a mild
detergent if necessary. After cleaning, dry the unit with a soft cloth.
•Do not use alcohol, gasoline, abrasive powders, furniture polish, or rough brushes to clean the heater.
This may cause damage or deterioration to the surface of the heater.
•Although this heater is outdoor approved (balconies and patios), do not immerse the heater in water
for your safety. Wait until the unit is completely dry before use.
6FØRO FOHACH2000BL FOHACH2000CR - MANUAL
Partyspace BV
Potteriestraat 67
8980 Beselare
Belgium
declares the following device in sole responsibility:
Brand name: Føro
Product type: Halo
Product name: Ceiling heater - Black
Ceiling heater - Cream
Item number: FOHACH2000BL
FOHACH2000CR
EAN: 5404019853940
5404019853957
Complies with the following harmonization rules:
EN 60335-2-30:2009 + A11:2012 + A1:2020 + A12:2020
EN 60335-1:2012 + A11:2014 + A13:2017 + A1:2019 + A14:2019 +
A2:2019
EN 62233:2008
AfPS GS 2019:01 PAK
EK1 309-06
Beselare, Belgium – JAN 2022
L. Thiers, Director
DECLARATION OF CONFORMITY


LEES DE VOLGENDE VEILIGHEIDSVOORSCHRIFTEN ZORGVULDIG VOORDAT U HET APPARAAT
INSTALLEERT EN GEBRUIKT
REPARATIES MOGEN ALLEEN WORDEN UITGEVOERD DOOR EEN GEKWALIFICEERD
ONDERHOUDSMONTEUR.
1. Verplaats het apparaat niet tijdens gebruik.
2. Onderhoud en reparatie moeten worden uitgevoerd door een gekwalificeerd persoon.
3. Een onjuiste installatie, afstelling of wijziging kan leiden tot lichamelijke letsels of
materiëleschade.
4. Probeer het apparaat op geen enkele manier aan te passen.
5. Vervang de regelaar alleen door een regelaar die door de fabrikant wordt aanbevolen.
6. Verplaats de haard niet net nadat deze is uitgeschakeld, maar wacht tot de haard volledigis
afgekoeld.
7. Volwassenen en kinderen moeten uit de buurt van oppervlakken met hoge
temperaturenblijven om brandwonden of het in brand vliegen van kleding te voorkomen.
8. U dient nauw toezicht te houden op kinderen wanneer zij zich in de buurt van de
haardbevinden.
9. Kleding of andere brandbare materialen mogen niet aan de haard worden gehangen of
opof naast de haard worden geplaatst.
BELANGRIJKE VEILIGHEIDSINFORMATIE
9FØRO FOHACH2000BL FOHACH2000CR - HANDLEIDING
NL
Dit toestel is niet bestemd om te worden gebruikt door personen (inclusief kinderen) met
verminderde fysieke, zintuiglijke of mentale vermogens, of met gebrek aan de noodzakelijke
kennis, tenzij ze onder toezicht staan of instructies betreffende het gebruik van het apparaat
hebben gekregen van een persoon die verantwoordelijk is voor hun veiligheid.
1. Lees de handleiding vóór installatie en gebruik. Dit apparaat moet worden geïnstalleerd en
moet worden opgeslagen inovereenstemming met de geldende voorschriften.
2. Verplaats het apparaat niet tijdens gebruik.
3. Bewaar de handleiding voor toekomstig gebruik.
4. Sluit de gasfles niet rechtstreeks aan op het apparaat zonder een regelaar.
WAARSCHUWINGEN
TOESTEL NIET BIJSTELLEN ALS HET HEET IS!
De verwarming moet minimaal 1,8 meter boven de vloer geïnstalleerd worden.
Gebruik de verwarming niet meer als het netsnoer beschadigd is.
De verwarming mag op geen enkele manier worden gewijzigd.

NL
OPHANGEN AAN EEN PLAFOND
10 FØRO FOHACH2000BL FOHACH2000CR - HANDLEIDING
De plafondverwarming moet aan een betonnen plafond gehangen worden. De bijgeleverde
bevestigingsonderdelen zijn niet geschikt voor andere oppervlakken.
1. Boor een gat met een diameter van 8 mm in het plafond.
2. Duw de zelftappende haakschroef in het geboorde gat.
3. Draai de haak stevig aan.
4. Hang de verwarming met de ketting aan de haak. Zorg dat er minimaal 30 cm afstand is
tussen het plafond en de verwarming. De hoogte tussen de vloer en de verwarming moet
minimaal 1,80 m zijn.
5. Leid het netsnoer langs de ketting naar het stopcontact. Het netsnoer moet met een
trekbandje aan de ketting bevestigd worden, maar u moet erop toezien dat het in geen
geval contact maakt met de eerste drie schakels van de ketting. Ook mag het netsnoer in
geen geval met het verwarmingselement in aanraking komen. De verwarming mag niet
aan het netsnoer worden opgehangen.
OPHANGEN IN EEN TUINPAVILJOEN
Zorg ervoor dat het frame van de tent waarin de verwarming wordt opgehangen, sterk genoeg
is om het gewicht van de verwarming te dragen.
1. Haak de ketting aan de verwarming.
2. Wikkel de ketting verscheidene malen om het frame en bevestig het andere uiteinde op
dezelfde manier als het eerste eveneens aan de verwarming. Zorg ervoor dat de afstand
tussen het ophangpunt en de verwarming minimaal 30 cm is. De hoogte tussen de vloer
en de verwarming moet minimaal 1,80 m zijn.
3. Zorg ervoor dat de verwarming stevig aan het frame hangt.
This manual suits for next models
1
Table of contents
Languages:
Other PartySpace Patio Heater manuals


Popular Patio Heater manuals by other brands


EUROM
EUROM 334241 instruction manual

Lava Heat
Lava Heat Venetian owner's manual

EHS Ltd.
EHS Ltd. HQH-2000W instruction manual

VONROC
VONROC ALICUDI PH515AC Original instructions

OZONA
OZONA Heatflow IF010997 Safety instructions and operation manual

theBBQshop
theBBQshop 51611010 Safety, Installation, Operation and Maintenance