GETTI G STARTED
Structural Requirements
Make sure all supporting structures and load attaching devices are
strong enough to hold your intended loads. If in doubt, consult a
qualified structural engineer.
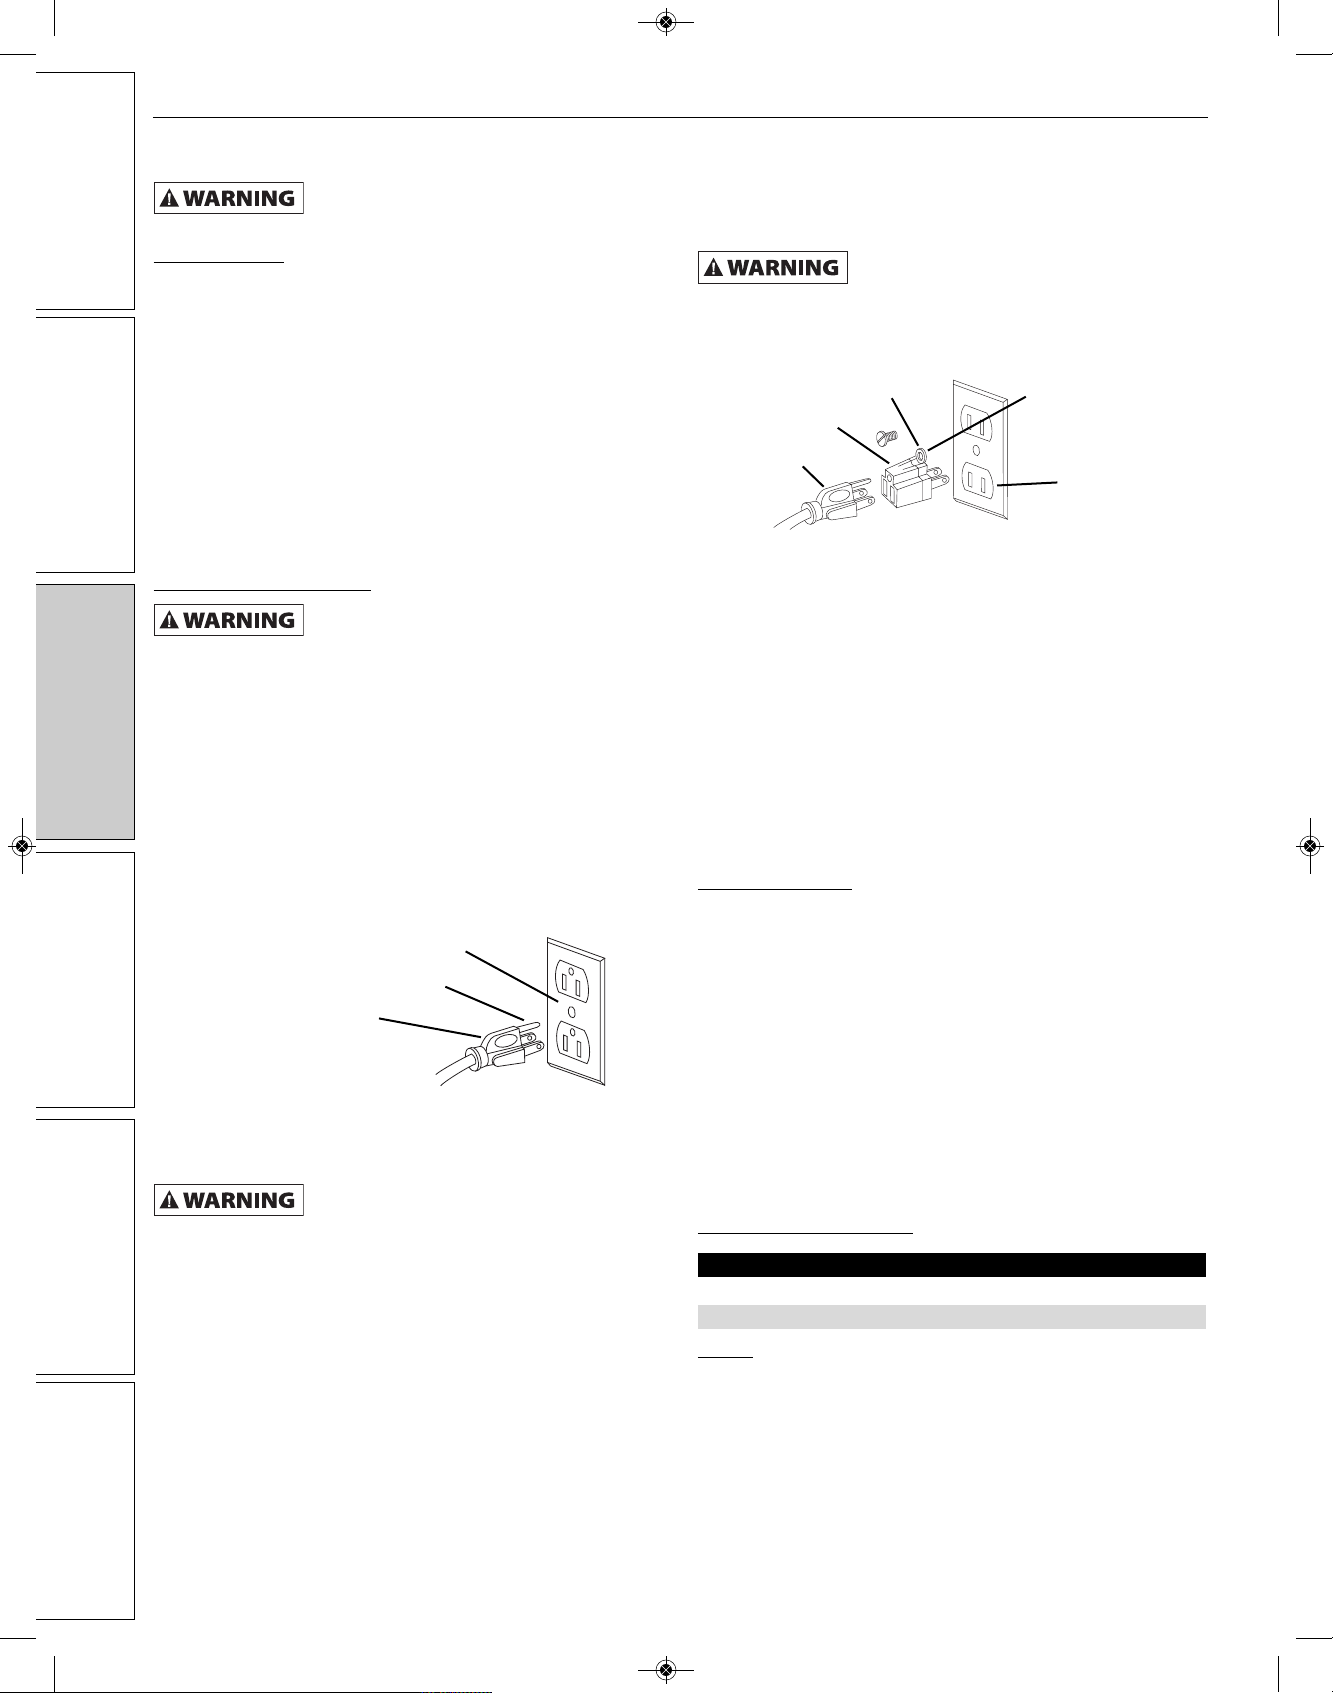
Electrical Requirements
The power supply to the Sander needs to be 120 volt/ 8.0 amp,
single phase, 60 Hz. The standard allowable voltage variation is
plus or minus 10%.
Tools eeded:
Standard mechanic’s hand tool set.
U PACKI G
Be careful not to touch overhead power
lines, pipin , li htin , etc. if liftin
equipment is used. Sander wei hs approximately 88 lbs,
proper tools, equipment and qualified personnel should be
employed in all phases of unpackin and installation.
Cartons should be handled with care to avoid damage from
dropping, bumping, etc. Store and unpack cartons with correct side
up. After unpacking Sander, inspect carefully for any damage that
may have occurred during transit. Check for loose, missing or
damaged parts. If any damage or loss has occurred, claim must be
filed with carrier immediately. Check for completeness. Immediately
report missing parts to dealer.
Sander is shipped partially assembled. End user will need to
assemble loose parts to machine.
IMPOR AN : The tool has been coated with a protective coating.
In order to ensure proper fit and operation, the coating must be
removed. Remove coating with mild solvents such as mineral
spirits and a soft cloth. Nonflammable solvents are recommended.
After cleaning, cover all exposed metal surfaces with a light coating
of oil.
Never use hi hly volatile solvents. Avoid
ettin cleanin solution on paint as it
may tend to deteriorate these finishes. Use soap and water
on painted components.
Contents:
• Sander (1)
• Miter gauge assembly (1)
• Fence support (1)
• Table assembly (1)
• Hardware bag (1)
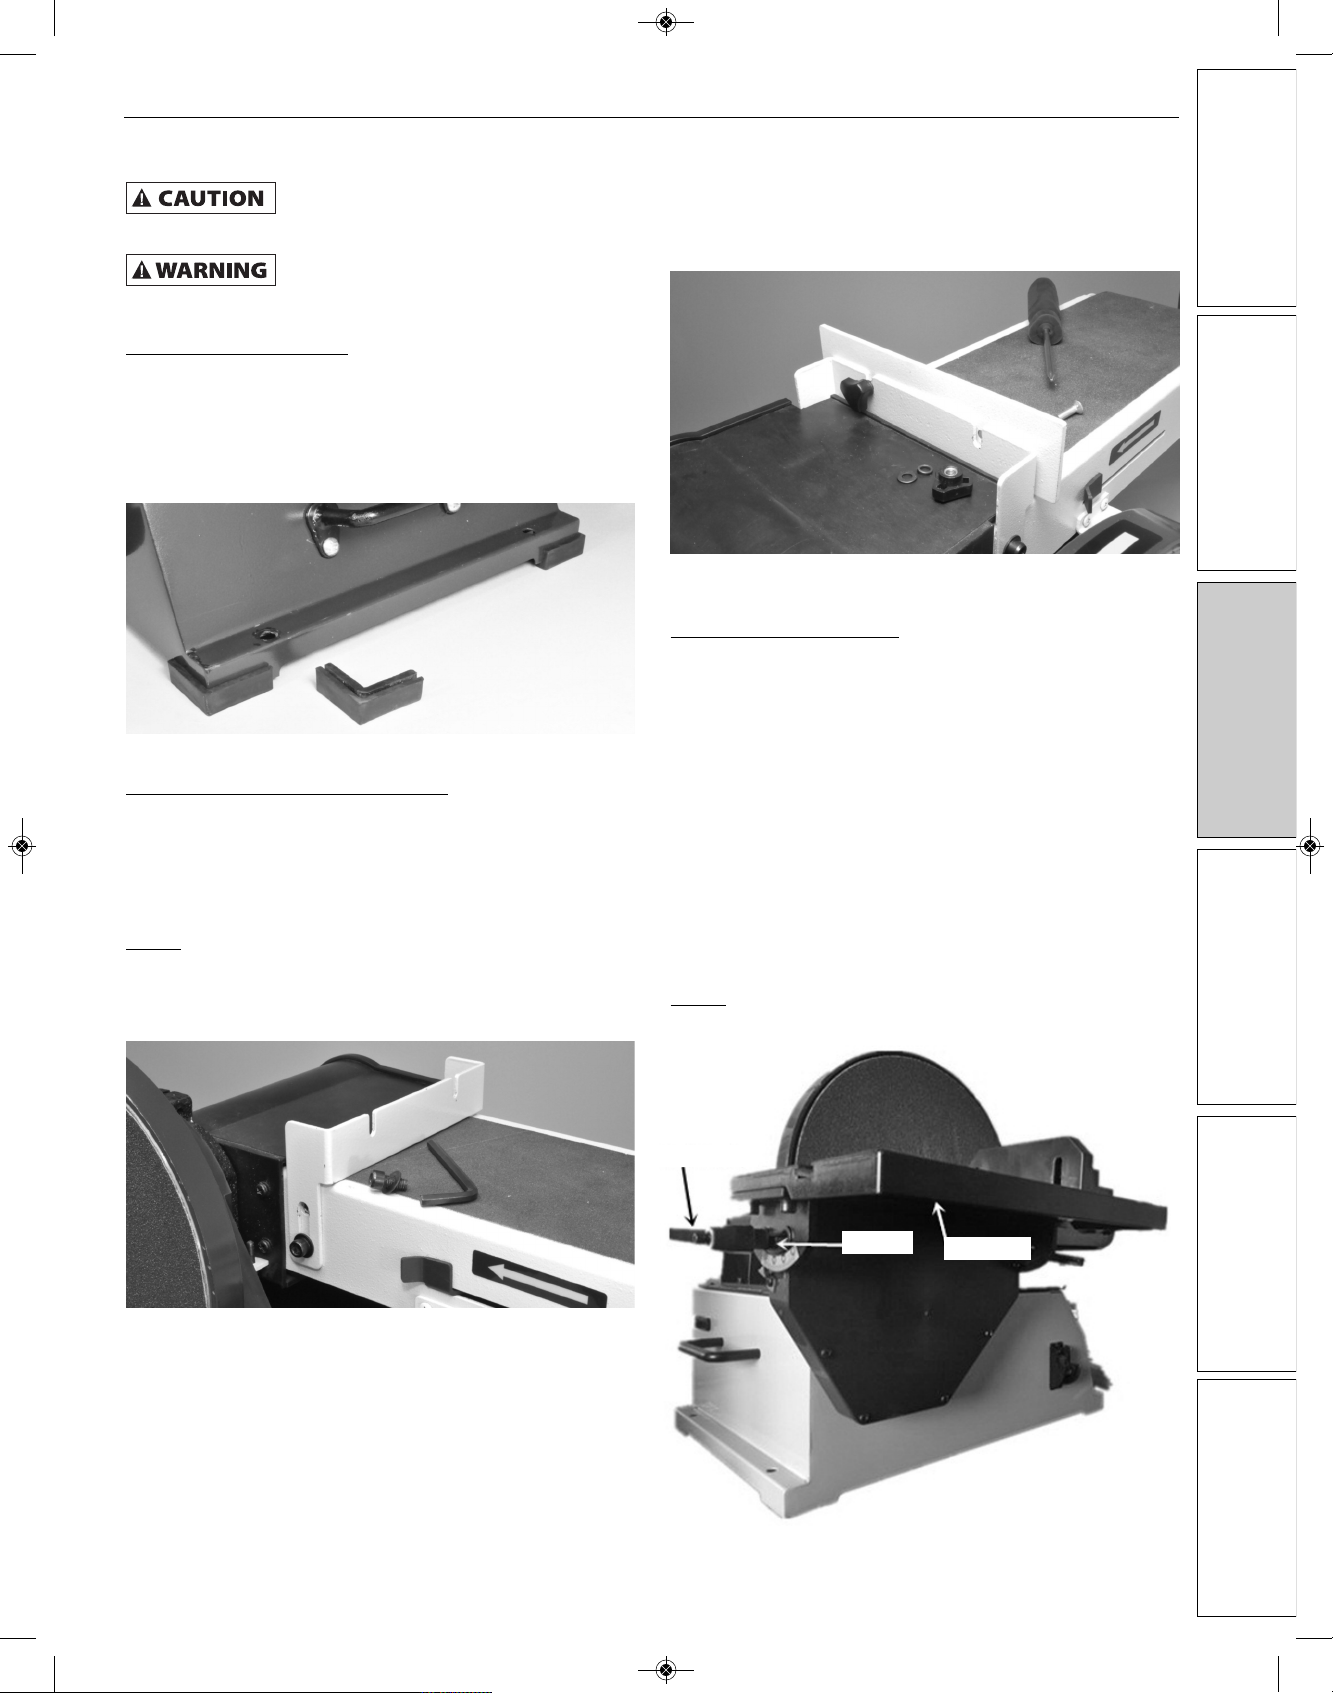
• Rubber foot (4)
• Hex wrench (1)
• Operating Instructions and Parts Manual (1)
Unpack:
• Carefully unpack Sander from carton. Do not discard packing
materials until after machine has been inspected for damage
and completeness. Locate loose parts and set aside.
Inspect:
• After unpacking the unit, carefully inspect for any damage that
may have occurred during transit. Check for loose, missing or
damaged parts. Shipping damage claims must be filed with the
carrier.
• All tools should be visually inspected before use, in addition to
regular periodic maintenance inspections.
• Be sure that the voltage labeled on the unit matches your
power supply.
• See General Safety Instructions, Cautions and
Warnings as shown.
SAFETY RULES
For your own safety, read all of the
instructions and precautions before
operatin tool.
PROPOSI ION 65 WARNING: Some dust created by
using power tools contain chemicals known to the state
of California to cause cancer, birth defects or other
reproductive harm.
Some examples of these chemicals are:
• Lead from lead-based paints.
• Crystalline silica from bricks and cement and other masonry
products.
• Arsenic and chromium from chemically-treated lumber.
Your risk from these exposures varies, depending on how often you
do this type of work. To reduce your exposure to these chemicals:
work in a well ventilated area and work with approved safety
equipment. Always wear OSHA/NIOSH approved, properly fitting
face mask or respirator when using such tools.
Always follow proper operatin
procedures as defined in this manual even
if you are familiar with the use of this or similar tools.
Remember that bein careless for even a fraction of a
second can result in severe personal injury.
Be Prepared for Job
• Wear proper apparel. Do not wear loose clothing, gloves,
neckties, rings, bracelets or other jewelry which may get
caught in moving parts of machine.
• Wear protective hair covering to contain long hair.
• Wear safety shoes with non-slip soles.
• Wear safety glasses complying with United States ANSI Z87.1.
Everyday glasses have only impact resistant lenses. They are
NO safety glasses.
3
NO SE Operating Manual & Parts List 9681115
GE ING S AR ED SAFE Y / SPECIFICA IONS ASSEMBLY / INS ALLA ION OPERA ION ROUBLESHOO ING MAIN ENANCE / REPAIR